How to Winterize an Outdoor Shower: Step-by-Step Guide to Prevent Freezing Damage
To winterize your outdoor shower and prevent freezing damage, follow these essential steps:
- Shut Off the Water Supply: Start by turning off the outdoor water supply.
- Drain Pipes and Fixtures: Drain all water from the pipes and fixtures.
- Remove Hoses and Showerheads: Take off any hoses and showerheads to ensure complete drainage.
- Blow Out Remaining Water: If possible, use compressed air to blow out any leftover water.
- Insulate Exposed Components: Insulate all exposed pipes, valves, and fittings to protect against freezing temperatures.
- Seal Openings: Apply exterior-grade seals where necessary to prevent cold air infiltration.
- Add Antifreeze: If applicable, add non-toxic antifreeze to any traps.
- Cap Openings: Ensure all openings are capped securely.
Finally, conduct a follow-up inspection in the spring to identify any hidden damage and prepare the shower for use. This comprehensive process will help maintain your outdoor shower and prevent costly repairs.
Why Winterizing an Outdoor Shower Matters
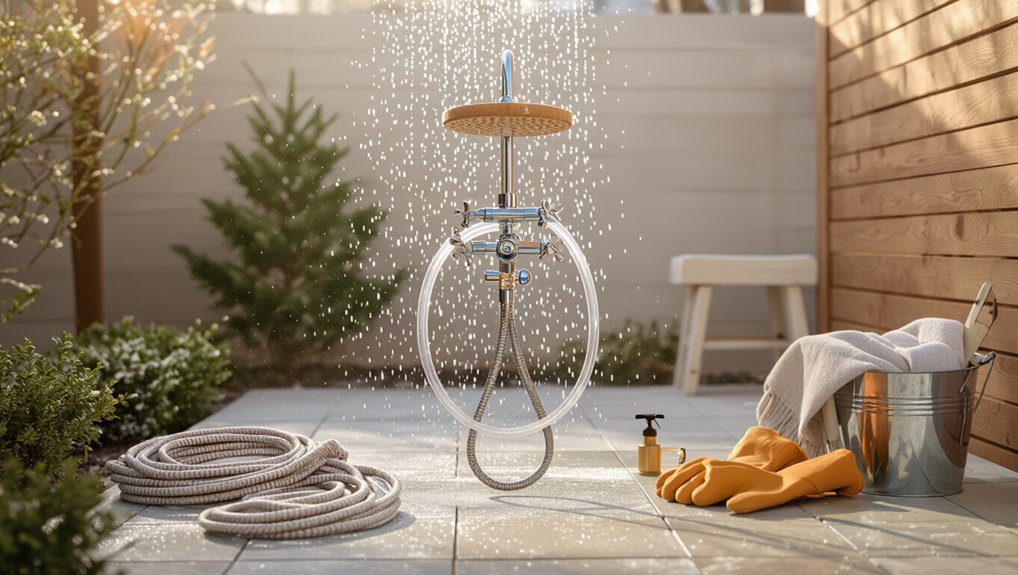
Outdoor showers exposed to freezing temperatures commonly suffer burst pipes, cracked fixtures, and damaged valves that impair function.
Neglecting winterization can lead to costly repairs, water loss, and interrupted use in spring.
Evaluating these risks highlights why timely winter preparation is financially and practically important.
Common winter damage to outdoor showers
Many outdoor shower systems suffer severe damage from freezing temperatures, with consequences ranging from burst pipes and cracked fixtures to ruined pumps and waterlogged decking. Typical issues include pipe splits, valve failures, and rot. Guidance on how to winterize outdoor shower reduces risk.
| Damage Type | Symptom | Prevention |
|---|---|---|
| Burst pipes | Leaks | Drain/insulate |
| Cracked fixtures | Drips | Remove/store |
| Waterlogged decking | Rot | Dry/ventilate |
Costs and consequences of not winterizing
Having reviewed the common winter damages—burst pipes, cracked fixtures, and waterlogged decking—the focus shifts to the tangible costs and consequences of not winterizing an outdoor shower.
Repairs, replacement parts, and professional plumbing can total hundreds to thousands of dollars. Water leaks promote mold and structural decay, lowering property value and increasing insurance claims.
Preventive winterization is far cheaper and less disruptive than post-freeze remediation.
Quick checklist What to do before temperatures drop
Before the first hard freeze, a brief, prioritized checklist helps guarantee the shower and plumbing survive winter without damage.
It outlines immediate actions that minimize rupture risk and moisture problems. Follow concise, sequential tasks to drain, protect, and inspect components before temperatures fall.
- Shut off outdoor water supply
- Drain pipes and fixtures
- Remove and store detachable hoses
- Insulate exposed valves
- Inspect for existing leaks
Tools and materials you’ll need
A concise inventory separates the basic homeowner toolkit from the specialized supplies needed for winterizing an outdoor shower.
Recommended winterizing items include pipe antifreeze, a hand pump or shop vacuum for flushing lines, insulation wrap, and durable sealants.
For those tackling larger or complex systems, optional professional-grade equipment such as a compressor, thermal camera, or commercial-grade heat tape may be considered.
Basic homeowner toolkit
Tools lay the foundation for a successful winterization: a basic homeowner toolkit should include a pipe wrench, adjustable pliers, shop vacuum or compressor for blowing out lines, hose bibb key or screwdriver for shutoff valves, bucket and towels for draining, pipe insulation or heat tape, and appropriate replacement washers or caps.
A flashlight, utility knife, adjustable wrench, and safety gloves complete the set for straightforward winter shutoff and drain tasks.
Recommended winterizing supplies
With the basic toolkit assembled, the next step is gathering specific winterizing supplies tailored to an outdoor shower’s plumbing and exposure.
Required items include a wet/dry vacuum or compressor for draining lines, non-toxic antifreeze for plumbing, pipe insulation and foam covers, waterproof tape and hose bib covers, basic replacement washers, and a tarp or breathable cover to protect fixtures and walls from ice and wind.
Optional professional-grade equipment
Consider upgrading to professional-grade equipment when an outdoor shower has complex plumbing, frequent freezing, or high exposure to wind and salt.
Suggested items include industrial-grade heat tape, commercial frost-free valves, high-capacity portable air compressors for blowouts, corrosion-resistant fittings, and insulated access panels.
Licensed plumbers may recommend pressure-regulating devices, moisture-resistant electrical heaters, and contractor-grade antifreeze injection systems for reliable long-term protection.
Step-by-step winterizing process for typical outdoor showers
A concise, ordered routine can protect an outdoor shower from freeze damage during cold months. The basic steps focus on cutting off water, removing standing moisture, and protecting exposed components.
Following each task in sequence reduces the risk of cracked pipes and costly repairs.
- Shut off the water supply to the outdoor shower
- Drain pipes and fixtures manually
- Blow out remaining water with compressed air (when applicable)
- Remove and store removable components (showerhead, hoses, valves)
- Insulate exposed pipes and fittings
Shut off the water supply to the outdoor shower
Locate and close the outdoor shower’s supply valve to stop water flow before temperatures drop below freezing.
Confirm the main shutoff or a dedicated isolation valve is fully clockwise. If accessible, shut off any secondary feed lines.
Label the valve for future reference and note its position.
Verify no pressure remains by briefly opening an outdoor fixture inside the isolated zone.
Drain pipes and fixtures manually
Begin by opening all outdoor shower fixtures—both hot and cold—and any accessible drain traps to let remaining water escape.
Then, remove shower heads, drain hoses, and low points to allow gravity to clear lines.
Use a cloth or small pump to extract trapped water from accessible sections.
Inspect fittings and replace deteriorated washers to guarantee dry, sealed connections before freezing temperatures arrive.
Blow out remaining water with compressed air (when applicable)
Use compressed air to expel residual water from supply lines and fixtures when space and system design allow.
A regulated compressor with a pressure-reducing valve prevents damage; purge each line briefly, venting at lowest outlets until sputtering stops.
Close shutoffs, cap the system, and inspect joints for remaining moisture.
Only trained users should apply air to prevent overpressurization and component failure.
Remove and store removable components (showerhead, hoses, valves)
Remove detachable parts such as the showerhead, hoses, and any handheld wands to prevent trapped water from freezing and to reduce corrosion. Components should be drained, dried, wrapped in soft cloth, and stored indoors in labeled containers. Small brass parts may be bagged to avoid loss.
| Item | Action | Storage |
|---|---|---|
| Showerhead | Drain, dry | Indoor box |
| Hose | Coil, dry | Shelf |
| Valves | Bag, label | Drawer |
Insulate exposed pipes and fittings
Wrap exposed pipes and fittings with insulating materials to prevent freezing, reduce heat loss, and protect against physical damage during winter.
Use closed-cell foam sleeves sized to the pipe diameter, secure with waterproof tape or zip ties, and cover joints with foam-filled tape.
For exposed valves and unions, add removable foam covers or insulation blankets.
Seal ends to keep moisture out and label insulated runs.
Protect the shower mixing valve and hot water connection
Begin by isolating the mixing valve and the hot-water supply so they can be drained and insulated without risk of trapped water. Close supply, open valve to drain, flush remaining water, and apply foam insulation or heated tape rated for outdoor use. Seal junctions and label shutoffs for winter.
| Action | Purpose |
|---|---|
| Close supply | Prevent flow |
| Drain valve | Remove water |
| Insulate | Prevent freezing |
| Tape joints | Seal gaps |
| Label | Aid access |
Secure outdoor shower enclosure and fasteners
Secure the enclosure and all fasteners to prevent wind damage and water intrusion during freeze–thaw cycles.
Inspect panels, doors, hinges, and trim for corrosion, looseness, or gaps.
Tighten screws, replace rusted fasteners with stainless steel, and add exterior-grade seals or caulk where needed.
Anchor freestanding structures and trim exposed edges to shed ice; guarantee vents remain unobstructed for dry airflow.
Apply antifreeze to traps and drains if necessary
After fastening checks and seal repairs are completed, attention turns to the traps and drains, where standing water can freeze and cause pipe damage.
If drains cannot be fully drained, a small amount of non-toxic propylene glycol antifreeze is poured into traps to lower freezing point.
Use only RV/marine-safe formulations, follow manufacturer dosage, and cap openings to prevent dilution or wildlife access.
Winterizing specific shower types
Different outdoor shower designs require tailored winterizing steps to protect plumbing and finishes.
Wall-mounted units, freestanding posts, enclosed bathroom-style showers, and systems tied into RVs or pools each present distinct shutoff, drainage, and insulation needs.
The following sections outline specific precautions and procedures for each type.
Wall-mounted outdoor showers
Many wall-mounted outdoor showers have exposed plumbing and fewer insulating cavities than freestanding units, so they require targeted drainage and protection to prevent freeze damage. Drain, shutoff, and insulate exposed pipes; remove fittings and cover fixtures. Use anti-freeze where appropriate and secure covers to wall anchors.
| Task | Tool | Outcome |
|---|---|---|
| Drain | Wrench | Dry pipes |
| Insulate | Wrap | Reduced freeze risk |
| Cover | Cap | Protected fixtures |
| Store | Remove | No trapped water |
| Check | Test | Winter-ready |
Freestanding post showers
Several considerations apply when winterizing freestanding post showers because their buried connections and hollow posts trap water differently than wall-mounted units.
Disconnect supply lines, drain and blow out the line from the riser, and remove removable fittings.
Inspect and seal the post base against ground moisture.
Elevate or insulate exposed piping and cap vents to prevent pests while allowing residual moisture to escape.
Enclosed or outdoor bathroom-style showers
After addressing freestanding post units, attention turns to enclosed or outdoor bathroom-style showers, which present different winterizing challenges due to built-in drain systems, enclosed walls, and often permanent plumbing.
These require isolating interior valves, draining traps and floor drains, blowing out lines if accessible, insulating exposed piping, sealing gaps to prevent cold air intrusion, and scheduling professional service for hard-to-reach plumbing.
Showers connected to RV or pool systems
Winterizing showers that tie into RV or pool systems requires attention to the larger water network and its unique components: pumps, holding tanks, backflow preventers, and multi-valve manifolds.
Drain and blow out lines, isolate and winterize pumps per manufacturer instructions, bypass or protect filtration and chemical feeders, purge holding tanks, and guarantee backflow devices are drained or removed.
Label valves and document system configuration.
When to call a professional
If visible leaks, frozen or burst pipes, persistent drainage problems, or complex pressurized systems are present, a plumber or winterization specialist should be contacted.
Professionals will assess risks, perform safe draining and insulation, and replace or winterize components that DIY methods may miss.
Hiring a specialist typically guarantees warranties are preserved and reduces the chance of costly spring repairs.
Signs you need a plumber or winterization specialist
Recognize obvious and subtle warning signs that indicate a professional is needed to winterize an outdoor shower: persistent leaks, bulging or frozen pipes, damaged insulation, or inconsistent water pressure that DIY fixes cannot resolve.
Additional indicators include visible corrosion, recurring mold or mildew, inaccessible shutoffs, complex plumbing layouts, or prior freeze damage.
These warrant licensed assessment to prevent structural or system failure.
What to expect from professional winterizing services
Call a licensed technician when outdoor shower systems show signs of complex damage, inaccessible shutoffs, or past freeze-related failures that DIY efforts cannot safely address.
Professionals assess piping, valves, and insulation, perform controlled drainage or pressurized blowout, replace compromised components, and recommend freeze-resistant upgrades.
They provide documentation, warranty-backed work, and safety compliance, reducing recurrence risk and ensuring reliable offseason protection for plumbing and fixtures.
Common mistakes to avoid
Common winterizing errors can lead to burst pipes and damaged fixtures if not addressed.
Failing to fully drain lines, applying the wrong antifreeze type, or leaving exposed valves and showerheads uninsulated are frequent culprits.
Attention to these specific mistakes prevents costly repairs and guarantees the shutdown holds through freezing conditions.
Incomplete drainage
Failing to fully drain pipes and valves leaves trapped water that can freeze, expand, and crack fixtures or burst supply lines. The homeowner should open all drains, remove shower heads, and invert hoses. Small low spots trap water; air and gravity must clear them. Inspect for residual puddles and retest after tilting or blowing out.
| Issue | Result |
|---|---|
| Closed valve | Trapped water |
| Low spot | Residual puddle |
| Hose kink | Blocked flow |
| Shower head | Hidden water |
Using the wrong type of antifreeze
When winterizing an outdoor shower, using the wrong antifreeze can do more harm than good: automotive or windshield washer fluids are toxic and not formulated for plumbing, while diluted or low-concentration products may not prevent freezing.
Only use non-toxic, propylene glycol–based plumbing antifreeze labeled safe for potable systems.
Incorrect selection risks pipe damage, contamination, and ineffective freeze protection; follow manufacturer recommendations.
Neglecting insulation for exposed fixtures
Overlooking insulation on exposed shower fixtures leaves valves, hoses, and spouts vulnerable to freezing and cracking during cold snaps.
Failure to wrap pipes with foam, use heat tape where appropriate, or insulate cabinets accelerates damage and costly repairs.
Properly sealed insulation prevents ice buildup, maintains residual warmth, and reduces pressure stress on fittings.
Regular inspection guarantees continued protection before and during winter.
Testing and verification after winterizing
A brief inspection confirms that pipes have been drained and fittings show no standing water by opening valves and briefly running fixtures until only air flows.
A simple checklist verifies shutoffs are closed, antifreeze (if used) is in place, and shut covers or insulation are secured.
Final notes recommend documenting completion and scheduling a spring recheck.
How to confirm pipes are clear of water
Confirming that pipes are free of water is essential to prevent freeze damage and guarantee the winterizing steps were effective.
Inspect exposed lines visually, open all valves and fixtures to observe steady air flow or intermittent sputters, and use an air compressor or shop vac to evacuate remaining moisture.
Check downstream low points and drains; dry with towels or a moisture meter for final verification.
Checklist for a winter-ready outdoor shower
One final walkthrough of seven key items guarantees the outdoor shower is truly winter-ready: verify valves are closed, drain plugs removed, and lines blown or drained;
insulate exposed pipes and fixtures; cap or store hoses; secure fittings against pests;
test taps for dryness; confirm heat tape is off or functioning;
document actions and schedule spring reactivation.
This checklist confirms thorough protection.
Recommissioning your outdoor shower in spring
When temperatures rise, the owner follows a clear step-by-step reactivation process to restore water, valves, and fixtures.
Before turning the supply back on, a careful inspection checks for winter damage such as cracked pipes, loose fittings, or animal nests.
For the first use after winter, basic maintenance—flushing lines, tightening connections, and testing water pressure and temperature—ensures safe, reliable operation.
Step-by-step reactivation process
Begin by visually inspecting the entire outdoor shower assembly to identify any obvious damage, remaining insulation, or lingering debris from winterization.
Close drip trays, remove covers, and reconnect insulated hoses.
Slowly restore water supply, opening valves gradually to purge air.
Check for leaks at fittings and test hot and cold mixing.
Flush the system, operate fixtures, and confirm normal pressure before regular use.
Inspecting for winter damage before use
Several key inspections confirm the outdoor shower survived winter without harm. The inspector checks visible plumbing, fixtures, seals, and structure for cracks, leaks, or mold before flow is restored. Any damage is documented and isolated to prevent wider issues. After inspection, proceed only when all issues are resolved to ascertain safe, damage-free operation.
| Sight | Sound | Touch |
|---|---|---|
| Cracks | Drips | Dampness |
| Corrosion | Silence | Cold |
| Mold | Gurgle | Soft spots |
| Loose fittings | Rattle | Brittle wood |
Maintenance tips for the first use after winter
After confirming no winter damage, attention shifts to practical maintenance steps that prepare the outdoor shower for reliable spring use.
Flush lines, open valves slowly, and inspect for leaks.
Clean fixtures, remove mineral deposits, and lubricate moving parts.
Test hot and cold functions, adjust pressure, and sanitize surfaces.
Replace worn washers or hoses before regular use to guarantee safe, efficient operation.
Cost estimates and time required
Typical DIY winterization requires basic materials and can take one to three hours, with parts like antifreeze, caps, and insulation typically costing $20–$100.
Hiring a professional generally shortens on-site time to under an hour but adds labor charges, bringing total costs into the $100–$300 range depending on location and complexity.
The following section compares itemized material lists and representative service quotes to help set realistic expectations.
Typical DIY time and material costs
When budgeting for winterizing an outdoor shower, expect most DIY projects to take between one and three hours for a single-season shutdown.
For more thorough winter-prep (including insulation, valve replacement, or dismantling exposed fixtures), it may take up to half a day.
Typical material costs range $20–$150: basic tools, antifreeze, hose bib covers, and pipe insulation at the low end; replacement valves or quality insulation raise costs.
Typical professional service costs
For homeowners who prefer to hire the work out, professional winterization services generally cost more but save time and guarantee workmanship.
Typical fees range $100–$350 for basic winterization and $300–$800 for thorough service including drain, insulation, and shutoff valve installation.
Most jobs take 1–3 hours; complex systems or remote sites may require half to full day and higher travel or labor charges.
Additional tips for long-term protection and maintenance
For long-term protection, a regular inspection rhythm and a few targeted upgrades can reduce damage and simplify future winterizing.
A seasonal inspection schedule helps catch wear early, while strategic improvements make end-of-season prep quicker and more reliable.
The following practical items offer straightforward ways to maintain and protect an outdoor shower year after year.
- Establish quarterly inspections: check seals, fixtures, and drainage.
- Create a simple winterizing checklist to follow each fall.
- Insulate exposed pipes or add removable heat tape for freeze protection.
- Install quick‑disconnect fittings and frost‑resistant fixtures to speed future shutdowns.
- Replace worn gaskets and add durable covers to extend component life.
Seasonal inspection schedule
How often should an outdoor shower be inspected to guarantee long-term protection and reliable performance?
A seasonal schedule recommends inspections each spring and fall, with a brief midwinter check in milder climates.
Inspect fixtures, seals, drainage, and insulation; test valves and winterization measures.
Log findings, note repairs, and replace worn components promptly to prevent freeze damage and extend system lifespan.
Upgrades to make winterizing easier in future
After documenting seasonal inspections and addressing immediate repairs, homeowners can consider upgrades that streamline future winterization and reduce freeze risk.
Install frost-proof faucets, add insulated valve boxes, and replace exposed piping with PEX or foam-sleeved copper.
Integrate an automatic drainback or remote-controlled isolation valve.
Label shutoffs, mount weatherproof access panels, and schedule annual professional plumbing reviews to prolong system resilience.
Conclusion
As frost tightens its grip, winterizing an outdoor shower becomes a small act of stewardship against nature’s brittle hands. Following clear steps—draining lines, insulating exposed fittings, and sealing access—transforms vulnerability into quiet resilience. Like wrapping a sleeping instrument against the cold, these precautions protect pipes and preserve summer comforts for another season. Preparedness now eases spring’s revival, ensuring a simple turn of the handle returns warm water, not costly repairs.