How to Crimp Downspouts Like a Pro: Step-by-Step Guide for DIY Homeowners
To crimp downspouts like a pro, you’ll need to create a tapered end for a secure, watertight connection. Start by measuring and cutting your downspout, then smooth any rough edges. Use pliers, a vise, or a sheet-metal brake to progressively crimp the metal. Secure the joint with rivets or screws, and seal it with exterior-grade silicone or butyl tape. Always use personal protective equipment (PPE) and follow safe ladder practices. This proper technique will help you avoid leaks, sagging, and misalignment. Continue reading for a detailed step-by-step guide and troubleshooting tips.
What Crimping a Downspout Means and Why It Matters
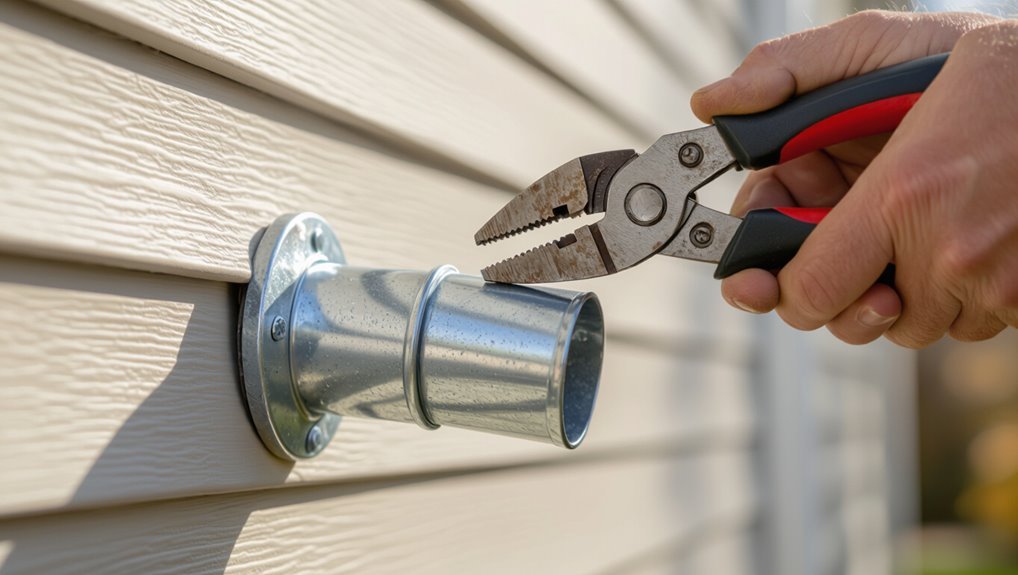
Downspout crimping is the process of compressing one end of the metal tube to reduce its diameter so it can fit into the next section. Proper crimping improves fit and seal, prevents leaks, and yields a neater appearance compared with forced or improvised connections.
Some installations require crimping for compatibility, while others may use adapters or telescoping fittings instead.
Definition of downspout crimping
Crimping a downspout is the process of narrowing one end of the metal tube by folding or pressing it inward to create a tapered connection that fits into the next section.
The definition emphasizes controlled deformation to guarantee alignment and secure joins.
Instructions on how to crimp downspouts focus on measurement, consistent folds, appropriate tools, and safe technique to prepare segments for assembly.
Benefits of crimping before fitting (fit, seal, aesthetics)
Confirm a precise taper before assembly to improve fit, create a watertight seal, and produce a cleaner visual finish.
Crimping prior to joining guarantees mating ends slide together uniformly, reduces gaps that cause leaks, and minimizes sealant reliance.
It also aligns panels for straighter runs and neater joints, enhancing curb appeal while simplifying installation and long-term maintenance by preventing misalignment and water intrusion.
Situations that require crimping versus alternative solutions
In many installations, narrowing the end of a gutter run by compressing its metal or vinyl profile is necessary to guarantee a snug mechanical fit and reliable seal where sections join.
Crimping is required for tapered connectors, inset downspouts, or retrofits with mismatched diameters.
Alternatives include adapter fittings, flexible couplers, or custom-cut inserts when material thickness or aesthetics rule out compression.
Tools and Materials Needed
The project requires a few basic hand tools—metal snips, a crimping tool or pliers, a file, measuring tape, marker, and a stable ladder—for cutting, shaping, and fitting downspout sections.
Professionals may also use a sheet-metal brake, rivet gun, silicone sealant, and gloves to speed work and improve durability.
Necessary materials include downspout sections, connectors, hangers, screws, and appropriate sealant.
Essential tools (snips, crimping tool/pliers, file, measuring tape, marker, ladder)
Gathering the right tools guarantees a clean, secure crimp and speeds the job: tin snips for precise cuts, a crimping tool or sturdy pliers to form the taper, a metal file to smooth sharp edges, a measuring tape and marker for accurate layout, and a stable ladder to reach the downspout safely.
- Tin snips, crimping pliers, metal file
- Measuring tape and marker
- Stable, appropriately rated ladder
Optional tools for pros (sheet-metal brake, rivet gun, silicone sealant, gloves)
Beyond the basic kit, a handful of professional-grade tools and materials can improve speed, durability, and finish.
A sheet‑metal brake yields straight, consistent bends for custom pieces. A rivet gun secures joints where screws or solder aren’t ideal.
Silicone sealant guarantees watertight seams and longevity.
Leather or cut‑resistant gloves protect hands during cutting, bending, and assembly.
Materials and parts (downspout sections, connectors, hangers, screws, sealant)
Materials for a reliable downspout run include straight sections sized to match the gutter outlet, angled or crimped connectors, sturdy hangers, appropriate fasteners, and a quality sealant.
The installer selects corrosion-resistant metal or PVC, matching profiles for seamless joints, and stainless screws or rivets. Sealant prevents leaks at connections and outlets.
- Downspout sections
- Connectors and hangers
- Fasteners and sealant
Safety and Preparation Before You Start
Before beginning, the worker should don appropriate personal protective equipment and follow ladder safety practices to prevent falls and injuries.
The existing gutter and downspout system must be inspected for corrosion, blockages, and secure attachments that could affect the crimping process.
Accurate measurements and a clear plan for the cut and crimp length should be recorded to guarantee proper fit and alignment.
Personal protective equipment and ladder safety
Wear appropriate personal protective equipment and set up the ladder according to manufacturer guidelines before any work on downspouts begins.
Protective gear includes gloves, safety glasses, long sleeves, and sturdy footwear.
Use a stable, correctly rated ladder on firm ground, secure its base, maintain three-point contact, and avoid overreaching.
Inspect ladder condition and weather; postpone work if conditions are unsafe.
Inspecting existing gutter/downspout system
Begin by visually and physically evaluating the entire gutter and downspout system to identify blockages, corrosion, separation at joints, loose fasteners, and improper slopes that could affect water flow.
Note damaged sections, dents, and missing hangers. Check outlet connections and splash blocks for alignment.
Document needed repairs and replace deteriorated components before crimping to guarantee a stable, watertight installation.
Measuring and planning the cut/crimp length
A clear, accurate measurement of the downspout length and the planned crimp location is essential to guarantee a secure fit and proper drainage. The installer should measure from the outlet to the splash block or trench outlet, account for overlaps at joints (typically 1–2 inches), and mark the cut line while considering slope, obstruction clearance, and any necessary fittings.
Then verify vertical alignment, transfer marks, and recheck before cutting.
Step-by-Step: How to Crimp a Downspout
The procedure begins with accurately marking and measuring the downspout where the crimp will be formed, then cutting the section cleanly to size.
Edges are prepared by deburring and filing to guarantee a snug, safe fit.
Crimps can be made using hand pliers for small adjustments or a vise and hammer for stronger, uniform bends.
Marking and measuring the downspout for crimping
Measure the downspout twice and mark the exact crimp location with a pencil or masking tape to secure a clean fit.
The installer confirms vertical alignment, notes offset for elbows or straps, and measures allowance for overlap where pieces join.
Use a square to secure perpendicular marks, record measurements from a fixed reference (roof edge or existing seam), and verify before proceeding.
Cutting the downspout cleanly
Begin by confirming the marked crimp line and ensuring the downspout is secured to prevent movement during cutting.
Use a fine-toothed metal-cutting saw or a powered nibbling tool, following the mark steadily. Maintain a straight, controlled motion, keeping the blade perpendicular to avoid angled cuts.
Remove small metal chips frequently and wear eye and hand protection throughout the cut.
Preparing edges (deburring and filing)
After cutting, inspect the exposed edges and immediately remove any burrs or sharp fragments to guarantee a clean, safe surface for crimping.
Use a deburring tool or metal file to smooth edges, working uniformly around the perimeter. Finish with a light sanding to eliminate raised metal.
Wipe debris away and verify that edges are even, free of snags, and dimensionally accurate for a snug fit.
Methods to crimp: hand pliers technique
Using hand pliers provides a simple, controlled way to crimp a downspout for slip-fit connections.
The technician marks the crimp location, secures the sheet with a gloved hand, and squeezes inward in short, evenly spaced bites to form a tapered edge.
Periodic checks verify the profile matches the receiving piece; final smoothing removes any sharp burrs before test-fitting.
Methods to crimp: vise and hammer technique
For larger or thicker downspouts where hand pliers may not produce a uniform taper, the vise-and-hammer method offers greater leverage and consistency.
Secure the end in a bench vise, protect the metal with wood or soft jaws, then gently tap the edge with a ball-peen or mallet to form a gradual crimp.
Rotate and re-clamp as needed, checking fit frequently to avoid over-crimping.
Methods to crimp: using a sheet-metal brake or specialized crimper
Crimping a downspout with a sheet-metal brake or a dedicated crimper gives a clean, uniform taper quickly and with minimal effort.
A brake clamps and bends evenly across the width for precise, repeatable crimps; a handheld crimper targets the corner or edge for localized tapering.
Both require measuring and marking, secure clamping, and steady operation to produce consistent, professional results without deforming the profile.
Checking fit with the receiving section and adjusting
After forming the taper with the brake or crimper, the installer should test-fit the trimmed end into the receiving section to verify alignment and clearance.
If binding occurs, rotate or slightly re-crimp edges for uniform taper. Check for flush seating and consistent gap for sealant.
Trim burrs, deburr edges, and retest until the joint slides smoothly and aligns with mounting points before final fastening.
Joining and Sealing After Crimping
After crimping, the shortened end is slid into a connector or receiving section to form the joint.
The connection is secured with an appropriate fastener such as pop rivets, self-tapping screws, or seam clips.
Finally, seams and joints are sealed with a compatible sealant or butyl tape to prevent leaks.
Sliding crimped end into connector or receiving section
Slide the newly crimped end straight into the connector or receiving section, aligning the folded edges so the seam seats evenly.
The piece should slide smoothly with moderate pressure; rotate slightly if needed to clear burrs.
Verify alignment visually and by feel, ensuring even insertion depth.
Check for gaps and adjust the crimp if needed before sealing or fastening to prevent leaks.
Fastening options (pop rivets, self-tapping screws, seam clips)
Secure the crimped joint using appropriate fasteners to guarantee a watertight, durable connection.
Choose fasteners based on material, access, and permanence: pop rivets offer clean, vibration-resistant joints; self-tapping screws provide quick, removable attachment; seam clips clamp without penetrating thin metal. Proper spacing and corrosion-resistant finishes extend life.
- Pop rivets: permanent, neat
- Self-tapping screws: removable, versatile
- Seam clips: non-penetrating, fast
Sealing seams and joints to prevent leaks (sealants, butyl tape)
Seal seams and joints immediately after crimping to prevent water intrusion and prolong the system’s life.
The installer should clean surfaces, apply a bead of exterior-grade silicone or polyurethane sealant, and press butyl tape into overlaps for immediate tack and long-term adhesion.
Smooth joints, remove excess, and allow proper cure time.
Inspect annually and re-seal compromised areas to maintain watertight performance.
Common Problems and How to Fix Them
Common problems after crimping include joints that are too tight or too loose, edges that have become distorted or jagged, and sections that are misaligned or sagging.
Simple corrective steps—adjusting crimp pressure and re-forming the joint—can fix fit issues, while filing and smoothing tools remove burrs and restore edge profiles.
Reinforcing brackets, adding support straps, and realigning overlaps address sagging and misalignment for a secure runoff path.
Crimp too tight or too loose corrective steps
When a crimped downspout is either too tight or too loose, water flow and joint integrity are compromised, so adjustments must be precise to restore proper fit.
If too tight, reopen slowly with pliers or a crimping tool, testing fit frequently.
If too loose, re-crimp incrementally, using a clamp to hold alignment.
Finish by sealing joints and verifying drainage.
Distorted or jagged edges repair and smoothing techniques
If adjustments to a crimped downspout have left metal folded unevenly or with sharp burrs, those distorted or jagged edges must be corrected before reassembly to prevent leaks and injury.
Trim protrusions with aviation snips, flatten folds using a rubber mallet over a wood block, then deburr with a file and fine-grit sandpaper.
Wipe clean, apply a thin bead of sealant, and check fit.
Misaligned sections and sagging reinforcement methods
Several factors can cause downspout sections to become misaligned or sag over time, including loose fasteners, inadequate hangers, thermal movement, and accumulated debris adding weight.
Inspect joints, straighten bends, and realign seams. Replace or add straps and adjustable hangers at recommended intervals.
Pinch crimps or use splice sleeves to reinforce connections. Confirm proper slope for drainage and secure to solid structure to prevent recurrence.
Tips for Professional-Looking Results
Consistent measurements and careful marking guarantee crimps align and seams meet cleanly.
Final touches like paint touch-ups and smoothing seams conceal joint lines and protect against corrosion.
If damage is extensive or alignment cannot be restored, replacement is recommended rather than repeated repairs.
Consistent measurements and marking techniques
Accurate measurements and clear markings set the foundation for a professional crimped downspout; a single misplaced line can ruin fit and finish.
Use a reliable tape, square, and fine-tip marker to transfer dimensions. Mark bend lines, overlap allowances, and cut points consistently on every section.
Double-check measurements before cutting; measure twice, mark once. Consistency speeds work and prevents misalignment.
Finishing touches (paint touch-up, smoothing seams)
With precise measurements and clean markings in place, attention shifts to the finishing touches that make a crimped downspout look professional.
Smooth seam edges with a file or fine sandpaper, remove dust, and apply primer to bare metal.
Match paint to existing gutters, use thin coats, and feather edges for seamless blending.
Inspect for drips and touch up as needed.
When to replace a downspout instead of crimping
Sometimes a downspout’s damage is beyond repair, and replacing it yields a cleaner, longer-lasting result than attempting to crimp.
Replace when corrosion has perforated the tube, seams separate, bends are irreversibly creased, or flow is obstructed by internal collapse.
Also replace when finishes are beyond matching or multiple previous repairs weaken structure.
Replacement guarantees proper fit, consistent appearance, and reliable drainage.
Time, Cost, and When to Hire a Pro
A simple crimping job on a single downspout can take an experienced DIYer 30–90 minutes.
However, complex runs or multiple bends may require several hours.
Typical out-of-pocket costs for materials and a basic crimping tool range from about $25 to $150, with advanced tools or replacement sections raising the price.
If the gutter system is severely corroded, the run is inaccessible, or the homeowner lacks confidence or tools, a professional installer should be contacted.
Estimated time for a DIY crimp job by complexity
Estimated time for a DIY crimp job varies by complexity: a simple partial crimp to redirect flow on a single downspout often takes 30–60 minutes, while full-length crimps, multiple downspouts, or work on tall, obstructed gutters can require several hours or be spread over a weekend.
Complexity factors include access, need for ladder work, siding clearance, and weather; plan accordingly and allow extra time for safety.
Typical material and tool cost ranges
Following the time estimates, budgeting for a DIY crimp job requires a brief rundown of typical material and tool costs so homeowners know what to expect.
Basic materials—downspout sections, elbows, sealant, screws—usually run $20–$75.
Essential tools—crimping pliers, snips, drill—cost $40–$150 if purchased; rentals or borrowing lower expenses.
Allow a $15–$40 contingency for fasteners and small consumables.
Signs you should call a professional installer
Several clear indicators signal when hiring a professional installer is wiser than a DIY crimp: extensive rust or corrosion, multiple misaligned or sagging downspouts, water penetrating fascia or foundation, complex rooflines or second-story work requiring ladders beyond homeowner comfort, and lack of proper tools or time.
Professionals assess hidden damage, provide guaranteed repairs, handle permits or complex flashing, and often offer cost-effective long-term solutions.
Comparison: Crimping Methods and When to Use Each
The comparison contrasts hand tools and mechanical tools by speed, precision, and cost, and matches methods to common materials like aluminum, vinyl, and steel. Practical recommendations favor hand tools for light, low-cost jobs and mechanical tools for thicker metals or high-volume work. The table below summarizes typical performance and suitability.
| Topic | Recommendation / Notes |
|---|---|
| Speed (hand vs mechanical) | Hand: slow; Mechanical: fast |
| Precision & finish | Hand: adequate for thin materials; Mechanical: superior for steel |
| Cost & accessibility | Hand: low cost, widely available; Mechanical: higher upfront cost |
| Best material matches | Aluminum/vinyl: hand tools acceptable; Steel/thicker aluminum: mechanical tools recommended |
Hand tools vs. mechanical tools (speed, precision, cost)
Choosing between hand tools and mechanical crimpers requires weighing speed, precision, and upfront cost to match the project’s scale and skill level.
Hand tools are inexpensive, portable, and adequate for occasional repairs but slower and operator-dependent.
Mechanical crimpers increase consistency and throughput, justify cost for larger jobs, and reduce fatigue; they require maintenance and higher initial investment.
Best method for different materials (aluminum, vinyl, steel)
Match crimping technique to material properties to guarantee secure joints and prevent damage.
Aluminum: use hand crimpers or bench pliers with gentle, incremental bends to avoid cracking; suitable for thin sheets.
Vinyl: avoid aggressive crimping; employ heat-softening and wide, low-pressure dies or adhesive couplers.
Steel: require power tools or heavy-duty mechanical crimpers with robust dies to form tight, permanent seams.
Quick Reference Checklist for a Successful Crimp Job
A concise checklist helps guarantee each crimp job is safe, efficient, and watertight.
It should cover preparations, the crimping sequence, and a final inspection to catch faults.
The following quick-reference items summarize those stages for easy on-site use.
- Pre-job checklist: tools, material condition, safety setup
- Step-by-step quick checklist: measuring, marking, crimping sequence
- Post-install inspection checklist: seal integrity, alignment, fastening
Pre-job checklist
Before beginning a crimping job, inspect the worksite, tools, and materials to confirm readiness: verify downspout type and length, check for dents or corrosion, ascertain availability of appropriate crimping tools and replacement fasteners, measure attachment points and clear surrounding obstacles, and review safety gear and ladder placement.
Document measurements, note required sealants or brackets, confirm weather conditions, and make sure a buddy or spotter is available for ladder safety.
Step-by-step quick checklist
Begin by assembling the confirmed tools, materials, and safety gear at the worksite and positioning the ladder so all attachment points are easily reachable; then follow the concise sequence below to perform a reliable crimp.
Measure and mark cut/overlap, remove old fasteners, cut to fit, align sections, clamp, form crimp at specified depth, secure with rivets or screws, seal seams, test alignment.
Post-install inspection checklist
Inspect the completed crimp thoroughly using a concise, itemized checklist to confirm watertight seams, secure fasteners, correct alignment, and proper slope.
Verify no visible gaps, uniform crimp depth, and sealed joints.
Ascertain hangers and brackets are tight, downspout runs are plumb, and outlet directs water away from foundation.
Test with water for leaks and flow, and document findings for future maintenance.
Visual Aid Suggestions for Readers
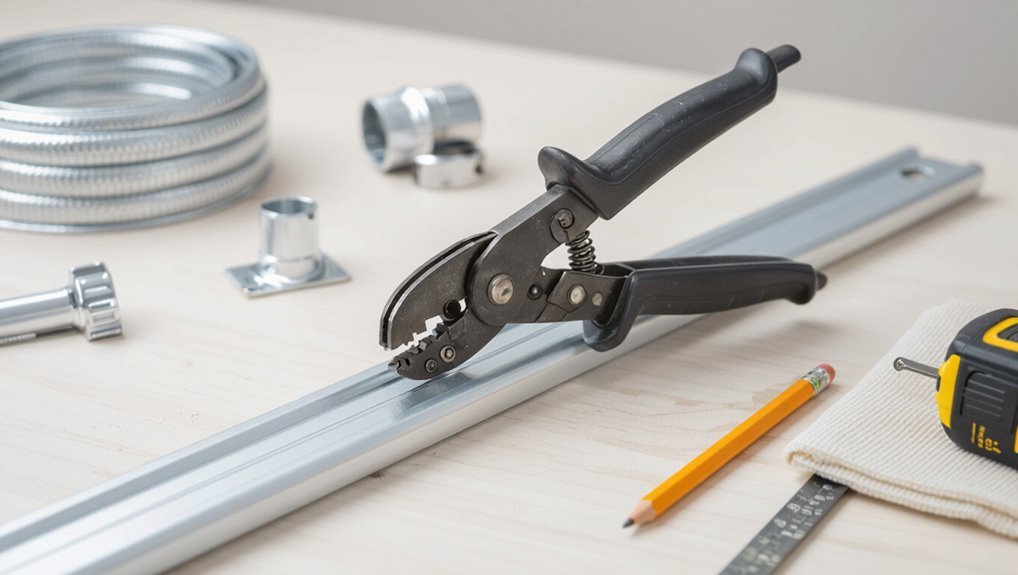
Suggested visuals include photos showing measuring and marking, step-by-step crimping techniques, and a close-up of a joined seam to clarify fit.
Complementary diagrams should depict a cross-section of the crimped joint and clear fastener placement.
These images and diagrams together give readers precise reference points for execution and inspection.
Photo ideas: measuring and marking, crimping techniques, joined seam close-up
Clear, well-composed photos make the crimping process easier to follow, so include tight shots of measuring and marking, medium-framed images showing hand positioning and tool alignment during crimping, and an extreme close-up of the joined seam to reveal the final interlock and any solder or sealant.
Also capture progression shots: measuring, marking, initial crimp, final squeeze.
Use neutral background, consistent lighting, and scale reference.
Diagram ideas: cross-section of crimped joint and fastener placement
Following the photo recommendations, schematic diagrams should complement images by simplifying internal geometry and showing where fasteners interact with the crimped joint.
Include a clear cross-section labeling layers: outer tube, crimp fold, sealant, and inner lip.
Indicate screw or rivet locations, spacing, and recommended angles.
Add scale bars and callouts for torque or fastening depth to prevent leaks and deformation.
Conclusion
Sunlight glints off a newly fitted seam as rainwater finds its guided path, each crimped lip locking like the teeth of a well-made gear. The homeowner steps back, tools laid aside, and watches droplets skip along a tidy downspout that channels order from storm. Confidence hums in callused fingers and neat joints; the roof’s work now travels smoothly, secured by careful bends and a practical, quiet pride.