How to Replace a Faucet on a Pedestal Sink: Step-by-Step DIY Guide
How to Replace a Faucet on a Pedestal Sink: Step-by-Step Guide
Replacing a faucet on a pedestal sink is a manageable DIY project that typically takes 1–3 hours. To begin, shut off the water supply and ensure the drain lines are clear. Next, disconnect the supply hoses and use a basin wrench to remove the mounting nuts. Clean the sink deck, then install the new faucet by fitting it into place and hand-tightening the mounting hardware. Reconnect the supply lines with plumber’s tape and test for leaks. Taking accurate measurements and exercising patience will help avoid any surprises. Follow this guide for detailed steps and troubleshooting tips.
How to Replace a Faucet on a Pedestal Sink Quick Overview
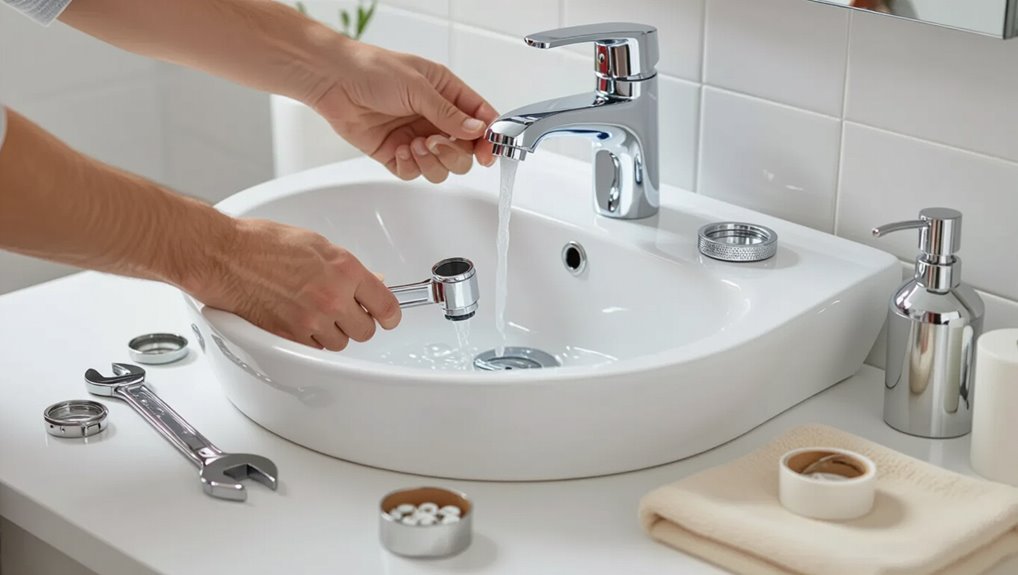
The overview explains common reasons to replace a pedestal sink faucet, such as leaks, corrosion, or outdated style.
It also summarizes expected time, difficulty level, and the basic tools needed—wrench, basin wrench, plumber’s tape, and plumber’s putty or silicone.
This quick snapshot helps readers decide whether to tackle the job themselves or hire a professional.
When and why you should replace a pedestal sink faucet
Homeowners should consider replacing a pedestal sink faucet when signs of wear, persistent leaks, poor water pressure, corrosion, or outdated styling compromise function or aesthetics.
Replacement is warranted when repairs fail, parts are unavailable, or water efficiency and hygiene improvements are desired.
Learning how to replace a faucet on a pedestal sink helps determine whether upgrading enhances performance, saves water, or refreshes bathroom style.
Time, difficulty, and tools required at a glance
Typically completed in one to three hours by someone with basic DIY skills, replacing a pedestal sink faucet rates as a moderate project: it requires patience and some awkward under-sink maneuvering but no advanced plumbing license.
Essential tools: adjustable wrench, basin wrench, screwdriver, plumber’s tape, bucket, and towel.
Optional: silicone sealant, supply line adapters.
Expect minor surprises; plan for parts and cleanup.
Safety Precautions and Preparations
Before starting work, the water supply should be shut off and isolation verified by opening the faucet to drain remaining lines.
The work area and surrounding finishes ought to be protected with drop cloths or towels to prevent scratches and water damage.
A clear checklist of required tools and replacement parts should be assembled to guarantee the job proceeds without interruptions.
Turn off water supply and verify isolation
Shut off the water at the nearest shutoff valves and confirm the lines are isolated before loosening any faucet connections.
Open faucet to relieve residual pressure and drain remaining water into a bucket.
If no local shutoffs exist, turn off the main supply.
Use pliers to gently test valve closure; observe that no water flows before proceeding with disassembly to prevent leaks and water damage.
Protect floor, basin, and surrounding finishes
Several layers of protection should be placed around the sink area to prevent scratches, chips, and water damage during faucet removal.
Lay down a waterproof drop cloth on the floor, cover the basin with soft towels or foam padding, and tape protective cardboard to nearby finished surfaces.
Secure coverings to prevent slipping and guarantee easy access to plumbing without leaving tools or debris on protected areas.
Gather tools and replacement parts checklist
One clear checklist helps guarantee the job proceeds smoothly and safely: essential tools, replacement parts, and personal protective equipment should be assembled and inspected before work begins.
A compact, inspected kit minimizes delays and damage. Verify sizes, seals, and hose lengths; confirm shutoff valves function.
- Basin wrench, adjustable wrench
- New faucet and O-rings
- Supply lines
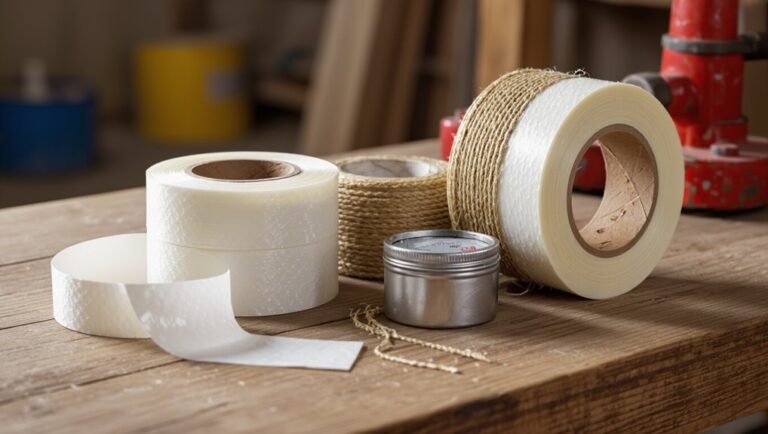
- Plumber’s tape, silicone
- Safety gloves, goggles
Identify Your Faucet Type and Compatibility
The installer should first note the faucet configuration on a pedestal sink—common layouts are 1-hole, centerset, and widespread—which determines mounting compatibility.
Exact measurements of hole spacing and deck thickness are required to guarantee the new faucet fits and seals properly.
Finally, supply line sizes and valve types must match or be adapted so the plumbing connections align with the replacement.
Common faucet configurations for pedestal sinks (1-hole, centerset, widespread)
Most pedestal sink faucets fall into three basic configurations—single‑hole, centerset, and widespread—which determine hole count, spacing, and compatibility with both the sink deck and the countertop-mounted hardware.
Single‑hole units combine valve and spout in one.
Centerset faucets mount on three holes with fixed spacing and integrated base.
Widespread models separate handles and spout, offering adjustable spacing for style and reach.
Measuring for replacement: hole spacing and deck thickness
Measuring hole spacing and deck thickness verifies the new faucet fits both the sink and its mounting hardware.
Measure center-to-center distance between outermost holes for centerset or widespread compatibility. Record hole diameter to verify shank fit.
Measure deck thickness at mounting location; compare with faucet shank length and included gasket/locknut reach.
Note any uneven surfaces that may require trim or sealant.
Matching supply line connections and valve types
After confirming hole spacing and deck thickness, attention shifts to matching supply line connections and valve types to guarantee compatibility between the new faucet and the existing plumbing.
Inspect inlet thread size (typically 3/8″ compression), supply hose ends, and shutoff valve style (compression, sweat, or threaded).
Note materials—copper, brass, or PEX—and select adapters or replacement valves as needed for a secure fit.
Step-by-Step Removal of the Old Faucet
Before removing the faucet, the homeowner should shut off both water shutoff valves and open the faucet to drain remaining water.
Next, the supply lines are disconnected and the mounting nuts are removed so the old fixture can be lifted out.
Finally, the sink surface is cleaned and inspected for corrosion or damage before installing the replacement.
Shutoff and drain: final prep steps
Shut off the water supply and relieve pressure to prevent spills and damage: close both the hot and cold shutoff valves under the sink, then open the faucet to drain residual water from the lines.
Place a bucket or towels beneath the connections, remove any standing water from the basin, and guarantee the workspace is dry and well-lit before proceeding with fastener access and tool placement.
Disconnect supply lines safely
With the water off and lines depressurized, locate the flexible supply hoses beneath the sink and place a bucket or rag under the connections to catch residual water.
Then use an adjustable wrench to hold the valve nut while turning the coupling nut on the supply line counterclockwise to loosen and remove it, repeating the process for both hot and cold lines.
Inspect fittings for corrosion, cap valves, and set hoses aside.
Remove mounting nuts and lift out old faucet
Loosen the faucet’s mounting nuts beneath the sink to free the fixture from the deck.
Use a basin wrench or adjustable wrench, turning counterclockwise while stabilizing the faucet above. Remove all nuts, washers, and mounting brackets.
Gently lift the faucet straight up, guiding supply lines and lift rods free. Set the old faucet aside for disposal or recycling.
Inspect the opening for remaining hardware.
Clean sink surface and inspect for damage
After the faucet is removed, wipe the sink surface with a soft cloth to remove water, putty, and debris so the underlying area is clearly visible.
Inspect for cracks, chips, corrosion, and old sealant residue around mounting holes. Note any hairline fractures or staining that could indicate leakage.
Photograph damage, measure hole alignment, and determine if cleaning, minor repair, or professional restoration is required before installing the new faucet.
Preparing the New Faucet and Sink for Installation
Before bringing parts to the sink, the new faucet should be fully assembled and checked on a workbench to confirm all components and fasteners are present.
Gaskets or appropriate sealant must be applied per the manufacturer’s instructions to guarantee watertight connections.
Finally, the supply lines and any necessary fittings should be prepared and cut to length so they connect cleanly to the shutoff valves.
Assemble faucet components on a workbench
Place the new faucet and its parts on a clean, well-lit workbench and organize components by type—handles, spouts, cartridges, mounting hardware, and supply lines—so each piece is readily accessible.
Inspect each item for damage, confirm parts match the instruction list, loosely assemble subcomponents (cartridge into body, spout onto base) to verify fit, and set fasteners and tools nearby for streamlined installation.
Apply sealant or gaskets correctly
With the faucet components organized and loosely fitted on the bench, attention turns to sealing the interface between the fixture and the sink.
Apply a continuous bead of plumber’s putty or silicone around the faucet base, or position factory rubber gaskets per manufacturer orientation.
Remove excess sealant, guarantee even compression when tightening, and confirm no gaps remain to prevent leaks once installed.
Prepare supply lines and fittings
Gather the supply lines, flexible hoses, and any required adapters, then inspect each component for damage, correct length, and compatible thread sizes.
Match thread types (compression, NPT, or BSP) and verify washer presence. Trim or replace hoses if too long.
Hand-tighten fittings first, then secure with wrenches without overtightening.
Test for leaks before finalizing pedestal alignment.
Step-by-Step Installation of the New Faucet
The faucet is positioned in the sink openings and its mounting hardware is tightened to secure a proper seal and alignment.
Supply lines are reconnected with appropriate thread sealant or tape, and trim pieces and handles are reinstalled while confirming correct orientation.
Finally, the water is turned on and the assembly is inspected for leaks and smooth operation.
Positioning the faucet and securing mounting hardware
Place the new faucet into the sink holes, aligning its base and supply lines so the fixture sits flush and centered over the basin.
From beneath, fit the gasket and mounting hardware, hand-tightening mounting nuts to hold position.
Use a basin wrench to snug each nut evenly, alternating sides to prevent wobble.
Verify level and firm seating before final torque.
Reconnecting supply lines and using thread sealant
Reconnect the water lines by hand-threading the supply hoses onto the faucet tailpieces, ensuring the hot and cold lines match their respective sides.
After hand-tightening, use an adjustable wrench to snug fittings one-quarter to one-half turn—avoid overtightening.
Apply thread sealant or plumber’s tape to male threads where recommended, wipe away excess, and orient connections for access.
Finally, confirm fittings are secure before turning water on.
Reinstalling trim and handles; checking alignment
With the supply lines secured and fittings checked, attention shifts to reinstalling the faucet trim and handles and verifying alignment.
The technician slides escutcheons or gaskets into place, tightens retaining nuts or set screws to manufacturer torque, and fits handle caps.
Alignment is confirmed visually and by ensuring handles operate without binding; any misalignment is corrected before final fastening.
Turn-on procedure and initial leak check
Open the shutoff valves slowly to restore water flow, then operate both hot and cold handles to purge air and allow water to reach the new faucet.
Observe supply connections, drain tubing, and beneath-sink joints for any drips.
Tighten fittings gently if leaks appear, recheck after one minute of flow, then test hot/cold mixing and handle operation before final cleanup and seal inspection.
Testing, Adjustments, and Final Checks
After installation, a thorough leak test should be performed around connections, drains, and supply lines while the water is pressurized.
The technician then checks and adjusts water pressure and handle operation for smooth movement and proper flow.
Finally, lines are flushed and hot/cold orientation verified to guarantee correct temperature delivery.
How to perform a comprehensive leak test
Begin by reactivating the water supply and running both hot and cold taps to pressurize the system while observing all joints, supply lines, and the faucet base for visible drips or moisture.
Next, dry surfaces, place paper towels under connections, and inspect after several minutes.
Check under-sink for slow leaks, tighten fittings as needed, and confirm no leakage during prolonged flow and after shutting off.
Adjusting water pressure and handle operation
Test water pressure and handle operation systematically to guarantee the faucet functions smoothly and delivers balanced flow from both hot and cold sides.
Turn handles from closed to full open, noting resistance and stops. Adjust supply valve openings for desired pressure.
Tighten or loosen handle set screws and cartridge retaining nuts if movement is stiff or loose.
Recheck for steady, vibration-free flow and smooth return to closed.
Flushing lines and verifying hot/cold orientation
Flush the lines by running each handle fully for at least 30 seconds to clear trapped debris and air.
Then operate them alternately while checking that hot water flows from the correct side and that temperature changes correspond to the labeled handles.
If reversed, shut off supply, swap hot and cold supply lines at the shutoff or faucet connections, retest, and confirm steady, debris-free flow.
Common Problems and Troubleshooting
After replacement, common issues include persistent leaks at the faucet base, spout, or supply connections that require re-seating seals or tightening fittings.
Low water pressure, misaligned handles, or an uneven spray pattern often point to blocked aerators, incorrect cartridge installation, or loose mounting.
Corroded or broken mounting hardware may necessitate extraction or replacement to secure the new faucet properly.
Persistent leaks at base, spout, or supply connections
Persistent leaks at the faucet base, spout, or supply connections often indicate worn seals, loose fittings, or improper installation and should be diagnosed systematically to prevent water damage.
Inspect O-rings, cartridge, and supply line ferrules; tighten fittings to manufacturer torque. Replace damaged seals or flex lines, apply plumber’s tape to threaded joints, and retest.
If leakage persists, re-evaluate mounting and consider professional assessment.
Low water pressure after replacement
Check common restrictions and system changes when water flow seems weak after installing a new faucet:
Inspect aerator and faucet cartridge for debris or installation damage.
Verify supply shutoffs are fully open, and confirm flexible supply lines are not kinked.
Check inlet screens and home-wide shutoff for sediment.
If pressure remains low, test both hot and cold separately and consult plumbing codes or a professional.
Misaligned handles or uneven spray pattern
Misaligned handles or an uneven spray pattern often indicate installation issues or internal component faults that affect performance and appearance.
Inspect handle alignment, tighten mounting nuts, and verify cartridge or valve orientation.
Remove aerator and check for debris or damaged flow straighteners.
Replace worn cartridges, O-rings, or spray head components as needed.
Test operation and adjust handle stops for consistent motion and spray.
Dealing with corroded or broken mounting hardware
When mounting hardware on a pedestal sink becomes corroded or breaks, the sink’s stability and seal can be compromised, creating leaks or unsafe wobble.
Inspect fasteners and mounting ring; remove rusted parts with penetrating oil and appropriate tools.
Replace with stainless steel or brass anchors and new rubber gaskets.
Tighten evenly, test for movement and leaks, and retrofit a mounting bracket if original supports fail.
Tips to Ensure a Long-Lasting Faucet Replacement
Selecting durable faucet materials and corrosion-resistant finishes helps extend service life on pedestal sinks.
Regular maintenance—such as checking seals, cleaning aerators, and testing for leaks—prevents minor issues from becoming failures.
Professional plumbing assistance should be sought for complex repairs, persistent leaks, or when access and alignment exceed DIY skills.
Choosing durable materials and finishes for pedestal sinks
Because pedestal sinks concentrate exposure to water and cleaning agents on a small area, choosing corrosion-resistant materials and durable finishes is essential to prevent premature wear and staining.
Opt for solid brass or stainless steel valves, nickel or chrome plating with protective clear coats, and ceramic-disc cartridges.
Prioritize finishes rated for high-traffic use and verify warranty and manufacturer corrosion resistance specifications before purchase.
Best practices for regular maintenance
Materials and finishes that resist corrosion and wear reduce the need for frequent repairs, but routine maintenance extends the life of a faucet beyond its initial qualities.
Regular cleaning with mild, nonabrasive solutions, periodic inspection of seals and hoses, prompt replacement of worn cartridges or washers, and tightening loose fittings prevent leaks and mineral buildup.
Schedule simple checks every few months.
When to call a professional plumber
When should a professional be engaged for a pedestal-sink faucet replacement?
A plumber should be called if leaks persist after tightening, supply lines are corroded or inaccessible, seals or valves require replacement, water damage or mold is present, or floor/wall structures are compromised.
Also consult a pro for complex fittings, unfamiliar tools, or local code concerns to guarantee a durable, code-compliant installation.
Cost, Time Estimate, and Parts Guide
A concise breakdown of expected expenses and time helps plan a pedestal sink faucet replacement.
Typical costs separate parts (faucet, supply lines, mounting hardware) from labor, with professional installation often costing several times the parts alone.
Estimated DIY time varies by skill—novice 2–4 hours, intermediate 1–2 hours, experienced DIY under an hour.
Typical cost breakdown: parts vs. labor
Typical faucet replacement projects on pedestal sinks split costs between parts and labor, with parts often accounting for 20–40% of the total and labor making up the remainder. A concise breakdown helps homeowners decide whether to DIY or hire pros; premium fixtures raise parts share, complex access increases labor.
| Item | Typical Cost | Feeling |
|---|---|---|
| Basic faucet | $40–$100 | Relief |
| Mid-range | $100–$250 | Confidence |
| Premium | $250+ | Pride |
| Labor | $100–$300+ | Restraint |
Estimated time for DIY replacement by skill level
Beginner, intermediate, and experienced DIYers should expect different time and cost profiles for replacing a pedestal-sink faucet: beginners often need 1.5–3 hours and may spend extra on basic tools or replacement parts ($10–$30) in addition to the faucet.
Intermediates typically finish in 45–90 minutes with only the faucet and common supplies needed.
Experienced DIYers can complete the job in 30–60 minutes using existing tools and minimal parts—this variation reflects skill with access, shutoff valve handling, and dealing with old fittings.
Additional factors: faucet complexity, corroded connections, and need for sealant or new supply lines alter time and expense.
Common Mistakes to Avoid
Common mistakes can turn a straightforward faucet replacement into a prolonged repair.
Using the wrong gasket or sealant, over-tightening fittings and injuring components, or overlooking worn supply valves are frequent causes of leaks and failures.
Each should be checked and corrected before reassembly to guarantee a lasting installation.
Using incorrect gasket or sealant
Using the wrong gasket or sealant can lead to leaks, corrosion, or a loose faucet assembly.
The guide notes that incompatible rubber, paper, or improper silicone can fail under water exposure or chemical cleaners. Appropriate materials—manufacturer-recommended gaskets and plumber’s-grade sealant—ensure reliable seals and prevent metal contact.
Incorrect choices necessitate rework, potential water damage, and shortened fixture lifespan.
Over-tightening fittings and damaging components
Apply firm but measured force when tightening fittings; over-tightening is a frequent cause of stripped threads, cracked porcelain, warped flanges, and damaged seals.
Technicians should tighten until snug, then test for leaks. Use a torque-limited wrench if unsure and tighten incremental turns.
Replace damaged parts rather than forcing fittings; corrective repairs are costlier and risk sink integrity and future leaks.
Ignoring supply valve condition during replacement
Check the condition of the shutoff valves before removing the old faucet: worn, corroded, or seized supply valves are a frequent hidden problem that can turn a straightforward replacement into a leak-prone disaster.
Failure to inspect and, if necessary, replace or service valves risks leaks, shutoff failure during work, and future water damage.
Verify operation and integrity before proceeding.
Recommended Tools, Supplies, and Replacement Faucet Brands
Gather the right tools and parts before beginning to avoid delays and guarantee a smooth faucet replacement on a pedestal sink.
Essential items include adjustable wrench, basin wrench, plumber’s tape, silicone sealant, and replacement supply lines.
Recommended faucet brands: Moen, Delta, Kohler, Pfister, and American Standard—durable, compatible models with single‑hole or centerset configurations suit most pedestal sinks.
- Adjustable wrench
- Basin wrench
- Plumber’s tape
- Silicone sealant
- Replacement supply lines
Conclusion
Replacing a pedestal sink faucet restores function and style with manageable effort and modest cost. Homeowners who follow proper preparation, safety, and compatibility checks typically avoid common pitfalls. Significantly, the U.S. Bureau of Labor Statistics reports that do-it-yourself home improvement participation rose to about 44% of households in recent years, indicating growing confidence in tackling projects like faucet replacement. With careful steps and quality parts, results are both durable and satisfying.