How to Unscrew a Bathroom Sink Drain: Step-by-Step Guide for Beginners
To unscrew a bathroom sink drain, follow these steps: First, turn off the water supply and clear the space under the sink. Place a bucket to catch any water. Remove the stopper and disconnect the P-trap. Use pliers or a basin wrench to loosen the locknut or retaining nut beneath the drain; apply penetrating oil if it’s stubborn. Unscrew the flange from above and clean off any old putty or sealant before reassembling. For more detailed tips and troubleshooting, continue reading.
What It Means to Unscrew a Bathroom Sink Drain and When You Should Do It
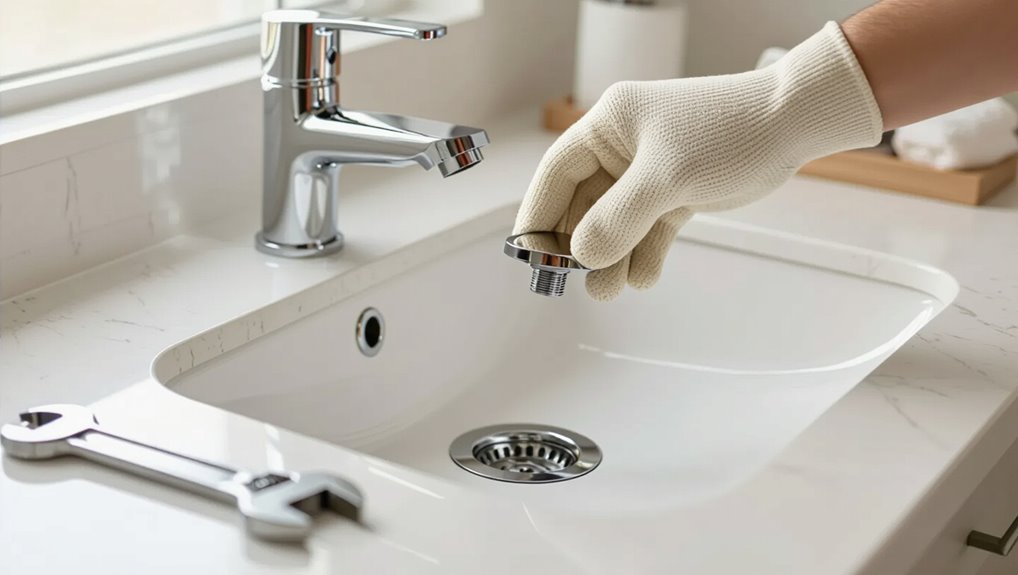
Unscrewing a bathroom sink drain means disconnecting the drain assembly from the sink to access its parts or the plumbing beneath.
Homeowners commonly perform this to repair or replace components, remove stubborn clogs, or conduct a thorough deep clean.
The exact steps depend on the drain type—pop-up, basket strainer, slip-joint, or threaded tailpiece—since each uses different fittings and fasteners.
Common reasons to remove a sink drain (repair, replace, deep clean, remove clog)
Removing a bathroom sink drain becomes necessary for several practical reasons: repairing a leaking or corroded assembly, replacing outdated or damaged parts, performing a thorough deep clean to eliminate mineral buildup and bacteria, or clearing a stubborn clog that chemical cleaners cannot fix.
Homeowners learn how to unscrew bathroom sink drain to access seals, tailpieces, and trapped debris, restoring function and preventing further damage.
Types of sink drains and fittings (pop-up, basket strainer, slip-joint, threaded tailpiece)
After identifying a need to access the drain—whether for repair, replacement, deep cleaning, or clog removal—the next step is recognizing the various drain designs and fittings that determine how to proceed.
Pop-up assemblies detach via retaining nut or clip; basket strainers unscrew from above with a locknut beneath; slip-joint connections use compression fittings; threaded tailpieces screw into the trap or flange and require pliers or pipe wrench.
Quick Overview Tools and Materials You’ll Need
A brief list of essential tools and optional extras helps prepare for unscrewing a bathroom sink drain. Necessary items include adjustable wrenches, pliers, plumber’s putty or replacement gaskets, and a bucket; optional tools and helpful supplies such as a basin wrench, penetrating oil, and cleaning brushes can make the job easier.
Safety gear and simple preparations—gloves, eye protection, and turning off the water supply—should be confirmed before starting.
Essential tools list
Clear, reliable tools make unscrewing a bathroom sink drain faster and less frustrating.
The essentials focus on grip, sealing, and protection: a basin wrench for hard-to-reach nuts, adjustable pliers for slip-joint gripping, and plumber’s putty or tape to reseal threads during reassembly.
These cover removal, handling, and temporary sealing without extras.
- Basin wrench
- Adjustable pliers
- Plumber’s putty or tape
Optional tools and helpful supplies
Consider bringing a few optional tools and supplies to make the job smoother and reduce risk of damage: a small selection can speed removal and protect finishes.
- Narrow basin wrench or flexible extension for tight spaces.
- Rubber jaw pliers or strap wrench to grip without scratching.
- Silicone sealant remover and clean rags for residue and tidy reassembly.
Safety gear and preparations
Several basic safety items and simple preparations make drain removal safer and more efficient. The technician should wear gloves, eye protection, and mask; clear the area; turn off water; and lay towels to catch spills. A small kit prevents delays and protects finishes.
| Item | Purpose | Tip |
|---|---|---|
| Gloves | Protect hands | Nitrile preferred |
| Goggles | Shield eyes | Close-fitting |
| Towels | Contain spills | Use old towels |
| Plumber’s tape | Seal threads | Keep handy |
Prepare the Work Area
Before beginning, the water supply should be shut off and the cabinet cleared to allow access and prevent spills.
Surfaces around the sink are protected with cloth or plastic and a bucket or towels are positioned to catch water and debris.
The sink and plumbing are then inspected from above and below to note fasteners, seals, and any corrosion.
Turn off water supply and clear the cabinet
Shut the sink’s water at the supply valves and clear out the cabinet beneath to create an organized, dry workspace. Confirm valves are fully closed by turning handles clockwise.
Remove stored items, wipe away debris, and set aside cleaning supplies and toiletries.
Guarantee adequate lighting and unobstructed access to the drain, P-trap, and surrounding fittings before proceeding to tool setup and disassembly.
Protect surfaces and place a bucket/towels
With the cabinet cleared and valves confirmed closed, protect the vanity, countertops, and cabinet floor by laying down old towels or a plastic drop cloth to catch drips and debris.
Place a shallow bucket beneath the P-trap to collect water and small parts.
Arrange towels for quick cleanup, keep a flashlight and pliers within reach, and avoid placing tools directly on finished surfaces.
Inspect the sink from above and below
One clear step is to examine the sink both from above and below to identify the drain assembly type, visible fasteners, corrosion, and any seals or slip-nut connectors that will affect removal.
Note gasket condition, plumber’s putty residue, and tailpiece alignment.
Record obstructing trap orientation and mounting hardware access.
Photograph configurations for reference before loosening components.
Step-by-Step: How to Unscrew a Bathroom Sink Drain
The procedure begins by removing the stopper or pop-up assembly to access the drain.
Next, the P-trap and tailpiece are disconnected and the retaining nut or locknut beneath the sink is loosened.
Finally, the drain flange is unscrewed from above if possible and any hardened plumber’s putty or sealant is carefully removed.
Step 1 Remove the stopper or pop-up assembly
Begin by removing the sink stopper or pop-up assembly so access to the drain flange and retaining hardware is unobstructed.
Rotate or lift the stopper, then trace the linkage beneath the sink to locate the pivot rod clip. Unclip and withdraw the pivot rod, freeing the stopper.
Clean accumulated debris from the stopper and flange area to improve visibility before proceeding to unscrew the drain.
Step 2 Disconnect the P-trap and drain tailpiece
Loosen the slip nuts on the P-trap and tailpiece to detach them from the drain assembly and wall outlet.
Support the trap with one hand while turning nuts counterclockwise with an adjustable wrench or channel-lock pliers.
Lower the trap carefully to avoid spills; drain any water into a bucket.
Inspect washers and slip joints for debris or damage before proceeding.
Step 3 Loosen the retaining nut or locknut under the sink
Locate the large retaining nut or locknut beneath the sink flange and prepare to turn it counterclockwise to free the drain assembly. The person applies penetrating oil if needed, uses pliers or a basin wrench, steadies the flange above, and avoids damaging threads. Once loose, the locknut slides down, releasing the drain for removal.
| Tool | Action | Tip |
|---|---|---|
| Penetrating oil | Loosen | Wait 5–10 min |
| Basin wrench | Turn | Use steady force |
| Pliers | Grip | Protect with cloth |
| Gloves | Safety | Prevent cuts |
| Rag | Clean | Catch small parts |
Step 4 Unscrew the drain flange from the top (from above if possible)
From above the sink, the flange is turned counterclockwise to unscrew it from the sink bowl, using steady, even pressure to avoid cross-threading the remaining parts.
The user applies firm grip or pliers with a cloth to protect finishes, checking for resistance.
Once loose, the flange lifts free; any remaining hardware below is supported to prevent dropping into the cabinet.
Step 5 Remove hardened plumber’s putty or sealant safely
After the flange is lifted and any lower hardware is supported, attention turns to the hardened plumber’s putty or sealant that often remains around the drain opening.
Use a plastic scraper or putty knife to pry away softened residue after applying white vinegar or a commercial residue remover.
For stubborn areas, gently score with a utility blade, working slowly to avoid scratching the sink surface.
Step 6 Clean threads and the sink opening before installing a new drain
Before fitting the replacement drain, the threads and sink opening must be thoroughly cleaned to guarantee a watertight seal and proper fit.
Remove residue with a cloth, nylon brush, and mild solvent; avoid brass brushes that damage metal.
Inspect threads for nicks or corrosion and file minor burrs smooth.
Wipe dry, apply plumber’s grease or new gasket, and prepare for reinstallation.
Alternative Methods When the Drain Is Stuck
If the drain will not turn, several alternative methods can be attempted to free it.
Penetrating oil with time, cautious application of heat where safe, or using a strap wrench, basin wrench, or adjustable pliers can often break the corrosion or grip.
If mechanical removal fails and the tailpiece is damaged, cutting and removing the tailpiece becomes a last-resort option.
Using penetrating oil and waiting
Apply a penetrating oil to the stuck threads and allow ample dwell time for the solvent to break down corrosion and mineral deposits.
After 15–30 minutes, reapply if necessary and probe gently with a soft brush or pick to remove loosened debris.
Protect surrounding finishes and ventilate the area.
Repeat cycle up to a few times before attempting rotation with proper tools.
Applying heat carefully (when appropriate)
When corrosion or mineral deposits resist penetrating oil, controlled heat can expand metal parts and break the bond; use a heat gun or propane torch only when the fixture material and nearby finishes can tolerate it.
Heat briefly and evenly, avoid overheating seals or plastic, keep flames or hot air away from flammable materials, wear heat-resistant gloves, and let parts cool before attempting to turn or apply tools.
Using strap wrench, basin wrench, or adjustable pliers
After using heat to loosen seized fittings, mechanical tools offer controlled leverage for removing a stubborn sink drain without damaging surrounding surfaces.
A strap wrench grips the flange evenly for rotating; a basin wrench reaches confined nuts under the sink; adjustable pliers (with jaw protection) provide strong bite on hex shapes.
Select the least forceful tool first, working incrementally to prevent marring or stripping.
Cutting and removing a damaged tailpiece (when unscrewing fails)
If unscrewing the tailpiece proves impossible due to corrosion, cross-threading, or a stripped connection, cutting and removing the damaged section becomes a practical next step.
Protect surrounding finishes, shut off water, and place a bucket.
Use a hacksaw or tubing cutter to cut below the damaged area, avoiding the trap.
Remove remaining threads with pliers, clean the mating surface, and prepare a replacement tailpiece and seal.
Preventing Damage to Sink Surfaces and Pipes
When unscrewing a bathroom sink drain, care should be taken to prevent scratches to porcelain, chrome, stone, and acrylic surfaces by using soft padding and non‑marring tools.
Protective measures such as tape on wrenches, rubber jaw covers, or cloth wraps can preserve chrome finishes and fragile materials.
Additionally, gentle support of pipe connections and gradual force application reduce the risk of cracking or loosening adjacent fittings.
How to avoid scratching sinks and chrome finishes
Protecting sink surfaces and chrome finishes requires deliberate care and the right tools to prevent scratches, dents, and corrosion during drain removal.
Use soft protective layers (microfiber, rubber pads) between tools and metal, wrap adjustable wrenches with tape, avoid abrasive pads or steel wool, and choose non-marring pliers.
Clean surfaces gently before work, apply light, controlled force, and inspect finishes afterward for touch-up.
Protecting fragile materials (porcelain, stone, acrylic)
Porcelain bowls, stone countertops, and acrylic basins require extra care during drain removal to prevent chips, cracks, and surface stress.
Use padded wrenches, rubber-coated pliers, and soft cloths under tools. Apply even pressure, avoid sudden torsion, and support thin edges.
Lift fittings straight out; never pry against surfaces. Sealants and adhesives should be softened before loosening to reduce stress.
Troubleshooting Common Problems
When problems arise during drain removal, a few recurring issues account for most delays and failures.
These include corroded or seized nuts and bolts, stripped threads or rounded nuts, and stubborn plumber’s putty or an old wax gasket that resists separation.
If the drain still leaks after reassembly, the text will outline targeted fixes and when to replace parts or call a professional.
Corroded or seized nuts and bolts
Corroded or seized nuts and bolts are a common obstacle when removing a bathroom sink drain, occurring as mineral deposits, rust, or old thread-locking compounds fuse metal parts together.
Apply penetrating oil, allow dwell time, then use properly sized wrenches or pliers with steady pressure.
Gentle heat can expand metal; tap threads to break corrosion.
Proceed slowly to avoid damaging surrounding fittings.
Stripped threads or rounded nuts
After dealing with seized fasteners, attention often turns to hardware whose grip has failed: stripped threads or rounded nuts prevent wrenches from getting purchase and can stall removal just as effectively as corrosion.
Use locking pliers, nut splitters, or an extractor socket designed for rounded hexes.
If threads are damaged, replace the fastener and repair the mating thread with a helicoil or thread file before reinstalling.
Sticky plumber’s putty or old wax gasket
Pry or cut away the old sealant carefully, since hardened plumber’s putty or a compressed wax gasket can bond the drain flange to the sink and resist ordinary unscrewing.
Use a thin putty knife, utility blade, or plastic scraper to score and lift material. Work incrementally to avoid scratching porcelain.
Clean residual residue with solvent compatible with the sink surface before attempting flange removal or replacement.
Drain still leaking after reassembly
If leaks persist after resealing or replacing the flange and cleaning old putty or wax, the cause is often an overlooked fitting, damaged gasket, or misaligned assembly. Inspect slip nuts, tailpiece, and trap for cracks or loose connections. Replace worn gaskets, realign components, tighten hand-tight plus quarter turn, and test. If persistent, consult a plumber.
| Item | Action |
|---|---|
| Slip nut | Tighten/replace |
| Gasket | Inspect/replace |
| Alignment | Adjust/test |
When to Call a Professional
If the sink shows structural damage, persistent leaks after attempted repairs, or clogs that resist standard removal methods, the situation likely exceeds typical DIY scope.
In those cases, a professional plumber should be contacted to assess and safely resolve the problem.
Providing the plumber with details such as the sink type, visible damage, what tools and methods were already tried, and any relevant plumbing history will speed diagnosis and service.
Signs the job is beyond DIY (structural damage, complex clogs)
Recognize when a sink repair exceeds routine DIY: visible corrosion of the sink flange, crumbling or warped cabinet support, persistent leaks staining or softening surrounding wood, or a drain assembly that spins freely without disengaging indicate structural problems better handled by a pro.
Also seek professional help for recurring clogs resistant to augers, sewage odors, damaged trap or venting, or when plumbing requires wall or floor access.
What information to give a plumber for faster service
When a problem clearly exceeds basic DIY—such as structural rot, a spinning drain assembly, or persistent sewage odors—calling a plumber promptly saves time and limits further damage.
Provide concise details: fixture type, sink material, visible damage, age, prior repairs, whether water drains or backs up, smell characteristics, noises, and photos.
State access constraints, desired timing, and contact information for faster, accurate service.
Reassembling or Replacing the Drain
When replacing a drain, the homeowner should select an assembly that matches the sink’s size, material, and finish for proper fit and longevity.
Attention should be given to sealing options—plumber’s putty, rubber gaskets, or silicone—each with different application methods and compatibility.
After reinstalling the tailpiece and P-trap, the assembly must be tested under water to confirm there are no leaks.
Choosing the right replacement drain assembly
Although replacing a sink drain can seem straightforward, selecting the correct replacement assembly requires attention to drain type, sink material, and measurements. The chosen unit must match the existing tailpiece diameter, flange size, and whether an overflow or pop-up mechanism is needed to guarantee a proper seal and function.
The installer should verify finish, material compatibility (brass, stainless), and mounting style (threaded, snap-in) before purchase.
Proper seal methods: plumber’s putty vs. rubber gasket vs. silicone
Several common sealing options—plumber’s putty, rubber gaskets, and silicone caulk—offer distinct benefits and trade-offs that determine their suitability for reassembling or replacing a bathroom sink drain.
Plumber’s putty is easy to shape and removable but can stain porous sinks.
Rubber gaskets provide quick, clean seals ideal for metal sinks.
Silicone cures waterproofly and flexibly, best for long-term, nonremovable seals.
Reinstalling the trap and testing for leaks
After the drain flange and seal have been set—whether with putty, a gasket, or silicone—the next step is to reattach the P-trap and confirm the assembly is watertight. Tighten slip nuts hand‑firm, align trap for proper slope, restore tailpiece, then run water and inspect joints for drips. Tighten slightly if needed; replace washers if leaks persist.
| Step | Check |
|---|---|
| 1 | Align |
| 2 | Hand‑tighten |
| 3 | Test |
| 4 | Inspect |
Maintenance Tips to Keep Drains Easy to Remove
Regular, simple cleaning prevents buildup that can seize drain fittings.
Recommended cleaners, occasional lubricant on threads, and scheduled inspections help the drain remain serviceable.
Seasonal checks for leaks or corrosion and timely preventative treatments extend ease of removal.
Routine cleaning practices
Establishing a simple cleaning routine keeps bathroom sink drains accessible and reduces the need for forceful removal.
Regular light maintenance prevents buildup and preserves fittings.
- Wipe stopper and visible drain edges weekly to remove soap residue.
- Flush with hot water after heavy use to dislodge grease.
- Clear hair and debris from the strainer promptly to avoid compacted clogs.
Recommended products and periodic checks
Use a few targeted products and scheduled inspections to keep sink drains easy to remove.
The piece recommends mild, noncorrosive cleaners, silicone lubricant for threads, and a small brush for trap crevices.
Periodic visual checks catch buildup before seizing occurs.
Suggested actions:
- Mild enzymatic cleaner monthly
- Silicone-based thread lubricant quarterly
- Inspect and wipe drain flange bi-monthly
Seasonal checks and preventative treatments
After the recommended monthly and quarterly treatments, seasonal checks provide a broader schedule to catch issues that routine tasks might miss.
Inspect for corrosion, mineral buildup, loose fittings, and worn seals every spring and fall.
Flush with hot water, apply a mild descaler if needed, and re-torque slip nuts.
Record observations and replace parts proactively to guarantee drains remain easy to remove.
Quick Reference Checklist Before You Start
A short checklist confirms the job starts safely and efficiently: gather the correct tools (adjustable wrench, plumber’s pliers, basin wrench, bucket, rags), confirm the water supply is shut off, clear the area beneath the sink, and wear gloves and eye protection.
The preparer verifies lighting, workspace protection, and readiness before proceeding.
- Verify tool condition.
- Position bucket and rags.
- Test water shutoff.
Conclusion
When the final nut gives way and the old drain drops free, a sense of quiet triumph settles—but the story isn’t quite over. The reader is left with tools still warm from use and a few lingering choices: patch, replace, or call for help. Small victories in maintenance often foreshadow larger confidence. With cautious hands and the right know-how, the next stubborn drain will be less mysterious—and far more manageable.