How to Build a Curbless Shower on Concrete: Step-by-Step Guide for a Watertight Installation
Building a curbless shower on concrete involves creating a sloped pre-slope mortar bed, installing a waterproofing membrane, and integrating a suitable drain with a final mortar bed and tile finish. To ensure a successful installation, assess the concrete slab for cracks, moisture, and slope, as drains typically require a 1/4-inch-per-foot fall. Attention to detail at corners and the drain is crucial to prevent leaks. Follow the detailed step-by-step guide below for a watertight installation.
Overview of Curbless Shower on Concrete and When to Choose It
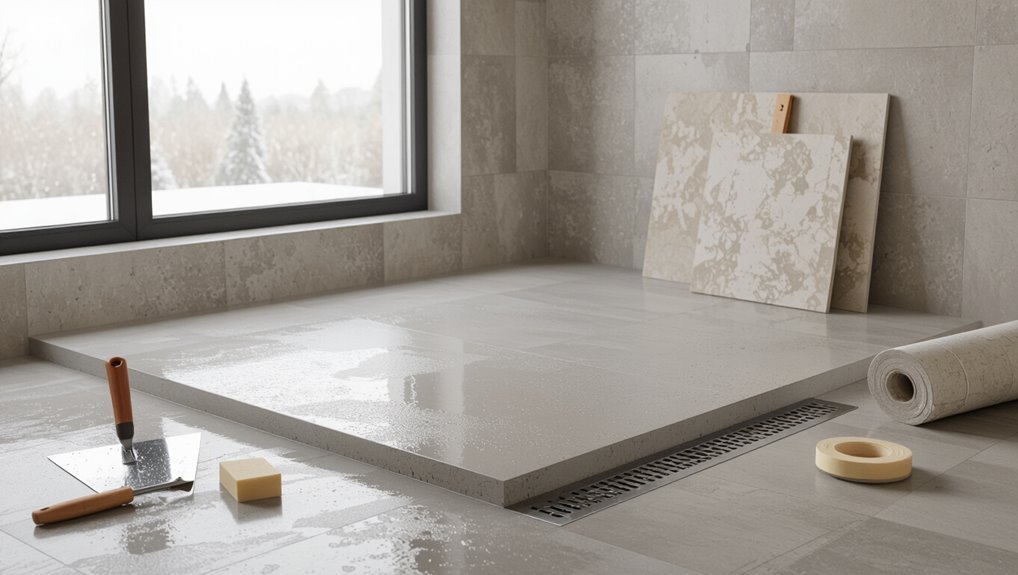
A curbless shower installed on concrete offers a seamless, accessible passage and simplifies waterproofing when proper slope and membrane are used, though it can be more challenging to retrofit and may require precise drainage details.
It is commonly chosen for ground-floor bathrooms, accessible designs, and open-plan layouts where floor-level entry is desired.
Before proceeding, professionals should verify local building codes and accessibility standards to confirm compliance with slope, threshold, and waterproofing requirements.
Benefits and limitations of curbless showers on concrete
One major advantage of installing a curbless shower on concrete is the seamless, accessible floor plane it creates, improving mobility for users and easing cleaning and maintenance.
Benefits include modern aesthetics, universal access, and reduced tripping hazards.
Limitations involve precise slope requirements, potential waterproofing complexity, and higher retrofit costs.
Guidance on how to build a curbless shower on concrete mitigates many risks when executed properly.
Typical use cases and room layout considerations
Having reviewed the benefits and limitations of curbless showers on concrete, consideration turns to where they make the most sense and how space influences design.
Ideal for master baths, accessible remodels, and modern minimalist layouts, they suit open plans with adequate floor slope and waterproofing.
Small bathrooms may require creative drainage placement or partial barriers to prevent splash without compromising openness.
Building code and accessibility standards to check
Although curbless showers offer accessibility and a sleek aesthetic, they must comply with local building codes and accessibility standards that govern slope, waterproofing, drain capacity, threshold heights, and grab-bar placement.
Review ADA guidelines, local plumbing codes, and municipality permits.
Verify required floor slope (typically 1/4″ per foot), trap/drain sizing, waterproofing membrane standards, maximum threshold height, and mandated safety fixtures before construction begins.
Required Materials, Tools, and Estimated Costs
The section outlines the essential waterproofing components, including membranes, pre-slopes, and sealants, alongside drain options such as linear versus center drains.
It also covers suitable substrates and flooring materials for curbless installations, a concise tools and safety equipment list, and a typical cost breakdown to aid budget planning.
Readers will gain a clear sense of material choices, necessary tools, and expected expenses before beginning work.
Waterproofing materials (membranes, pre-slopes, sealants)
Before installing tile or setting the curbless threshold, a complete waterproofing system must be specified and staged: this includes a pre-slope to guarantee proper drainage, a chosen membrane (sheet or liquid-applied) compatible with the substrate and drain type, and appropriate sealants and tapes for all penetrations and seams.
Costs vary: sheet membranes, liquid membranes, pre-slope materials, waterproof tape, and sealant cartridges should be budgeted separately.
Drain systems and linear vs center drain options
Drain choices—center drains vs. linear drains—dictate slope geometry, waterproofing interfaces, and parts lists, so selecting a system early clarifies required materials, tools, and budget.
Center drains require concentric pre-slopes, round strainer assemblies, and compact clamping rings.
Linear drains need single-direction slope, channel bodies, adjustable grates, and often adjustable outlets.
Costs vary: center typically lower; linear adds material and labor.
Substrate and flooring materials compatible with curbless builds
Choosing between center and linear drains influences more than slope layout; it also narrows compatible substrates and floor coverings because the chosen drain type sets required slope direction, waterproofing overlap, and changeover details.
Suitable substrates include bonded mortar beds, sealed concrete, or prefabricated shower pans compatible with thinset.
Flooring options favor nonporous tiles, large-format porcelain, textured stone, or waterproof vinyl rated for wet-floor use; grout and sealants must match.
Tools and safety equipment list
A concise kit of required materials and safety equipment lets installers move from planning to execution with fewer delays:
Essential tools include measuring devices, chalk line, level, circular saw with diamond blade, grinder, trowels, notched float, mixing bucket, and drill.
Required safety gear: respirator, eye and ear protection, gloves, knee pads, and dust-control equipment.
Include waterproofing membrane, drain assembly, and compatible sealants.
Typical cost breakdown and budget planning
When planning a curbless shower project, homeowners should itemize required materials and tools alongside labor to produce a realistic budget.
Typical line items include waterproofing membrane, drain systems, substrate modification, tile, fixtures, and labor rates.
Contingency of 10–20% is advised. Cost varies by finish quality and local labor.
- Waterproofing, drain, substrate
- Tile, fixtures, trim
- Labor and contingency
Site Preparation and Existing Concrete Assessment
Before any tile or waterproofing is installed, the existing slab must be inspected and tested for slope, cracks, and moisture to determine suitability.
A mock layout should be measured and marked to establish the shower footprint and drain location.
Structural and leveling issues—such as cutting low spots or building up areas—should be planned and addressed to guarantee proper drainage and a stable substrate.
Inspecting and testing existing slab for slope, cracks, and moisture
Several key checks determine whether an existing concrete slab can receive a curbless shower: slope measurement to confirm a minimum fall toward the drain, a crack survey to identify structural or surface defects, and moisture testing to assess vapor drive and membrane needs.
The inspector records slope values, maps and gauges cracks for repair priority, and performs RH or calcium chloride tests to determine remediation and membrane specifications.
Measuring and marking mock layout and shower footprint
Having confirmed slope, documented cracks, and recorded moisture readings, the next task is to establish the shower footprint and mock layout on the slab.
Measure desired dimensions, mark perimeter with chalk or pencil, and locate drain center. Verify clearances for fixtures and door swing.
Snap lines for curbless threshold, mark any slopes to drain, and confirm layout alignment with room and plumbing.
Structural and leveling considerations (cutting or building up low spots)
A careful inspection of the existing slab determines whether cutting into high spots or building up low areas will be required to achieve a continuous, ADA‑compliant slope to the drain.
Structural assessment verifies slab thickness, reinforcement, and load capacity. Low spots can be corrected with bonded, polymer‑modified patch or self‑leveling mortar; high spots get ground or sawed.
Confirm substrate soundness and proper curing before waterproofing.
Designing Drainage and Slope for a Watertight Installation
Designing the drainage and slope begins with precise calculation of the required fall and construction of a compatible pre-slope to guarantee water moves toward the drain.
Selection of drain type and location is critical for a seamless curbless passage and must accommodate expected flow and finish flooring.
Waterproofing details at the drain and where the shower meets adjoining floors must be specified to maintain a continuous, watertight membrane.
Calculating required slope and pre-slope construction
Determine exact slopes and pre-slope layers before installing the finished shower base so water reliably flows to the drain and the waterproofing system performs as designed.
Calculate a uniform cross-slope of 1/4 inch per foot (2%) toward the drain; provide a bonded mortar pre-slope beneath the waterproofing to create fall, compacted to thicknesses varying 1/2–2 inches.
Verify with a straightedge and level.
Choosing drain location and type for curbless transitions
Selecting the drain location and type is essential for achieving a seamless curbless shift and ensuring water is reliably directed into the plumbing without compromising the waterproofing system.
Position drains to follow natural flow and traffic, typically near the low point or linear along the threshold.
Choose linear or center drains based on slope strategy, flow capacity, aesthetic preference, and access for maintenance.
Details for waterproofing transitions to adjoining floor surfaces
Establish a continuous waterproof plane where the shower meets adjoining floors by detailing overlapping membranes, compatible sealants, and appropriate height differentials at the threshold.
Specify membrane overlap onto adjacent substrate, bond-breakers at movement joints, and sealant compatible with membrane and tile.
Design a subtle slope away from the dwelling area, use stainless-steel junction profiles, and test for watertight continuity before finishing.
Step-by-Step Installation Process
The installation sequence begins with demolition and concrete preparation to create a stable substrate.
Next, the drain assembly is placed and checked for proper fit before a pre-slope mortar bed is formed.
Once the waterproofing membrane is applied over the concrete and corners, the final mortar bed is installed and shaped to the correct slope toward the drain.
Demolition and concrete preparation
Begin by removing existing fixtures, tile, and any waterproofing down to a sound substrate, taking care to isolate and protect adjacent rooms from dust and debris.
Inspect slab for cracks, delamination, and improper slopes.
Repair spalls, grind high spots, and fill voids with polymer-modified patching compound.
Ascertain a clean, bonded surface; remove dust and contaminants before proceeding to membrane installation.
Installing the drain assembly and testing fit
Install the drain assembly next, positioning it to align precisely with the planned slope and plumbing stub-out.
Secure the flange to the concrete using appropriate anchors or mortar, ensuring a level, stable seat.
Test-fit the grate and any clamping ring, verify alignment with waterproofing flange, and confirm the drain height matches finished floor plans before proceeding to waterproofing and mortar work.
Creating and installing the pre-slope mortar bed
With the drain secured and its height verified against the finished floor plan, attention shifts to forming the pre-slope mortar bed that will guarantee water flows to the drain.
A sand-cement mix is sloped 1/4 inch per foot toward the drain, troweled smooth and compacted.
Care is taken to maintain consistent slope, avoid voids, and allow proper curing before the next waterproofing step.
Applying waterproofing membrane over concrete and corners
Prepare the cured pre-slope surface and drain area for membrane application by ensuring it is clean, dry, and free of loose particles or standing water.
Apply a compatible primer, allow it to flash, then lay sheet or liquid waterproofing.
Seal corners with flexible reinforcing tape or fabric and compatible sealant.
Integrate the membrane into the drain flange per manufacturer instructions and inspect for voids.
Installing final mortar bed and ensuring correct slope to drain
Begin the final mortar bed stage by verifying the waterproofing is fully cured and the pre-slope meets the drain flange.
Then mix a dry-packed or polymer-modified mortar to a workable, firm consistency.
Screed the mortar to establish a uniform fall—typically 1/4″ per foot—toward the drain, compacting and trowel-finishing to eliminate voids and guarantee consistent slope and proper bond to the pre-slope.
Tiling or finishing floor surface and grout selection
Once the mortar bed has been compacted and the slope verified to the drain flange, attention turns to finishing the shower floor and selecting grout.
Tile layout prioritizes smallest cut at walls, consistent joint widths, and slip-resistant tile selection.
Thinset application follows manufacturer instructions.
Grout choice considers joint width, water exposure, stain resistance—epoxy for durability, cementitious grout with sealer for ease.
Maintain grout lines cleanly.
Final waterproofing checks and sealing edges
After tiles and grout cure, the installer performs final waterproofing checks and seals all connections to guarantee a watertight assembly.
Inspection includes membrane continuity, drain flashing, and changes to walls. Penetrations receive approved sealant and backer where needed.
Movement joints get flexible waterproofing tape. Final rinse and flood test confirm no leaks before finishing trim and reinstalling fixtures.
Waterproofing Methods Compared
A concise comparison highlights how sheet membranes, liquid-applied membranes, and integrated waterproof systems perform differently with regard to pros, cons, cost, and suitability for concrete slabs. The choice affects installation complexity, long-term reliability, and budget. The table below summarizes key differences for quick reference.
| Method | Pros | Cons |
|---|---|---|
| Sheet membranes | Durable, predictable thickness | Seams require careful sealing |
| Liquid-applied membranes | Seamless, conforms to irregulars | Requires correct curing and coverage |
| Integrated systems | Engineered compatibility, often faster install | Higher upfront cost, system-dependent |
Sheet membranes vs liquid-applied membranes vs integrated waterproof systems
When selecting a waterproofing approach for a curbless shower, homeowners and professionals weigh three primary options—sheet membranes, liquid-applied membranes, and integrated waterproof systems—each offering distinct performance, installation, and durability trade-offs.
Sheet membranes provide preformed uniform layers; liquid-applied systems conform to complex shapes and seams; integrated systems combine substrate, slope, and membrane for cohesive installation, often simplifying coordination between trades.
Pros, cons, cost, and suitability for concrete slabs
Several factors—performance, cost, and slab compatibility—determine which waterproofing method suits a curbless shower on a concrete slab. Sheet membranes offer reliable puncture resistance but require seams; liquid membranes conform to details but need cure time; integrated systems simplify installation but cost more. Choose based on budget, traffic, and slab condition.
| Method | Pros | Cons |
|---|---|---|
| Sheet | Durable | Seams |
| Liquid | Seamless | Cure/time |
| Integrated | Easy | Expensive |
Common Problems and How to Fix Them
Common issues with curbless showers include inadequate slope causing puddling, leaks at drain connections or membrane seams, and cracking or delamination of mortar beds.
Each problem has distinct causes and targeted repairs, from regrading or reinstalling the substrate to resealing or replacing faulty drain assemblies and addressing substrate failure.
The following section outlines diagnostics and practical fixes for these specific failures.
Dealing with inadequate slope or puddling
Addressing inadequate slope or puddling requires diagnosing the exact cause—insufficient pitch, uneven substrate, or drain placement—and selecting a corrective method that matches the construction stage and materials.
Solutions include regrading substrate with cementitious mud or self-leveling compound, installing a new pre-sloped mortar bed, or adding tapered underlayment.
After correction, verify uniform 1/4″ per foot slope and test with water to confirm drainage.
Repairing leaks at drain connections or seams
Once slope and substrate issues are resolved, attention should turn to waterproofing failures at the drain and membrane seams, which are frequent sources of leaks.
Inspect flange seals, clamping rings, and membrane overlaps. Remove compromised sealant or adhesive, dry the area, and apply compatible membrane patching and stainless hardware.
Torque clamps per manufacturer, retest with a water flood, and monitor for recurrence.
Fixing cracking or delamination of mortar beds
Identify and assess mortar bed cracking or delamination promptly, since compromised beds undermine waterproofing and tile stability.
Remove loose mortar, clean substrate, and verify slope.
Repair small areas with bonded mortar or epoxy-modified thinset; for widespread failure remove and replace the bed.
Reinstall waterproofing membrane and test for watertightness before tile.
Allow proper cure times and control movement joints to prevent recurrence.
Inspection, Testing, and Maintenance for Longevity
Before finishing, a flood test should be performed and documented to confirm the pan and drain are watertight.
Regular maintenance—clearing drains, inspecting grout and seals, and monitoring floor slopes—helps prevent water intrusion and mold.
If persistent leaks, staining, or movement of fixtures are found, a qualified professional should be contacted for repair and further assessment.
Flood testing and best practices before finishing
Because a properly executed flood test verifies the integrity of the waterproofing system, it is a nonnegotiable step prior to tiling or finishing:
Fill the pan to a specified depth, mark waterline, allow a 24–72 hour dwell, and monitor for drop.
Inspect seams, drains, and penetrations.
Repair any loss, retest until stable.
Document results and only proceed when watertightness is confirmed.
Routine maintenance tips to prevent water damage
After confirming watertightness through flood testing, regular inspection and targeted maintenance preserve the shower’s integrity and prevent slow-developing damage.
Inspect grout, tile, and sealant quarterly; re-seal grout or caulk where cracks or voids appear.
Check drain and slope for pooling, clear debris, and test floor membrane via localized water checks.
Promptly address condensation, ventilation, and minor leaks to avoid substrate deterioration.
When to call a professional for repairs
While routine checks can catch many issues early, certain signs and test results indicate the need for a professional assessment and repair.
Persistent leaks, visible mold, recurring drainage blockages, failed flood tests, significant slope or membrane damage, and structural cracks warrant licensed intervention.
A professional guarantees proper diagnosis, waterproofing integrity, and compliance with codes, preventing costly repairs and preserving shower longevity.
Accessibility, Finishes, and Design Tips
Considerations for threshold treatments and smooth changes to adjacent rooms are essential to maintain accessibility while preventing water migration.
Choices in tile size, texture, and grout type affect slip resistance, waterproofing details, and long-term maintenance.
Aesthetic decisions—such as continuous flooring, subtle slope planning, and coordinated finishes—help achieve a seamless curbless appearance without compromising safety.
Threshold treatments and transitions to adjacent rooms
When a curbless shower meets an adjacent room, the threshold becomes both a functional barrier and a design opportunity—balancing wheelchair access, water containment, and visual continuity requires careful selection of profile height, material, and drainage strategy.
Practical options include low-profile metal or stone ramps, recessed linear drains at the interface, and sealed waterproof membranes turned up and flashed into adjacent flooring to prevent migration.
Tile choices, slip resistance, and grout considerations
After selecting a threshold solution that balances accessibility and water control, attention turns to the shower surface—tile selection, slip resistance, and grout all shape safety, durability, and appearance.
Choose tiles with low porosity and appropriate R or COF ratings for wet areas; small-format or textured tiles improve traction.
Use cementitious grout with sealant or epoxy grout for waterproofing and stain resistance; maintain proper joint width.
Aesthetic tips for seamless curbless designs
How can a curbless shower feel intentionally integrated rather than simply barrier-free? Thoughtful changes, consistent materials, and subtle detailing create cohesion.
Prioritize accessible layouts, coherent flooring flow, and concealed drains. Use color, texture, and trim to define zones while maintaining openness.
- continuous flooring and coordinated grout
- linear drains and minimal thresholds
- integrated niches and matching fixtures
Estimated Project Timeline and When to Hire Pros
A typical DIY curbless shower can take several weekends to a few weeks depending on skill level, while professional installation commonly completes in 3–7 business days.
Structural changes, waterproofing, complex drain work, and plumbing rough‑ins are best handled by licensed contractors or plumbers.
Homeowners should plan timeline buffers for inspections and curing times when scheduling either route.
Typical timeline for DIY vs professional installation
Timeline expectations for a curbless shower vary widely based on scope, skill, and whether the work is DIY or contracted.
A DIY project often spans 2–4 weeks: demolition, substrate prep, waterproofing, pan slope, tile, grout, and curing.
A professional crew can complete similar work in 4–7 days with permits and inspections adding time.
Contingencies (substrate repair, material delays) extend timelines.
Tasks best left to licensed contractors or plumbers
Identify work that carries safety, code, or warranty implications and plan to hire a licensed pro for those tasks.
Licensed contractors reduce liability and guarantee compliance; complex plumbing, structural alterations, and electrical work are common exclusions from DIY scope.
- Relocate or alter drain/waste lines and trap assemblies
- Modify structural concrete or load-bearing elements
- Rewire or install shower-specific electrical components
Conclusion
A curbless shower on concrete combines precision and patience, delivering both accessibility and modern aesthetics when executed correctly. Like tuning a finely crafted instrument, each step—from substrate assessment and slope creation to waterproofing and drain integration—must harmonize to prevent leaks and guarantee longevity. With careful planning, the right materials, and thorough testing, the installation can perform reliably for years; professionals should be engaged for complex conditions or when confidence in workmanship is limited.