How to Cut Copper Pipe in Tight Space: 7 Pro Techniques for Clean, Accurate Cuts
Cutting copper pipe in tight spaces requires specialized tools and techniques. To achieve clean, accurate cuts, use a mini tubing cutter or ratcheting cutter for square cuts. For awkward angles, a mini hacksaw, right-angle reciprocator, or Dremel with a cutoff wheel is effective. Always deburr the edges, square the ends, and test-fit before joining. Remember to wear eye protection, shut off and drain the line, and support the pipe to prevent flattening. Below, you’ll find step-by-step methods, recommended tools, and troubleshooting tips.
Quick solution for cutting copper pipe in tight spaces
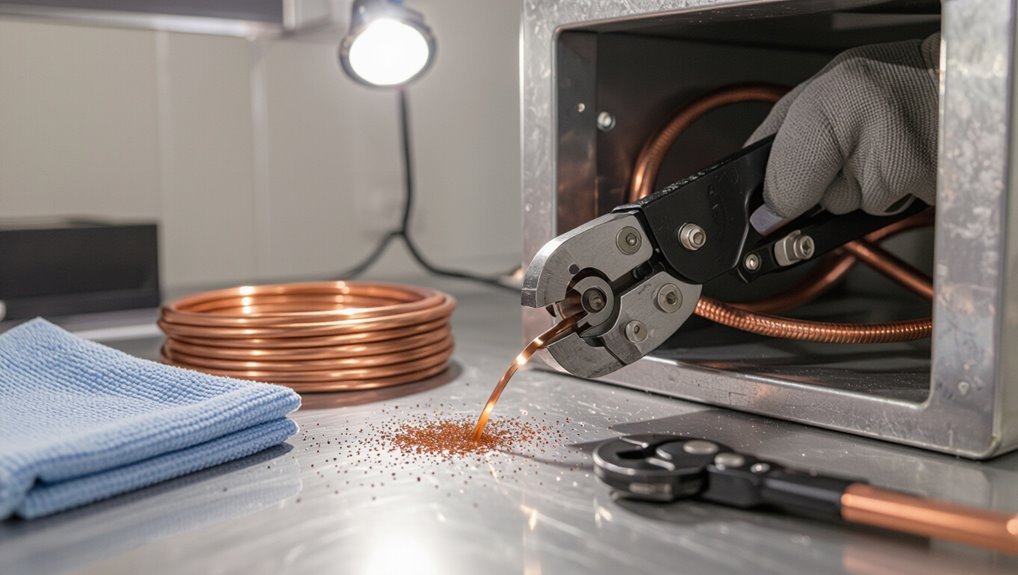
A compact tubing cutter offers a fast method: rotate the tool around the pipe, tightening the wheel incrementally until the cut completes.
For most tight spots, a mini ratcheting cutter is recommended for its low profile and controlled cutting action. This approach minimizes clearance needs and produces a clean, square end suitable for fittings.
One-sentence method summary and recommended tool choice
For tight spaces, use a compact tubing cutter or a mini rotary tool with a copper-specific cutting wheel to score and rotate around the pipe for a fast, clean cut.
The method: secure the pipe, mark cut, rotate cutter for even score, tighten gradually, deburr edges.
Recommended tools: compact tubing cutter for confined gaps or mini rotary with copper wheel for awkward angles—efficient, precise, minimal clearance.
Safety and preparation essentials before cutting
Before cutting, the technician gathers appropriate personal protective equipment and secures the workspace to prevent slips, sparks, or debris hazards.
They verify the pipe material, diameter, and system pressure, then shut off and drain the line before marking the cut location.
Measurements account for fittings and allow for deburring after the cut to guarantee a proper, leak-free connection.
Personal protective equipment and workspace precautions
Several essential items of personal protective equipment and clear workspace protocols reduce the risk of injury and damage when cutting copper pipe in confined areas.
Safety glasses, gloves, ear protection and a dust mask protect eyes, hands, hearing and lungs.
Secure workpiece, clear flammable materials, guarantee stable footing, provide adequate lighting and ventilation, and keep a fire extinguisher nearby.
Identifying pipe type, size, and system pressure
Identifying the pipe type, size, and system pressure is a critical step that determines appropriate cutting tools, fittings, and safety measures.
The technician verifies copper grade (soft vs. rigid), measures outside diameter or nominal size, and confirms working pressure or residential vs. commercial rating.
Compatibility with solder, compression, or press fittings is assessed, and any pressure-related hazards documented before proceeding.
Turning off water, draining, and marking the cut
Shut the supply at the nearest shutoff valve and verify the line is depressurized by opening a downstream fixture; this isolates the work area and prevents accidental discharge.
Once drained, blot residual water with a rag and inspect for corrosion or obstructions.
Mark the cut line clearly with a fine-tip marker or scribe, allowing visible alignment for tools and ensuring the cut is square to the pipe axis.
Measuring and allowing for fittings and burr removal
Before cutting, measure the run and account for the added length of fittings and the material lost to the cutting method, so the finished assembly meets required dimensions.
Allow clearance for coupling depths, solder or compression overlaps, and any reduction from pipe cutters or saw blades.
Mark and recheck measurements, then deburr interiors and chamfer edges to guarantee proper fit, seal, and flow before assembly.
Tools suited for tight-space copper pipe cuts
A concise selection of tools can make tight-space copper pipe cuts cleaner and faster while minimizing risk to surrounding structures.
Consider options tailored to access and pipe size:
- Compact tubing cutter (mini rotary) — best for very confined clearances and clean, controlled cuts.
- Inside/mini hacksaw with flexible blade — useful where a slim profile must reach around obstacles.
- Ratchet-style tubing cutter — suited for thicker pipe or when incremental cutting is needed.
- Rotary tool (Dremel) with cutoff wheel — ideal for precision cuts and trimming in cramped spots.
- Reciprocating saw with right-angle attachment — appropriate for stubborn runs or when more cutting power is required.
Selection should match the specific space constraints, pipe diameter, and nearby materials.
Compact tubing cutter (mini rotary) when to use
Several small, purpose-built rotary cutters excel where clearance is minimal: compact or mini tubing cutters. They suit straight, accessible runs in cramped cabinets, behind fixtures, or near walls where a full-size cutter won’t fit.
Their low-profile body and short handle provide controlled, consistent scoring and wheel pressure. Choose models with replaceable wheels and smooth ratcheting for repeatable, burr-free cuts on 1/8″–1″ copper.
Inside/mini hacksaw with flexible blade when to use
Reach into confined cavities with an inside or mini hacksaw fitted with a flexible blade when pipe access prevents rotation or conventional cutters from seating properly.
Its slim profile and bendable blade allow cutting around obstructions, inside cabinets, or between joists.
Employ short, controlled strokes, steady support to avoid bending, and fine-tooth blades for clean cuts.
Deburr edges after cutting for proper fittings.
Ratchet-style tubing cutter when to use
Many projects benefit from a ratchet-style tubing cutter when space restricts full rotations or when incremental cutting force is needed; its stepped ratchet mechanism lets the user advance the wheel in confined gaps without repositioning the tool.
It excels on straight runs, inside cabinets, or behind fixtures.
Provides controlled, repeatable cuts with minimal pipe distortion; ideal for copper sizes typically 1/8″–1¼”.
Rotary tool (Dremel) with cutoff wheel when to use
When the ratchet-style tubing cutter cannot fit or cannot rotate enough to score and tighten repeatedly, a rotary tool (Dremel) fitted with a thin cutoff wheel becomes a practical alternative for cutting copper pipe in tight spaces.
It excels where limited clearance prevents wheel-style cutters. Use steady control, light pressure, and short cuts to avoid overheating, burrs, and deformation.
Protect nearby fittings and finish with a deburring tool.
Reciprocating saw with right-angle attachment when to use
A reciprocating saw fitted with a right-angle attachment suits situations where space restricts blade swing and access to the pipe end, allowing cuts from awkward orientations that standard saws or cutters cannot reach.
It excels on concealed runs, bends, or near fixtures where reach and leverage are limited.
Use short, controlled strokes, secure the pipe, and select a fine-tooth metal blade to minimize burrs and vibration.
Tubing shears and pinch-off tools when to use
Choose tubing shears and pinch-off tools for tight copper runs where access is limited but a clean, controlled cut or temporary flow stop is required.
Tubing shears deliver burr-free, square cuts in confined clearances; compact ratcheting models reduce hand effort.
Pinch-off clamps temporarily seal pressurized lines without draining systems; use with care and support fittings to prevent kinks and guarantee serviceability.
Blowtorch and soldering tools when to use (for rework, not cutting)
After using tubing shears or a pinch-off clamp to isolate and prepare a tight copper run, blowtorches and soldering tools become relevant for rework tasks rather than cutting.
They enable brazing, joint repair, and replacing fittings where access limits mechanical tools.
Use small propane or butane torches, heat shields, and flame arrestors; prioritize flux, proper ventilation, and flame control to avoid damage in confined spaces.
Seven step-by-step techniques for clean, accurate cuts in tight spaces
The following section presents seven concise, step-by-step techniques for achieving clean, accurate copper pipe cuts in confined areas.
It covers use of a mini rotary tubing cutter when rotation is limited, a ratchet-style cutter for deep or recessed pipes, a flexible blade hacksaw with guide for straight cuts, a Dremel or rotary tool with a cutoff wheel for precision, and right-angle reciprocating or oscillating multi-tools for stubborn runs.
Each technique emphasizes setup, blade selection, and control to minimize deformation and burrs.
Technique 1 Using a mini rotary tubing cutter with limited rotation clearance
The mini rotary tubing cutter is positioned and tightened to a firm, yet not crushing, grip, with spacing noted for the planned number of turns per revolution to control cut depth.
A consistent scoring method—small, even rotations with brief re-tightening—helps prevent ovaling by maintaining concentric pressure.
Final passes are lighter and focused on breaking the remaining lip cleanly, followed by a quick deburr for a square edge.
Setup, number of turns, and scoring method
Positioning matters: the installer sets the mini rotary cutter square to the pipe, confirms enough clearance for the head to turn, and marks the cut line.
They snug the wheel, make light initial scoring revolutions—four to six—to seat the blade. Then they tighten slightly and continue steady, controlled turns, increasing pressure incrementally until the tube separates cleanly.
Tips to avoid ovaling and how to finish the cut
Work deliberately to prevent ovaling and to produce a square, burr-free end when using a mini rotary tubing cutter in tight quarters.
Maintain even pressure, advance the cutter incrementally, and rotate consistently. Re-center frequently if alignment shifts.
After the cut, deburr inside and outside with a reamer or file, chamfer the edge slightly, and verify squareness with a small square or visual check before fitting.
Technique 2 Ratchet-style cutter for deep or recessed pipes
A ratchet-style cutter suits deep or recessed copper runs where wrist clearance is limited, because its staged tightening lets the user advance the cutting wheel without full rotations.
The operator should seat the jaws squarely on the pipe and engage the ratchet in short increments, checking bite depth after each click.
Maintaining visual and tactile alignment in confined areas prevents crooked cuts and reduces the need for rework.
How to position jaws and incrementally tighten
Place the ratchet-style cutter so its jaws straddle the pipe with the cutting wheel aligned at the mark and the rollers seated opposite the blade; this guarantees even contact and prevents slipping as the tool is tightened incrementally.
The operator advances the ratchet a single click, rotates the cutter around the pipe, then repeats. Small, consistent increments maintain blade pressure, avoiding gouges and ensuring a clean score before final tightening.
Controlling alignment in confined areas
Several simple adjustments let the operator maintain alignment when using a ratchet-style cutter on deep or recessed copper pipes.
The technician uses visual markers, fingertip registration, and a temporary support shim to steady the tool. Short, controlled ratchet strokes and periodic rotation of the workpiece guarantee even cutting.
Frequent checks with a feeler or small square prevent drift and produce a square, burr-free end.
Technique 3 Flexible blade hacksaw with guide for straight cuts
The flexible blade hacksaw offers access where a rigid frame cannot, but success depends on choosing a fine-toothed blade and fabricating a simple guide from scrap wood or a magnetic strip to keep the cut square.
Proper stroke technique—steady, full-length pushes with light return strokes—reduces blade binding and heat buildup. Attention to blade tension and guide alignment produces the clean, accurate cuts required in confined spaces.
Blade selection and creating a makeshift guide
Selecting the right blade and fashioning a simple guide lets a flexible-blade hacksaw deliver straight, clean cuts even in cramped areas.
Choose a fine-tooth bi-metal blade (18–24 TPI) for copper to reduce burrs.
Clamp a short scrap metal strip or hardwood as a guide aligned to the mark, secure with tape or a pin, and guarantee the blade tracks against it for consistent, square cuts.
Stroke technique to prevent binding
After aligning the guide and blade, attention shifts to stroke technique to prevent binding.
The operator uses long, controlled forward strokes with light pressure, letting the blade do the cutting. On the return stroke, pressure eases to avoid tooth snag. Periodic backing-out clears chips.
Maintain consistent angle and rhythm; adjust stroke length when space limits reach so the blade never stalls.
Technique 4 Using a Dremel/rotary tool with cutoff wheel for precision
A Dremel or rotary tool fitted with a cutoff wheel allows access to tight angles and confined spaces that larger saws cannot reach.
Careful positioning of protective shields or heat-resistant tape prevents accidental damage to nearby surfaces and fixtures.
Controlling speed, using short cutting bursts, and periodically cooling the pipe minimize heat buildup and reduce the risk of warping or solder joint damage.
Accessing tight angles and protecting surrounding surfaces
When maneuvering a rotary tool in cramped areas, maintaining control and shielding nearby surfaces becomes the priority; a Dremel fitted with a thin cutoff wheel offers the precision to reach tight angles while minimizing collateral damage.
The operator uses steady, short strokes, secures the pipe, employs narrow attachments or angled collets, and places foam, tape, or metal shields to protect adjacent fixtures and finishes.
Managing heat and avoiding damage
Focuses on minimizing heat buildup and preventing surface damage while using a Dremel with a cutoff wheel in confined spaces.
Operators work in short bursts, allow cooling pauses, and use light pressure to avoid overheating.
Apply heat sinks or wet cloths nearby, shield adjacent fittings with metal tape, and use rotary speed settings appropriate for copper.
Inspect for discoloration and file burrs gently.
Technique 5 Right-angle reciprocating saw or oscillating multi-tool for stubborn runs
The right-angle reciprocating saw and oscillating multi-tool offer different blade attachments and anti-vibration features that affect cut quality and user control.
Choices of fine-tooth metal blades or bi-metal plunge-cut blades, plus accessory mounts or dampening handles, help minimize chatter and scoring on copper.
This approach is preferred over hand tools when access is limited, the pipe is strapped or corroded, or rapid, repeatable cuts are required.
Attachment choices and vibration control
Choose attachments and manage vibration carefully to make a right-angle reciprocating saw or oscillating multi-tool effective in confined runs.
Use a bi-metal blade or carbide-grit segment sized for thin metal cuts; shorter blades reduce chatter.
Add rubberized handles, anti-vibration mounts, or a simple foam pad between tool and structure.
Clamp pipe close to cut and steady the tool with two hands to minimize movement.
When to prefer this over hand tools
When access is severely limited and a file or tubing cutter cannot be positioned squarely, a right-angle reciprocating saw or oscillating multi-tool becomes the preferred option because it reaches into tight runs and handles stubborn fittings without the torque and clearance a hand tool requires.
Choose this method when pipe alignment, obstructing framing, or corroded joints prevent safe, square manual cuts; control speed, secure the pipe, and use fine-tooth blades.
Technique 6 Tubing shears/pincer for small-diameter copper
Tubing shears or pincers offer a quick, controlled way to cut small-diameter copper, but their effectiveness decreases as wall thickness increases.
Thicker or heavily annealed tubing can crush or deform under the jaws, requiring a saw or cutter designed for heavier gauge pipe.
After shearing, the cut edge should be deburred and smoothed with a file or reamer to guarantee a proper fit and avoid leaks.
Limitations by pipe thickness and finishing the edge
Many small-diameter copper pipes can be cut with tubing shears, but effectiveness falls off as wall thickness increases. Shears and pincers are best for soft, thin-walled refrigeration and domestic water lines up to about 18–20 AWG (roughly 0.8–1.0 mm wall).
Thicker or hard-drawn tubing requires rollers or a mini hacksaw. After cutting, deburr both ID and OD and file burrs smooth for proper fit and leak-free joints.
Technique 7 Pinch-off and remove technique when space prevents direct cutting
When direct cutting is impossible, the technician first uses a pinch-off tool to safely clamp and isolate flow. Then, they remove a downstream section for access.
Careful placement and gradual tightening prevent damage to the pipe while holding pressure, after which cutting can proceed in the newly exposed area.
If the removed segment affects joint integrity, the operator plans for solder or crimp repairs to restore a reliable connection.
Using pinch-off tools safely and then cutting downstream
Employ a pinch-off tool to isolate the line before attempting any downstream cut: the device clamps the copper tube closed, stopping flow so the section beyond the pinch can be removed or modified without draining the whole system.
Confirm a secure, leak-free clamp, relieve pressure, then cut downstream using a compact cutter or hacksaw.
Release slowly, inspect for leaks, and support the pipe to prevent stress.
When to combine with soldering or crimp repairs
Combine the pinch-off and remove technique with soldering or crimp repairs whenever the isolated section requires a permanent joint or a quick, mechanical connection after removal.
The technician assesses access, water pressure, and material condition, then selects solder for long-term integrity or crimp fittings for speed.
Prepare ends, deburr, flux or insert fittings, test for leaks, and reinstate service only after verification.
How to deburr, square, and test the cut for fittings
After cutting, the pipe end should be deburred both internally and externally using a reamer, deburring tool, or fine file to remove sharp edges and guarantee a smooth seat for the fitting.
The cut must be squared—checked with a guide, square, or flat file—and adjusted as needed for a flush, even fit.
Once reassembled, the joint should be leak-tested and pressure-checked according to local codes to confirm a secure connection.
Tools and methods for internal and external deburring
Deburring both the inside and outside of a copper pipe is essential to guarantee a snug, leak-free fit and to prevent damage to seals or fittings. The process uses a few simple tools—reamers, rotary deburring bits, fine files, and abrasive cloth—to remove burrs, square the end, and leave a clean, slightly chamfered edge.
Use internal reamers for concentric clearing, external deburrers or files for chamfering, and wipe with abrasive cloth.
Test fit gently; rotate to confirm smooth entry and proper seating before final assembly.
Ensuring square cuts and using guides or files
Make certain the cut face is perfectly square before deburring by checking it against a small machinist’s square, a filing guide, or a purpose-made pipe square; a square end guarantees even seating and reliable compression or soldered joints.
After squaring, remove burrs inside and outside with a deburring tool or fine file.
Fit test with the coupling, adjust as needed, then clean and finalize.
Leak testing and pressure checks after reassembly
With the cut face squared and burrs removed, the assembler proceeds to reassemble fittings and prepare for leak testing and pressure checks.
Completed joints receive flux or soldering as specified, allowed to cool, then visually inspected.
A low-pressure air or water test follows, holding specified PSI for the duration.
Any leak is isolated, corrected, retested until dry, stable pressure confirms sound joints.
Common problems and how to avoid them
Common problems when cutting copper in confined spaces include ovoid or flattened pipe ends, overheating or brazing hazards, and accidental damage to nearby insulation, wiring, or drywall.
Practical corrective steps and preventative measures—such as using proper supports or mandrels, controlling heat with shields and heat sinks, and protecting adjacent materials—reduce risk.
Attention to tool selection and maintenance, correct cutting technique, and secure work positioning prevents binding, slippage, and blade breakage.
Ovoid/flattened pipe and corrective steps
Ovoid or flattened copper pipe often results from excessive clamping force or squeezing during cutting in confined spaces, distorting the round profile and compromising fit and seal.
To correct, gently roll with a circulating mandrel or use a hardwood dowel and vise to reshape uniformly. Replace badly deformed sections.
Prevent recurrence by using padded clamps, minimal pressure cutters, and support rollers during tight-space cuts.
Overheating and brazing hazards in tight areas
When brazing in confined spaces, excessive heat buildup and limited access increase the risk of damaging nearby fittings, insulation, or combustible materials. This can cause joint failures from overheating the flux or base metal.
Technicians should use heat sinks, short controlled flames, intermittent heating, and proper ventilation.
Pre-fitting with clamps, temperature indicators, and fire-resistant shielding minimizes overheating and guarantees reliable, repeatable brazed joints.
Damage to nearby insulation, wiring, or drywall and prevention
Cutting or brazing copper in confined areas often risks scorching insulation, melting wiring sheaths, or crumbling drywall if sparks, radiant heat, or hot debris reach adjacent materials.
Protective measures include heat shields, fire blankets, and noncombustible barriers, distancing or temporarily relocating wiring, and using low-heat cutting methods.
Ventilate to disperse heat and debris and inspect surrounding materials afterward for hidden damage before closing walls.
Tool binding, slippage, and blade breakage solutions
After safeguarding nearby materials and utilities, attention turns to tool control in confined cuts: binding, slippage, and blade breakage are the most common hazards when space limits leverage and blade clearance.
Use the correct cutter size, maintain perpendicular alignment, score before full cut, clamp pipe securely, and rotate gently.
Replace dull blades, avoid excessive force, and employ lubricant or heat to reduce friction and clear chips.
Matching repair method to situation: quick decision guide
A concise matrix helps match tools and repair methods to the specific constraints of the job. Below is a quick reference table showing pipe size, access, material condition, and the recommended repair or restoration approach for common scenarios. Use the matrix to make fast, practical decisions before cutting or repairing.
| Pipe size | Access level | Material condition |
|---|---|---|
| 1/2″–3/4″ | Tight behind wall | Sound — solder or compression fitting |
| 1″–2″ | Limited clearance | Minor corrosion — sleeve or clamp repair |
| Any | Extremely restricted | Severely damaged — reroute or section replacement |
Tool versus scenario matrix (pipe size, access, material condition)
Several factors determine the best tool for cutting copper in tight spaces: pipe diameter, available access, and the pipe’s condition.
Small diameters favor tube cutters or mini ratchet cutters; limited access points call for oscillating multi-tools or compact hacksaws.
Corroded or deformed pipes may require abrasive wheels or reciprocating saw blades.
Choose tool size and cutting method to match clearance and material integrity.
Recommended repair/restoration method per scenario
Begin by evaluating the immediate needs: whether the goal is a temporary stopgap, a long-term repair, or full replacement, then match the method to pipe size, access, and condition.
For hairline leaks use clamp or epoxy putty; for accessible small sections solder joints or compression fittings; for corroded runs opt for sectional replacement or push-fit couplers; for confined spaces prioritize mini cutters and press fittings.
Time-saving tips, hacks, and professional shortcuts
Practical shortcuts include using extension adapters, right-angle attachments, and low-profile cutters to reach confined fittings without sacrificing control.
Simple preparation hacks—marking cut lines, securing the pipe, and using deburring tools—speed alignment and improve finish quality.
The guide also notes clear criteria for when a plumber should be called versus continuing as a DIY job.
Using extension adapters, right-angle attachments, and low-profile cutters
When working in cramped plumbing cavities, using extension adapters, right-angle attachments, and low-profile cutters streamlines cuts and reduces strain.
Professionals swap bulky tools for compact heads, extend reach with adapters, and fit cutters into narrow bays. These accessories preserve cutting accuracy, protect nearby fittings, and speed workflows.
Selection prioritizes compatibility, durability, and secure connections to prevent slippage and uneven cuts.
Preparation hacks for faster alignment and cleaner finishes
Marking and staging the work area before cutting dramatically speeds alignment and yields neater ends: professionals clamp a short guide strip or magnetic straightedge to the pipe, scribe the cut line with a carbide marker, and index-fit the cutter or saw against a pre-set stop so the tool sits square at first contact.
Tape a foam block to steady the pipe, deburr immediately, and use masking tape to prevent scoring.
When to call a plumber versus DIY
A few clear rules help decide whether a job is suitable for DIY or requires a plumber: simple, low-pressure cuts and replacements on exposed copper can be handled by a competent DIYer using proper tools and testing for leaks.
However, anything involving hidden joints, multiple fittings, gas lines, main shutoffs, high water pressure, soldered branches, or code-sensitive work should prompt a call to a licensed plumber to avoid damage, leaks, or failed inspections.
Experienced homeowners should still defer complex layouts and permit-required work to professionals to save time and guarantee compliance.
Materials and replacement parts checklist
A concise checklist helps guarantee the job proceeds without delays or unexpected trips to the supply store.
Common items to have ready include:
- common fittings (elbows, couplings, adapters)
- solder and flux or, alternatively, compression and push-fit connectors
- spare blades and cutter wheels
- basic safety gear (gloves, eye protection, mask)
Preparedness with these parts and consumables simplifies work in confined spaces.
Common fittings, solder/flux, compression vs. push-fit options
When selecting fittings for tight copper piping runs, the choice between soldered, compression, and push-fit options hinges on space constraints, permanence required, and available tools.
Soldered joints remain the most durable but demand torch access and flux. Compression fittings suit restricted-clearance spots without heat.
Push-fit connectors offer fastest installation and easy replacements though may be bulkier and costlier.
Select correct diameters, adapters, and replacement O-rings.
Spare blades, cutter wheels, and safety gear to keep on hand
Several essential spares and basic safety gear should be kept on hand for tight-space copper work to prevent delays and reduce risk:
multiple tubing cutter wheels and extra blades for hacksaws or reciprocating saws,
replacement deburring tools and reamers,
a small stock of compression ferrules and O-rings,
and at least one push-fit connector per common diameter.
Also include nitrile gloves, safety glasses, a dust mask, and a compact first-aid kit.
Conclusion
To summarize, these seven techniques equip a homeowner or pro to cut copper pipe cleanly in cramped spaces while minimizing mistakes. Even skeptics who assume only specialist tools suffice will find that compact tubing cutters, mini hacksaws, and creative leverage often work equally well. With proper prep, deburring, and testing, small repairs become routine—saving time and expense. Embrace the stepwise approach to guarantee reliable joints and long-lasting plumbing performance.