How to Connect a Hose to PVC Pipe: Step-by-Step Guide for Leak-Free Results
To connect a hose to PVC pipe securely and without leaks, first ensure that the diameters, pressure ratings, and thread types match. Choose a compatible fitting—such as barbed, threaded, compression, or bulkhead. Prepare the PVC by cutting and deburring it, then clean and dry the surfaces. For permanent connections, use primer and solvent cement; for removable ones, opt for clamps and thread sealant. If using barbed fittings, warm or lubricate the hose ends, tighten the connections incrementally, and perform a pressure test to check for leaks. Further instructions cover specific fittings, necessary tools, and troubleshooting tips.
What Connecting a Hose to PVC Pipe Entails and When to Do It
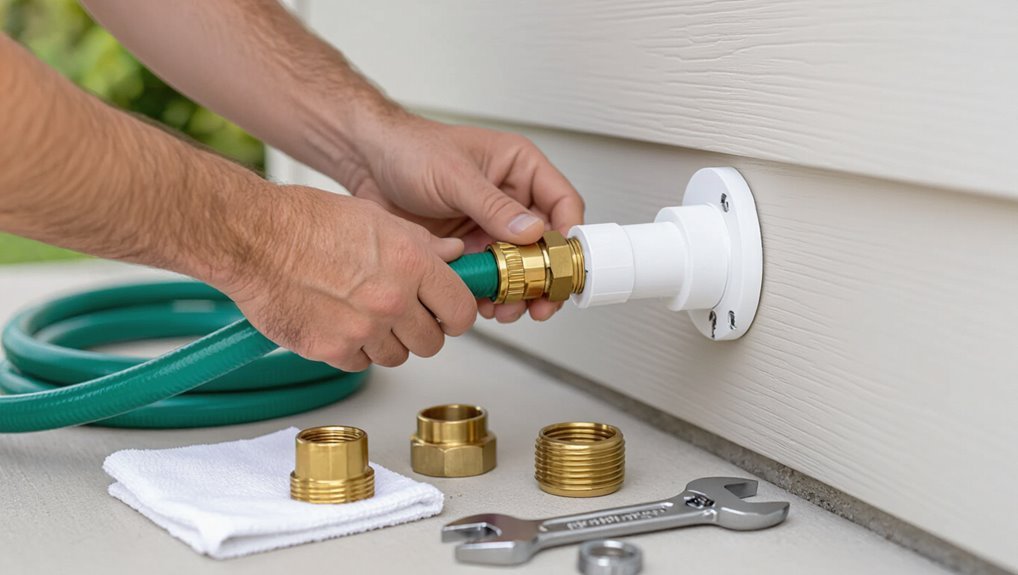
Connecting a hose to PVC pipe involves matching the hose type, diameter, and pressure rating to suitable PVC fittings and adapters.
Typical applications include irrigation systems, pool hookups, pressure washer supply lines, and temporary plumbing repairs.
Choosing compatible hose materials and PVC schedules guarantees a reliable, leak-free connection for each use case.
Common use cases irrigation, pool, pressure washer, temporary plumbing
Many homeowners and professionals use hose-to-PVC connections for irrigation systems, pool hookups, pressure-washer supply lines, and temporary plumbing because these setups are inexpensive, adaptable, and relatively easy to assemble.
Typical use cases include garden irrigation zones, filling or draining pools, supplying a pressure washer, and short-term potable or greywater bypasses.
Guides on how to connect hose to PVC pipe emphasize secure fittings and proper sealing.
Types of hoses and PVC applications compatible with hose connections
Hoses range from lightweight vinyl garden lines to heavy-duty reinforced rubber and braided stainless-steel types, and each demands compatible PVC materials and fittings to match pressure, temperature, and fluid type.
Matching includes using schedule 40/80 or flexible PVC, solvent-weld or threaded adapters, barb or garden-faucet fittings, and appropriate clamps.
Applications: irrigation, pressure washers, pond circulation, pool backwash, temporary potable supply, and industrial fluid transfer.
Quick answer Best methods for a leak-free hose-to-PVC connection
For a reliable, leak-free hose-to-PVC connection, common options include direct barbed fittings secured with clamps for flexible hoses, threaded adapters that match hose thread, and compression or bulkhead fittings that provide watertight seals.
Choice depends on hose type, pipe size, and whether the joint must be removable or permanent. Each method balances ease of installation against durability and leak resistance.
Direct barbed fittings with clamps for flexible hoses
Use a barbed PVC adapter and a matching-size hose clamp to create a straightforward, durable connection between flexible hose and PVC pipe.
Confirm the barb size matches the hose ID. Heat the hose end slightly for easier insertion, push fully onto the barb, and position the clamp over the barb’s widest section.
Tighten securely but avoid over-compression that can deform the hose.
Threaded adapters with hose thread fittings
Choose a threaded adapter with matching hose thread (NH or garden thread) and the correct PVC male or female threads to guarantee a tight, reliable junction between hose and PVC.
Apply plumber’s tape or thread sealant to PVC threads, hand-start then tighten with a wrench.
Use an adapter with integrated barb if needed; inspect for leaks and re-torque after initial use.
Compression fittings and bulkhead fittings for watertight seals
Compressing and sealing with purpose, compression and bulkhead fittings provide watertight hose-to-PVC connections without solvent welding or permanent modification.
Compression fittings tighten a nut onto a ferrule to compress hose or tubing for a gasket-like seal.
Bulkhead fittings pass through walls or tanks with integrated gaskets and nuts.
Both require proper sizing, clean cuts, and even torque to prevent leaks.
Tools and materials required
This section lists the specific pipes, hoses, fittings, and tools needed for a reliable hose-to-PVC connection.
It covers PVC types, diameters, and schedules; hose types, inner diameters, and common thread standards (NPT, BSP, GHT); and fitting options such as barbed, threaded, compression, bulkhead, and slip-on adapters.
Required tools and consumables include a PVC cutter, drill and reamer, primer and solvent cement, plumber’s tape, hose clamps, and wrenches.
PVC pipe types, diameters, and schedule considerations
Selecting the correct PVC type, diameter, and schedule is essential before gathering tools and materials, because each variable affects fit, strength, and compatibility with hose fittings.
PVC types (PVC-U, CPVC) determine temperature and chemical resistance.
Diameter must match adapter inner/outer dimensions.
Schedule (40, 80) indicates wall thickness and pressure rating; choose accordingly for system pressure and mechanical load.
Hose types, inner diameters, and thread standards (NPT, BSP, GHT)
Why choose one hose type over another?
Selection depends on fluid, pressure, flexibility and UV or chemical resistance. Match hose inner diameter to PVC ID for flow and avoid restriction.
Confirm thread standards: NPT (tapered, common in US), BSP (parallel or tapered, common UK), and GHT (garden hose thread).
Thread compatibility prevents leaks and guarantees proper adapters.
Fittings overview: barbed, threaded, compression, bulkhead, slip-on adapters
A range of fittings—barbed, threaded, compression, bulkhead, and slip-on adapters—provides the mechanical interfaces needed to join hoses to PVC pipe for different pressures, fluids, and installation environments.
- Barbed: hose secured with clamp for flexible lines.
- Threaded: seals with tape or gasket for removable joints.
- Compression: gasketed, tool-tight for pressure-rated connections.
- Bulkhead/slip-on: pass-through or solvent-weld options for panel or pipe ends.
Tools: PVC cutter, drill, reamer, primer/solvent cement, plumber’s tape, hose clamps, wrenches
Gather the right tools before beginning: a PVC cutter or fine-tooth saw for clean pipe ends, a drill and correctly sized bits for fitting holes, and a reamer or deburring tool to remove burrs and guarantee proper fit.
Essential items include primer and solvent cement, plumber’s tape, hose clamps, and wrenches.
Recommended kit:
- Cutting and deburring
- Drilling
- Sealing
- Fastening
Preparing PVC pipe and hose for a secure connection
Before making any joints, the diameters and thread types of both the hose and PVC must be measured and confirmed to guarantee compatibility.
Pipe ends should be cut square and deburred, then all mating surfaces cleaned and fully dried to promote a reliable seal.
The choice between primer and solvent cement or mechanical fittings depends on pipe material, permanence of the connection, and the need for future disassembly.
Measuring and confirming diameters and thread types
When preparing to join a hose to PVC, accurate measurement of both the pipe’s outer diameter and the hose fitting—or verification of thread type where threads are present—is essential to guarantee a leak-free, mechanically sound connection.
Use calipers for OD, a ruler for quick checks, and a thread gauge or visual comparison against known NPT/BSP samples.
Record measurements before purchasing adapters.
Cutting and deburring PVC pipe ends
Cut the PVC pipe squarely and remove burrs to guarantee a tight, leak-free connection; a clean, true end prevents uneven seating of fittings and strain on hose adapters.
Use a fine-toothed saw or PVC cutter, support the pipe to avoid deformation, then file or chamfer the inside and outside edges with a deburring tool or utility knife.
Verify roundness and smoothness before assembly.
Cleaning surfaces and drying components
Wipe all mating surfaces of the PVC pipe, fittings, and hose ends with a clean cloth to remove dust, grease, and loose debris; any residue can prevent solvent cement or mechanical seals from bonding properly.
Allow components to air-dry or use a lint-free cloth to speed drying.
Inspect for remaining moisture, oil, or particles; repeat cleaning until surfaces are visibly clean and dry before assembly.
When to use primer and solvent cement versus mechanical fittings
Choose the joining method based on pressure, permanence, and service conditions:
solvent cement with primer creates a permanent, leak-resistant bond best for pressurized water lines and buried or concealed runs, while mechanical fittings (barbed, compression, or threaded adapters) are preferable for temporary connections, flexible hoses, or systems requiring periodic disassembly or adjustment.
Consider chemical exposure, thermal cycling, and vibration; use mechanical fittings where movement or replacement is anticipated.
Step-by-step: Connecting a flexible hose to PVC using a barbed adapter
The process begins with choosing a barbed adapter that matches both the PVC socket size and the hose inner diameter for a snug fit.
The adapter can be fitted into PVC either by slipping it into a socket or bonding it with solvent cement, after which the hose is eased onto the barb with gentle heat or lubricant as needed.
Finally, the connection is clamped securely and pressure-tested for leaks before regular use.
Selecting the correct barbed adapter size
Several measurements must be confirmed before selecting a barbed adapter size: hose inner diameter, PVC pipe outer diameter, and the adapter’s barb spacing and taper.
The adapter should match hose ID closely for a snug fit and align with PVC OD or socket size.
Consider material compatibility, pressure rating, and whether clamps are needed.
Verify barb count and taper for secure grip.
Installing a hose barb into PVC using a slip-on or glued socket
Begin by preparing the PVC fitting and hose so they are clean, dry, and free of burrs or debris; this guarantees a secure, leak-free joint when a barbed adapter is slipped into a socket or glued into place.
Insert the barb fully into the socket; for glued sockets, apply PVC cement to the socket only.
Secure with a hose clamp and allow proper cure time before pressurizing.
Using heat or lubricant to ease hose onto barb
Warm or slippery surfaces make sliding a flexible hose onto a barbed adapter far easier and reduce the risk of tearing the hose.
Apply brief heat—hot water or a heat gun at low setting—or a small amount of plumber’s silicone, dish soap, or rubbing alcohol to the hose end.
Push evenly onto the barb until snug, avoiding overstretching or prolonged heat exposure.
Securing hose with clamps and testing for leaks
Secure the hose with an appropriately sized clamp and then test the connection under pressure to confirm a watertight seal.
Tighten the clamp evenly until snug, avoiding over-tightening that may cut the hose.
Inspect the joint visually, then pressurize the line slowly.
Check for drips or seepage, retighten or reposition as needed, and rerun the pressure test to verify a durable, leak-free connection.
Step-by-step: Connecting a threaded hose to PVC using threaded adapters
The section explains how to select a male or female threaded adapter that matches the hose and PVC thread standard.
Then, it covers how to install it into the pipe—either by using a threaded bushing or bonding a glued fitting.
It discusses applying plumber’s tape or appropriate thread sealant and properly tightening the connection.
Finally, it describes attaching the hose and testing the assembly under pressure for leaks.
Choosing male/female adapter with matching thread standard
Which thread standard does the hose use, and does the chosen PVC adapter match it?
The installer verifies hose threads (NPT, BSP, garden hose thread/GHT) and selects a male or female PVC adapter with identical standard and pitch.
Confirm external vs. internal thread orientation and size (e.g., 3/4″).
Mismatched standards cause leaks or cross-threading; use proper adapters only.
Installing threaded adapter into PVC (threaded bushings vs glued)
Begin by deciding whether a threaded bushing or a glued adapter best fits the application and pipe material: use a threaded bushing for removable connections and thin-walled fittings; choose a glued adapter (PVC male adapter) for permanent, pressure-rated joins.
Prepare the PVC end, clean and dry.
Insert and tighten bushings by hand; solvent-cement adapters require proper priming and seating per manufacturer instructions.
Applying plumber’s tape or thread sealant and tightening
After the threaded adapter or bushing is seated and tightened, attention turns to sealing the male threads before attaching the hose to prevent leaks.
Wrap plumber’s tape clockwise three to five times, smoothing overlaps into the threads. Alternatively, apply a thin, even coat of pipe thread sealant.
Hand-thread the hose fitting, then finish with a wrench snugly—avoid over-tightening to prevent thread damage.
Attaching hose and testing under pressure
Attach the hose by hand-threading the fitting onto the sealed male adapter until it seats, then tighten with a wrench until snug; next, slowly pressurize the line and inspect the connection for leaks, watching for drips, seepage at the thread line, or sudden pressure loss.
If leaks appear, depressurize, retighten or reapply tape/sealant, then retest. Confirm steady pressure and dry joint before regular use.
Step-by-step: Using bulkhead or compression fittings for durable, watertight joins
Selection between bulkhead and compression fittings depends on wall thickness, pressure requirements, and whether a permanent watertight pass-through is needed.
The process includes drilling the correct diameter hole, installing the bulkhead with its gasket and nut, or fitting the compression nut and ferrule, followed by a specific tightening sequence to compress seals without overtorquing.
Final steps involve pressure testing the joint and addressing common leaks by rechecking gasket orientation, retorquing to spec, or replacing damaged seals.
When to choose a bulkhead or compression fitting
Choosing between a bulkhead or compression fitting depends primarily on wall thickness, exposure, and the need for a removable, watertight connection.
Bulkheads suit thin walls, tanks, or panels needing a robust, sealed pass-through and frequent removal.
Compression fittings fit standard PVC pipe ends, provide easy installation without through-holes, and work well where access is limited and a simple, reliable seal is required.
Drilling proper hole size and installing bulkhead fitting
Measure and mark the exact center of the panel or tank wall. Then select a drill bit matching the bulkhead’s barrel diameter so the fitting fits snugly without forcing.
Drill slowly, supporting the panel to prevent cracking and deburr both sides.
Insert the bulkhead from the outside, seat the gasket against the interior face, and hand-thread the nut.
Align outlet toward the hose run before final set.
Tightening sequence and gasket placement for leak-free seal
With the bulkhead seated and the nut hand-threaded, attention turns to proper gasket placement and a controlled tightening sequence to guarantee a watertight seal.
The gasket must lie flat, centered against the flange.
Alternate tightening: quarter-turn increments between opposite sides until snug.
Stop before overcompressing; fittings should be firm but not crushed.
Recheck hand-tight plus one quarter-turn for final security.
Testing and troubleshooting common seal issues
Begin testing by filling the line or tank and observing the fitting area for at least 15 minutes while applying light pressure—this reveals slow leaks that static inspection can miss.
Inspect gaskets, threads, and compression nuts; tighten incrementally. If seepage persists, drain, disassemble, clean mating surfaces, replace damaged O-rings or gaskets, reapply plumber’s grease, and reassemble.
Re-test under operating pressure to confirm a watertight seal.
Alternatives for specific needs
For situations that call for speed or flexibility, quick-connect hose adapters and snap fittings offer tool-free attachment and fast disconnection.
Flexible PVC or PEX sections can serve as intermediaries to absorb movement or bridge mismatched diameters.
Where threads differ, a range of threaded adapters and reducer fittings makes conversion between standards straightforward.
Quick-connect hose adapters and snap fittings
Several quick-connect hose adapters and snap fittings offer fast, tool-free connections between hoses and PVC pipe when standard threaded or glued joints are impractical.
These fittings clip onto pipe ends or use barbed inserts, creating a secure seal with built-in O-rings or compression collars. They suit temporary setups, irrigation lines, or tight spaces, and allow rapid disconnection for maintenance without solvent or thread tape.
Using flexible PVC or PEX as an intermediary
Consider using flexible PVC or PEX as an intermediary when a direct hose-to-rigid-PVC connection is awkward or likely to stress joints: these materials bend around obstacles, absorb vibration, and simplify alignment between mismatched fittings.
They require proper clamps or crimp rings, compatible connectors to shift to hose ends, and pressure-rated lengths.
Use supported runs and avoid sharp bends to maintain flow and longevity.
Adapter options for converting between thread standards
Many users encounter mismatched thread standards—typically NPT (tapered) and BSP (parallel or tapered)—when joining hoses to PVC, so selecting the correct adapter is essential to guarantee a leak-free, pressure-safe connection. Options include NPT↔BSP adapters, BSPP↔BSPT converters, and metric-to-imperial fittings; choose material and seal type for pressure, chemical compatibility, and ease of installation.
| Adapter Type | Thread Pairing | Typical Use |
|---|---|---|
| NPT to BSP | NPT ↔ BSPT/BSPP | General plumbing |
| BSPP to BSPT | Parallel ↔ Tapered | Lawn/garden |
| Metric to NPT | Metr. ↔ NPT | Equipment hookups |
| Union adapters | Any | Easy disassembly |
| Material guide | Brass/SS/Poly | Match application |
Common problems and how to fix them
Common failures include leaks at hose barbs or threaded joints, hoses slipping off under pressure, and PVC cracking from overtightening.
Each problem has straightforward remedies: reseating and replacing barbed fittings or applying sealant and retightening threaded connections, choosing and reinforcing proper clamps for hose retention, and repairing or replacing cracked PVC while using correct torque and support to prevent recurrence.
The following sections describe causes, quick fixes, and preventive steps for each issue.
Leaks at the hose barb causes and remedies
Leaks at the hose barb typically stem from a handful of predictable issues—improper seating, undersized or damaged hose, degraded sealant, or corrosion on the barb itself—and each requires a targeted remedy to restore a watertight connection.
Remedies include reseating and properly aligning the hose, trimming or replacing worn hose, using correct-size barbed fittings, applying fresh hose clamps and compatible sealant, and replacing corroded barbs.
Leaks at threaded joints sealing and retightening strategies
While hose-barb problems are often mechanical—fit, damage, or corrosion—threaded joints present a different set of failures centered on sealing and torque.
Leaks usually stem from worn threads, insufficient tape/compound, or under/over-tightening.
Fixes: clean threads, apply fresh PTFE tape or pipe thread sealant, hand-tighten then quarter-turn with a wrench, inspect for cracks, and retest under pressure, reapplying sealant if persistent.
Hose slipping off under pressure clamp selection and reinforcement
Hose blow-off under pressure occurs when clamps fail to grip the hose securely or the hose material and fitting are incompatible, allowing pressurized flow to force the hose free.
Inspect hose and barb for matching diameters and smooth mating surfaces.
Choose wide-band stainless steel or T-bolt clamps sized correctly.
Add a hose stop, crimped ferrule, or hose barb with barbs and stepped fittings to reinforce retention.
Cracked PVC from overtightening repair and prevention
Over-torquing clamps or fittings can transfer excessive stress to PVC components, causing hairline fractures or full splits that weaken the joint and lead to sudden failures.
Repair options include replacing cracked sections or using a repair coupling and solvent weld for clean cuts.
Preventive measures: tighten clamps incrementally to manufacturer torque, use hose pads or stainless clamps, avoid metal-on-plastic contact, and inspect regularly.
Safety, code, and longevity considerations
Attention to safety, code, and longevity helps prevent failures and guarantees compliant installations when connecting a hose to PVC.
Check pressure ratings and temperature limits for both the PVC and the hose, account for UV exposure and chemical compatibility, and follow local plumbing codes.
When ratings are uncertain or the installation supplies potable water or high pressure, consult a qualified professional.
Pressure ratings and temperature limits for PVC and hoses
When selecting fittings and pipe for a water line, matching the pressure rating and temperature limits of the PVC and hose is essential to safety and longevity.
PVC schedules (40, 80) and hoses have maximum working pressures; use the lowest common rating as the system limit.
Consider operating temperature: PVC brittle below freezing and weak above recommended temps.
Factor in surge, testing, and local code limits.
UV exposure and chemical compatibility
Beyond pressure and temperature limits, ultraviolet light and chemical exposure also govern the selection and placement of PVC and hoses.
Prolonged UV degrades many plastics; UV-stabilized PVC or shielding prevents brittleness.
Chemical compatibility charts identify solvents, oils, acids, and fertilizers that can swell or dissolve hose and pipe materials.
Regular inspection and choosing compatible, rated materials extend service life and reduce failure risk.
Local plumbing codes and when to consult a professional
Although many DIY hose-to-PVC connections are straightforward, local plumbing codes and permit requirements can dictate materials, joint methods, backflow prevention, and allowable uses. Compliance guarantees safety, legal conformity, and long-term reliability.
Homeowners should verify jurisdictional rules before altering potable systems. For complex installations, pressure zones, chemical use, or commercial applications, consulting a licensed plumber prevents violations, guarantees proper testing, and protects warranties and insurance coverage.
Maintenance checklist and seasonal tips
A concise maintenance checklist helps guarantee hose-to-PVC connections remain reliable, noting a regular inspection schedule and common signs of failure such as cracks, leaks, and loose clamps.
Seasonal steps include winterizing connections by draining, insulating, and storing removable hoses to prevent freeze damage.
When wear is evident, components should be replaced and fittings upgraded to more durable materials or better-sealing designs.
Regular inspection schedule and signs of failure
Establish a routine inspection schedule to catch wear and leaks early: visually check hose connections, fittings, and PVC joints at least monthly during active seasons and before winterizing.
Record observations, noting cracks, soft spots, corrosion, loose clamps, or mineral buildup.
Test under pressure for drips, listen for hissing, and tighten or replace components showing wear.
Prioritize safety and timely repairs to prevent failure.
Winterizing hose-to-PVC connections
Drain and disconnect all hoses from PVC fittings, then follow a concise maintenance checklist to protect connections from freeze damage and mineral buildup during winter.
Flush lines, open shutoffs, and leave drains ajar. Remove detachable fittings and store indoors.
Inspect washers and O-rings for dryness, lubricate with silicone grease, and cover exposed spigots with insulated caps.
Recheck seals before spring startup.
Replacing worn components and upgrading fittings
Inspect fittings and replace worn components promptly to maintain reliable hose-to-PVC connections and prevent leaks.
Periodically check washers, clamps, thread tape, and barbed inserts for cracking, corrosion, or deformation.
Swap damaged parts with compatible, higher-quality materials (brass or stainless fittings, reinforced hose ends).
Tighten or upgrade clamps to worm-drive or stainless options.
Record replacements and inspect seasonally for proactive maintenance.
Quick troubleshooting flowchart for leak diagnosis
How should a homeowner proceed when a hose connection to PVC starts leaking? A concise flowchart guides diagnosis: stop water, inspect, test, fix. Follow steps in order to isolate cause quickly.
- Turn off supply and dry joint.
- Inspect fittings, O-rings, clamp tightness.
- Reassemble with sealant or replace damaged parts.
- Pressurize slowly; check for persistent leaks.
Conclusion
Clear, well-fitted connections between hose and PVC pipe prevent leaks and extend system life. Even DIYers worried about professional-grade finishes can visualize the connection as a smooth pipeline: PVC pipe, barbed adapter, hose pushed past the barb, and a tight clamp locking everything in place. With basic tools and proper prep—cleaning, deburring, and using primer or adhesive as appropriate—this simple, staged setup yields reliable, long-lasting results.