How to Clean Copper Plumbing Pipes Safely: Step-by-Step Methods for Shiny, Corrosion-Free Pipes
To safely clean copper plumbing pipes and restore their shine, follow these steps:
- Shut Off Water: Begin by turning off the water supply to prevent any leaks.
- Protect Surroundings: Cover nearby surfaces to avoid damage from cleaning agents.
- Wear Safety Gear: Use gloves and eye protection to ensure safety during the cleaning process.
- Initial Wipe: Clean the pipes with mild soap and water to remove basic grime.
- Tarnish Removal: For light tarnish, apply a paste of vinegar and salt or lemon and baking soda.
- Heavy Corrosion: Use citric acid or a commercial copper cleaner for more severe verdigris.
- Neutralize: After using acids, be sure to neutralize them to prevent further damage.
- Inspect: Check for any pitting or leaks, and consult a plumber if you find structural issues.
Avoid abrasives and harsh chemicals to preserve the integrity of the pipes. Follow these steps for effective cleaning while ensuring the longevity of your copper plumbing.
What “cleaning copper plumbing pipes” means and when it’s necessary
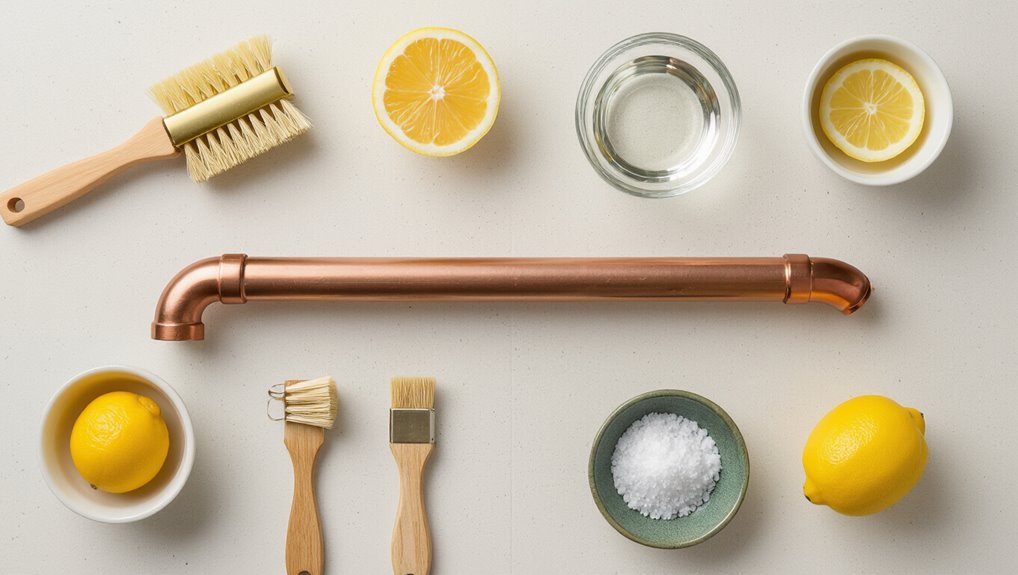
Cleaning copper plumbing pipes refers to removing buildup and corrosion that affects appearance or function.
Indicators that cleaning is needed include discoloration or a green patina, visible corrosion spots, and reduced water flow, while distinguishing cosmetic tarnish from structural corrosion determines urgency.
Before beginning, one must consider safety precautions and local regulations governing pipe work and water contamination.
Signs copper pipes need cleaning (discoloration, green patina, reduced flow, corrosion spots)
When copper pipes show discoloration—brownish streaks, a green patina, or distinct corrosion spots—or when water flow noticeably decreases, those signs indicate the need for cleaning; this refers to removing surface oxides, mineral buildup, and light corrosion to restore appearance and function rather than replacing damaged sections.
Observers should note visible tarnish, flaky deposits, staining at joints, or reduced pressure before deciding how to clean copper plumbing pipes.
Differences between cosmetic tarnish and functional corrosion
How can a homeowner tell whether copper pipe discoloration is merely cosmetic or a sign of structural trouble?
Visual cues distinguish them: uniform green or brown patina is usually superficial; localized pitting, flaking metal, pinhole leaks, soft spots, or scale inside fittings indicate active corrosion.
Cosmetic tarnish mainly affects appearance; functional corrosion compromises integrity and requires repair or replacement rather than simple cleaning.
Safety and regulatory considerations before you start
Before any work begins, homeowners should understand that “cleaning” copper plumbing pipes can range from surface polishing to removing corrosion products for repairs. Each task carries distinct safety and regulatory implications.
Professionals and DIYers must assess lead solder, water contamination risks, local plumbing codes, permit requirements, and required protective equipment.
Documenting conditions and consulting authorities prevents code violations and health hazards.
Quick overview safe, effective methods at a glance
A concise list of safe, effective cleaning options is provided for homeowners, including mild vinegar solutions, baking soda paste, and nonabrasive commercial cleaners.
Each recommendation notes brief application steps and safety precautions.
A licensed plumber is advised when corrosion is extensive, leaks are present, or the task requires soldering or pipe replacement.
Fast one-line recommendations for homeowners
Start with simple, safe approaches: wipe accessible pipe sections with a soft cloth and mild dish soap, use a vinegar-and-salt paste or commercial copper cleaner for tarnish, rinse thoroughly, and dry to prevent spotting—reserve abrasive pads or harsh acids for professionals.
Advise gentle, periodic maintenance, test cleaners in an inconspicuous spot, protect nearby fittings and finishes, wear gloves and eye protection, and ventilate the area.
When to call a licensed plumber instead of DIY
If simple cleaning and minor tarnish removal do not restore pipe condition, or if cleaning uncovers leaks, corrosion eating through the metal, persistent green or blue staining inside fittings, or reduced water pressure, a licensed plumber should be contacted promptly.
Professionals assess hidden damage, replace compromised sections, address galvanic corrosion, test water chemistry, guarantee code compliance, and prevent health risks and costly failures through proper repair or replacement.
Tools, materials, and safety gear required
Before beginning, the user should assemble appropriate protective equipment—chemical-resistant gloves, safety goggles, and a mask—and gather necessary tools such as wrenches, soft and pipe-cleaning brushes, and microfiber cloths.
Suitable cleaners include mild acids and abrasives like vinegar, lemon, baking soda, citric acid, or purpose-made copper cleaners.
Avoid abrasive pads and strong chemicals such as harsh acids, ammonia, or chlorine bleach that can damage copper or create hazardous fumes.
Protective equipment (gloves, goggles, mask)
Appropriate personal protective equipment (PPE) is essential when cleaning copper plumbing—nitrile or chemical-resistant gloves, safety goggles, and a particulate or organic-vapor mask protect skin, eyes, and lungs from acids, cleaners, and loosened debris.
Closed-toe shoes and long sleeves limit skin exposure. Confirm gloves fit, goggles seal, and masks match contaminant type.
Replace damaged PPE and follow manufacturer safety instructions.
Tools (wrenches, soft brushes, microfiber cloths, pipe-cleaning brushes)
Gather the right tools to guarantee efficient, safe cleaning of copper plumbing: adjustable and basin wrenches for loosening fittings, soft-bristled brushes and dedicated pipe-cleaning brushes for scrubbing interiors without scoring metal, and microfiber cloths for polishing and removing residue.
Include a small scraper or nylon spatula for stubborn deposits.
Include a bucket, towels, flashlight for inspection, and a magnet-free pick for mineral buildup.
Cleaning agents (vinegar, lemon, baking soda, commercial copper cleaners, citric acid)
With the tools assembled, attention turns to selecting cleaning agents suited to copper’s softness and patina.
Mild acids—white vinegar, lemon juice, or citric acid—break down oxidation; baking soda forms a gentle abrasive paste when mixed with water for grime removal.
Commercial copper cleaners offer formulated options.
Include gloves, eye protection, and nonreactive containers; rinse thoroughly and ventilate the work area.
What to avoid (abrasive pads, harsh acids, ammonia, chlorine bleach)
Because copper is soft and chemically reactive, users should avoid abrasive pads, harsh acids, ammonia, and chlorine bleach when cleaning plumbing pipes.
These materials scratch, strip protective patina, or trigger corrosive reactions producing toxic fumes.
Instead, recommend soft cloths, nonabrasive sponges, mild acids like vinegar or citric solutions, and proper ventilation.
Wear gloves and eye protection; rinse thoroughly to remove residues.
Preparation steps before cleaning copper plumbing pipes
Before beginning work, the water supply should be shut off and pressure relieved to prevent leaks and spray.
The preparer must distinguish between exposed and concealed pipe sections to plan access and may need to open panels or remove coverings.
Surrounding fixtures and surfaces should be protected and a small test area checked for any adverse reaction before full cleaning.
Shutting off water and relieving pressure
Shut the main supply to the section of piping to be cleaned and open nearby faucets to drain residual water and relieve line pressure.
Confirm isolation by checking gauges or attempting flow at distal fixtures.
Close and tag isolation valves to prevent accidental reopening.
Relieve trapped pressure in appliances by following manufacturer purge procedures.
Wear gloves and eye protection during bleeding and draining operations.
Accessing exposed versus concealed pipe sections
With the supply isolated and pressure relieved, attention turns to gaining physical access to the piping.
Exposed runs allow immediate inspection and cleaning; remove insulation or access panels as needed.
For concealed sections, identify junctions, shutoffs and access points; consider temporary removal of drywall or ceiling panels only where necessary.
Guarantee safe clearance for tools and future movement around pipe routes.
Protecting surrounding fixtures and surfaces
A clear perimeter should be established around the work area to protect fixtures, finishes, and nearby surfaces from chemical cleaners, debris, and tools.
Cover adjacent countertops, cabinets, and flooring with waterproof drop cloths or plastic sheeting. Secure coverings with painter’s tape.
Remove or shield hardware, electrical outlets, and nearby decorative elements.
Keep a bucket and absorbent cloths at hand for spills and rinse runoff.
Testing a small area for reaction
Before applying any cleaner to the entire run of copper, test it on a discreet, small section to confirm there is no adverse reaction.
Apply the chosen cleaner, wait the recommended time, then rinse and dry.
Inspect for discoloration, pitting, or residue. If unchanged, proceed; if any damage or unexpected staining appears, stop and try a milder method or consult a professional.
Method 1 Gentle household cleaning for light tarnish
For light tarnish, a gentle household paste and careful scrubbing restore copper without harsh chemicals.
Recommended steps include:
- Create a vinegar-and-salt or lemon-and-baking-soda paste
- Apply paste and let sit for recommended time
- Gently scrub with a soft brush and rinse thoroughly
- Dry and polish with a soft cloth
- Test a small area first to confirm compatibility
The method is quick, low-risk, and suitable for routine maintenance.
Step 1: Create a vinegar-and-salt or lemon-and-baking-soda paste
Mix vinegar and salt or lemon juice and baking soda into a thick paste to gently remove light tarnish from copper plumbing.
The cleaner combines mild acid with abrasive particles to loosen verdigris without harsh chemicals. Measure small batches, stirring until smooth.
Use nonmetallic utensils and avoid excess liquid. Prepare enough for immediate use; discard leftover paste after one cleaning session.
Step 2: Apply paste and let sit for recommended time
Spoon a small amount of the vinegar-and-salt or lemon-and-baking-soda paste onto a clean, soft cloth or a nonabrasive pad and spread it evenly over the tarnished areas of the copper pipe, avoiding solder joints and threaded fittings.
Allow the paste to sit for 5–10 minutes for light tarnish, or up to 20 minutes for heavier spots, monitoring to prevent prolonged exposure.
Step 3: Gently scrub with a soft brush and rinse thoroughly
Gently scrub the treated areas with a soft-bristled brush or nylon pad, using light, circular motions to lift loosened tarnish without scratching the copper; focus on the cleaned spots and keep away from solder joints and threaded fittings.
Rinse frequently with clean water to remove paste residue and loosened particles.
Inspect for persistent stains and repeat gentle scrubbing only where needed, avoiding aggressive abrasion.
Step 4: Dry and polish with a soft cloth
Pat the copper dry immediately with a clean, lint-free cloth to prevent water spots, then buff in small circular motions to restore shine; for light tarnish this final polish brings out the metal’s natural luster without reintroducing moisture or residue.
After drying, inspect joints and fittings for remaining spots, re-polish stubborn areas gently, and dispose of or launder the cloth to avoid transferring residues.
Method 2 Deeper cleaning for green patina and mineral buildup
For stubborn green patina and mineral deposits, the procedure begins with a controlled application of citric acid or a commercial copper cleaner following product safety guidelines.
Physical agitation with non-abrasive brushes and, if required, mechanical descaling tools helps lift deposits before the surface is thoroughly neutralized and rinsed to remove chemical residues.
A final inspection should check for damage and determine whether the treatment must be repeated.
Step 1: Use citric acid or a commercial copper cleaner safely
Begin by preparing a citric acid solution or selecting a commercial copper cleaner formulated for removing verdigris and mineral deposits.
The worker dons gloves and eye protection, tests the cleaner on an inconspicuous area, and follows manufacturer dilution and contact-time instructions.
Rinse thoroughly with water after treatment, neutralize residues if recommended, and ventilate the workspace to avoid inhalation of fumes.
Step 2: Agitation with non-abrasive brushes and mechanical descaling if needed
Scrub the copper with soft nylon or natural-bristle brushes to loosen surface grime and thin layers of verdigris, using gentle, consistent strokes to avoid scratching the metal.
For heavier mineral deposits, employ plastic or brass-tipped rotary brushes at low speed and scrape encrustations with plastic picks.
Inspect frequently, pause to remove loosened debris, and proceed until deposits yield to gentle mechanical action.
Step 3: Neutralize and rinse to remove chemical residues
After mechanical action has loosened verdigris and scale, the pipe should be treated to neutralize any remaining acids or alkalis from cleaners and to flush away dissolved deposits.
A dilute baking soda solution neutralizes acids; a mild citric rinse can neutralize alkaline residues.
Rinse thoroughly with copious clean water until pH is neutral and runoff contains no visible particulates, then dry surfaces to prevent reoxidation.
Step 4: Inspect for damage and repeat if necessary
Inspect the treated section carefully for pitting, thinning, or cracks by wiping it dry and examining under good light; use a flashlight and, if available, a magnifier to spot hairline damage or areas where copper has been eroded to a dull, rough texture.
If damage is present, mark affected spots, repeat localized cleaning more gently, then neutralize and reinspect; consult a plumber for structural concerns.
Method 3 Cleaning inside pipes and restoring flow
For cleaning inside copper pipes and restoring flow, the article outlines mechanical options such as a pipe snake or rotary descaler to break up obstructions.
It then covers chemical flushing with a safe descaling solution to remove mineral deposits.
Finally, it explains professional hydro-jetting and the situations—severe buildup or inaccessible blockages—when hiring a pro is advisable.
Using a pipe snake or mechanical descaler
Running a pipe snake or using a mechanical descaler clears mineral buildup and soft obstructions from the interior of copper plumbing, restoring flow without dismantling the line.
The operator feeds the flexible auger or rotating descaler head through access points, advances gently, and withdraws debris.
Use appropriate diameter tools, protect joints, wear eye protection, and inspect for damage after treatment to avoid worsening corrosion.
Flushing lines with a safe descaling solution
Flush the pipe with a controlled descaling solution to dissolve mineral deposits without harming the copper.
The technician selects a manufacturer-approved, pH-balanced descaler, isolates the section, and circulates the solution at recommended concentration and temperature.
After dwell time, they flush thoroughly with clean water until neutral pH, inspect for residue, and restore service, documenting the procedure and safety measures taken.
Using professional hydro-jetting and when to opt for it
Many plumbing professionals turn to professional hydro-jetting when stubborn scale, biofilm, or heavy particulate buildup resists chemical descalers and mechanical snaking. The method uses high-pressure water streams to scour pipe interiors without abrasive contact, restoring diameter and flow while minimizing damage to copper when performed by trained technicians.
It suits mains, severe blockages, or recurring fouling; require assessment for joint age, pipe condition, and fixture protection.
Post-cleaning inspection and maintenance actions
After cleaning, the technician inspects the pipe run for leaks, pinholes, or softened sections by running water at normal pressure and observing joints and fittings.
Where metal appears vulnerable, a compatible protective coating or corrosion inhibitor is applied following manufacturer instructions and safety precautions.
A simple maintenance schedule is recommended, noting inspection intervals and actions to prevent future corrosion.
How to check for leaks or weakened pipe sections
Inspect the cleaned copper carefully for signs of leaks or compromised sections, prioritizing joints, soldered connections, and areas that were heavily scaled.
Perform a slow-pressure test, watch for drips, moisture, or discoloration.
Tap suspicious spots to detect thin metal or hollow sounds.
Mark and document defects, tighten fittings if appropriate, and schedule professional repair or replacement for any weakened or leaking segments.
Applying protective coatings or inhibitors safely
Apply a suitable protective coating or corrosion inhibitor promptly to extend the life of cleaned copper plumbing and reduce future maintenance.
The technician selects compatible, non-conductive products (e.g., water-based lacquer, silicone, or approved corrosion inhibitors), follows manufacturer safety data sheets, applies evenly to dry, degreased surfaces, and allows full cure.
Avoid contact with mating fittings; ventilate and wear PPE.
Routine maintenance schedule to prevent future corrosion
Longevity of cleaned copper plumbing hinges on a consistent, documented maintenance schedule that includes periodic visual checks, targeted testing, and timely touch-ups.
Inspections every 3–6 months assess discoloration, pinholes, and joint integrity. Annual water chemistry testing detects corrosive conditions.
Reapply inhibitors or coatings as needed, tighten fittings, and record actions. Immediate repairs prevent escalation and extend service life.
Common mistakes and how to avoid them
The article highlights frequent mistakes when cleaning copper pipes and how to prevent them.
It warns against using dangerous chemicals or materials that react with copper, over-scrubbing that can thin the metal and cause pinhole leaks, and ignoring the signs that old piping needs replacement rather than repair.
Practical tips and safe alternatives follow to help readers avoid these pitfalls.
Dangerous chemicals and incompatible materials
Avoid mixing or exposing copper plumbing to strong acids, chlorinated solvents, or incompatible metals, as these substances can corrode tubing, weaken joints, and cause leaks.
Wear gloves and eye protection, rinse surfaces thoroughly if contact occurs, and use only cleaners labeled safe for copper.
Avoid brass or galvanized fittings unless dielectric connectors separate dissimilar metals to prevent galvanic corrosion and premature failure.
Over-scrubbing and causing surface damage or pinhole leaks
Scrubbing too aggressively can thin copper tubing and abrade protective patinas, increasing the risk of surface damage or pinhole leaks.
Use soft-bristle brushes or nonabrasive pads, apply gentle pressure, and limit duration on any spot. Inspect frequently during cleaning to stop when tarnish clears.
Rinse thoroughly, dry, and avoid wire wool or harsh scrapers that concentrate wear and create weak points.
Ignoring pipe age and the need for replacement
Consider pipe age when inspecting copper plumbing, since years of corrosion, mineral buildup, and repeated repairs weaken tubing beyond what cleaning can fix.
Neglecting age risks hidden thinning, stress fractures, and sudden leaks. Recommend documented inspection, measuring wall thickness, and replacing sections showing significant erosion, pinholes, or recurring problems rather than repeatedly cleaning.
Prioritize safety, long-term reliability, and cost-effectiveness over temporary cosmetic fixes.
Comparing cleaning options and costs
A concise comparison helps readers weigh home remedies, commercial cleaners, and professional services by time, cost, effectiveness, and safety. The following quick reference contrasts typical options to guide choice. Consider personal skill and pipe condition before selecting a method.
| Option | Typical profile |
|---|---|
| Home remedies | Low cost, moderate time, variable effectiveness, generally safe if used correctly |
| Commercial cleaners | Moderate cost, faster, more consistent effectiveness, chemical hazards possible |
| Professional services | High cost, quickest for complex jobs, most effective for corrosion, requires scheduling |
| Summary | Trade-offs: cost vs. time vs. safety; choose based on severity and user comfort |
Home remedies vs. commercial cleaners vs. professional services
When comparing home remedies, commercial cleaners, and professional services for copper pipe maintenance, cost, effectiveness, and safety are the primary factors homeowners should weigh.
Home remedies are low-cost and mild but may require more effort and risk inconsistent results.
Commercial products offer targeted formulations and faster results but pose chemical hazards.
Professionals guarantee thorough, safe restoration at higher expense and assure workmanship.
Estimated time, cost, effectiveness, and safety for each option
Weighing time, cost, effectiveness, and safety reveals distinct trade-offs among home remedies, commercial cleaners, and professional services:
DIY methods typically take longer but cost less and pose minimal chemical risk; commercial products act faster and more consistently at moderate cost while increasing exposure to hazardous ingredients; professional services offer the quickest, most reliable results with the highest safety assurances but incur the greatest expense and may require scheduling lead time.
Home remedies: low cost, hours, moderate effectiveness, safe.
Commercial: $–$$, minutes–hours, high effectiveness, chemical risks.
Professional: $$$, hours (including travel), superior effectiveness, licensed safety.
When cleaning is not enough signs you must replace copper piping
When cleaning cannot restore integrity, visible structural corrosion, multiple active leaks, or severe wall thinning indicate replacement is necessary.
Pipes that pose health risks or fail to meet current codes also require prompt replacement rather than further cleaning.
A professional assessment can confirm irreparable damage and code-related hazards.
Structural corrosion, multiple leaks, and irreparable thinning
Assess visible damage promptly: structural corrosion, multiple leaks, and severe wall thinning indicate that cleaning alone will not restore pipe integrity.
Corrosion that penetrates metal, clusters of weeping joints, or pipe sections so thin they flex under pressure require replacement.
Temporary repairs mask failure risks; continuing use can cause sudden bursts, water damage, and costly emergency remediation.
Replacement guarantees long-term reliability.
Health and code issues that require replacement
Recognize that visible damage is not the only trigger for replacement: certain health hazards and code violations demand immediate pipe removal rather than cleaning.
Persistent lead solder, bacterial contamination, or internal pinhole corrosion causing contamination warrant replacement.
Outdated sizing, noncompliant materials, or failed backflow prevention that violate local codes require upgrade.
Prioritize safety, document issues, and consult a licensed plumber for code-compliant replacement.
Tips for preventing copper pipe corrosion long-term
Preventing long-term corrosion requires attention to water chemistry and the use of appropriate filtration or softening systems to limit aggressive ions.
Proper installation practices—such as correct soldering, use of dielectric fittings, and avoiding contact with dissimilar metals—reduce galvanic corrosion risks.
Controlling the environment with adequate insulation, humidity management, and regular seasonal inspections further extends pipe life.
Water chemistry management and filtration options
Several straightforward water chemistry adjustments and proper filtration choices greatly reduce long-term copper pipe corrosion by addressing pH balance, dissolved oxygen, hardness, and aggressive ions like chlorides and sulfates.
Implement pH stabilization (7.2–8.0), aeration control, and softening or sequestration for hardness.
Install sediment, activated carbon, and ion-exchange filters where needed, plus corrosion inhibitors and regular monitoring to track treatment effectiveness.
Proper installation practices and avoiding dissimilar metals
After addressing water chemistry and filtration, attention turns to physical installation choices that determine how long copper piping resists corrosion.
Proper practices include using compatible fittings, dielectric unions where copper meets steel, avoiding direct contact with aluminum or brass alloys prone to galvanic action, ensuring secure supports to prevent abrasion, and preventing stagnant sections.
Correct soldering and flux selection also reduce localized corrosion risks.
Environmental controls (humidity, insulation) and seasonal checks
When indoor humidity is controlled and pipes are insulated against temperature swings, the risk of corrosion and stress-related damage drops considerably. Routine seasonal inspections further catch insulation gaps, condensation, and early pinhole leaks before they worsen.
Technicians should monitor relative humidity, add vapor barriers in crawlspaces, replace degraded insulation, and check for thermal cycling signs. Prompt repairs and consistent documentation extend service life and prevent corrosion.
Recommended products and professional services to consider
Recommended household cleaners and brands suited for copper maintenance can make routine cleaning safe and effective, while certain signs indicate the need for professional intervention.
Below are common product types and service triggers to evaluate before attempting repairs or deep treatments:
- Mild acid-based copper cleaners (follow label instructions)
- Non-abrasive copper polishes and cloths
- pH-neutral dish soap for routine washing
- Hire a licensed plumber for leaks, joint failures, or extensive corrosion
- Consult a corrosion specialist for persistent greenish corrosion or water chemistry issues
Trusted household cleaning solutions and brands
Several household cleaners and a few reputable brands consistently deliver safe, effective results on copper plumbing without harsh abrasives.
Products like diluted white vinegar, baking soda paste, and mild dish soap remove grime; commercial options from Bar Keepers Friend and Wright’s offer gentle polish formulations.
Microfiber cloths and soft-bristle brushes prevent scratching.
Always test in an inconspicuous area and follow manufacturer instructions for best results.
When to hire a plumber or corrosion specialist
After attempting safe household cleaners and gentle polishes, homeowners should consider professional help if persistent greenish corrosion, pinhole leaks, worsening water discoloration, or reduced water pressure appear.
A licensed plumber or corrosion specialist can perform inspections, pressure tests, and electrochemical analysis. Recommended services include leak repair, pipe relining or replacement, water treatment installs, and documented corrosion mitigation plans with material warranties.
Safety checklist to follow each time you clean copper pipes
Begin each cleaning session with a concise safety checklist to prevent injury and protect plumbing integrity:
- Wear gloves and eye protection to avoid chemicals and metal shards.
- Shut off water and relieve pressure before work begins.
- Guarantee proper ventilation when using cleaning agents.
- Use nonabrasive tools to prevent scratching and thinning.
- Inspect joints and seals; stop and consult a professional if corrosion or leaks appear.
Conclusion
Maintaining clean copper plumbing extends pipe life and system efficiency. Studies show household copper corrosion affects about 10% of residential systems within 20 years, highlighting preventive care’s value. Regular light cleaning, protective coatings, and water chemistry control can delay deterioration; replacement is warranted when leaks, pinholes, or heavy pitting occur. Following proper preparation, safe methods, and a safety checklist reduces risk and preserves both function and appearance of copper plumbing for years.