
How to Install a 3-Way Shower Diverter Valve: Step-by-Step Guide for DIYers
To install a 3-way shower diverter valve, start by identifying the valve type and shutting off the water supply. Remove the trim, drain the lines, and extract the old valve. Fit a compatible replacement using solder, compression, or push-fit methods, securing it to the studs. After reattaching the trim, test all outlets for leaks and adjust connections or cartridges as necessary. This guide also includes a tool list, troubleshooting tips, and advice on when to hire a professional for complex setups.
Overview of 3-Way Shower Diverter Valves and When to Install One
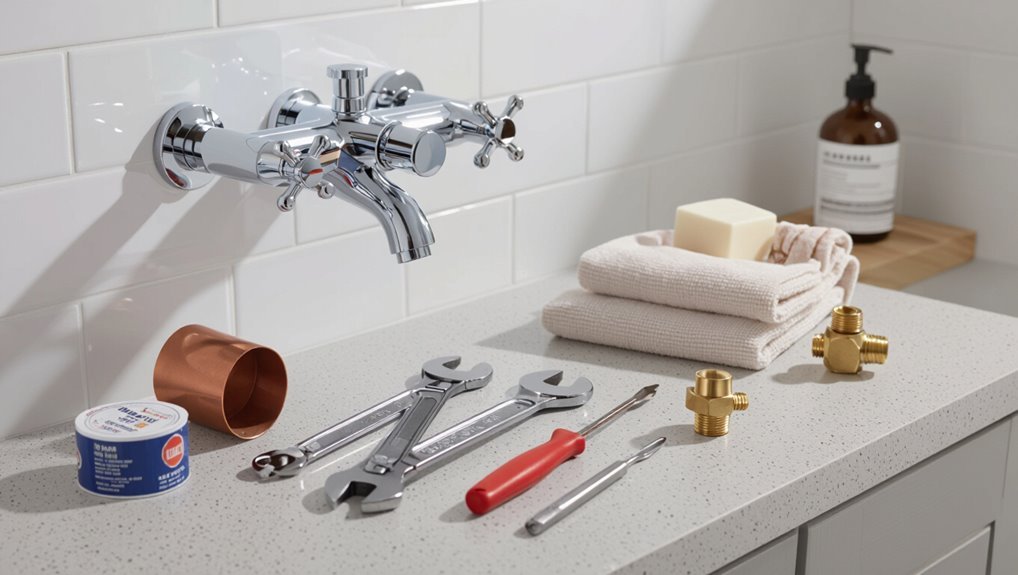
A 3-way shower diverter valve directs water between three outlets—such as a tub spout, overhead shower, and handheld—and is commonly used in multi-function shower systems.
Indicators for replacement or new installation include leaks, difficulty switching outlets, corroded components, or upgrading fixtures.
A concise checklist of required tools, replacement parts, sealants, and safety gear (gloves, eye protection, and a shutoff method) should accompany the procedure.
What a 3-way diverter valve does and common applications
When installed between the shower valve and the outlets, a 3-way diverter directs water flow to two different fixtures or splits it between them. This enables combinations such as showerhead and hand shower, tub spout and overhead rain head, or body sprays and a handheld.
It allows sequence selection, flow splitting, and balancing. Homeowners follow how to install a 3 way shower diverter valve for customized setups.
Signs you need a replacement or new installation
Following installation, performance and wear indicate whether a 3-way shower diverter needs replacing or a new unit should be installed.
Common signs include persistent leaks, difficulty shifting between outlets, reduced water pressure, corrosion or visible damage, and frequent need for repairs.
Age-related deterioration, compatibility issues with upgraded fixtures, and noisy operation also justify replacement rather than continued repairs.
Tools, materials, and safety gear checklist
Before beginning work, assemble a concise checklist of tools, materials, and safety gear specific to 3-way shower diverter valve installation to guarantee efficiency and reduce risks.
Necessary items minimize delays and hazards during replacement or new installation.
- Adjustable wrench, pipe wrench, and basin wrench
- Screwdrivers and hex keys
- Replacement 3-way diverter valve and fittings
- PTFE tape, flux, solder or compression fittings
- Safety glasses, gloves, and leak detection paste
Types of 3-Way Diverter Valves and How to Choose the Right One
The section compares common valve designs—rotary, sliding, and ball—highlighting each type’s advantages and limitations for flow control and maintenance.
It also reviews material choices such as brass, stainless steel, and plastic with respect to longevity and corrosion resistance.
Finally, compatibility considerations cover mounting, trim kit fit, and required water pressure to guarantee proper operation.
Valve designs (rotary, sliding, ball) and pros/cons
Choosing among rotary, sliding, and ball 3-way diverter valves requires weighing how each design controls flow, how durable it is, and how easy it will be to install or service. Rotary: smooth, compact; Sliding: linear action, prone to wear; Ball: robust, forgiving but bulkier.
| Design | Key trait |
|---|---|
| Rotary | Smooth control |
| Sliding | Simple linear action |
| Ball | Durable, compact control |
Material options (brass, stainless, plastic) and durability
After comparing mechanical styles like rotary, sliding, and ball, attention turns to what those valves are made from, since material affects longevity, corrosion resistance, and cost.
Brass offers proven durability and machinability; stainless steel resists corrosion best in harsh or chlorinated water; engineered plastics lower cost and resist scale but may deform under heat or stress.
Choose based on environment and budget.
Compatibility with shower systems, trim kits, and water pressure
When selecting a 3-way diverter, compatibility with the existing shower system, trim kit, and available water pressure determines both functionality and longevity.
Confirm valve type (compression, cartridge, or threaded), rough-in dimensions, and trim mounting.
Match finish and stem design to the trim kit.
Verify minimum operating pressure and flow requirements to guarantee balanced delivery to multiple outlets and prevent sputtering or reduced flow.
Pre-Installation Preparation
Before beginning work, the installer should assess the existing plumbing layout, locate shutoff options, and verify whether wall access is adequate or an access panel must be created.
They must measure and document pipe locations and trim dimensions, then turn off the water, drain the lines, and isolate the work area.
Confirming these steps minimizes surprises during valve replacement and guarantees a safer, more efficient installation.
Assessing existing plumbing layout and shutoff options
A quick but thorough inspection of the existing plumbing layout and shutoff options identifies the pipe routes, valve types, and access points that will determine the 3-way diverter valve installation approach.
The evaluator verifies main and local shutoff locations, tests isolation effectiveness, notes meter or pump constraints, confirms accessible access panels, and records any nonstandard fittings or materials that could require adapters or special tools.
Measuring and documenting pipe locations and trim dimensions
Measure and mark the exact locations of exposed and concealed pipes and the finished trim dimensions to guarantee the 3-way diverter aligns with both plumbing and fixture clearance.
Record pipe centerlines, depths behind wall surfaces, and distances between hot, cold, and outlet ports.
Note finished wall thickness and escutcheon diameter.
Photograph and sketch measurements, labeling reference points for cutting, fastening, and final trim placement.
Turning off water, draining lines, and isolating the work area
With pipe locations and trim dimensions documented, attention shifts to shutting off water, draining lines, and isolating the work area to prevent leaks and water damage.
The homeowner locates and closes the main or local shutoff, opens nearby faucets to relieve pressure, and drains residual water.
Use buckets, towels, and plumbing plugs; place drop cloths and cordon off the area for safety and cleanliness.
Verifying access behind the wall and creating an access panel if needed
Before cutting into drywall, the installer confirms whether there is unobstructed access to the shower valve cavity by removing trim, feeling for studs, and using a small inspection mirror or borescope to check for pipes, wiring, insulation, and blocking.
If access is restricted, the installer marks and cuts a neat access panel between studs, frames its edges, and plans a removable cover to preserve finish and allow future service.
Step-by-Step Installation Guide
The installation proceeds through a clear sequence of tasks starting with removal of existing trim and identification of the current valve connections.
Next comes extraction of the old valve, preparation of the pipe ends, and fitting of the new valve using solder, compression, or push-fit as appropriate.
Finally, the valve is secured and aligned for proper handle and trim fit, and the escutcheon, handles, and trim are reattached.
Removing existing trim and identifying current valve connections
Once the water supply has been shut off and the shower thoroughly dried, remove the escutcheon, handle, and any decorative trim to expose the valve body and ports.
Inspect visible piping, noting hot, cold and diverter ports. Photograph or sketch connections and label pipe orientations.
Check for threaded, sweat or solder joints and nearby shutoffs. Confirm clear access for measurement and replacement.
Removing the old valve and preparing pipes for the new valve
Begin by draining residual water from the lines and confirming the main supply remains off.
The installer removes mounting screws, extracts the old valve body, and notes inlet/outlet orientations.
Corroded fittings are cut back to clean copper or PEX.
Debris and old solder flux are cleaned, pipe ends deburred and measured for correct insertion depth, and nearby fittings are supported for secure reconnection.
Fitting the new valve: soldering, compression, or push-fit methods
Prepare to install the new 3-way diverter by selecting the joining method—solder, compression, or push-fit—appropriate for the pipe material and local code, and laying out necessary tools and fittings within easy reach.
For solder, clean, flux, and sweat joints with proper heat.
For compression, verify ferrules seat squarely and tighten nuts.
For push-fit, cut square, deburr, and push fully until locked.
Securing and aligning the valve for correct handle and trim fit
Position the valve body in the rough-in so the handle orientation and trim access match the planned finished layout, confirming the cartridge stem is centered and at the correct depth relative to the finished wall.
Fasten mounting brackets or screws to framing, shim as needed to guarantee level and plumb, and verify inlet/outlet ports align with supply lines.
Check rotation stops and secure all fasteners.
Reattaching or installing trim, handles, and escutcheon
With the valve secured and cartridge verified, the installer proceeds to fit the escutcheon, handles, and trim by working from inside out—first sliding the escutcheon over the valve body to seat flush against the finished wall, aligning any index marks or sealing gaskets.
Then, the installer installs the handle assembly and tightens set screws to the manufacturer’s torque recommendations.
Finally, they check that the trim hugs evenly, rotates smoothly, and that rotation stops engage correctly before applying any decorative caps or covers.
Restoring water and testing all diverter positions for leaks and flow
After the escutcheon and handles are secure and rotation checks pass, the installer can restore the home’s water supply and proceed to test each diverter position for leaks and proper flow.
Open hot and cold supply slowly, inspect joints and connections for drips, and operate the diverter through all three settings.
Confirm strong, consistent flow to each outlet and tighten or reseal any leaking fittings.
Common Problems During Installation and How to Fix Them
Common installation issues include leaks at fittings, misaligned trim or handles that impede operation, low or uneven water flow between outlets, and corroded or fragile existing plumbing.
Each problem requires targeted troubleshooting—sealing or retightening connections, realigning or shimming trim, checking supply pressures and valve cartridges, or replacing compromised pipes.
The following section explains practical fixes and when professional help is advisable.
Leaks at fittings and how to troubleshoot
Check fittings, connections, and seating when water appears where it shouldn’t: most leaks at diverter fittings stem from improper tightening, damaged threads, or missing sealant.
Inspect joints, tighten to manufacturer torque, replace stripped nipples, and reapply PTFE tape or pipe dope on threads.
Test under low pressure, isolate sections to locate leaks, and replace faulty seals or O-rings before full system reassembly.
Misaligned trim or handles interfering with operation
Misaligned trim or handles can prevent a diverter from fully engaging, causing stiff operation, incomplete flow switching, or visible gaps between components.
The installer should remove trim, check cartridge orientation and stem alignment, adjust escutcheon placement, and confirm screw torque.
Re-seat or shim trim pieces to eliminate binding.
Test rotation and flow before finalizing to guarantee smooth, full-range operation without obstruction.
Low water flow or uneven distribution between outlets
Diagnose reduced or uneven flow by isolating supply and outlet performance: inspect inlet screens and the diverter cartridge for mineral buildup or debris, verify that supply shutoff valves are fully open and not partially closed, and confirm that branch piping and showerheads are free of blockages or flow restrictors.
Clean or replace clogged screens/cartridges, remove inline restrictors, flush lines, and test after each change to confirm balanced delivery.
Dealing with corroded or fragile existing plumbing
After addressing flow issues, attention must shift to the condition of the existing plumbing: older pipes and fittings can be corroded, brittle, or fused with mineral deposits, which raises the risk of leaks or damage during diverter replacement.
Inspect joints, test with gentle movement, and apply penetrating lubricant to seized fittings.
Replace compromised sections, use coupling adapters for mismatched materials, and consider professional help if structural failure is likely.
Tips for a Professional-Looking Finish and Longevity
Attention to sealing, torque and alignment, coordinated trim, and a simple maintenance routine guarantees the diverter performs reliably and looks finished.
Proper waterproofing around the access panel and correct torque settings prevent leaks and water damage.
Matching fixtures and a regular inspection schedule extend the valve’s life and preserve aesthetic continuity.
Proper sealing and waterproofing around the access panel
Seal and waterproof the access panel carefully to prevent leaks and assure a clean, long-lasting installation.
The installer should apply a continuous bead of mildew-resistant silicone around the panel frame, press-fit a gasket where provided, and guarantee flush seating.
Use waterproof backing board if exposed, sloped seals toward the shower, and test for moisture entry before finishing trim to maintain durability and appearance.
Torque and alignment tips to prevent future leaks
Guarantee correct torque and precise alignment when fastening the diverter and its fittings to prevent stress on seals and future leaks.
Use a calibrated torque wrench following manufacturer specs, tighten progressively in small increments, and avoid over-torquing.
Align inlet and outlet ports so plumbing runs are straight and strain-free.
Recheck connections after initial use and retighten to spec if minor settling occurs.
Matching trim and finishes for aesthetic continuity
Choose trim and finishes that match the existing bathroom palette and the diverter’s style to confirm a cohesive, professional look and durable performance.
Selecting the same metal finish (brushed nickel, chrome, oil-rubbed bronze, etc.) and compatible trim dimensions prevents mismatched tones, uneven wear, and premature corrosion while making installation simpler and visually seamless.
Confirm gasket materials, screw finishes, and escutcheon thicknesses align for consistent appearance and longevity.
Maintenance schedule and simple care to extend valve life
After matching trim and finishes, attention should turn to a simple maintenance schedule that preserves both appearance and function.
Routine care prevents leaks and wear, ensuring a professional look and longer service life.
- Inspect for leaks monthly
- Clean exterior with mild soap weekly
- Exercise diverter quarterly to prevent sticking
- Replace worn seals every 2–3 years
- Flush supply lines annually
When to Call a Plumber and Cost Considerations
Certain scenarios—complex valve assemblies, hidden leaks, or failures affecting multiple fixtures—warrant a professional plumber.
Cost comparisons should weigh labor against DIY time savings, variable parts prices, and potential permit or code-related expenses.
Warranty implications and local permit requirements can also affect total cost and dictate when licensed work is necessary.
Situations that require professional help
A homeowner should call a professional when diagnosis or repair goes beyond basic tools and skills.
Situations include hidden pipe damage, soldering or complex sweat joints, corroded fittings, inaccessible valves within walls, persistent leaks after attempted fixes, and water pressure anomalies suggesting broader system issues.
Licensed plumbers guarantee code compliance, safe shutoffs, and reliable long-term solutions.
Labor vs. DIY cost breakdown and parts cost factors
Weighing labor versus DIY costs hinges on skill level, time, and the complexity of the shower diverter job: a homeowner comfortable with basic plumbing can save on labor but must account for parts, potential mistakes, and opportunity cost, while hiring a plumber trades higher upfront expense for speed, warrantyed work, and code compliance.
| Item | Typical cost |
|---|---|
| Diverter valve | $30–$200 |
| Tools | $0–$100 |
| Labor (pro) | $150–$400 |
| Misc parts | $5–$50 |
| Risk/repairs | Variable |
Warranty, permits, and code considerations
When work affects warranties, building permits, or plumbing codes, homeowners should seriously consider hiring a licensed plumber rather than proceeding as a DIY project.
Licensed professionals guarantee compliance, preserve manufacturer warranties, and provide permits and inspections when required.
Unexpected complications, like hidden leaks or code-specific venting, can raise costs; professional diagnoses and liability coverage often outweigh DIY savings in complex or high-risk installations.
Quick Troubleshooting Checklist After Installation
A brief checklist helps confirm the new 3-way diverter functions correctly and that no leaks or temperature issues remain.
The following quick tests isolate common faults and guide whether outlet-specific checks are needed. If problems persist after these steps, proceed to individual outlet isolation and testing.
- Check all visible joints and connections for drips while system is pressurized.
- Operate each diverter position and verify correct outlet selection and smooth movement.
- Confirm water temperature is stable and consistent at each outlet.
- Shut off one branch at a time (if valves present) to isolate a problematic outlet.
- Use a bucket test or flow meter to compare flow rates between outlets.
Stepwise checks for leaks, operation, and water temperature control
Several quick checks confirm a properly functioning 3-way shower diverter after installation: inspect all visible joints for drips, cycle each outlet to verify flow direction and pressure, and test hot and cold balance at each position to guarantee stable temperature control.
Observe for pressure drops, listen for sputtering or hammering, check trim and handle alignment, and confirm no slow leaks after 10–15 minutes of steady flow.
How to isolate and test individual outlets if problems persist
Begin by isolating each outlet to pinpoint the source of the problem: shut off water, remove the diverter trim, and cap or temporarily block one outlet at a time while restoring water to test the remaining paths.
Observe flow, pressure, and leaks for each open outlet. Swap caps and repeat. If an outlet fails, inspect its supply line, check for debris or misaligned seals, and verify diverter spool movement.
Useful Resources and Parts Reference
A concise parts and measurement checklist is provided for printing to guarantee all fittings, seals, and dimensions are confirmed before purchase.
Recommended brands and suggested retailers for replacement diverter valves are listed to simplify sourcing compatible parts.
Links to video demonstrations and manufacturer installation guides are included for step-by-step visual reference and warranty details.
Printable parts and measurement checklist
This section provides a concise, printable parts list and measurement checklist designed to guarantee the correct components and clear dimensions are on hand before installing a 3-way shower diverter valve.
A single-page checklist helps confirm fit and materials prior to cutting or soldering.
- Diverter valve model and inlet/outlet sizes
- Pipe type and diameters
- Fittings and adapters
- Seal types and quantities
- Measured rough-in distances
Recommended brands and where to buy replacement valves
Several reputable manufacturers consistently produce durable 3-way shower diverter valves suitable for both DIY and professional use.
Recommended brands and common retailers include trusted options for compatibility, warranty, and parts availability.
- Moen — widespread retail and OEM cartridges
- Delta — durable assemblies, easy cartridge swap
- Kohler — premium finishes, parts support
- Pfister — cost-effective replacements
- Home Depot / Lowe’s — stock various brands and online ordering
Links to video demonstrations and manufacturer installation guides
Where can one find reliable step-by-step guidance for installing or replacing a 3-way shower diverter valve?
Useful resources include official videos, printable manuals, and third-party tutorials that demonstrate tools, disassembly, valve replacement, and testing.
Recommended links:
- Manufacturer installation PDFs
- Official YouTube walkthroughs
- Authorized dealer support pages
- Plumbing trade video channels
- Parts diagrams and exploded views
Conclusion
Installing a 3-way shower diverter can seem intimidating, but with careful preparation and basic tools a competent DIYer can achieve reliable results. Even those worried about working with plumbing should note many kits are designed for straightforward retrofit with clear, reversible connections—minimizing risk. Follow manufacturer steps, test thoroughly for leaks, and use proper seals; if complexity or persistent leaks arise, consult a licensed plumber to guarantee safety and code compliance.
