
How to Regrout a Tub: Step-by-Step Guide to Clean, Mold-Free Shower Seams
Regrouting a tub is essential for maintaining watertight seams and preventing mold growth. This process involves removing damaged grout, cleaning the joints, and applying fresh grout and silicone caulk where the tile meets the tub. To begin, ensure proper ventilation, protect surfaces, and select the right type of grout—unsanded for narrow seams and sanded for wider joints. Use mold-resistant products for added durability. After completing the job, allow time for the new grout to cure fully, maintain good ventilation, and reseal periodically to prolong the life of your grout. Follow this step-by-step guide for removal, mixing, application, and troubleshooting to achieve the best results.
What Regrouting a Tub Achieves and When You Need It
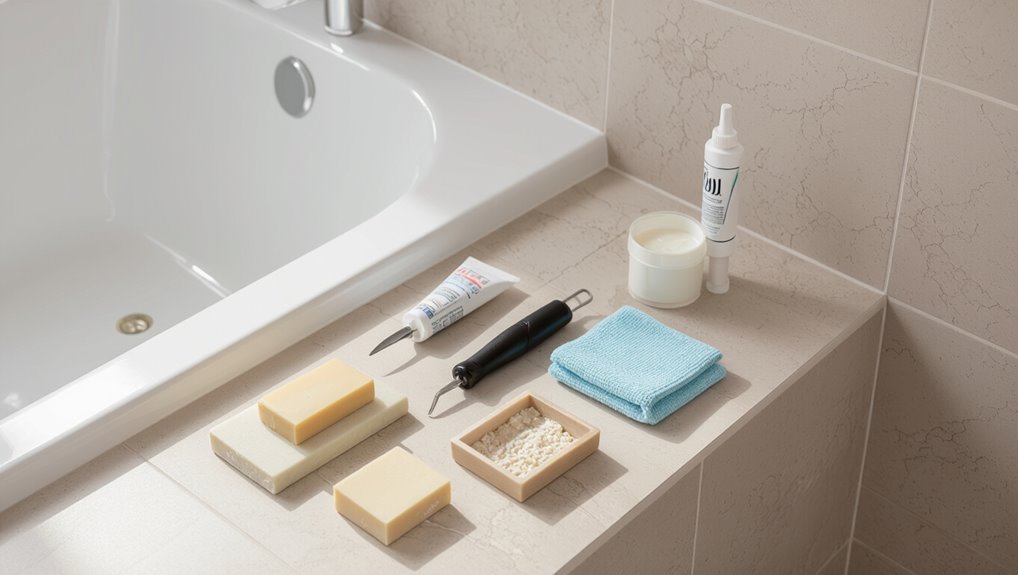
Regrouting restores waterproofing and appearance by replacing cracked, crumbling, or discolored grout that no longer seals joints.
Damaged or moldy grout can allow water infiltration, promote mildew growth, and eventually cause tile or substrate damage.
Typical regrouting requires grout or caulk, a grout saw or scraper, a sponge, and basic safety gear.
Signs your tub grout needs replacing
A clear indicator that a tub’s grout requires replacement is visible deterioration—cracked, crumbling, or missing grout lines allow water to penetrate behind tiles and create mold, mildew, and structural damage.
Other signs include persistent staining that resists cleaning, loose or hollow-feeling grout when tapped, and recurring discoloration along seams.
Recognizing these cues guides decisions about how to regrout a tub promptly and effectively.
Risks of damaged or moldy grout
When grout is damaged or colonized by mold, water can seep behind tiles and compromise the underlying wallboard, adhesive, and framing—leading to rot, weakened tile adhesion, and costly structural repairs.
Mold also degrades indoor air quality, aggravates allergies and respiratory issues, and accelerates surface deterioration.
Left unchecked, failing grout increases repair scope and expense, often requiring tile removal and replacement of affected substrate.
Materials and tools overview
Effective regrouting requires a concise set of materials and tools selected for the job’s scope and grout type. Necessary items include grout (sanded or unsanded), grout sealer, mildew-resistant caulk, a grout removal tool or oscillating tool, grout float, sponge, bucket, utility knife, and protective gear.
Optional items: grout colorant, backer rod for large gaps, and a grout saw for detailed work.
Preparing the Bathroom and Work Area
Before regrouting, the bathroom should be prepared with adequate ventilation and basic safety measures such as gloves and eye protection.
Fixtures, drains, and adjacent surfaces must be covered or masked to prevent damage and keep grout lines clean.
Work should be scheduled when the space can remain undisturbed for the grout’s recommended curing time and at a moderate temperature and humidity.
Safety precautions and ventilation
Wear appropriate personal protective equipment and confirm the room has steady airflow to minimize exposure to dust, chemical fumes, and mold spores while regrouting a tub.
Ensure fans direct air outdoors, open windows, and use an exhaust or box fan.
Limit occupancy, keep children and pets away, read product labels for hazards, and have a respirator rated for particulates and organic vapors if using strong chemicals.
Protecting fixtures, drains, and surfaces
Protect fixtures, drains, and surrounding surfaces to prevent damage and simplify cleanup during regrouting.
Cover faucets, handles, and showerheads with painter’s tape and plastic; seal the drain with a removable stopper and tape or use a drain protector.
Lay down drop cloths or towels on tub edges and floor.
Remove or shield soap dishes and accessories to keep grout off finishes.
Choosing the right time and environment for curing
Ideally scheduled for a period of low household traffic, curing should occur when the bathroom can remain undisturbed for at least 24–72 hours, depending on the grout type and manufacturer instructions.
Guarantee stable temperature (65–80°F/18–27°C), low humidity, and good ventilation without drafts. Avoid steam from showers, running fans intermittently if needed, and block access to prevent accidental contact during full cure.
Removing Old Grout Step-by-Step
This section outlines a clear sequence for removing old grout, starting with manual hand tools and progressing to power tools when joints are wide or grout is deeply set.
It notes precautions and techniques to protect tile edges and the tub flange during removal.
The final steps cover thorough cleaning and drying of seams to guarantee proper adhesion for new grout.
Manual removal methods (hand tools)
Begin by assembling a small set of hand tools—grout saw, utility knife, needle-nose pliers, and a stiff brush—so each tile joint can be accessed and cleaned without power.
Work methodically along seams, scoring and removing grout in short sections. Use pliers to pull loose fragments, a brush to clear dust, and a damp cloth to inspect depth.
Pause frequently to avoid tile damage.
Power tools and when to use them
After hand tools have been tried or when joints are too wide, deep, or hardened for manual removal, powered options offer speed and consistency for stripping old grout.
Rotary tools with carbide or diamond bits suit narrow joints; oscillating multi-tools handle wider seams. Use adjustable-speed settings, steady pressure, and short passes.
Prioritize dust control and appropriate PPE; operate slowly to preserve adjacent surfaces.
How to avoid damaging tiles and tub edges
Work deliberately to protect tiles and tub edges while removing old grout, using controlled motions and the right tools to prevent chipping or scratching.
Use narrow grout saws, carbide tips, or manual chisels with small, angled strokes. Keep blade edges away from glaze, support tiles with one hand or a shim, and stop at sound changes.
Replace dull bits promptly to avoid slips.
Cleaning and drying the seams after removal
With the old grout removed and tiles protected, the seams should be thoroughly cleared of dust, loose particles, and any remaining grout fragments before any new material is applied.
A vacuum with a crevice tool removes debris, then a stiff nylon brush dislodges stubborn bits.
Wipe with a damp cloth, rinse with clean water, and allow seams to dry completely—use fans or a hair dryer on low if needed.
Selecting the Best Grout and Caulk for Tubs
Choosing the right materials begins with understanding that grout fills tile joints while silicone caulk seals corners and seams where movement occurs.
The decision between sanded and unsanded grout depends on joint width—sanded for wider gaps, unsanded for narrow—and homeowners should prioritize mold-resistant, waterproof formulations with mildew inhibitors.
Comparing reputable brands and product reviews helps identify options that balance durability, ease of application, and long-term resistance to moisture.
Difference between grout and silicone caulk for seams
A clear distinction exists between grout and silicone caulk for tub seams: grout fills and bonds between tiles, while silicone caulk seals joints where surfaces meet and move.
Grout is rigid, suited for tile gaps; silicone remains flexible, waterproof, and resists mold at dynamic junctions like tub-to-wall seams.
Use each material where its properties match the seam’s movement and water exposure.
Types of grout (sanded vs. unsanded) and recommended use
After explaining where grout and silicone caulk belong in a tub installation, the next decision is which grout type to use: sanded or unsanded.
Sanded grout suits wider joints (typically >1/8 inch) and provides strength and shrink resistance for floor or large-tile work.
Unsanded grout fits narrow joints and delicate tiles to prevent scratching.
Choose based on joint width and tile surface.
Mold-resistant and waterproof product features to look for
Durability and moisture resistance are the priorities when selecting grout and caulk for a tub: look for formulations specifically labeled mold- or mildew-resistant, waterproof or water-repellent, and suitable for continuous wet environments.
Choose epoxy or urethane grouts, silicone-based caulks with fungicides, and products with good adhesion and flexibility.
Fast-curing, stain-resistant, and VOC-compliant options improve longevity and indoor air quality.
Recommended brands and product comparisons
Several leading manufacturers produce grout and caulk formulations specifically formulated for wet areas, so comparing features, performance, and cost helps identify the best fit for a tub. Brands vary by mildew resistance, flexibility, cure time, and color matching. Below is a quick comparison:
| Brand | Strength |
|---|---|
| Mapei | Fast cure, mold-resistant |
| Laticrete | Durable, color range |
| DAP | Affordable, flexible |
| GE | Long-lasting, mildew-resistant |
Applying New Grout and Sealing Joints
The installer begins by mixing the grout to the manufacturer’s recommended consistency, then selects the proper tools—rubber float, grout sponge, and tooling implement—to apply it evenly into joints.
Excess grout is removed and joints are smoothed and tooled to a consistent profile before final cleaning.
Caulk is reserved for corners and tub-to-wall seams, applied after grout has set and allowed to cure for the time specified, with post-application care to keep the area dry until fully cured.
Mixing grout to the correct consistency
Mix grout to a thick, peanut-butter-like paste that will hold its shape when spread but still pack easily into joints.
Use measured powder and water, adding liquid gradually to avoid over-thinning. Stir until homogeneous, scraping bowl sides.
Test consistency by forming a small mound; it should neither slump nor crumble.
Allow a brief slake period, then remix before use for uniform texture.
Tools and techniques for applying grout smoothly
Gather the right tools before applying grout to guarantee smooth, efficient work and consistent joints.
A grout float, margin trowel, grout bag or syringe, sponge, and quality caulk gun for sealed corners are essential.
Use the float at a low angle to press grout into gaps, the bag for tight seams, and a damp sponge to begin cleanup.
Wear gloves and eye protection.
Smoothing, tooling, and removing excess grout
With grout pressed into the joints and excess still on the tile faces, attention shifts to smoothing, tooling, and removing surplus material to create uniform lines and prevent future failures.
A rounded rubber float or grout rake firms grout into gaps, then a damp sponge wipes residue, rinsed frequently.
Final detailing removes smears, firms edges, and guarantees consistent joint depth for ideal curing.
When and how to use caulk at corners and tub-to-wall seams
Apply caulk where rigid grout meets flexible joints—such as inside corners and the tub-to-wall seam—because grout cannot accommodate the movement caused by settling, temperature changes, and tub flex.
Use a waterproof, mildew-resistant silicone or hybrid caulk.
Remove old material, clean and dry surfaces, mask edges, run a steady bead, and tool smooth for full contact.
Remove tape before skin formation.
Proper curing time and post-application care
After grout is set to the touch, allow a full curing period before exposing joints to water or heavy use—typically 24 to 72 hours for sanded or unsanded cement-based grouts and up to 7 days for epoxy formulations—following the manufacturer’s stated times exactly.
During curing, keep area dry, ventilated, and free from disturbance.
Afterward, apply recommended sealer, inspect for voids, and re-caulk as needed.
Cleaning Up and Restoring the Tub Area
Once the grout has set, the installer removes haze and residue with recommended cleaners and a soft cloth to reveal clean joints.
Fixtures and trim are reinstalled and the plumbing is tested for leaks to confirm watertight performance.
Finally, finished seams are inspected for gaps or imperfections and any touch-ups are performed before regular use.
Final cleaning techniques for grout haze
Wipe the cured grout haze from tile and fixtures with care to avoid scratching surfaces or disturbing fresh grout lines.
Use a damp microfiber cloth and mild vinegar solution for light haze; for stubborn residue, apply a nonabrasive grout haze remover per manufacturer instructions.
Rinse thoroughly with clean water, dry surfaces to prevent streaks, and inspect joints for any remaining residue or imperfections.
Reinstalling fixtures and testing for leaks
Begin reinstalling fixtures only when grout and sealants are fully cured and the area is dry; this prevents movement that can compromise newly set joints.
Reattach handles, spouts, and trim using original hardware or appropriate replacements, ensuring gaskets and plumber’s tape are used where required.
Turn water on slowly, observe supply lines and connections for leaks, tighten fittings as needed, and wipe dry to confirm watertight seals.
Inspecting finished seams for gaps or imperfections
After fixtures are reattached and supply lines checked, attention turns to the finished seams around the tub.
The inspector examines grout and caulk for hairline gaps, pinholes, shrinkage, or uneven joints.
Any flaw is marked, cleaned with a soft brush, and corrected—recaulked or touched with matching grout.
Final wipe removes residue; seams should be continuous, sealed, and smooth.
Preventing Mold and Extending Grout Life
Routine care and timely moisture control are essential to prevent mold and keep grout sound.
Simple daily and weekly cleaning, combined with proper ventilation and quick drying, reduces mildew growth.
Periodic resealing of grout and inspecting caulk—typically every 1–3 years—helps maintain waterproofing and prolong grout life.
Daily and weekly maintenance routines
Because grout degrades fastest where moisture and soap residue accumulate, consistent short maintenance tasks can greatly slow mold growth and extend grout life.
A routine combines rapid daily wipes with targeted weekly cleaning and inspections to catch stains or cracks early.
- Wipe seams after each use with a squeegee or microfiber cloth.
- Weekly mild cleaner and soft brush scrubbing.
- Inspect and touch up damaged grout.
Ventilation and moisture control strategies
When bath and shower areas are kept well-ventilated and moisture is controlled promptly, mold growth is greatly reduced and grout life is extended.
Use exhaust fans during and after use, open windows when possible, and run fans at least 20–30 minutes post-shower.
Wipe tiles and seams dry, remove pooled water, and keep doors or curtains ajar to promote airflow.
Monitor humidity with a small hygrometer.
When to reseal grout and how often to caulk
How often should grout be resealed and caulk refreshed to prevent mold and prolong service life?
Periodic inspection every six months is advised; reseal grout when water no longer beads or stains appear, typically every one to two years.
Caulk joints should be replaced every one to three years or immediately if cracked, detached, or mold-infested.
Prompt repairs prevent moisture intrusion and extend overall finish longevity.
Common Mistakes and How to Avoid Them
Common errors include overgrouting, underfilling, and incorrect caulking at joints, each of which compromises appearance and waterproofing.
Choosing the wrong grout type or working in too-hot, too-cold, or overly-humid conditions often causes adhesion and curing failures.
Simple remedies—removing excess grout, properly packing joints, switching to the correct product, and redoing failed sections after proper surface prep—can correct most problems.
Overgrouting, underfilling, and improper caulking
Overapplying grout, leaving gaps, or using the wrong caulk are frequent errors that shorten the repair’s lifespan and invite leaks or mold.
Technicians should apply grout flush with joints, remove excess to prevent cracking, and fully fill voids to eliminate water channels.
For edges, use a flexible, mildew-resistant silicone caulk and smooth beads for a continuous, watertight seal that accommodates movement.
Using the wrong grout type or applying in poor conditions
Multiple mistakes stem from choosing an inappropriate grout type or working in unsuitable conditions, both of which compromise adhesion, cure, and durability.
Using non-waterproof or sanded grout on shower seams, applying in high humidity or cold, and neglecting substrate preparation lead to cracking, staining, and mold.
Selecting the correct grout, following temperature/humidity guidelines, and ensuring clean, dry surfaces prevents premature failure.
How to fix common regrouting errors
Identify the problem quickly and choose the appropriate repair method based on the failure mode—cracked grout, loose joints, staining, or mold—since each requires a different approach.
For cracks, remove damaged grout and repoint with matching grout.
For loose joints, reseal or regrout after drying.
For stains or mold, clean with suitable remover, rinse, dry, then apply grout sealer to prevent recurrence.
Time, Cost, and When to Hire a Professional
Typical DIY regrouting takes a few hours to a full day depending on surface area and drying times.
Material and tool costs are generally modest—grout, sealant, a grout saw or scraper, and basic applicators—but can rise if specialty products or replacement tiles are needed.
If extensive damage, mold infiltration, persistent leaks, or uncertain waterproofing are present, a professional should be hired and the homeowner can expect inspection fees and higher labor costs.
Typical time estimates for DIY regrouting
A straightforward DIY regrouting job for a standard bathtub surround usually takes between 2 and 6 hours, depending on area size, old grout removal difficulty, and curing times for chosen products.
Removing old grout can consume most time; prepping, masking, and grout application are faster.
Allow additional hours for drying before light use.
Complex patterns, severe mold, or tile damage extend timelines and may warrant professional help.
Cost breakdown for materials and tools
With time estimates established, attention turns to the money and tools required to complete a regrouting job. Typical DIY costs: grout and sealant $10–30, tools $15–50, cleaning supplies $5–15, optional tile adhesive $10–25. Total budget: $40–120 depending on quality and scope.
| Item | Typical Cost |
|---|---|
| Grout & sealant | $10–30 |
| Tools kit | $15–50 |
| Cleaners | $5–15 |
| Adhesive | $10–25 |
| Total | $40–120 |
Signs you should call a professional and what to expect
Recognize when a regrouting task exceeds DIY scope: persistent mold that returns after cleaning, crumbly or missing grout over large areas, bowed or loose tiles, recurring leaks, or visible water damage behind walls all indicate professional intervention.
A contractor evaluates damage, estimates time (often 4–12 hours) and cost ($200–$1,200+), performs waterproofing, repairs substrate, and provides warranty; expect permit needs for major work.
Quick Troubleshooting Guide
A quick troubleshooting guide highlights common problems that can arise after regrouting a tub and how to address them.
It covers persistent mold resistant to cleaning, grout that cracks or shrinks prematurely, and adhesion failures that can expose or damage tile edges.
Each issue will be paired with concise causes and practical remedies to restore a durable seal.
Persistent mold after regrouting
If mold returns after regrouting, the likely causes are residual spores, trapped moisture, improper grout or sealant choice, or failing substrate conditions.
Inspect for hidden leaks, damaged backing, or porous grout. Remove affected material, clean with appropriate biocide, allow full drying, and install mildew-resistant grout and sealant.
Improve ventilation and monitor moisture to prevent recurrence; consult a pro if structural issues persist.
Cracking or shrinking grout
Check for common causes when grout cracks or shrinks: rapid drying, improper mix ratio, movement in the substrate, or using the wrong grout type for the joint width.
Inspect joints for voids, hairline fractures, and loose particles.
Remove failed grout, clean and dry the area, then choose appropriate cement or epoxy grout.
Allow proper cure time and control drying conditions to prevent recurrence.
Adhesion failures and tile edge damage
When grout fails due to cracking or shrinkage, nearby adhesion problems and tile edge damage often follow. This section outlines quick identification and fixes for loose tiles, delaminated edges, and adhesive residue that compromises new grout.
Inspect for hollow sounds, gaps, and crumbling edges. Remove old adhesive, clean surfaces, reapply thinset or epoxy, clamp tiles if needed, then regrout and seal.
Step-by-Step Quick Checklist for Regrouting a Tub
A concise checklist guides the regrouting process from start to finish, ensuring nothing is missed.
- Pre-job preparation checklist
- Removal and application checklist
- Post-job inspection checklist
Following this outline helps maintain efficiency and achieve a clean, durable finish.
Pre-job preparation checklist
Prepare all tools, materials, and safety gear before starting to confirm the regrouting process proceeds smoothly and without interruptions.
Inspect grout lines, tiles, and surrounding caulk for damage.
Clear the work area and protect surfaces with drop cloths.
Ascertain ventilation and lighting.
Gather grout, sealant, applicators, joint tools, scrub brushes, vacuum, scraper, bucket, sponge, gloves, and safety glasses.
Removal and application checklist
Begin by removing old grout and damaged caulk. Then proceed through a strict sequence of cleaning, drying, and applying new grout to guarantee durable, even joints.
Use grout saw, vacuum, and mildew cleaner. Rinse and dry thoroughly.
Mix grout to manufacturer specs, apply with float, force into joints, wipe excess with a damp sponge. Allow cure time and seal joints if recommended.
Post-job inspection checklist
After grout and sealant have fully cured, the technician inspects joints, tiles, and surrounding fixtures to confirm adhesion, uniform finish, and watertightness.
They check for voids, cracks, color inconsistencies, excess grout, and smooth tool lines. Fixtures and grout lines are tested with a controlled water run for leaks.
Photos document results; client receives care instructions and warranty details.
Conclusion
Regrouting a tub transforms tired, moldy seams into pristine, watertight joints, restoring both function and appearance. When performed with proper prep, the right grout and caulk, and patient technique, it prevents leaks and saves costly repairs. Although modest in scope, the task demands attention to detail—one false move invites future problems. For anyone willing to follow steps carefully, the result is gloriously durable and invigoratingly clean, almost miraculous for a weekend project.
