How to Use a Sprinkler Valve Key: Step-by-Step Guide for Quick Repairs and Maintenance
A sprinkler valve key is essential for quickly locating and operating underground irrigation valves during repairs and maintenance. To use it effectively, follow these steps: first, identify the correct zone and relieve the system pressure. Next, position the T-shaped key securely on the valve nut. Turn it clockwise to close and counterclockwise to open, applying steady force in small increments while checking for leaks. Always wear gloves, inspect the valve for damage, and ensure nearby valves are labeled for easy identification. For further guidance, consult detailed steps, troubleshooting tips, and safety precautions.
What a sprinkler valve key is and when you need one
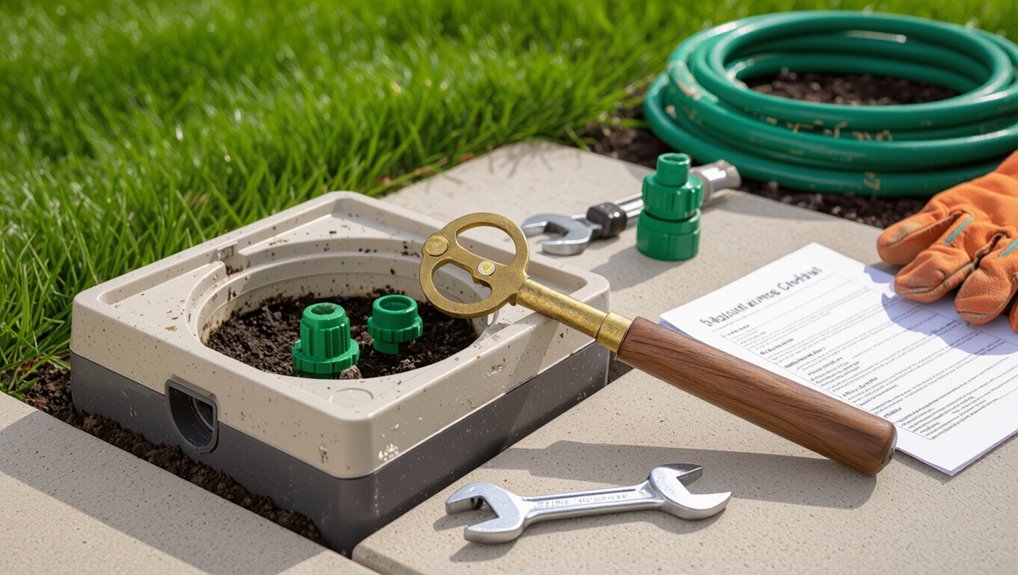
A sprinkler valve key is a T‑shaped or socket-style tool used to operate underground irrigation shutoff and control valves, with variations sized for common residential and commercial valve stems.
It is required for tasks such as repairs, routine maintenance, and winterization when valves are inaccessible by hand.
Before use, the operator should confirm the correct water shutoff location and follow safety precautions to prevent accidental flooding or injury.
Definition and common types of sprinkler valve keys
Sprinkler valve keys are simple hand tools designed to reach and operate buried irrigation control valves without digging. They typically consist of a long shaft with a T- or L-shaped handle and a removable socket or crossbar that fits valve stems.
Common types include straight keys, telescoping keys, and multi-head keys.
Instructions on how to use sprinkler valve key vary by model but remain straightforward.
Scenarios that require a valve key (repairs, maintenance, winterization)
While the previous section described what valve keys look like and the common styles available, this paragraph outlines when one is actually needed.
Technicians and homeowners use a valve key to access buried irrigation valves for repairs, routine maintenance like inspection and diaphragm replacement, isolating zones for component swaps, and winterization tasks such as draining or closing valves before freeze conditions.
It speeds buried-valve access.
Safety and water shutoff considerations before use
Before using a valve key, confirm which valve controls the desired zone and shut off any upstream water sources to prevent unexpected flow or pressure surges.
Inspect the area for electrical hazards, mark buried lines, and wear gloves and eye protection.
Verify system pressure is relieved by opening a manual drain or bleed port.
Keep bystanders clear and have shutoff area labeled for future access.
Tools and materials to gather before starting
Before beginning work, the article outlines recommended valve key styles and sizes to match common valve stems.
It also lists complementary tools—adjustable wrench, screwdriver, spare seals or diaphragms, and work gloves—that simplify removal and repair.
Finally, it notes necessary personal protective equipment and simple site prep such as shutting off water and clearing vegetation.
Recommended valve key styles and sizes
A sturdy, correctly sized valve key is essential for safely operating irrigation shutoff and control valves. Professionals typically choose between T-handle, L-handle, and adjustable socket styles depending on valve depth and access.
Selection criteria focus on reach, torque, and socket fit.
Common options:
- T-handle for shallow, high-torque access
- L-handle for compact spaces
- Adjustable socket for multiple sizes
- Telescoping shafts for deep boxes
- Insulated grips for wet conditions
Complementary tools (adjustable wrench, screwdriver, replacement parts, gloves)
After selecting a valve key suited to the box depth and socket size, the operator should assemble a small kit of complementary tools and parts to handle common adjustments and repairs.
Include an adjustable wrench for packing nuts, a flathead and Phillips screwdriver for solenoids and clamps, spare diaphragm and O-rings, Teflon tape, small pliers, and a pair of durable work gloves for grip and cleanliness.
Personal protective equipment and site preparation
Gather necessary personal protective equipment and prepare the site to confirm safe, efficient valve work: durable work gloves, safety glasses, steel-toe or sturdy boots, and hearing protection if power tools will be used, plus a high-visibility vest where traffic or landscaping equipment is present.
Inspect the area for trip hazards, locate the irrigation shutoff, mark buried utilities, clear vegetation, set tool layout, and guarantee good lighting.
Locating and identifying the sprinkler valve
The reader should first locate valves by checking common spots such as underground valve boxes near the controller, manifold clusters along property lines, and individual control valves near sprinkler heads.
Next, they should identify valve types and stem shapes to confirm compatibility with the sprinkler valve key.
Before operating any valve, a quick visual checklist—clear access, no visible damage, and valves fully exposed—helps prevent injury or equipment damage.
How to find valves in common irrigation systems (box locations, manifolds, control valves)
When locating sprinkler valves, technicians first check common access points: valve boxes near the house or property perimeter, valve manifolds mounted to walls or fences, and the irrigation controller’s wiring hub.
They probe box lids, remove debris, inspect manifold fittings for labeled zones, trace mainlines from the controller, and follow wiring to exposed control valves.
Mapping and photographing placements aids future access.
How to identify valve types and stems that match your key
While inspecting a valve cluster, a technician must first visually identify valve bodies and stem types to guarantee the sprinkler valve key fits correctly.
Determine whether valves are plastic, brass, or stainless, note stem head shapes (square, slotted, hex, slotted pear), and measure stem size if uncertain.
Match key sockets to stem profiles and length to reach operating mechanisms without forcing connections.
Visual inspection checklist before operating the valve
Having confirmed valve body and stem compatibility, the technician should perform a focused visual inspection to locate and identify the valve before operating it.
Check for visible damage, obstructions, and correct labeling. Note orientation and nearby controls. Verify access and safety hazards.
- damaged housing
- debris or vegetation
- missing or incorrect labels
- nearby electrical or piping
- accessibility and clearance
Step-by-step procedure to turn a sprinkler valve with a key
The procedure begins with proper placement of the key and using steady body mechanics to apply controlled force.
When closing the valve, the operator turns in the designated direction at a measured speed and addresses any resistance with short back-and-forth adjustments or lubrication as needed; opening requires gradual rotation while observing for leaks.
Finally, the operator confirms correct operation by cycling the valve and checking system response and zone performance.
Positioning the key and body mechanics for easy turning
A single, deliberate approach guarantees efficient use of the sprinkler valve key: position the key squarely over the valve nut, feet shoulder-width apart, and align the body so the arms can turn using torso rotation rather than relying solely on wrist strength.
Kneel or squat as needed to lower the center of gravity, grip firmly, keep elbows close, and pivot from hips for controlled, sustained leverage.
Turning the valve off: direction, speed, and troubleshooting resistance
With the key positioned and the body aligned for torso-driven turning, the operator should rotate the valve key clockwise to close the valve, using steady, controlled pressure rather than rapid jerks.
If resistance is met, pause, reposition feet for leverage, confirm alignment, and try again.
For stubborn valves, apply penetrating lubricant at the stem and tap gently to loosen before retrying with cautious force.
Turning the valve on: gradual opening and checking for leaks
Begin by placing the key squarely on the valve stem and orienting the body so turning uses steady torso rotation; then rotate the key counterclockwise slowly to open the valve just a fraction at first.
Allow pressure to stabilize, inspect the box and visible fittings for leaks, and continue opening in small increments until full flow is achieved or a leak is detected.
If a leak appears, stop and tighten or isolate.
Confirming correct valve operation and system response
Verify operation and system response by observing the valve and downstream components as flow is introduced incrementally.
The operator watches for steady poppet movement, consistent pressure, full station activation, no hissing leaks, and prompt shutoff when closed.
If anomalies appear, stop and troubleshoot seals, solenoid, or supply.
- steady poppet movement
- consistent pressure
- full station activation
- no hissing leaks
- prompt shutoff
Common problems and how to fix them
Common issues include stuck or seized valve stems that require careful loosening, broken or stripped valve keys and stems that may need temporary field fixes, and leaks that appear after operation.
Guidance should cover safe methods to free a seized stem, quick repairs or workarounds for damaged parts, and basic leak diagnostics with repair options.
Recommendations must also clarify when a full valve replacement is preferable to continued field repairs.
Stuck or seized valve stems and safe ways to loosen them
A stuck or seized sprinkler valve stem is usually the result of mineral buildup, corrosion, or prolonged disuse that prevents the stem from turning smoothly.
Addressing it promptly restores flow control and prevents damage to the valve assembly.
To loosen, shut water, apply penetrating oil, wait, use a proper valve key with steady pressure, tap gently to break corrosion, then cycle slowly.
Broken valve key, stripped stem, or damaged valve parts and temporary fixes
When a valve key breaks, a stem is stripped, or internal parts show damage, temporary measures can restore control long enough to arrange proper repairs or replacements.
Use pliers or locking grips to turn a broken key stub; wrap a rag for grip and to protect plastic.
For stripped stems, try a rubber sleeve or hose clamp for purchase.
Shut main supply if temporary fixes fail.
Leaks after operation: diagnostics and repair options
Inspecting leaks after sprinkler operation begins with identifying where water appears and when it runs: at the valve box, along the lateral line, around fittings, or from the valve bonnet.
Next, isolate the zone and observe pressure drop, feel for wet soil, and check for loose clamps or cracked pipes.
Tighten fittings, replace seals or diaphragms, and reseat bonnets; retest for persistence.
When to replace the valve vs. perform field repairs
Deciding whether to replace a sprinkler valve or attempt field repairs hinges on the nature, severity, and recurrence of the problem: minor seal failures, debris-clogged ports, or simple solenoid issues are often repairable on-site, while cracked bodies, corroded internal surfaces, repeated diaphragm tears, or valves that fail electrically despite correct wiring typically warrant replacement.
| Repairable | Replace |
|---|---|
| Seals | Cracked body |
| Debris | Corrosion |
| Solenoid | Repeated tears |
| Short-term fix | Electrical failure |
Routine maintenance using a valve key
Routine maintenance with a valve key includes seasonal tasks such as spring activation and winterization, presented in clear step sequences for safe operation.
Regular lubrication, debris removal, and minor adjustments extend valve life and prevent leaks.
Technicians are advised to label valves and keep an updated system map to simplify future service and troubleshooting.
Seasonal tasks (spring activation, winterization) with step sequence
Each spring and before the first freeze in autumn, a homeowner or technician should use a sprinkler valve key to perform seasonal activation and winterization tasks that protect the irrigation system and guarantee reliable operation.
This includes opening main shutoff valves, cycling individual zone valves to verify function, and closing or draining valves and backflow devices as required.
- Open main valve slowly
- Cycle and inspect zones
- Check for leaks
- Drain low points
- Secure backflow assembly
Lubrication, cleaning, and minor adjustments to prolong valve life
Perform regular lubrication, cleaning, and small adjustments with a valve key to keep sprinkler valves operating smoothly and extend their service life.
Inspect bonnet screws and solenoid threads, remove debris, and apply manufacturer-recommended lubricant sparingly to O-rings and moving parts.
Tighten loose fittings, realign diaphragms, and test for leaks.
Repeat seasonally or after heavy use to prevent corrosion and premature failure.
Record-keeping tips: labeling valves and maintaining a system map
Record-keeping is essential for efficient long-term sprinkler maintenance: clearly labeled valves and an up-to-date system map save time during seasonal checks and when using a valve key.
Labels should indicate zone, valve number, and install date.
Maintain a digital and printed map showing valve locations, controller zones, and pipe runs.
Update entries after repairs, parts replacement, or layout changes for quick diagnostics.
Choosing and buying the right valve key
When selecting a sprinkler valve key, the buyer should consider size and material—steel or brass for durability, or lighter composite for occasional use.
Useful features include telescoping shafts, ergonomic handles, and universal heads that fit multiple valve types.
Price varies by quality and purpose, with affordable homeowner models from reputable brands and heavier-duty professional models for frequent service.
Size and material considerations (steel, brass, composite)
Size and material are the two practical factors that determine a valve key’s fit, durability, and ease of use.
Sizes must match valve nut dimensions and reach depths; common lengths suit residential lines.
Steel offers strength and affordability but can corrode.
Brass resists corrosion and fits snugly; composites are lightweight and corrosion-proof but less robust.
Choose based on local conditions and expected workload.
Features to look for: telescoping shafts, ergonomic handles, universal heads
Practical features can greatly affect a valve key’s usability and longevity: telescoping shafts provide adjustable reach for varying bury depths, ergonomic handles reduce wrist strain during repeated turns, and universal heads increase compatibility with different valve nut profiles.
Consider durability and ease of use when selecting features:
- Telescoping length settings
- Comfortable grip material
- Universal head fitment
- Locking mechanisms
- Corrosion-resistant finish
Price ranges and recommended brands/models for homeowners vs. professionals
Budget considerations play a key role in selecting a valve key, with homeowner needs typically met by affordable, entry- to mid-level models while professionals often require heavy-duty, higher-priced tools built for frequent use.
Homeowner picks: Orbit, Rain Bird basic keys ($10–$30).
Pros: K-Rain, Melnor, Greenlee commercial-grade keys ($40–$120+).
Consider warranty, materials, and replaceable heads.
Safety precautions and best practices
Before operating a sprinkler valve key, the user should consider measures to prevent water hammer and manage system pressure to avoid pipe or component damage.
Attention to personal safety and protection of landscaping—using proper posture, gloves, and avoiding sharp edges—reduces injury and plant disturbance.
If system faults, stubborn valves, or complex pressure issues arise, a licensed irrigation technician should be contacted.
Preventing water hammer and pressure issues when operating valves
When operating sprinkler valves, taking steps to prevent water hammer and manage pressure protects both the irrigation system and nearby plumbing fixtures.
Inspect slow-closing valves or install water hammer arrestors. Open valves gradually to avoid sudden pressure spikes. Relieve trapped air before full flow, and monitor system pressure with a gauge.
Use pressure-reducing valves where mains pressure exceeds system ratings.
Avoiding injury and protecting landscaping while working
After addressing pressure control and water hammer, attention turns to physical safety and plant protection while working with sprinkler valve keys.
The operator wears gloves, eye protection, and sturdy footwear, clears trip hazards, and lifts with proper technique.
Turf and flowerbeds are shielded using boards or mats; exposed roots and irrigation components are handled gently to prevent damage and avoid costly repairs.
When to call a professional irrigation technician
Why call a professional irrigation technician?
Complex leaks, damaged mainlines, recurring valve failures, electrical controller issues, or uncertain diagnostics warrant expert intervention.
Professionals guarantee safe shutoffs, correct parts selection, and system-wide testing.
Call also when trenching, backflow concerns, or warranty preservation is involved.
Timely professional service prevents landscape damage, reduces long-term costs, and guarantees regulatory compliance.
Quick troubleshooting checklist for field repairs
When a zone fails to run, the technician first verifies the controller settings, checks the valve with the sprinkler valve key, and inspects for obvious blockages or closed isolation valves.
If a full repair is not immediately possible, simple temporary fixes—such as manually opening the valve, replacing a blown fuse, or clearing debris—can restore watering.
Persistent low pressure, multiple nonresponsive zones, or visible pipe damage signal more extensive system issues requiring thorough repair.
Immediate steps for a non-working zone
Start by isolating the affected zone and performing a rapid visual and manual check: confirm the controller is calling the zone, inspect the valve box for visible damage or standing water, verify the solenoid is tight and free of debris, and exercize the manual bleed or lever to determine whether the issue is electrical or hydraulic.
Next, test continuity at the solenoid, check fuse/transformer output, and note valve response.
Fast fixes to restore watering until a full repair can be done
Apply quick, targeted fixes to restore immediate watering while documenting issues for a full repair.
The technician assesses valves, clears debris, and notes leak locations. Perform quick actions to resume flow and record details for follow-up.
- Open valve manually with key
- Clear visible debris
- Tighten loose fittings
- Replace damaged solenoid temporarily
- Isolate leaking section for later repair
Signs that indicate more extensive system damage
Several clear indicators point to damage beyond a quick field fix: persistent low or no pressure across multiple zones, repeated leaks after temporary isolation, water pooling or erosion near mainlines, nonresponsive or short-cycling controllers and solenoids, and visible pipe fractures or joint separation.
Technician should document symptoms, avoid temporary band-aids, shut off mains if needed, and schedule professional diagnostics and trenching for repairs.
Conclusion
A sprinkler valve key proves indispensable for swift, effective irrigation repairs and upkeep. When used correctly, it grants precise control over underground valves, saving time and preventing water waste. Regular inspections and proper tool selection extend valve life, while simple troubleshooting resolves most common issues. Like a reliable compass guiding fieldwork, the valve key directs maintenance toward efficiency and longevity—ensuring systems run smoothly with minimal disruption and less chance of costly failures.