How to Use Delta Faucets Repair Kits: Step-by-Step Guide for Quick Fixes
To quickly fix common Delta faucet issues like drips, low flow, or loose handles, follow this step-by-step guide using a repair kit specific to your faucet model. Start by shutting off the water supply and relieving any pressure. Next, remove the handle and cartridge, then inspect and clean the components. Replace any worn O-rings, seats, springs, or the cartridge as needed. Reassemble the faucet, test for leaks, and adjust alignment if necessary. If issues continue, explore replacement options or check your warranty. This guide will help you effectively identify and troubleshoot problems with your Delta faucet.
What Delta Faucet Repair Kits Fix and When to Use Them
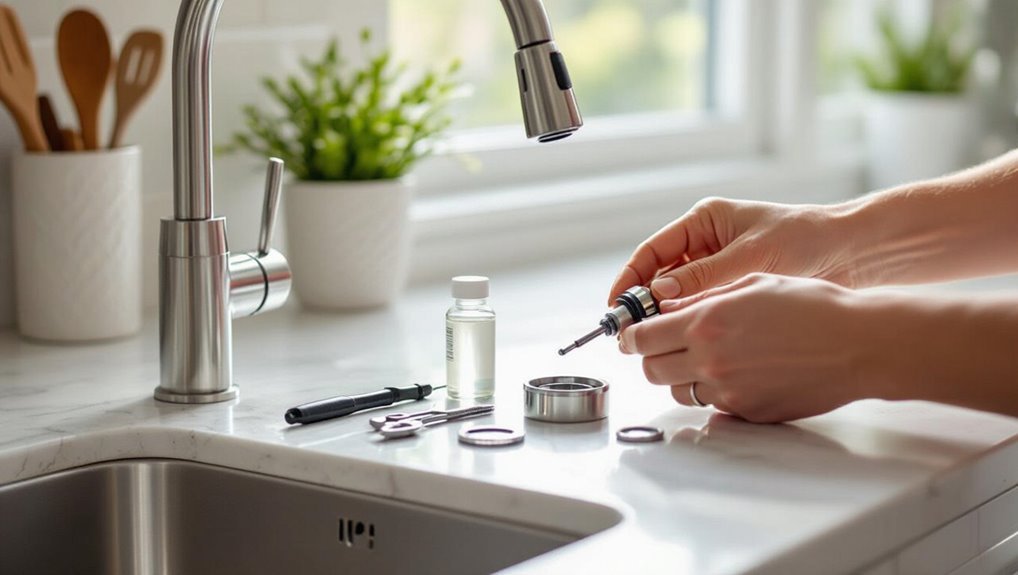
Delta repair kits commonly address leaks, drips, worn seals, and malfunctioning cartridges or aerators.
Homeowners can determine if a kit is appropriate by matching symptoms to kit contents, inspecting part condition, and confirming whether disassembly reveals replaceable components.
Compatibility depends on the faucet model and part numbers, so verifying the model series and cross-referencing Delta’s parts list guarantees the correct kit is selected.
Common faucet problems addressed by Delta repair kits
Several common issues with kitchen and bathroom faucets can be resolved using Delta repair kits, making them a practical first step before replacing fixtures.
These kits address drip and leak repair, worn seals and O-rings, cartridge-related flow problems, loose handles, and minor spray diverter faults.
Instructions on how to use delta faucets repair kits guide appropriate part replacement and basic adjustments.
How to identify if a repair kit is the correct solution for your faucet
When should a repair kit be chosen over a full faucet replacement? A repair kit is appropriate when issues are isolated—dripping, low flow from sediment, worn seals, or a faulty cartridge—while body, finish, and valve structure remain intact.
Choose repair when parts are available, cost and downtime are low, and troubleshooting confirms component-level failure rather than systemic corrosion or extensive damage.
Compatibility: Models and parts covered by Delta repair kits
Compatibility between repair kits and faucet models hinges on matching the kit’s components to the faucet’s specific cartridge, valve body, and handle type.
Delta kits typically cover common cartridge styles and O-rings across tubs, showers, and sinks.
Check model number against kit description and parts diagram.
- Cartridge replacements
- Valve seats and springs
- Handles and trim seals
Quick Checklist Before You Start a Repair
Before beginning a Delta faucet repair, the technician verifies that all required tools and replacement parts are on hand.
They confirm safety measures, shut off the water supply, and relieve pressure before disassembly.
They also record the faucet model and part numbers to guarantee proper kit compatibility.
Tools and materials needed
A concise set of tools and materials guarantees a smooth Delta faucet repair and prevents mid-job delays.
Essential items include the specific Delta repair kit, adjustable wrench, Phillips and flathead screwdrivers, needle-nose pliers, hex/Allen keys, plumber’s grease, replacement O-rings and cartridges, plumber’s tape, and clean rags.
A small container for parts and a flashlight complete the checklist.
Safety precautions and water shutoff steps
With tools and parts assembled, attention turns to safety and shutting off the water to prevent injury and damage.
The person should wear gloves and eye protection, clear the work area, and place a towel or bucket under the sink.
Locate and close the local shutoff valves; if absent, shut off the main supply.
Verify water is off by opening the faucet.
How to document your faucet model and part numbers
How should the faucet be identified before parts are ordered? The technician records brand, model number (usually under sink or on original paperwork), finish, and trim style.
Photograph the entire faucet, cartridge area, and any stamped codes. Measure spout reach and handle orientation.
Note supply line types and valve connection sizes. Keep a checklist of observed part numbers and images for ordering accuracy.
Step-by-Step Guide: Using a Delta Faucet Repair Kit
The guide begins by instructing how to shut off the water and prepare a clean workspace before any disassembly.
It then outlines removing the handle, trim, and cartridge, inspecting and cleaning internal parts, and replacing O-rings, seats, springs, and cartridges supplied in the kit.
Finally, it covers reassembly and a leak test to confirm a successful repair.
Turning off water supply and preparing the workspace
Shut off the faucet’s water supply and clear the work area before disassembly.
Verify both hot and cold shutoff valves are fully closed; if none under the sink, turn off the main.
Open the faucet to relieve pressure and drain remaining water.
Lay out tools, repair kit parts, and a towel to catch drips.
Confirm adequate lighting and protective gloves are available.
Disassembling the faucet: handle, trim, and cartridge removal
Begin by removing visible decorative elements and fasteners to access the handle assembly.
The technician loosens set screws, lifts off the handle, and removes trim pieces. Retaining clips and escutcheons are carefully extracted.
For single-handle models, the cartridge retaining nut is unthreaded and the cartridge pulled straight out; for two-handle units, hot and cold cartridges are removed similarly, noting orientation for reassembly.
Inspecting and cleaning internal components before installation
Inspect components visually and by touch to identify mineral buildup, worn seals, deformed O-rings, and damaged valve seats before installing parts from the repair kit.
Remove scale and debris with vinegar or a mild descaler, soft brushes, and lint-free cloths.
Inspect springs, retaining clips, and housing surfaces for corrosion or pitting.
Dry thoroughly and apply appropriate lubricant to moving surfaces before reassembly.
Replacing O-rings, seats, springs, and cartridges using the kit
Carefully follow the repair kit’s instructions and the manufacturer’s diagram to replace O-rings, seats, springs, and cartridges in a Delta faucet; accurate part identification, correct tool selection, and methodical steps prevent leaks and guarantee smooth operation.
Remove worn parts, note orientation, lubricate new O-rings with plumber’s grease, seat new springs properly, and install the cartridge ensuring alignment before securing retaining clips and screws.
Reassembling the faucet and testing for leaks
With the internal components correctly seated and lubricated, reassembly proceeds in reverse order of disassembly: align the cartridge, reinstall retaining clips or screws, replace the bonnet or escutcheon, and secure the handle assembly before restoring water flow.
Close access panels, reopen supply valves slowly, check for drips at connections and the cartridge area, tighten fittings as needed, and observe under running water for any leaks.
Post-repair adjustments for smooth operation
Once the faucet has been reassembled and water restored, small adjustments guarantee smooth, long-lasting operation.
The technician checks handle alignment, cartridge seating, and lever tension, making minor turns to mounting nuts and set screws.
Aerator and spray hose are inspected for flow and debris.
Final tests include full-range handle movement, gradual shutoff, and leak recheck to confirm proper function.
Visual Reference and Part Identification
The section explains how to interpret the diagrams and part labels included in Delta repair kits to match kit components with faucet assemblies.
It also outlines simple visual and tactile cues—such as wear patterns, deformation, and loss of elasticity—that distinguish worn parts from those still serviceable.
Clear identification prevents unnecessary replacements and guarantees correct reassembly.
How to read diagrams and labels in Delta repair kits
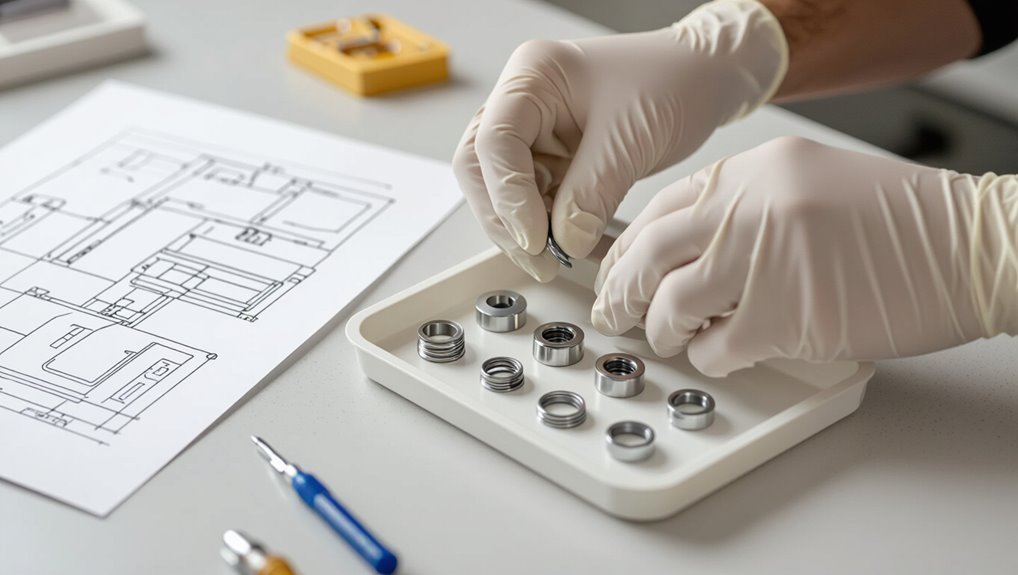
How does one quickly interpret the diagrams and labels included in Delta repair kits to identify parts and placement?
The guide directs users to match numbered callouts with parts list, note orientation arrows, and follow scale indicators.
Symbols denote fasteners, seals, and flow direction.
Cross-reference part codes with package contents and assembly steps to confirm correct positioning before installation.
Identifying worn parts versus parts that are still usable
Having matched diagram callouts to physical pieces and confirmed orientation, attention shifts to distinguishing components that require replacement from those that remain serviceable.
Inspection focuses on visible wear, deformation, and leaks. Use tactile checks and fit-testing to verify tolerances.
- Replace cracked, torn, or eroded seals and O-rings.
- Replace corroded cartridges or springs.
- Retain intact, dimensionally accurate metal parts.
Troubleshooting After Installation
After installation, the guide outlines steps to verify and correct any remaining leaks, including rechecking seals and tightening fittings.
It then covers troubleshooting for low or inconsistent water flow by inspecting aerators, supply valves, and cartridge seating.
Finally, the section explains solutions for noisy or stiff handles such as lubrication, cartridge adjustment, or part replacement.
What to do if the faucet still leaks
If a Delta faucet still leaks following a repair kit installation, begin troubleshooting by isolating the leak’s location and retracing each installation step to confirm parts are seated and tightened correctly.
Check O-rings and seals for tears, guarantee cartridges and seats align, and verify retaining clips and springs are installed.
If visible damage or wear persists, replace the defective component or consult manufacturer support before reassembly.
Addressing low water pressure or inconsistent flow
Low water pressure or uneven flow after installing a Delta repair kit signals a blockage, misaligned component, or supply issue that requires systematic troubleshooting.
Inspect aerator and screen for debris and clean or replace.
Verify cartridge seating and O-rings for correct alignment.
Check shutoff valves and supply lines for partial closure or kinks.
Test both hot and cold to isolate source before reassembling.
Handling noisy or stiff handles
Inspect the handle assembly for signs of binding, worn components, or mineral buildup when a handle feels stiff or emits clicking, grinding, or squeaking noises after a repair kit installation.
Remove the handle, clean mineral deposits with vinegar, lubricate moving parts with plumber’s grease, and replace worn springs, retainers, or bushings.
Reassemble and test; repeat if noise or stiffness persists.
When to Replace Instead of Repairing
Signs such as persistent leaks, extensive corrosion, or multiple failing components can indicate that a full faucet replacement is more appropriate than repair.
A comparison of costs and time shows that repair kits are typically cheaper and quicker for isolated issues, while replacement may be more cost-effective long-term when repairs are frequent or complex.
The following section examines these indicators and the practical trade-offs between repairing and replacing.
Signs that indicate a full faucet replacement is needed
When corrosion has advanced, components are repeatedly failing, or the faucet shows structural damage, replacement becomes the more practical choice than continued repairs.
Other clear signs include persistent leaks after multiple fixes, cracked or warped bodies, internal valve fragmentation, chronically low water pressure unrelated to supply, extensive mineral buildup inaccessible to repair kits, and outdated models lacking compatible replacement parts.
Cost and time comparison: repair kit vs. replacement
Although a repair kit can often be cheaper and quicker upfront, the decision between repairing and replacing a Delta faucet hinges on a clear comparison of total costs, time investment, and expected longevity. Repair suits minor leaks and worn seals; replacement is better for extensive corrosion or outdated models. Evaluate parts cost, labor, downtime, warranty, and projected lifespan before deciding.
| Factor | Repair vs Replacement |
|---|---|
| Cost | Lower vs Higher |
| Time | Short vs Longer |
| Longevity | Shorter vs Longer |
| Warranty | Limited vs Extended |
| Complexity | Low vs High |
Tips to Extend the Life of Your Repaired Faucet
After a repair, regular maintenance routines such as inspecting seals, tightening fittings, and cleaning aerators help prevent future leaks.
Attention to water quality—using filters or softeners where needed—and following cartridge care guidelines will prolong component life.
If persistent problems or complex valve issues arise, a professional plumber should be consulted.
Maintenance routines to prevent future leaks
Regular, targeted maintenance greatly reduces the chance of recurrent leaks and preserves the functionality of a repaired Delta faucet.
Routine inspections, timely part replacement, and gentle cleaning prevent wear and buildup.
Recommended actions include:
- Inspect seals and connections monthly for wear or mineral deposits.
- Replace O-rings and seats at first signs of deterioration.
- Clean aerators and exterior surfaces quarterly.
Best practices for water quality and cartridge longevity
When water quality is managed proactively, cartridge wear slows and the repaired Delta faucet performs more reliably over time.
Regular filtration, scale inhibitors, and periodic flushing reduce sediment and mineral buildup. Avoid harsh chemical cleaners; use manufacturer-recommended descalers.
Monitor water hardness and replace inline filters per schedule.
Gentle operating practices—full-range movements without excessive force—also minimize internal abrasion and prolong cartridge service life.
When to seek professional plumbing help
How can a homeowner tell if a repair is sufficient or if a licensed plumber should be called?
If leaks persist, water pressure remains uneven, noises continue, or repairs require repeated intervention, a professional evaluation is warranted.
Significant corrosion, hidden pipe damage, malfunctioning valves, or unclear diagnosis also justify calling a licensed plumber to prevent further damage and guarantee code-compliant, lasting repairs.
Where to Buy Genuine Delta Repair Kits and Warranty Info
The article outlines where genuine Delta repair kits can be purchased, including authorized retailers and reputable online sources.
It also summarizes Delta’s warranty and return policies to help users understand coverage and claim procedures.
Finally, it explains how to verify authentic Delta parts through packaging, model numbers, and retailer credentials.
Authorized retailers and online sources
Several reliable channels supply genuine Delta repair kits, including authorized plumbing distributors, major home improvement chains, and Delta’s official online store.
Accredited retailers list model-compatible kits and offer trained staff guidance. Online marketplaces with seller verification can be acceptable when listings show OEM part numbers.
Purchasing from authorized sources helps guarantee authenticity, proper fit, and access to genuine replacement components and technical documentation.
Understanding Delta warranty and return policies
When purchasing genuine Delta repair kits, buyers should review Delta’s warranty terms and the seller’s return policy to guarantee coverage for defects, compatibility issues, and accidental damage.
Delta typically offers limited lifetime or specified-term warranties on valves and finish; proof of purchase and model information may be required.
Confirm return windows, restocking fees, and whether installation voids coverage before completing a purchase.
How to verify genuine Delta parts
Buyers should confirm authenticity of Delta parts by checking packaging, part numbers, and purchase sources against Delta’s official listings and authorized dealer directories.
Verification steps include:
- Purchase from Delta-authorized dealers or Delta.com and retain receipts.
- Match casting marks, logos, and SKU numbers to official images.
- Register parts for warranty and contact Delta support for serial confirmation before installation.
Conclusion
In short, using a Delta faucet repair kit lets a homeowner tackle dripping, low-flow, or stiff-handle issues without calling a pro. With basic tools and close attention to parts, most fixes are straightforward and restore function quickly. If problems persist, however, it may be time to replace the faucet rather than chase band-aid solutions. When maintained promptly, repaired faucets can last longer—prove the adage that a stitch in time saves nine.