How to Unfreeze Bathtub Drain Fast: Proven DIY Fixes to Restore Flow
When faced with a frozen bathtub drain, quickly restore flow by applying localized heat. Use a hair dryer, warm towels, or hot (not boiling) water to thaw the ice. If accessible, loosen and remove the trap to pour warm water directly into it. For ice-packed traps, a plumbing snake can help break up the blockage. Additionally, warming the room with a space heater can aid the thawing process. Remember to wear gloves and check for leaks as you work. Continue reading for detailed steps and tips to prevent future freezes.
What Causes a Bathtub Drain to Freeze
Frozen bathtub drains typically result from prolonged cold exposure, inadequate insulation, and water left standing in vulnerable sections of pipe.
Pipes located in exterior walls, unheated crawlspaces, or near drafty vents face higher freezing risk than those inside conditioned spaces.
A frozen trap often shows no flow and a hard, ice-blocked feel, whereas a clog usually allows slow drainage and can often be cleared with plunging or snaking.
Common reasons for frozen bathtub drains in cold climates
When outdoor temperatures drop and heat loss occurs within poorly insulated pipes, water remaining in the bathtub drain can freeze and block flow.
Common reasons include stagnant water, cracks or narrow traps, exterior-facing runs, inadequate home heating, and debris that accelerates ice formation.
Awareness of these causes helps guide practical steps on how to unfreeze bathtub drain safely and efficiently.
How pipe location and insulation affect freezing risk
Having outlined common causes like stagnant water and exterior-facing runs, attention turns to how pipe location and insulation determine freezing risk.
Pipes in unheated walls, crawlspaces, attics, or exterior-facing studs face greater exposure. Poorly insulated or uninsulated runs lose heat rapidly, increasing freeze likelihood.
Proper routing toward interior spaces and adding continuous insulation or heat tape reduces vulnerability and maintains flow.
Signs a drain or trap is frozen vs. clogged
How can a homeowner tell whether a sluggish bathtub is due to ice or a simple clog?
Signs of freezing:
- slow drainage after cold nights
- rigid or icy pipes
- no hairball in the strainer
- sudden restoration when warmed.
Signs of clogging:
- persistent localized blockage
- visible debris
- gurgling sounds
- failure to improve with ambient warming.
Fast, Safe Ways to Unfreeze a Bathtub Drain
Before attempting any repair, one must follow basic safety steps such as shutting off water and electricity to the area and wearing protective gloves and eye protection.
Rapid remedies include applying hot water and insulated towels to exposed pipe sections, using a hair dryer or heat gun at safe distances for accessible pipes, or warming the room with a portable space heater or electric blanket.
If heat alone is insufficient, a plumbing snake can be used to mechanically break up ice in the trap while taking precautions to avoid pipe damage.
Immediate safety precautions before attempting fixes
Assess potential hazards around the bathtub and secure the area before attempting any thawing methods.
Confirm power to nearby outlets and bathroom fixtures is off to prevent electrical shocks.
Remove loose rugs and items that could obstruct movement.
Wear insulated gloves and non-slip footwear.
Verify adequate ventilation if chemical deicers might be used.
Keep children and pets away until the drain is safe.
Method 1 Hot water and towels: quick heat application
Apply steady hot water to the frozen section and wrap with towels to concentrate heat and speed thawing.
The towels retain warmth, directing heat toward the pipe and surrounding trap.
Repeat pouring warm water while replacing cooled towels.
Monitor for leaks and avoid boiling water that could damage seals.
This method thaws shallow ice quickly and minimizes tool use when access is limited.
Method 2 Hair dryer or heat gun safely used on accessible pipes
Use a hair dryer or a heat gun to deliver controlled warmth to exposed sections of pipe and the trap, working from the faucet end toward the blockage to melt ice without forcing it deeper.
Maintain safe distance, low heat, and steady motion to prevent pipe damage. Insulate warmed sections with towels as thaw progresses.
Stop if fittings leak or materials overheat; call a plumber.
Method 3 Portable space heater or electric blanket for bathroom warming
After warming accessible pipes with a hair dryer or heat gun, attention can shift to gently raising the ambient temperature in the bathroom to melt ice farther back in the line.
A portable space heater positioned safely away from water or an electric blanket wrapped around exposed drain sections can increase warmth.
Monitor continuously, keep ventilation, avoid leaving devices unattended, and maintain safe distances from fittings and combustibles.
Method 4 Using a plumbing snake to break up ice in the trap
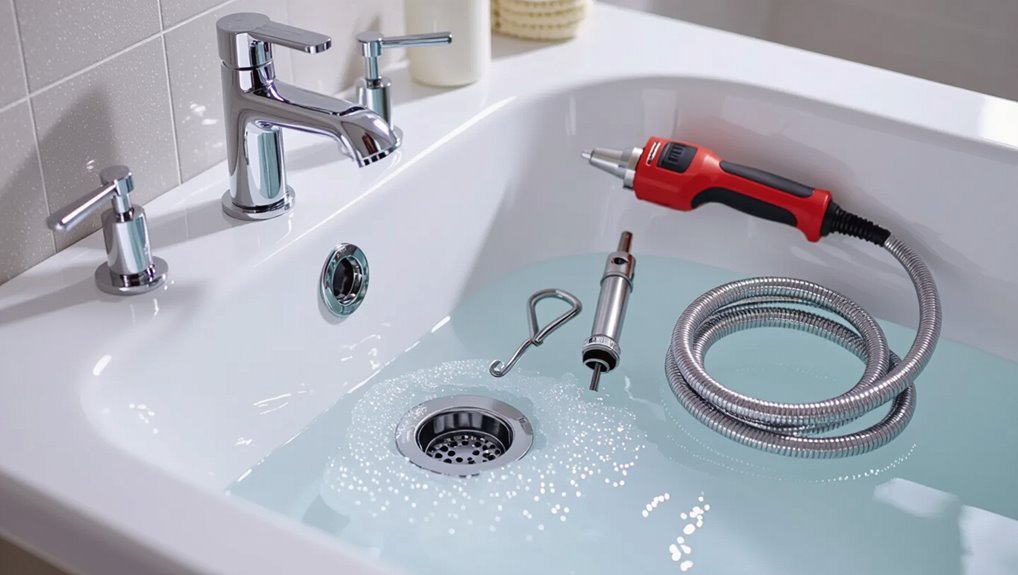
Feed a flexible plumbing snake down the drain until it reaches the P-trap, then rotate and advance it gently to break and retrieve compacted ice without forcing fittings.
Use short strokes, withdraw periodically to clear debris, and protect nearby finishes.
If resistance feels solid or fittings loosen, stop and consider warming or calling a plumber.
Sanitize and dry the snake after use.
Method 5 Applying a chemical-safe de-icer for plumbing (when appropriate)
Apply a commercial, plumbing-safe de-icer formulated for metal and plastic pipes to dissolve ice when mechanical methods are impractical or risky.
The product’s instructions and dosage must be followed precisely. Confirm ventilation, wear gloves and eye protection, and avoid mixing with other chemicals.
Use only de-icers labeled safe for indoor plumbing and septic systems; if thawing fails, contact a professional plumber.
Tools and Materials You’ll Need
A concise list of tools and materials helps guarantee a quick and safe thawing process.
Essential items include a basic toolkit for DIY thawing and recommended protective gear such as gloves and eye protection.
Guidance should also clarify when to employ specialized plumbing tools versus common household items.
Basic toolkit for DIY thawing
Preparation begins with assembling a compact toolkit tailored to thawing a frozen bathtub drain: a hair dryer or heat gun, a pair of insulated gloves, long-handled pliers or a drain snake, a bucket, towels, a screwdriver or small wrench, and optionally a plumber’s auger and a hair clog remover.
Recommended essentials:
- Heat source and tools for dislodging blockages.
- Containers and towels for water containment.
- Small hand tools for access and minor adjustments.
Recommended protective gear and safety equipment
Several essential pieces of protective gear help minimize risk when thawing a frozen bathtub drain: insulated gloves to prevent burns and cold injury, safety goggles to shield eyes from splashes and debris, non-slip footwear to reduce fall risk on wet surfaces, and a heat-resistant apron or long sleeves to protect clothing and skin.
- Inspect gear for damage.
- Wear layered protection.
- Keep a fire extinguisher nearby.
When to use specialized plumbing tools vs. household items
When is it appropriate to reach for specialized plumbing tools instead of improvised household items?
The guide recommends household items for mild clogs or temporary thawing—boiling water, drain snake alternatives, or baking soda and vinegar.
Use specialized tools—drain snake, auger, heat gun, or pipe wrench—when blockages persist, metal parts require manipulation, or risk of damage exists; leave complex cases to professionals.
How to Thaw Different Drain Configurations
Different drain setups call for tailored thawing approaches.
For tubs with an accessible P-trap, attention can focus on the trap and nearby piping.
Wall-mounted or in-floor drains may require access panels or surface heating.
Frozen pipes inside exterior walls typically need cautious, indirect warming and possibly professional intervention to avoid damage.
Unfreezing a drain with an accessible P-trap
One practical option for thawing a frozen bathtub drain is to access and heat the P-trap directly; this approach targets the most likely spot for ice build-up where the horizontal pipe retains cold and standing water.
Turn off water, place a bucket beneath, loosen slip nuts, remove trap, and pour warm (not boiling) water or apply a hair dryer until flow resumes.
Reassemble and check for leaks.
Thawing a wall-mounted or in-floor drain
Many wall-mounted and in-floor bathtub drains require a different approach than P-trap access because their plumbing is concealed behind walls or beneath the floor, making direct removal impossible.
Technicians use localized heat—hair dryers, heat guns on low, or heated mats—combined with safe chemical deicers and mechanical tools like long flexible drain snakes.
Inspect fixtures, protect finishes, and proceed cautiously to avoid wall or floor damage.
Dealing with frozen pipes inside exterior walls
When pipes freeze inside exterior walls, access and heat transfer become the primary challenges, requiring a methodical approach that balances thawing speed with structural care.
Technicians recommend locating the freeze, opening minimal wall sections, and applying controlled heat—portable heaters, heat guns, or warm air via small vents—while monitoring for leaks.
Insulate repaired sections and address exterior drafts to prevent recurrence.
When to Stop and Call a Professional
If thawing efforts produce persistent leaks, unusual noises, or no improvement after repeated attempts, the homeowner should stop and seek professional help.
Licensed plumbers are needed for damaged pipes, frozen traps beyond reach, or signs of sewer line backup.
When contacting a plumber, provide the pipe location, symptoms observed, steps already taken, and any visible damage to expedite diagnosis.
Warning signs you should not continue DIY thawing
How can one tell when a DIY thaw has gone beyond safe limits?
Persistent leaks, worsening water stains, cracking sounds, or sudden loss of heat indicate structural or pipe damage.
If makeshift thawing methods fail after repeated attempts, electrical tools behave erratically, or corrosion and brittle seals appear, stop and seek professional assessment to avoid escalation or hidden hazards.
Plumbing issues that require a licensed plumber
Persistent signs of damage or unsuccessful DIY thawing should prompt consideration of professional help.
A licensed plumber is required for frozen pipes inside walls, persistent leaks, broken or corroded trap or drain assemblies, sewer line backups, or damage from ice expansion.
Complex rerouting, hidden access, and permits for pipe replacement also warrant calling a professional to guarantee safe, code-compliant repair.
What to tell the plumber to speed diagnosis
When calling a plumber, homeowners should provide a concise timeline of symptoms, exact locations of affected fixtures, and any recent work or temperature events that might be relevant.
Also note observed noises, smells, visible leaks, water discoloration, and whether multiple drains or appliances are impacted.
Share previous DIY attempts, access points, and any shutoff valve locations to accelerate diagnosis and accurate repair estimates.
Preventing Future Freezes
Preventing future freezes requires a proactive approach that targets insulation, heating, and routine upkeep.
Recommendations include pipe-wrapping and localized insulation around bathtub plumbing, adjusting home heating and drain-flow practices to keep water moving, and following a seasonal maintenance checklist.
Implementing these measures reduces the likelihood of repeated frozen drains and costly repairs.
Insulation and pipe-wrapping strategies for bathtubs
Several straightforward insulation and pipe-wrapping measures can greatly reduce the risk of bathtub drain freezes by keeping vulnerable pipes warmer and minimizing heat loss.
- Fit foam pipe sleeves on exposed sections, sealing joints with tape.
- Wrap flexible heat tape per manufacturer instructions for intermittent freezing.
- Insulate access panels and cavities with batt or spray foam while maintaining ventilation and service access.
Drain and home heating adjustments to reduce freeze risk
After addressing insulation and pipe-wrapping, attention turns to household heating and drain-specific adjustments that lower freeze risk.
Maintain consistent indoor temperatures, open cabinet doors beneath tubs to circulate warm air, and route heat toward vulnerable plumbing.
Install low-wattage heat tapes or thermostatic cables on exposed drain lines, seal drafts around access panels, and guarantee slow, periodic water flow during extreme cold to prevent freezing.
Seasonal maintenance checklist to avoid frozen drains
A concise seasonal maintenance checklist helps homeowners systematically reduce the risk of frozen bathtub drains by targeting insulation, heating, and routine inspections.
Recommended steps focus on prevention, early detection, and timely repairs.
- Inspect and add pipe insulation, weatherstripping, and heat tape where needed.
- Maintain consistent indoor temperatures and service heating systems annually.
- Clear exterior vents, test drain flow, and schedule professional plumbing checks before winter.
Troubleshooting If Water Still Won’t Drain
If water still drains slowly after thawing, the next step is to distinguish a remaining clog from lingering cold-related restrictions by checking for visible blockages and listening for gurgling or air pockets.
If a clog is suspected, simple measures such as using a plunger, drain snake, or biodegradable enzymatic cleaner can be attempted to clear the line.
After clearing, run a strong flow of warm water and observe for consistent, rapid drainage to confirm full restoration.
How to distinguish remaining clog from residual freeze
Determine whether slow drainage is caused by an actual clog or lingering ice by observing flow behavior and simple tests: a clog typically produces little or no movement despite added heat, gurgling or bubbling sounds, and localized backups.
In contrast, residual freeze often shows gradual improvement as warmer water runs or nearby pipes warm, and may clear after targeted thawing.
Check multiple fixtures, listen for air, and note timing.
Steps to clear a clog after thawing
When slow drainage persists after thawing, the problem may be a physical clog rather than remaining ice; begin troubleshooting by removing visible debris from the stopper or drain opening and then proceed with targeted clearing methods.
Use a plunger, plumbing snake, or wire hook to extract hair and gunk. Flush with hot water and a mild enzymatic cleaner.
Repeat until flow improves.
Testing and verifying full restoration of flow
Begin by running several quick verification checks to confirm the drain is fully restored: fill the tub with a few inches of warm water, release the stopper, and observe the flow rate and time to empty; inspect for slow draining, gurgling, or backflow; then run hot tap water and check downstream fixtures (sink or shower) for signs of shared blockage.
If issues persist, repeat clearing steps, snake the line, or call a plumber.
Cost and Time Estimates for Common Fixes
The section summarizes typical time required for common DIY methods—such as boiling water, chemical deicers, and mechanical snaking—and provides rough estimates for each.
It then compares material costs for those approaches against the average price range for hiring a plumber.
This allows readers to weigh time investment and expense when choosing a solution.
Typical time required for each DIY method
Many common DIY approaches to unfreezing a bathtub drain take between a few minutes and a couple of hours, depending on the method, the severity of the ice blockage, and available tools. Typical times: plunging or hot water 5–20 minutes, hair-snake 10–45 minutes, heat-gun or towels 20–90 minutes.
| Method | Time |
|---|---|
| Plunge/Hot water | 5–20 min |
| Snake/Heat | 10–90 min |
Estimated costs for materials vs. professional service
Although some DIY fixes demand only common household items, comparing material costs to professional service fees helps decide the most cost-effective route.
Typical DIY expenses: $0–$30 for plungers, drain snakes, baking soda, vinegar, and basic tools.
Professional plumbers charge $75–$250+ for service calls; complex repairs increase costs.
Choose DIY for simple clogs, hire pros for persistent or risky problems.
Quick Reference: Do’s and Don’ts for Unfreezing a Bathtub Drain
A concise set of do’s and don’ts helps guarantee safe, effective thawing of a frozen bathtub drain without causing damage or injury. Follow clear steps and avoid shortcuts.
- Do: apply gentle heat (hair dryer), insulate, wear gloves.
- Don’t: use open flame, excessive force, or chemical drain cleaners when frozen.
- Do: call a pro if unsure or leak signs appear.
Conclusion
To sum up, homeowners harness helpful habits: hurriedly heating hoses, handily handling hair, and habitually hosing hidden hollows halt freezing. Calmly checking connections, cautiously choosing correct chemicals, and consistently conferring with capable craftsmen curb complications. Preventive practices—insulation, periodic pipe patting, and proper plumbing planning—promote peace. When stubborn solids solidify or seeping surprises show, stop, summon specialists, and safeguard systems. Reliable routines reduce rerun risks and restore regular runoff with reassuring rapidity.