How to Remove Aerator From Delta Bathroom Faucet: Step-By-Step Guide
To remove a Delta bathroom faucet aerator, first determine if it’s fixed, recessed, or threaded at the spout tip. Begin by protecting the finish with a cloth or tape. If it’s threaded, try turning it counterclockwise by hand. For recessed aerators, use an aerator key; for delicate finishes, opt for a strap wrench, or use tape-wrapped pliers for stuck aerators. If mineral buildup is an issue, apply penetrating oil and let it soak. After removal, inspect, clean, or replace parts as needed, then reinstall by hand-threading and check for leaks. Detailed troubleshooting steps follow.
How to Remove the Aerator from a Delta Bathroom Faucet Quick Overview
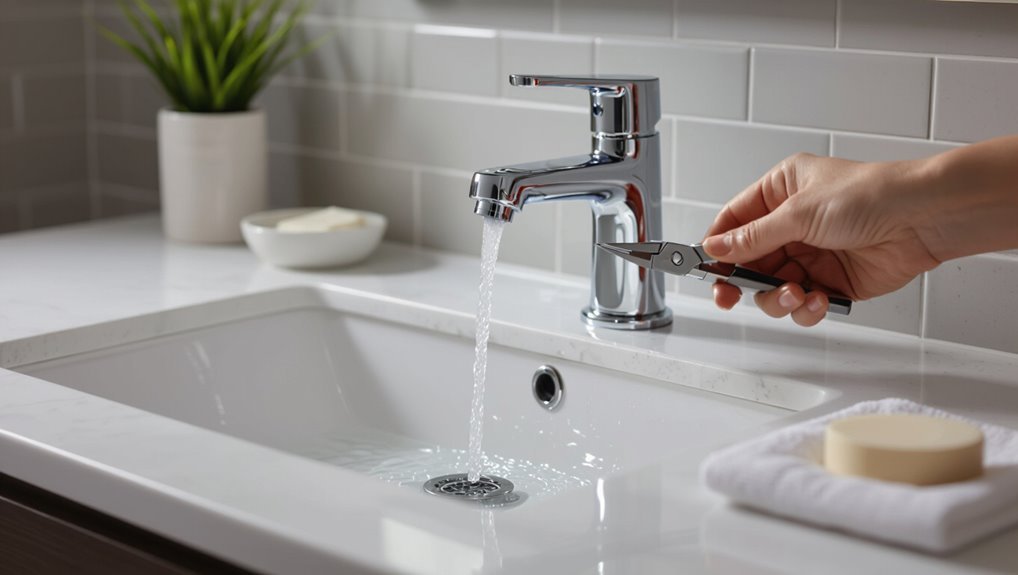
A Delta aerator can typically be removed by turning the aerator housing counterclockwise by hand or with a strap wrench if it is tight.
This task usually takes 5–10 minutes, is easy for a DIYer, and requires only a cloth or strap wrench and possibly pliers with tape.
Protective padding is recommended to avoid scratching the finish.
One-sentence solution for removing a Delta aerator
To remove a Delta aerator quickly, grip the aerator housing with needle-nose pliers wrapped in tape and turn counterclockwise until it loosens, or use the supplied Delta key or a strap wrench to avoid marring the finish.
For those learning how to remove aerator from delta bathroom faucet, this single-sentence method conveys the safest, non-damaging approach when access and parts match.
Estimated time, difficulty level, and tools required
Following the quick method—whether using a Delta key, taped pliers, or a strap wrench—readers can expect the overall job to be short and straightforward.
Typical estimates: 5–15 minutes, easy difficulty for beginners, minimal force required, and no plumbing experience necessary.
- Time: 5–15 minutes
- Difficulty: Easy
- Tools: Delta key or pliers with tape
- Extras: Soft cloth, small container
Identify Your Delta Faucet and Aerator Type
Delta faucets commonly include models like Lahara, Porter, and Vero, with aerators typically seated at the spout tip or just inside the spout opening.
Fixed aerators appear as a flush, non-rotating insert while swivel aerators have a visible joint or seam allowing movement.
Users can usually tell if an aerator is integrated (no removable ring or visible threads) or removable (exposed threads or a retaining ring).
Common Delta faucet models and where the aerator is located
Many Delta bathroom faucets share common designs—single-handle, widespread, and wall-mounted—each with the aerator positioned where the spout meets the outlet: inside a threaded tip on standard spouts, recessed behind a removable cap on higher-end or water-efficient models, or integrated into the cartridge assembly for certain compact or pull-out styles.
Identify model by spout shape, handle count, and presence of a removable tip or cap.
Visual characteristics of fixed vs. swivel aerators
A simple visual check distinguishes fixed from swivel aerators: fixed aerators appear as a smooth, immobile ring at the spout tip with a flat or slightly domed face, while swivel aerators have a visible seam or ball-joint housing that allows the nozzle to pivot and often show a narrower neck or offset connection where the swivel mechanism sits.
Fixed surfaces lack joint gaps; swivels display movement points.
How to tell if your aerator is integrated or removable
How can one determine whether the aerator is integrated or removable by inspecting the faucet’s tip and mounting features?
The observer checks for visible seams, threads, or a snap-ring at the spout end. Exposed threads or a removable ring indicate a detachable aerator.
A smooth, unbroken spout with no access points suggests an integrated, non-removable assembly requiring internal access or professional service.
Tools and Materials You Might Need
A concise list of hand tools and protective items helps prepare for aerator removal, typically including adjustable pliers, an aerator key, a strap wrench, masking tape, and gloves.
The guide explains when to choose pliers (stuck or corroded metal aerators), an aerator key (standard recessed types), or a strap wrench (finished or fragile fixtures).
Recommended replacement aerator sizes and common adapter options are noted so the correct thread and flow-rate match the faucet.
List of hand tools and protective items
Needed hand tools and simple protective items streamline the aerator-removal process and reduce the risk of damage or injury.
Small selection includes basic instruments and safety gear for predictable, controlled work.
- Flathead screwdriver (small)
- Adjustable wrench (soft-jaw recommended)
- Aerator key or socket
- Rubber gloves and cloth for grip and surface protection
When to use pliers vs. an aerator key vs. strap wrench
Determine the best tool by matching the aerator’s design and condition to the grip type: use an aerator key or socket for recessed or OEM-style aerators designed with key slots,
pliers (with cloth or soft jaws) only for exposed, corroded or stubborn aerators where other options can’t engage,
and a strap wrench for fragile chrome finishes or plastic housings that risk marring from metal jaws.
Choose accordingly.
Recommended replacement aerator sizes and adapters
When replacing an aerator, match the thread size, flow rate, and housing type to the faucet to guarantee compatibility and proper performance.
Recommended common sizes: 15/16″-27 (male) and 55/64″-27 (female). Choose 1.0–1.5 gpm for conservation; 2.2 gpm for standard flow.
Use universal adapters when threading differs; select rubber washers for leak prevention.
- Measure threads
- Verify gpm
- Pick housing
- Fit adapter
Step-by-Step Removal Methods
The following section outlines concise, practical methods for removing a bathroom faucet aerator.
It covers hand removal, using an aerator key or brand-specific tool, employing adjustable pliers or a taped wrench to protect the finish, and tactics for stubborn units such as penetrating oil and patience.
It also addresses steps for disassembling faucets with integrated or hidden aerators.
Method 1 Remove aerator by hand (no tools)
Start by feeling the aerator to confirm it is the threaded tip of the faucet and assess whether it can be rotated by hand.
If loose, grip the aerator with a cloth for traction, turn counterclockwise steadily, and avoid twisting the faucet.
If resistant, apply fingertip pressure while alternating gentle back-and-forth turning until it loosens.
Remove and inspect the screen and washer for cleaning or replacement.
Method 2 Use an aerator key or Delta-specific tool
If hand removal fails or the aerator is recessed or sealed too tightly, an aerator key or a Delta-specific removal tool provides a secure, non-damaging grip.
Select the correct key size, insert it into the aerator slots, and turn counterclockwise with steady pressure.
Inspect the aerator seat for debris, clean or replace components as needed, then reassemble by threading the aerator back by hand.
Method 3 Use adjustable pliers or a wrench with tape to protect finish
Grip the aerator housing with adjustable pliers or a wrench wrapped in tape to prevent scratching, applying steady, even pressure while turning counterclockwise.
Maintain a firm, centered grip, avoiding angled force that could deform the housing. If it resists, pause and reposition the tool for better contact.
Once loosened, finish removal by hand, inspecting threads and the screen for debris or damage.
Method 4 For stubborn or stuck aerators: penetrating oil and patience
Apply penetrating oil and allow time for it to work when an aerator refuses to budge.
Spray penetrating lubricant onto threads, let it soak 10–30 minutes, then attempt removal with protected pliers.
Repeat spray-and-wait cycles if necessary. Gently rock the aerator back and forth to break corrosion.
Wipe excess oil, clean threads, and inspect gasket and housing before reinstalling or replacing the aerator.
Method 5 Removing an integrated or hidden aerator (disassembly steps)
For faucets with integrated or hidden aerators, removal requires partial disassembly of the spout or inlet rather than unscrewing a visible cap.
This paragraph outlines the basic approach and cautions before beginning.
Turn off water, remove handle and spout retaining screws, slide spout off, locate aerator assembly, extract with needle-nose pliers or pick, clean or replace, reassemble, test for leaks.
What to Do After Removing the Aerator
After removal, the aerator and its internal parts should be inspected for cracks, mineral buildup, and worn seals.
Components can then be cleaned or descaled, screens and washers replaced if damaged, or the entire aerator swapped out.
Finally, the aerator must be reinstalled correctly and the faucet tested for proper flow and leaks.
Inspecting the aerator and internal parts for damage
Inspect the removed aerator and internal components closely for mineral buildup, worn threads, cracked screens, or damaged O-rings that can impair flow or cause leaks.
Note corrosion on metal parts, distortion of plastic housings, and stripped threads.
Verify screen integrity and seating surfaces for nicks.
Identify missing or flattened washers and confirm whether replacement parts are required before reassembly or continued use.
Cleaning and descaling the aerator components
Begin by separating the aerator parts—screen, flow restrictor, housing, and O-ring—onto a clean towel so each piece can be cleaned individually and examined.
Soak metal components in a vinegar solution to loosen mineral deposits. Gently scrub with a soft brush, rinse thoroughly, and dry.
Inspect for remaining buildup; repeat soaking if necessary. Preserve O-ring integrity; avoid harsh abrasives.
Replacing the screen, washings, or the entire aerator
Replace worn or damaged aerator components promptly to restore proper flow and prevent leaks.
Inspect the screen, rubber washers, and housing for mineral buildup, tears, or corrosion.
Fit matching replacement parts—verify thread size and flow rating match manufacturer specs.
Discard deformed washers and clogged screens.
For severely corroded housings, replace the entire aerator assembly to guarantee reliable operation.
How to reinstall the aerator properly and test for leaks
After replacing worn screens, washers, or the entire aerator housing, the next step is to reassemble and reinstall the aerator so it seals correctly and delivers proper flow.
Hand-thread the aerator into the faucet tip, align threads, then snug with a cloth-wrapped pliers if needed.
Turn water on slowly, inspect for drips, tighten slightly if leaking, and confirm steady, even stream without sputtering.
Troubleshooting Common Problems
If the aerator resists removal despite using tools, the article outlines safe methods to increase grip and apply steady force without damaging the fixture.
It also covers how to handle rounded or stripped aerator edges, steps to restore normal spray patterns after cleaning, and checks for sealing issues that can cause leaks after reinstallation.
Each problem is paired with clear, practical solutions and cautions to prevent further damage.
Aerator won’t budge despite tools
When an aerator refuses to turn despite using the correct wrench or pliers, corrosion, mineral buildup, or a hidden locking mechanism is often the cause.
Diagnosing the specific obstruction before applying more force prevents damage to the faucet finish, threads, or internal components.
Inspect for set screws, plastic retaining clips, or heavy calcification; apply penetrating oil, soak with vinegar, or access manufacturer’s removal method before escalating.
Stripped or rounded edges on the aerator
Encountering an aerator with stripped or rounded edges prevents tools from gaining purchase and complicates removal, often resulting from overtightening, corrosion, or plastic wear.
Techniques include using a rubber jar opener or silicone pad for extra grip, molding a strip of rubber inward to catch edges, applying penetrating oil briefly, or cutting a small notch to engage pliers.
Replace damaged aerator components after extraction.
Water still spraying irregularly after cleaning
After cleaning the aerator, persistent irregular spray patterns often indicate issues beyond simple mineral buildup—such as damaged internal screens, kinked supply lines, residual debris trapped in the housing, or problems with the faucet cartridge or diverter.
Inspect the aerator components for cracks or misalignment, flush the faucet to clear trapped particles, check flexible lines for kinks, and consider replacing worn screens or the cartridge if irregular flow persists.
Leaks after reinstallation
Recheck the assembly immediately if leaks appear after reinstalling the aerator, as most drips stem from misaligned parts, damaged seals, or debris trapped in threads.
Inspect the washer and O-ring for cracks, replace if compressed or torn.
Clean threads and seat surfaces, confirm proper alignment and hand-tighten then snug with a wrench.
Test slowly, retighten slightly if necessary; avoid overtightening.
Preventive Maintenance and Best Practices
Routine inspection and cleaning of a Delta aerator every 3–6 months helps maintain flow and prevent clogs.
Simple steps—such as wiping after use, installing a water softener or using vinegar soaks—reduce mineral buildup and corrosion.
Professional plumbing assistance should be sought if persistent leaks, damaged threads, or complex valve issues are detected.
How often to clean or replace a Delta aerator
Regular inspection and maintenance of a Delta aerator help preserve flow efficiency and water quality; most household installations benefit from cleaning every three to six months and from replacement every one to three years depending on local water hardness and sediment levels.
Frequency adjusts for usage: high-use fixtures or homes with well water require more frequent checks and earlier replacement, while low-use, treated-water systems can extend intervals.
Tips to prevent mineral buildup and corrosion
Prevent mineral buildup and corrosion by minimizing contact time between water and metal, reducing dissolved minerals, and creating conditions that discourage oxidation; simple measures like wiping fixtures dry after use, installing a water softener or point-of-use filter, and using mild, non-abrasive cleaners can greatly extend aerator and faucet life.
- Wipe dry after use.
- Install filters.
- Use gentle cleaners.
- Rinse and inspect periodically.
When to call a professional plumber
While simple measures like drying fixtures, installing filters, and gentle cleaning reduce wear and mineral buildup, some issues exceed homeowner capabilities and warrant professional attention.
Call a plumber for persistent leaks, damaged threads, seized aerators, internal cartridge problems, inadequate water pressure unexplained by aerator cleaning, or signs of corrosion inside the faucet body.
Professionals guarantee safe disassembly, proper replacement, and prevent further damage.
Comparison of Replacement Options
When considering replacement aerators, the article compares OEM Delta units with universal alternatives to highlight fit and performance differences.
It also examines choices of flow rates and water-saving models to balance pressure with conservation.
Finally, cost and durability factors are weighed to guide a practical selection.
OEM Delta aerators vs. universal replacements
Although both OEM Delta aerators and universal replacements restore flow, they differ in fit, performance, and warranty implications. OEM parts guarantee precise threading, original flow characteristics, and manufacturer support; universals offer cost and availability but may require adapters and vary in quality.
| Option | Fit | Support |
|---|---|---|
| OEM Delta | Exact | Warranty |
| Universal | Variable | Seller-dependent |
Choosing flow rates and water-saving aerators
A range of flow rates and water-saving aerator designs lets users balance performance and conservation: lower-flow aerators (e.g., 0.5–1.5 GPM) reduce consumption but may feel weaker.
Mid-range models (1.5–2.2 GPM) offer a compromise, and high-flow options preserve strong stream for tasks requiring more volume.
Aerator types include laminar, low-flow mesh, and dual-threaded models; choose based on desired feel, spray pattern, and faucet compatibility.
Cost and durability considerations
Because replacement aerators vary widely in materials, mechanisms, and brand quality, buyers should weigh upfront cost against expected lifespan and maintenance needs.
Choices balance price, performance, and serviceability. Consider:
- Material (brass vs plastic) — longevity differences.
- Brand warranty — repair or replacement options.
- Filter complexity — clogging and cleaning frequency.
- Eco models — potential long-term savings.
Safety and Warranty Considerations
Attention should be paid to protecting the faucet’s finish and following manufacturer guidelines to avoid voiding any warranty.
Proper tool selection and gentle techniques reduce the risk of scratches or stripped threads.
When using chemical cleaners, appropriate gloves and ventilation should be employed to guarantee safe handling.
Protecting faucet finish and avoiding warranty voidance
When working on a faucet, care must be taken to protect its finish and preserve any warranties by using the correct tools (such as a rubber-jawed wrench or cloth-wrapped pliers), avoiding abrasive cleaners and pads, and following the manufacturer’s disassembly instructions to prevent scratches, stripped threads, or damaged coatings that can void coverage.
Keep replacement parts OEM, document service actions, and consult warranty terms before modifying components.
Safe handling of tools and chemicals
Handle tools and chemicals with deliberate care to prevent injury, damage to the fixture, and actions that could void warranties.
Wear gloves and eye protection, use nonabrasive cloths and correct-size tools, and avoid metal-on-finish contact.
Test cleaning solutions on a hidden area; prefer manufacturer-approved products. Rinse thoroughly after chemical use.
Store tools safely and document any repairs for warranty records.
Quick Reference Checklist
A concise step-by-step removal checklist is provided for quick reference on paper or a phone screen.
It lists required tools, safety checks, and the exact sequence for loosening and removing the aerator.
The checklist is formatted for easy scanning during the task.
Step-by-step removal checklist for print or phone use
Begin by gathering the few tools and materials needed—adjustable wrench or pliers wrapped with tape, cloth, small container, and replacement washer or aerator—then confirm water is shut off.
A compact checklist for print or phone:
- Protect aerator with tape-covered pliers; loosen slowly.
- Remove components into container; inspect for debris.
- Clean threads and screen; replace washer or aerator.
- Reinstall, tighten gently, restore water, test for leaks.
Conclusion
Concluding the guide, readers find that removing a Delta bathroom faucet aerator is a quick, manageable task using the right tools and careful technique. Investigating the theory that most clogs stem from mineral buildup confirms it: cleaning or replacing the aerator restores flow in the majority of cases. By following preventive maintenance steps and checking compatibility before replacement, homeowners can avoid frequent problems and extend faucet life with minimal cost and effort.