How to Relocate a Water Heater: Step-by-Step Guide for Safe, Code-Compliant Moves
To relocate a water heater safely and in compliance with local codes, follow these essential steps:
- Planning and Permits: Assess the new location for site constraints and ensure you have the necessary permits.
- Utility Management: Shut off the water, gas, or electricity to the heater and drain the tank.
- Disconnecting Lines: Carefully disconnect the water and gas or electrical lines.
- Site Preparation: Install a new platform and drain pan, ensuring proper venting and hookups are in place.
- Testing and Inspections: Conduct pressure tests on water lines and schedule inspections to confirm compliance with safety standards.
Given the potential complexity and risks, especially with gas and electrical work, consider hiring a professional for assistance.
What it Means to Relocate a Water Heater and When to Consider It
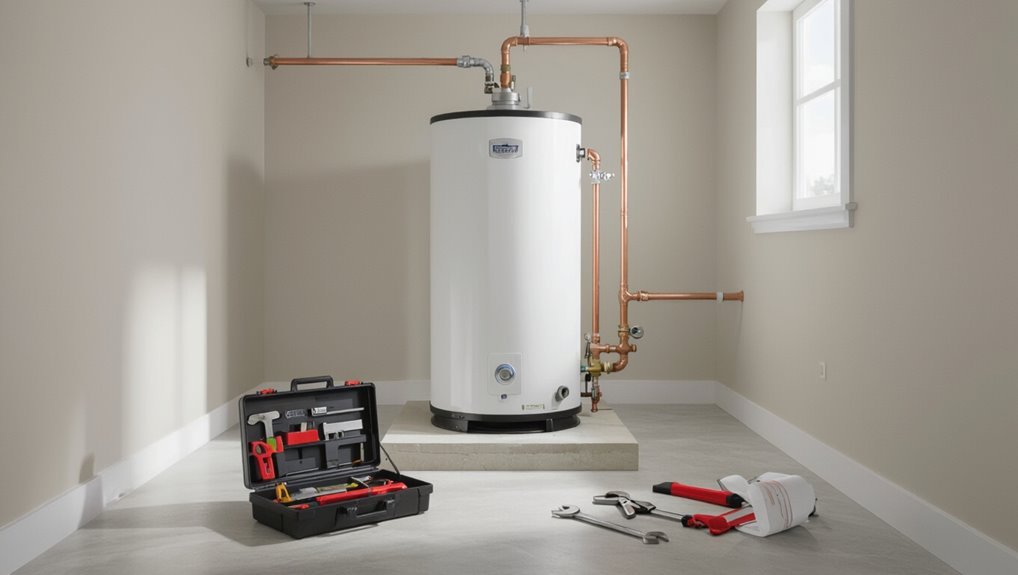
Relocating a water heater involves moving the unit to address safety concerns, improve space planning during remodeling, or meet updated code requirements.
The process and considerations vary by type—tank, tankless, hybrid, or indirect—because each has different venting, fuel, and plumbing needs.
Decisions about DIY versus hiring a professional hinge on the complexity of the unit, local permit requirements, and the homeowner’s skill level.
Reasons to relocate safety, space planning, remodeling, and code compliance
Moving a water heater can resolve safety hazards, free up usable space, facilitate remodeling, or bring the installation into compliance with current building codes.
Owners consider relocation to eliminate fire, venting, or leak risks; to reclaim closets or utility areas; to accommodate kitchen or bath remodels; and to update installations to meet seismic, clearance, or access requirements.
Guidance on how to relocate a water heater helps plan decisions.
Types of water heaters affected tank, tankless, hybrid, and indirect
When a homeowner contemplates changing a water heater’s location, the type of unit—tank, tankless, hybrid, or indirect—determines the scope of work, required connections, and potential constraints.
Tank units need drain pans, venting and larger clearances; tankless require gas/electrical upgrades and dedicated venting; hybrid needs electrical capacity and condensate handling; indirects depend on boiler proximity and plumbing routing, influencing feasibility and cost.
When to hire a professional vs. DIY relocation
Assess the project scope before deciding on a DIY approach or hiring a professional: relocating a water heater can range from a simple plumbing reroute within the same utility room to a complex installation involving gas lines, venting, electrical service upgrades, drain pans, and code-mandated clearances.
DIY suits minor relocations with plumbing skills; hire a licensed plumber or HVAC technician for gas, electrical, structural changes, permits, or unfamiliar codes.
Quick Overview of Steps to Move a Water Heater
The process begins with an assessment of site conditions and permits, moves through disconnecting and relocating plumbing, venting, and electrical or gas connections, and concludes with testing and final inspection.
Typical projects take a few hours to a full day for straightforward moves, while complex relocations can span several days.
Expected costs commonly range from a few hundred to a few thousand dollars depending on labor, materials, and permit requirements.
High-level sequence from assessment to final inspection
Before any physical work begins, a concise sequence should be established that moves from initial site evaluation through permitting, disconnection and safe removal, transport and reinstallation, system reconnection and testing, to final inspection and documentation.
The sequence: assess access, measure and mark new location, obtain permits, shut off and drain, disconnect utilities, safely remove unit, relocate, install per code, reconnect, pressure-test, commission, and document approvals.
Typical timeline and cost ranges
A typical relocation project spans a few hours to several days depending on complexity, with straightforward in-home moves often completed in 3–6 hours.
More involved jobs—requiring permit processing, structural work, or long-distance transport—take one to three days.
Typical costs range from $300–$1,500 for simple relocations; complex moves with permits, new venting, or seismic upgrades can reach $2,000–$5,000.
Pre-Move Assessment and Code Requirements
Before relocating a water heater, a thorough pre-move assessment must verify local permit and code requirements along with utility and structural constraints such as load-bearing floors and access paths.
The assessment should confirm safety clearances, combustion air and ventilation rules, appropriate fuel-specific considerations (gas, electric, propane), and required seismic straps, TPR drain routing, and drain pan installations.
Any code conflicts or access limitations identified should be resolved with the authority having jurisdiction and qualified contractors prior to proceeding.
Local building codes and permit requirements
When evaluating a proposed water heater relocation, it is essential to identify applicable local building codes and permit requirements to guarantee the move meets safety, plumbing, gas, electrical, and ventilation standards.
Failure to do so can lead to failed inspections, fines, or the need to undo work.
Research jurisdictional rules, obtain required permits before starting, and confirm inspection schedules.
Retain documentation and follow code-prescribed installation methods.
Safety clearances, combustion air, and ventilation rules
Proper clearances, adequate combustion air, and correct venting are critical assessments for any water heater relocation to guarantee safe operation and code compliance.
Inspect manufacturer clearances, local codes, and nearby combustibles.
Verify required indoor or outdoor combustion air sources, ventilation pathways, and termination clearances for draft hoods or direct-vent systems.
Document dimensions and plan adjustments before permitting and physical move.
Seismic straps, TPR drain routing, and drain pan requirements
Having confirmed clearance, combustion air, and venting considerations, attention must turn to anchoring, temperature-pressure-relief (TPR) discharge routing, and drain pan requirements that are typically mandated by code.
Seismic straps must secure the heater at prescribed heights. TPR valves need full‑size, gravity‑draining discharge to a visible safe location.
Drain pans and drains are required where leaks could damage occupied spaces or utilities.
Fuel type considerations: gas, electric, and propane
Fuel source dictates distinct pre-move assessments and code obligations for gas, electric, and propane water heaters.
Gas units require ventilation, combustion clearances, and certified gas shutoff connections; propane demands leak-proof fittings and certified fuel piping plus proper detector placement.
Electric units need circuit capacity, disconnects, and conduit routing per code.
Permits and inspections vary by fuel type and local jurisdiction, and must be secured before relocation.
Utility and structural constraints load-bearing floors, access paths
After confirming fuel-specific requirements, attention shifts to the physical constraints that govern any water heater relocation.
Inspect load-bearing floors for weight capacity, vibration isolation, and floor penetrations.
Verify clear access paths for delivery, installation, and maintenance, including door widths, stair navigation, and landing space.
Coordinate utility routing—gas, electric, and condensate—ensuring compliance with local codes and required clearances.
Tools, Materials, and Parts Needed
Relocating a water heater requires a clear list of plumbing supplies—pipes, fittings, dielectric unions, and shutoff valves—along with gas and venting components such as flexible connectors, vent pipe, and sealed-combustion parts.
Electric and hybrid units need appropriate electrical materials including wiring, disconnects, and breakers.
Essential safety gear and specialty tools include pipe wrenches, a multimeter, and a reliable leak detector.
Plumbing materials pipes, fittings, dielectric unions, and valves
When preparing to move a water heater, the installer gathers the proper plumbing materials—copper or PEX piping, compatible fittings, dielectric unions, shutoff and relief valves—to guarantee a safe, code-compliant connection between the appliance and the home’s water and gas systems.
Appropriate solder, crimp tools, tape, and thread sealant complete the kit for leak-free joints.
- Coiled PEX rolls
- Straight copper lengths
- Brass fittings
- Dielectric union assembly
Gas and venting materials flexible connectors, vent pipe, sealed combustion components
Gather the required gas and venting components—flexible gas connectors, appropriate-length vent pipe, sealed combustion kits, draft diverters, and high-temperature sealant—to secure safe fuel delivery and exhaust evacuation.
The installer selects certified flexible connectors, properly sized vent sections, sealed-combustion intake assemblies, and corrosion-resistant fasteners.
Proper clearances, pitch, and support hardware guarantee code compliance and long-term safety.
- braided stainless flex connector
- Class B or B-vent pipe
- sealed combustion air kit
- high-temp silicone sealant
Electrical materials for electric and hybrid units wiring, disconnects, breakers
After completing the gas and venting preparations, attention shifts to electrical requirements for electric and hybrid water heaters.
Installations require appropriately sized NM or THHN conductors, dedicated circuit breakers, a local disconnect (lockable if required), and a grounding conductor.
Conduit runs and junction boxes must meet code; use listed fittings and weatherproof enclosures for exterior placements.
- Thick insulated conductors
- Dedicated breaker panel slot
- Lockable disconnect switch
- Grounding/ bonding kit
Safety gear and specialty tools pipe wrenches, multimeter, leak detector
Begin by outfitting the worksite with essential personal protective equipment and specialty tools to guarantee a safe, code-compliant water heater relocation.
The technician selects gear and instruments to prevent injury, detect electrical faults, and locate leaks while enabling secure pipe and fitting manipulation.
- Heavy-duty pipe wrench and adjustable wrench
- Insulated multimeter for voltage and continuity
- Electronic leak detector
- Safety glasses, gloves, and respirator
Step-by-Step Guide to Relocate a Tank Water Heater
The process begins with preparation: secure any required permits, shut off gas, water, and power, and fully drain the tank before disconnecting water lines, the gas or electrical feed, venting, and the TPR valve.
The old unit is removed safely while the new location is readied with an appropriate platform, drain pan, and required clearances.
Reinstallation focuses on proper positioning, reconnecting water lines with dielectric unions, and restoring venting and utilities per code.
Preparation obtain permits, turn off utilities, drain the tank
Confirm permits, shut off utilities, and drain the tank before moving a water heater to guarantee safety and compliance.
Verify local permit requirements and schedule inspections as required. Notify utility providers if needed.
Turn off gas or electrical supply at the service panel and close the water supply valve.
Attach a garden hose to the drain valve, open a hot faucet, and fully drain the tank into a safe drainage location.
Disconnecting water lines, gas line or electrical feed, venting, and TPR valve
Proceed to disconnect all service connections methodically, working from water lines to fuel or electrical feeds, then venting and the TPR valve.
Close isolation valves, cap lines, and purge remaining water.
For gas, shut the supply, loosen union at the appliance, and cap per code; for electric, isolate breaker and disconnect wiring with lockout.
Detach venting and remove TPR valve assembly carefully.
Removing the old unit safely
Begin by draining and depressurizing the tank completely.
Then prepare to unfasten and remove the unit using proper support and lifting techniques.
Secure connections already detached, cap or plug open lines to prevent contamination, and remove straps or anchors.
Tilt and lift with helpers or mechanical aids, keeping clear pathways.
Place the old heater on a stable dolly for transport and dispose per local regulations.
Preparing the new location platform, pan, and clearances
Before installing the heater, the new location must be prepared with a stable, level platform sized to support the tank’s weight and an approved drain pan positioned beneath it.
Required clearances to combustibles, service access, and venting must be verified against local codes and the manufacturer’s specifications.
Install pan drain to a safe outlet, confirm floor load capacity, and maintain minimum clearance distances for servicing and combustion air.
Reinstalling positioning, connecting water lines, installing dielectric unions
With the platform, pan, drain, and clearances verified, attention shifts to placing the tank in its final position and completing the water connections.
The heater is leveled, anchored per code, and inlet/outlet stamped lines aligned.
Cut, deburr, and flux/solder or thread fittings as required.
Install dielectric unions on both hot and cold connections to prevent corrosion.
Pressure-test for leaks before finishing.
Reconnecting gas or electrical supply and venting (with pressure/combustion checks)
Once the tank and water lines are secured, attention turns to restoring the fuel or electrical supply and completing venting and safety checks.
Licensed personnel reconnect gas with approved fittings, test for leaks with a manometer or soap solution, and verify proper combustion air and draft.
Electric connections follow code, torque specifications, and ground continuity.
Finalize by checking operating pressure and observing flame stability.
Reinstalling TPR valve, drain, and condensate if applicable
Begin by installing the temperature and pressure relief (TPR) valve, drain pan outlet, and any condensate piping in a specific, code-compliant sequence to guarantee safe operation and proper drainage.
Mount the TPR per manufacturer torque and orientation, route its discharge to a visible, code-approved termination.
Connect pan drain to a trapped, pitched drain line.
Install condensate plumbing with proper slope and corrosion-resistant fittings.
Filling, purging air, leak testing, and initial startup
Carefully fill the tank and purge air from the system before applying power or lighting the burner to prevent dry-fire, noisy operation, and inaccurate pressure readings.
Open cold-water inlet slowly, vent hot taps until steady flow, and cycle valves to remove trapped air.
Inspect all joints, fittings, and valves for leaks.
Energize or light per manufacturer instructions and verify normal operation and stable temperature.
Final safety checks and code-compliance verification
With the tank filled, purged of air, and operating normally, the final safety checks and code-compliance verification guarantee the installation is safe and legal.
Inspect relief valve, discharge piping, seismic strapping, expansion tank, venting, clearances, and electrical/gas connections.
Verify labels, permits, and local code requirements.
Document measurements, test results, and obtain final inspection or sign-off as required.
Step-by-Step Guide to Relocate a Tankless or Electric Water Heater
Relocating a tankless or electric water heater requires attention to venting, gas BTU input and condensate management for gas-fired tankless units, and to electrical capacity and breaker sizing for electric models.
Proper mounting, precise plumbing connections, and adherence to manufacturer startup checks guarantee safe operation after relocation.
The following steps outline those specific considerations and required verifications.
Special considerations for tankless units venting, gas BTU input, and condensate
When moving a tankless water heater or replacing an electric unit with a tankless model, attention must be paid to venting clearances, gas BTU input capacity, and condensate handling because each affects performance, safety, and code compliance.
Verify vent type, length, and termination to prevent backdrafting; confirm gas line size and meter capacity for BTU demand; provide slope, trap, and drain for acidic condensate disposal per code.
Electrical capacity and breaker upgrades for electric models
Attention then shifts from venting and gas considerations to the electrical demands of electric tankless units and replacement electric heaters.
Inspect service capacity, panel space, and main breaker rating.
Calculate amp draw per manufacturer specifications, including simultaneous-load allowances.
Upgrade feeders, breakers, and grounding as required by NEC and local code.
Permit, inspection, and qualified electrician involvement are mandatory for safe, compliant upgrades.
Mounting, plumbing connections, and startup checks specific to tankless/electric
Begin by securing a suitable mounting surface and confirming clearances, load ratings, and access for electrical and plumbing connections specific to the selected tankless or electric tank unit.
Mount per manufacturer instructions, use proper anchors, and slope water lines for drainage.
Install isolation valves, pressure relief, and dielectric unions.
Verify electrical terminations, ground, and proper breaker sizing.
Perform leak, flow, and startup tests per checklist.
Common Challenges and How to Solve Them
Relocating a water heater often encounters space constraints, difficult access, and the need for creative routing or compact equipment to fit tight spots.
Projects may also require upgrading gas lines or electrical service, reworking venting paths with approved materials, and addressing floor penetrations while ensuring adequate structural support.
Practical solutions balance code-compliant modifications, contractor coordination, and targeted reinforcements to maintain safety and functionality.
Limited space and access problems solutions and workarounds
Many installations encounter tight quarters or awkward access that complicate moving a water heater; overcoming these constraints requires planning for clearances, lifting logistics, and routing of piping and venting.
Solutions include using compact tankless or slim tanks, modular routing with flexible connectors, temporary panel removal, mechanical lift aids, and professional riggers for stair or crawlspace moves.
Pre-measure and mock-up pathways before cutting.
Upgrading gas lines or electrical service
When upgrading a water heater, whether switching to a higher-capacity gas model or moving from electric to gas (or vice versa), the existing fuel and electrical infrastructure often proves inadequate and requires careful assessment and modification.
Licensed plumbers or electricians should verify supply sizing, pressure, breaker capacity, and conduit.
Permits, code-compliant fittings, pressure regulators, proper bonding/grounding, and leak/testing protocols guarantee safety and inspection approval.
Venting route complications and options
Because proper venting is critical to safety and efficiency, evaluating available routes and their constraints is a first step in any water heater relocation.
Common complications include long runs, bends, roof vs. sidewall termination, and shared flues.
Options: concentric or power venting, approved materials, and clearance adjustments.
Consult codes and manufacturers to select vent type, size, and termination to guarantee draft and combustion safety.
Floor penetrations and structural support issues
Floor penetrations and structural support present frequent obstacles during water heater relocation, requiring precise planning to maintain building integrity and meet code.
Assess joist layouts, load paths, and firestopping requirements; size and place reinforced openings or use platform/support frames to distribute weight.
Coordinate with structural drawings and obtain permits when cutting members.
Install proper sleeves, seismic restraints, and flashing to preserve strength and compliance.
Code Compliance Checklist Before Final Inspection
Before scheduling the final inspection, the installer verifies that required clearances, structural supports, and seismic strapping meet local code.
They confirm proper venting, combustion air, and exhaust termination along with electrical and gas connection standards.
Finally, they guarantee the TPR valve discharges correctly, a drain pan is installed where required, and a compliant floor drain is available.
Required clearances, supports, and seismic strapping
Clearances, supports, and seismic strapping guarantee a relocated water heater is stable, accessible, and compliant with code requirements; inspectors will verify minimum side and top clearances, adequate structural backing or platforms, and properly installed seismic straps anchored to the building framing.
The unit must sit on rated supports, elevated if required for drainage, with straps at prescribed heights and fasteners into framing members, not drywall.
Proper venting, combustion air, and exhaust termination
Proper venting, combustion air, and exhaust termination secure safe operation and code compliance by preventing backdrafting, carbon monoxide buildup, and inefficient combustion.
Inspect vent materials, slopes, and clearances; verify termination points meet height and distance from openings per code.
Confirm dedicated combustion air sources, louvers, or ducts sized correctly.
Confirm sealed joints, proper draft, and absence of obstructions before final inspection.
Electrical and gas connection standards
With venting and combustion air verified, attention shifts to electrical and gas connections that must meet local and national codes to guarantee safe operation and inspection approval.
Electrical circuits require proper gauge, dedicated breakers, grounding, and conduit or cable protection.
Gas lines need correct sizing, shutoff valves, support, leak-tested fittings, and flexible connectors per code.
Documentation and accessible shutoffs aid final inspection.
TPR valve discharge, drain pan, and floor drain requirements
Although often overlooked during installation, the temperature-pressure-relief (TPR) valve discharge, drain pan, and floor drain details are critical elements for code compliance and safe operation; each must be sized, routed, and terminated according to local and national codes to prevent scalding, water damage, and allow proper inspection.
- visible TPR discharge pipe terminating above a drain
- corrosion-resistant pan under heater
- pan drain piped to approved receptor
- floor drain slope and trap awareness
Cost Estimates, Permits, and When to Hire a Pro
A concise comparison of typical DIY versus professional costs frames budgeting decisions for a water heater relocation.
Permit requirements, expected timelines, and inspection steps are outlined so readers understand regulatory milestones.
Clear warning signs—such as complex gas or venting work, structural modifications, or recurring leaks—indicate when hiring a licensed professional is the safer choice.
Typical DIY vs. professional cost breakdown
When planning a water heater relocation, homeowners must weigh the clear cost differences between a DIY approach and hiring a licensed professional:
DIY expenses often include materials, tools rental, disposal fees, and possible correction costs if mistakes occur, typically $200–$800.
Professional moves add labor, licensing, and warranty—commonly $800–$2,500—but reduce risk, guarantee code compliance, and may prevent costly future repairs.
Permit timelines and inspection steps
Permit requirements and inspection schedules vary by jurisdiction but typically follow a predictable sequence: permit application, plan review, permit issuance, work completion, and final inspection/approval.
Applicants should allow days to weeks for review, schedule rough and final inspections, and expect corrective directives if work fails codes. Fees vary; expedited services may shorten timelines.
Retain receipts and inspection reports for compliance.
Warning signs that indicate professional intervention is required
After securing permits and scheduling inspections, homeowners should watch for specific warning signs that indicate professional help is required.
Persistent leaks, corrosion, unusual noises, unstable mounting, gas odors, or failed pilot systems demand licensed plumbers or HVAC technicians.
If structural alterations, complex venting, or electrical and gas reconnections are necessary, obtain written estimates and hire certified professionals to guarantee code compliance and safety.
Maintenance and Post-Relocation Tips
After relocation, the homeowner should perform initial maintenance tasks such as flushing the tank, checking connections and the pressure relief valve, and confirming proper venting and clearances.
A regular inspection schedule—including monthly visual checks and annual professional evaluations—helps spot signs of failure like leaks, rust, unusual noises, or drops in hot water supply.
Detailed documentation of the move, including photos, receipts, permit records, and service notes, preserves warranty eligibility and simplifies future inspections.
Initial maintenance tasks after moving the heater
Begin by restoring utilities and verifying system integrity: the gas or electric supply is reconnected, the water inlet is opened slowly, and the tank is filled while checking for leaks at all joints and fittings.
Next, purge air from the system, test pressure relief valve operation, confirm thermostat and controls function, inspect venting and flue seals, and document serial numbers, installation dates, and initial readings for records.
Ongoing inspection schedule and signs of failure
With utilities restored and initial checks recorded, a regular inspection schedule helps detect problems early and extend the heater’s service life.
Inspect monthly for leaks, corrosion, unusual noises and proper venting; quarterly check pressure relief valve, drain for sediment, and test thermostatic settings.
Annually schedule professional combustion, flue and seismic brace inspection.
Immediate action is required on rapid rust, persistent leaks or loss of heat.
How to document the relocation for warranties and future inspections
Several concise records should be created at the time of relocation to preserve warranty rights and simplify future inspections.
Include dated photos of original and new placement, contractor invoice with license and permit numbers, appliance model and serial information, a copy of the permit approval/inspection report, and notes on materials or modifications.
Store digital and physical copies; notify the manufacturer if relocation affects warranty terms.
Comparison of Relocation Options and Their Tradeoffs
The section compares moving a water heater within the same room, to a different room, or between floors, and contrasts replacing a tank unit with a tankless alternative to highlight practical tradeoffs. Factors considered include cost, plumbing and venting complexity, space and structural constraints, and energy or performance differences. The following table summarizes typical pros and cons for each option.
| Option | Typical Advantages | Typical Tradeoffs |
|---|---|---|
| Same room move | Lower labor, minimal plumbing changes | Limited improvement in access or layout |
| Different room move | Better placement for usability/noise | Moderate plumbing/venting rerouting cost |
| Upstairs/downstairs move | Optimizes supply gravity/short runs | Structural access, permits, possible drain/pump needs |
| Tank vs tankless replacement | Tankless: higher efficiency and smaller footprint | Higher upfront cost, possible gas/electrical upgrades |
Moving within the same room vs. different room vs. upstairs/downstairs
Evaluating relocation options for a water heater requires balancing space, plumbing complexity, cost, and safety.
Moving within the same room typically minimizes piping and permits, allowing for the retention of venting and drain configurations.
Relocating to another room increases routing, permits, and potential structural work.
Upstairs or downstairs moves add vertical piping, pressure and venting considerations, possible floor reinforcement, higher labor, and stricter code inspections.
Replacing with a different type (tank vs. tankless) benefits and constraints
When homeowners consider replacing a traditional tank water heater with a tankless unit—or vice versa—they must weigh differences in footprint, installation complexity, energy use, and upfront cost.
Tankless systems save space and offer on-demand hot water but often require upgraded gas lines or electrical service and more intricate venting.
In contrast, tank models are simpler to install and provide reserve hot water yet occupy more space and incur higher standby energy losses.
Choosing depends on capacity needs, retrofit cost, local code, venting feasibility, and long-term operating savings.
Contractors should evaluate flow demand, fuel type, and access constraints before relocating or converting systems.
Safety Checklist for DIY Relocation
A concise safety checklist highlights steps to prevent leaks, fires, electrical hazards, and carbon monoxide exposure during a DIY water heater relocation.
It also specifies how to test connections, secure ventilation, and verify electrical and gas shutoffs.
Emergency shutoff procedures and contingency plans for leaks or suspected CO are outlined before work begins.
Steps to prevent leaks, fire, electrical hazards, and carbon monoxide risks
Before any physical work begins, a concise safety checklist should be followed to prevent leaks, fires, electrical hazards, and carbon monoxide exposure:
inspect fittings and replace corroded valves,
drain and pressure-test the tank,
cap fuel lines and test for gas leaks with a detector,
de-energize and label electrical connections,
guarantee proper venting and combustion air,
and confirm smoke and CO alarms are functional and positioned correctly.
Emergency shutoff and contingency planning
Establish clear emergency shutoff procedures and contingency plans so anyone present can quickly isolate hazards and summon help: mark and test the home’s main gas, water, and electrical shutoff points; provide labeled, accessible shutoff tools (wrenches, valve keys, circuit identifiers); designate a safe evacuation route and meeting point; keep a functioning fire extinguisher and a portable CO detector nearby; and document phone numbers for emergency services and a qualified plumber or gas technician.
- A wrench tucked by the water main
- A labeled breaker panel map
- A CO detector blinking green
- A clear path to the driveway and meeting spot
Conclusion
Relocating a water heater can improve space use and safety when done correctly. One recent industry study found that roughly 40% of homeowners planning renovations consider moving major appliances, with water heaters among the most commonly repositioned units. This underscores both demand and the need for code compliance. Homeowners contemplating relocation should weigh costs, permits, and risks, and consider professional help to guarantee a safe, compliant outcome and long-term system reliability.