How to Install a Water Meter: Step-by-Step Guide for DIYers and Plumbers
To install a water meter effectively, start by checking local permits and notifying utilities. If you’re unsure about the process, consider hiring a qualified installer. First, shut off and drain the main water line, then prepare and square-cut the pipe ends. Position the meter so the flow arrow points downstream. Use appropriate seals and valves, and add bypass and isolation valves for easier service. Gradually restore pressure and check for leaks and zero-flow accuracy. Finally, tag the valves and document any approvals. For further guidance, explore detailed steps, smart meter connections, and troubleshooting tips.
How to Install a Water Meter: Quick Overview for DIYers and Plumbers
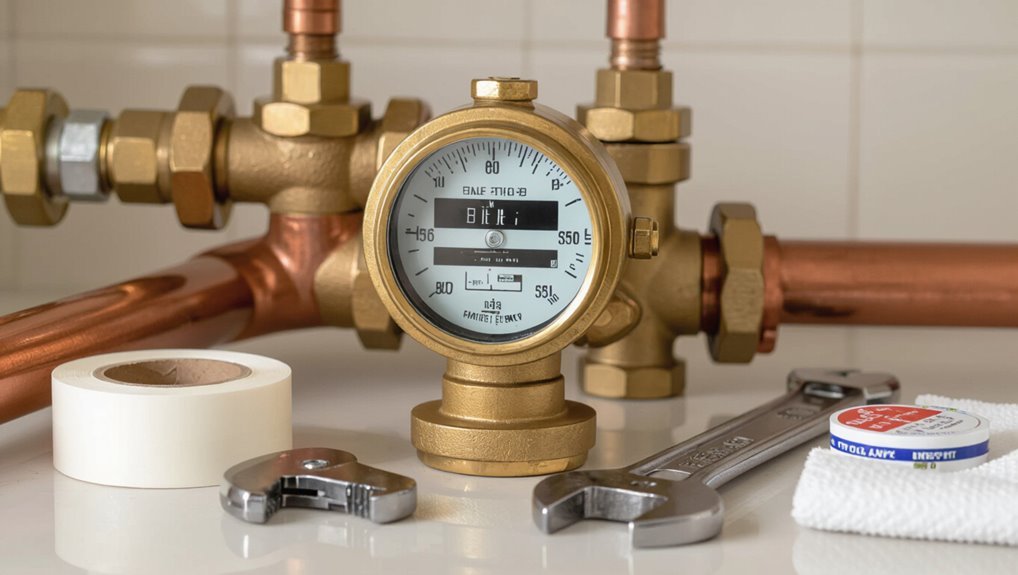
A water meter measures household consumption to facilitate billing and detect leaks, so proper installation guarantees accurate readings and system integrity.
Guidance should clarify which tasks a competent homeowner can safely handle and which require a licensed plumber and permits.
Typical installations vary by location but generally take one to several hours, range from low to moderate difficulty, and cost anywhere from a modest DIY expense to several hundred dollars for professional service and materials.
What a water meter does and why installation matters
Installers and homeowners should understand that a water meter measures the volume of water passing through a supply line, converting flow into readable units for billing, monitoring, and leak detection.
Proper installation guarantees accurate readings, prevents leaks, maintains pressure, and complies with local codes.
Practical knowledge of how to install a water meter and correct placement minimizes errors, maintenance, and unexpected costs.
Who should install a water meter homeowner vs. licensed plumber
Decide who should perform the work by weighing skill level, local regulations, and the complexity of the installation.
A homeowner may handle simple indoor meter swaps if permitted, comfortable with plumbing tools, and willing to follow codes.
A licensed plumber is recommended for main-line taps, permit-required work, complex pipe layouts, or when accuracy and liability protection are priorities; inspectors often prefer licensed installers.
Typical time, difficulty, and cost estimates
Several common factors—meter type, location (indoor vs. main line), permit needs, and the installer’s experience—determine the typical time, difficulty, and cost of a water meter job.
Simple indoor swaps: 1–2 hours, low skill, minimal cost ($50–$200 parts).
Main-line or new installations: 4–8+ hours, moderate to high skill, possible excavation, permits; total cost $300–$2,000+ depending on complexity.
Legal, Safety, and Preparation Requirements
Before beginning a water meter installation, the installer must review local regulations, obtain any required permits, and notify the utility company to avoid code violations or service interruptions.
Certifications and licensing requirements determine when a professional is required, and appropriate safety precautions—including PPE and lockout procedures—must be planned.
A concise tools and materials checklist and selection of the correct meter type and size for the property complete the preparation.
Local regulations, permits, and utility company notifications
Because water metering affects public infrastructure and billing, installers must verify local regulations, obtain required permits, and notify the utility before any work begins.
They should confirm meter placement rules, backflow prevention standards, inspection requirements, and road/open-trench permits. Utility notification secures service shutoff, meter record updates, and scheduling of official inspections.
Documentation of approvals must be retained for compliance and billing activation.
Required certifications and when to hire a professional
After confirming permits and utility notifications, attention turns to the certifications and professional qualifications that govern meter installation.
Licensed plumbers often require state or municipal certification; utility-approved technician credentials may be mandatory for connection and calibration.
Hire a certified professional when local codes demand, when the job affects service mains, or when unfamiliar with regulations, pressure systems, or inspection procedures.
Safety precautions and personal protective equipment
Wear appropriate personal protective equipment and follow site-specific safety procedures to reduce risk during meter installation.
Installers should use gloves, eye protection, hearing protection for noisy environments, and sturdy footwear.
Respiratory protection is required when confined spaces or contaminated water exist.
Isolate and depressurize the line, lock out valves, and post clear signage.
Follow local regulations and emergency response plans.
Tools and materials checklist
With safety measures in place and the line isolated, attention turns to assembling the specific tools, materials, and documentation required to perform a compliant installation.
Required items include meter, fittings, shutoffs, and permits; verify compatibility and legal requirements before starting.
- Water meter and appropriate couplings
- Pipe cutters and wrenches
- Thread sealant and primers
- Isolation valves and fittings
- Installation permit and property documentation
How to choose the right meter type and size for your property
Which meter best fits the property depends on expected flow rates, connection type, and local regulations; selecting the correct model and size prevents inaccurate billing, legal violations, and safety hazards.
Assess peak and average demand, pipe diameter, and pressure. Choose between residential, commercial, or industrial accuracy classes.
Confirm material compatibility, backflow prevention, meter orientation, and certification requirements. Consult utility rules and a qualified plumber.
Pre-Installation Site Assessment
The technician begins by identifying the ideal installation point—near the main shutoff or existing meter box—ensuring clear access for future reading and maintenance.
They measure pipe diameter, confirm flow direction and note any existing fittings, then verify system pressure, backflow devices, and meter compatibility.
Finally, they prepare the work area, isolate and secure the water supply, and stage tools and parts for a safe, efficient installation.
Locating the best installation point (main shutoff, meter box, accessibility)
Before any physical work begins, assess the property to identify the ideal installation point by locating the main shutoff, existing meter box (if present), and routes for easy, code-compliant access.
Evaluate proximity to the service entrance, visibility for reading and maintenance, and clearance for tools and replacement.
Note potential obstructions, freezing risks, drainage, and legal setback or easement restrictions before proceeding.
Measuring pipe size, flow direction, and existing fittings
Accurate measurements of pipe diameter, flow direction, and nearby fittings are essential for a compliant, leak-free water meter installation.
Measure outside diameter or nominal size, identify material (copper, PVC, galvanized) and orientation, and mark flow arrow direction.
Note nearby elbows, tees, valves, reducers, unions and clearances required for meter body and coupling alignment.
Record dimensions for correct adapter selection.
Checking for pressure, backflow devices, and meter compatibility
Confirm system pressure and identify existing backflow prevention devices to guarantee the chosen meter tolerances and connection types match site conditions.
Verify static and operating pressures with a gauge, note pressure surges and cycles, and locate check valves, vacuum breakers, or reduced-pressure assemblies.
Confirm meter pressure rating, inlet/outlet configuration, and compatibility with materials and local code to prevent performance or approval issues.
Preparing the work area and securing water supply
Secure the work area and isolate the water supply to create a safe, controlled environment for meter installation.
The installer inspects access, clears obstacles, and guarantees adequate lighting. Necessary tools, fittings, and spill containment are staged nearby.
Shutoff valves are operated and locked or tagged out; downstream fixtures are drained.
Confirm permits and utility locates before beginning work to prevent interruptions and hazards.
Step-by-Step Installation for Inline Water Meters (Residential)
The installer first shuts off the water supply and drains the line to prevent spills and pressure hazards.
Existing fittings are removed and pipe ends are prepared before placing the meter with its flow arrow correctly aligned.
Joints are sealed by the appropriate method (thread tape, compression, or solder), and bypass and isolation valves are added if required.
Turn off water and drain the line safely
Shut off the main supply valve to isolate the section of pipe where the meter will be installed.
Verify isolation by opening a downstream faucet to confirm no flow.
Relieve residual pressure with a hose bib or bleed valve, and collect discharged water in a bucket.
Wear safety goggles and gloves.
Make certain nearby electrical devices are protected from splashes before proceeding.
Remove existing fittings and prepare pipe ends
Begin by removing any remaining fittings, unions, or short sections of pipe within the isolated area to create clean, accessible pipe ends for the meter.
Inspect pipe ends for corrosion, burrs, or deformation.
Deburr and square-cut with appropriate tools.
Clean surfaces of debris, flux, or sealant.
Measure and verify alignment and gap for the meter and chosen connectors before proceeding.
Install meter with correct orientation and flow arrow
One important step is to position the meter so its flow arrow aligns with the direction of water through the pipe.
The meter body should sit squarely between fittings, avoiding stress or misalignment.
Make certain inlet and outlet faces match pipe orientation, verify register accessibility, and secure mounting brackets if provided.
Confirm no internal obstructions and that the arrow points downstream before final tightening.
Properly seal joints: thread tape, compression, or soldering methods
With the meter aligned and secured, attention shifts to sealing the joints to prevent leaks and maintain system pressure.
Choose method per pipe type: wrap PTFE tape clockwise on male threads; tighten female fittings to specified torque.
For compression fittings, seat ferrules correctly and tighten nuts evenly.
For copper, clean, flux, and solder joints with proper heat and avoid overheating meter components.
Install bypass valve and isolation valves if required
Install a bypass and isolation valves to allow meter servicing without shutting off water to the entire residence.
The installer positions a bypass loop around the meter with a full‑port valve on each bypass end and isolation valves on inlet and outlet.
Valves should match pipe size, orientation, and pressure rating; support and secure fittings, and tag valves for clear operation during maintenance.
Re-pressurize the line, check for leaks, and tighten connections
Gradually restore water pressure by slowly opening the inlet isolation valve while observing the meter assembly and nearby fittings for any sign of leakage or unusual movement.
If drips appear, tighten compression nuts or flange bolts incrementally, then recheck. Confirm joints remain dry under steady pressure.
Finally, secure any mounting straps and verify shutoff valves operate smoothly before proceeding to meter activation and performance verification.
Initial meter testing and calibration checks
Before activating the meter, the technician should verify that all fittings are secure, isolation valves are set correctly, and any electrical or remote-read connections are intact.
Perform a zero-flow test, confirm register reads zero, then introduce a known volume at low, typical, and high flow rates.
Compare readings to standards, adjust calibration per manufacturer, document results, and tag the meter with test date.
Step-by-Step Installation for Smart/Remote-Read Meters
Smart/remote-read meter installations require additional electrical or wireless components beyond the meter body, including a transmitter or antenna that must be mounted and wired correctly.
The installer should pair and configure the meter with the utility’s reading system and select an appropriate power source—battery with known life expectancy or a hardwired connection.
Finally, common tasks include testing signal strength and troubleshooting connectivity issues such as interference, weak reception, or pairing failures.
Additional electrical or wireless components required
When installing a smart or remote-read water meter, several electrical and wireless components are typically required to enable power, data transmission, and integration with utility systems.
Necessary items often include batteries or low-voltage power supplies, surge protection, signal repeaters or gateways, RF modules or cellular/LTE modems, network interface controllers, and secure connectors.
Compatibility with utility protocols and grounding requirements must be verified.
Mounting and wiring remote transmitter or antenna
Begin by locating a suitable mounting site for the transmitter or antenna that guarantees clear signal paths, minimal interference, and secure attachment to the meter or nearby structure.
Secure bracket or adhesive, orient antenna per manufacturer instructions, and route cable avoiding sharp bends.
Use gland or waterproof connector at penetration points, fasten wiring with clamps, and label connections.
Verify mechanical stability before sealing.
Pairing and configuring the meter with reading system
With the transmitter or antenna firmly mounted and cable runs secured, the meter can be paired to the utility’s reading system.
Technicians initiate pairing via the meter’s interface or handheld programmer, confirm device IDs and signal strength, and register the unit in the utility’s network.
Configure reporting intervals, encryption and endpoint settings, then run test reads to verify successful communication and accurate data logging before closing the job.
Power sources: battery life and hardwired options
Several factors determine whether a smart or remote-read meter should rely on battery power or be hardwired: anticipated reporting frequency, expected service life, environmental conditions, and site accessibility.
Battery-powered meters suit low-update intervals and hard-to-reach locations but require periodic replacement and temperature-resistant cells.
Hardwired installations offer continuous power and reduced maintenance but need safe conduit routing, reliable mains, and installer compliance with electrical codes.
Troubleshooting connectivity and signal issues
After choosing the appropriate power option, attention turns to connectivity and signal issues that can impede data transmission for smart and remote-read meters.
Diagnose by verifying antenna placement, checking signal strength via the meter interface, and confirming network credentials.
Inspect for physical obstructions, RF interference, or damaged cabling.
Reboot devices, update firmware, and log persistent failures for technician escalation.
Alternative Installations: Pit, Wall-Mounted, and Multi-Unit Meters
Alternative installations require different mounting and protection strategies than typical indoor setups.
This section outlines installation steps for pit-mounted and wall-mounted meters, best practices for apartment or commercial submeters, and key measures for frost protection and drainage.
Attention to access, sealing, and isolation valves guarantees reliable operation across these configurations.
Installing a pit or underground meter box
Installing a pit or underground meter box requires careful site evaluation and adherence to local codes to guarantee the meter remains accessible, protected from freezing, and safe from vehicular or pedestrian traffic.
The installer selects frost-free depth, stable bedding, and non-corrosive box materials.
Include proper drainage, tamper-resistant covers, clear labeling, conduit for future wiring, and compliance with utility inspection and backfill compaction requirements.
Wall- or building-mounted meter installation tips
Mount a wall- or building-mounted meter on a structurally sound, weather-protected surface at a height and location that guarantee safe access, freeze protection where applicable, and clear separation from electrical and gas lines.
Secure robust mounting brackets, align inlet/outlet piping for minimal stress, install accessible shutoffs and unions, provide adequate insulation and weatherproofing, label clearly, and verify straight runs for accurate readings and maintenance.
Installing submeters for apartments or commercial units
When wall- or building-mounted meters are insufficient for multi-tenant situations, submeters provide a means to allocate water use to individual apartments or commercial units through dedicated measurement devices.
Installation requires clear isolation of each unit’s supply line, accessible meter locations, shutoff valves, and tamper-resistant fittings.
Proper labeling, calibration, and connection to a billing or monitoring system guarantee accurate allocation and simplified maintenance.
Special considerations for frost protection and drainage
Because freeze damage and standing water can quickly compromise metering accuracy and system integrity, frost protection and drainage must be integral to any pit, wall-mounted, or multi-unit installation.
Install insulation, heat trace, or heated enclosures where exposure risk exists.
Provide gravity drainage, frost-proof traps, and accessible sumps with pumps or automatic drains.
Verify slope, vapor barriers, and service access for maintenance and winterization.
Testing, Commissioning, and Handover
The installer performs calibrated flow and accuracy tests and completes a leak detection and pressure test checklist to verify system integrity.
Serial number, initial meter reading, and installation notes are recorded accurately for the customer file.
A final report is submitted to the utility and an official inspection is scheduled if required.
Flow and accuracy testing procedures
Begin commissioning by verifying that the meter and associated piping are correctly installed, isolated, and free of air pockets or debris that could skew readings.
Perform baseline zero-flow checks, then run calibrated volume or gravimetric tests at low, mid, and high flows.
Compare readings to manufacturer tolerances, record deviations, adjust or replace components as needed, and document final accuracy and test conditions.
Leak detection checklist and pressure testing
Conduct a systematic leak detection checklist and pressure test to confirm the integrity of the meter installation and connected piping before handover.
Inspect joints, fittings, valves, and seals visually and with soapy solution or electronic leak detector.
Isolate sections, apply specified test pressure, monitor for pressure decay over the required duration, and log results.
Repair defects and retest until pass criteria are met.
Recording meter serial, initial reading, and installation notes
Record the meter serial, initial reading, and concise installation notes immediately after successful leak and pressure verification to create an auditable baseline for future operation and billing.
Log serial number, meter model, date, installer name, initial register value, flow direction, orientation, any fittings used, and photographed meter face.
Note observed anomalies, calibration status, and customer handover items for the service record.
Reporting to utility and scheduling official inspection if required
With the installation baseline documented, the installer must notify the utility and arrange any required official inspection or commissioning appointment.
The installer submits serial, readings, photos, and compliance forms per utility protocol.
Coordinate dates, access, and contact details; remediate identified issues promptly.
Obtain signed acceptance, meter activation confirmation, and retain copies for records and customer handover.
Common Problems and How to Fix Them
Common installation issues include leaks at joints and seals, meters that fail to register or give inaccurate readings, and hydraulic problems such as air pockets, pressure spikes, or disturbed flow.
Troubleshooting should identify leaks for resealing or tightening, verify meter calibration and flow conditions, and address system dynamics that affect measurement.
For smart meters, diagnostics must also cover electrical connections and wireless communication faults with targeted repairs or component replacement.
Leaks at joints and seals diagnosis and repair
Inspecting joints and seals is the first step when diagnosing leaks around a water meter. The technician checks compression nuts, threaded connections, and gasket seating for corrosion, cracks, or misalignment.
Tightening, replacing damaged washers or O-rings, and reapplying thread sealant or plumber’s tape resolve most issues. If leaks persist, isolation and pipe replacement or professional service are recommended.
Meter not registering or inaccurate readings causes and fixes
A meter that fails to register flow or reports inaccurate readings can stem from mechanical wear, electrical faults, or installation errors. Diagnosing the cause requires a systematic check of the register, internal gears or impeller, sensing coils or magnets, and the meter’s orientation and connections.
Clean or replace fouled components, tighten or reseal loose wiring and fittings, verify correct wiring/polarity, recalibrate or replace the register, and confirm flow direction.
Air pockets, pressure spikes, and flow disturbances
Air pockets, pressure spikes, and flow disturbances can disrupt meter accuracy, cause mechanical stress, and shorten component life if not addressed promptly.
Technicians should purge trapped air, install air chambers or vacuum breakers, and fit pressure-reducing valves or surge arrestors.
Guarantee straight pipe runs and proper upstream/downstream lengths to stabilize flow.
Inspect for cavitation and replace damaged meters when performance remains erratic.
Electrical/wireless malfunctions in smart meters
Electrical and wireless malfunctions in smart meters arise from faults in power supplies, wiring errors, signal interference, firmware glitches, and failed communication modules; these issues impair data accuracy and transmission reliability.
Technicians should verify power and grounding, inspect and secure cabling, check antenna placement, reboot or update firmware, and replace faulty modules.
Regular diagnostics and signal strength monitoring prevent recurrence and guarantee reliable readings.
Maintenance, Calibration, and Replacement Guidelines
A regular maintenance routine should include scheduled inspections and cleaning to prevent buildup and guarantee unobstructed flow.
Professional recalibration or accuracy testing is recommended after significant servicing, seasonal extremes, or if readings become inconsistent.
Guidance should cover expected lifespan and replacement triggers, plus safe removal and installation procedures to protect the meter and plumbing.
Routine inspection and cleaning schedule
Several simple checks performed at regular intervals guarantee a water meter remains accurate and reliable.
Inspect for leaks, corrosion, and debris monthly; verify seals and register clarity quarterly.
Clean strainers and remove sediment buildup during inspections.
Lubricate moving parts annually if manufacturer permits.
Document findings, actions, and dates.
Adjust schedule for harsh environments or heavy sediment loads.
When to recalibrate or test accuracy professionally
How often should a water meter be professionally recalibrated or tested for accuracy depends on its type, age, and operating conditions.
Recommended intervals range from annually for critical commercial meters to every 3–5 years for standard residential models.
Additional triggers include noticeable billing discrepancies, suspected drift after maintenance, leak repairs, regulatory requirements, or exposure to extreme temperatures or sediment that may affect measurement.
Expected lifespan and signs that warrant replacement
Longevity of a water meter depends on design, materials, and operating conditions, with typical residential mechanical meters lasting 10–20 years.
Modern ultrasonic or electromagnetic meters often exceed 15–25 years under ideal conditions.
Replacement is warranted for persistent drift, frequent false readings, visible corrosion or leaks, mechanical wear (sticking registers or rattling), failed seals, or after repeated repair history impacting accuracy and reliability.
Safe procedures for removing and replacing a meter
After signs of wear or inaccuracy justify replacement, removal and installation must follow safe, standardized procedures to protect personnel, preserve meter integrity, and maintain system accuracy.
Technicians isolate supply, depressurize and drain the line, tag and lock out valves, document meter readings, disconnect fittings, and avoid shock or contamination.
Install replacement with correct orientation, seals, torque, and perform leak and accuracy tests before restoring service.
Cost Breakdown and Comparison of Installation Options
A concise cost comparison helps readers weigh DIY installation against hiring a licensed plumber, accounting for tool and labor differences. Ongoing expenses for manual versus smart meters—such as reading, subscription, and data-management fees—should be compared alongside upfront costs. Typical permit, inspection, and utility hookup fees can greatly affect total project cost and vary by locality.
| Option | Upfront Costs | Ongoing Fees |
|---|---|---|
| DIY installation | Lower (materials, tools) | Minimal |
| Licensed plumber | Higher (labor, expertise) | None for labor |
| Manual vs. smart meter | Manual cheaper; smart costlier | Smart: subscription; Manual: negligible |
DIY installation vs. hiring a licensed plumber
Compare DIY installation and hiring a licensed plumber by weighing upfront costs, required tools and materials, time investment, and potential risks or savings from mistakes.
DIY lowers labor expense but adds tool purchase, permit navigation, and higher risk of leaks or code violations.
Hiring a plumber increases immediate cost but provides expertise, warranty, faster completion, and reduced liability.
Choose based on skill, budget, and local regulations.
Manual meter vs. smart meter ongoing costs
While both manual and smart water meters measure consumption, their ongoing costs diverge considerably:
Manual meters incur low maintenance and no data fees but require periodic manual reads and potential callouts for issues.
Smart meters carry higher upfront and recurring connectivity, data-management, and cybersecurity expenses, though they reduce reading labor, enable leak detection, and often lower unbilled water loss, offsetting some ongoing costs over time.
Typical permit, inspection, and utility hookup fees
Begin by accounting for permit, inspection, and utility hookup fees as predictable components of total installation cost.
Fees vary by jurisdiction: permits typically range $25–$200, inspections $50–$150, and utility connection or meter set fees $50–$500.
Municipal rules, required documentation, and complexity drive costs.
Budgeting for these items prevents surprises and guarantees compliance with local codes and utility requirements.
Practical Tips, Best Practices, and Common Mistakes to Avoid
Practical tips and common pitfalls help guarantee a water meter performs reliably and remains secure over time. Key items to address include tamper prevention, seasonal protections, and documentation to retain after installation.
Recommended checklist for owners and installers:
- Tamper-proof fittings and regular inspection schedule
- Freeze protection measures and timing for winter work
- Best practices for summer installations and heat considerations
- Securely filed warranties, permits, and installation records
- Routine meter readings and service logs to detect issues early
How to ensure long-term reliability and tamper prevention
Guarantee long-term reliability and deter tampering by combining proper installation, routine maintenance, and physical safeguards: use tamper-evident seals, lockable meter boxes, and secure mounting; follow manufacturer torque and alignment specs; schedule regular inspections, cleaning, and calibration; replace worn gaskets and fittings promptly; document readings and maintenance; train personnel on detection of tamper signs; avoid bypasses and improper repairs to preserve accuracy and warranty.
Seasonal considerations (freeze protection, summer work)
After addressing tamper prevention and routine upkeep, seasonal factors must be accounted for to protect meter integrity and accuracy year-round.
Insulate and heat-trace exposed pipes and meter boxes before freeze season; drain and winterize unused lines.
In summer, secure shading, check for expansion stresses, and inspect joints after temperature extremes.
Schedule seasonal inspections and avoid delaying corrective repairs to prevent damage and inaccurate readings.
Documentation to keep after installation (warranties, permits, readings)
Several types of documentation should be retained following meter installation: warranty certificates, installation and calibration records, applicable permits or inspection reports, and a log of initial and ongoing meter readings.
Store originals and scanned copies in a secure, indexed folder. Note installer contact, serial numbers, and date-stamped photos.
Retain records for warranty periods and local regulatory timelines; update readings monthly or per billing cycle.
Troubleshooting Flowchart and Quick Repair Checklist
A concise troubleshooting flowchart and quick repair checklist guide technicians through immediate on-site actions and identifies when work must stop and a utility or professional should be called.
The checklist highlights priority steps to stabilize the situation before escalating. Key points include:
- Verify shutoff and isolate the meter
- Check for visible leaks and pressure anomalies
- Inspect fittings, seals, and meter orientation
- Attempt simple fixes only within scope and safety limits
- Cease work and notify utility for major leaks, gas odors, or structural damage
Stepwise actions for immediate on-site issues
Begin by evaluating the meter and immediate surroundings to identify visible faults—leaks, loose fittings, blocked strainers, or abnormal noises.
Then follow a concise troubleshooting flowchart that prioritizes safety, isolation, and function checks.
Isolate supply, verify shutoff integrity, depressurize, inspect and clear strainers, tighten fittings, test for residual leaks, verify meter register operation, and document actions and outcomes for follow-up.
When to stop work and call the utility or a professional
Stop work and notify the utility or a licensed professional whenever a situation exceeds on-site safe repair limits, poses a contamination or safety risk, or requires specialized tools or permissions.
Contact is required for major leaks, suspected cross-connections, damaged service lines, unexplained pressure loss, frozen or burst pipes, gas or electrical proximity hazards, permit needs, or meter reading discrepancies beyond routine troubleshooting.
Conclusion
The guide closes by pairing simple DIY confidence with professional caution: a homeowner tightening a fitting beside a licensed plumber reading regulations. Practical steps, safety checks, and smart-meter tech coexist with paperwork, calibration, and periodic replacement. Small seals and big permits share the same importance. By balancing hands-on thrift with technical rigor, readers are left able to act responsibly—whether patching a leak at dawn or commissioning a certified install by midday.