How to Clean a Walk-In Tiled Shower: Step-by-Step Guide for Sparkling Grout and Tile
To achieve a sparkling walk-in tiled shower, follow these essential steps: set clear goals for even tile sheen, stain-free grout, and efficient fixtures. Start by removing all items, ensuring good ventilation, and rinsing the surfaces to loosen grime. Apply a grout cleaner and let it sit for the recommended time. Use nylon brushes and non-abrasive sponges to scrub the grout and tiles, then rinse thoroughly. Dry the area with a squeegee and microfiber cloth. Address any mold with suitable cleaners and replace any damaged grout or caulk. For a comprehensive cleaning plan and ongoing maintenance tips, follow this step-by-step guide.
What a Sparkling Walk-In Tiled Shower Should Look Like
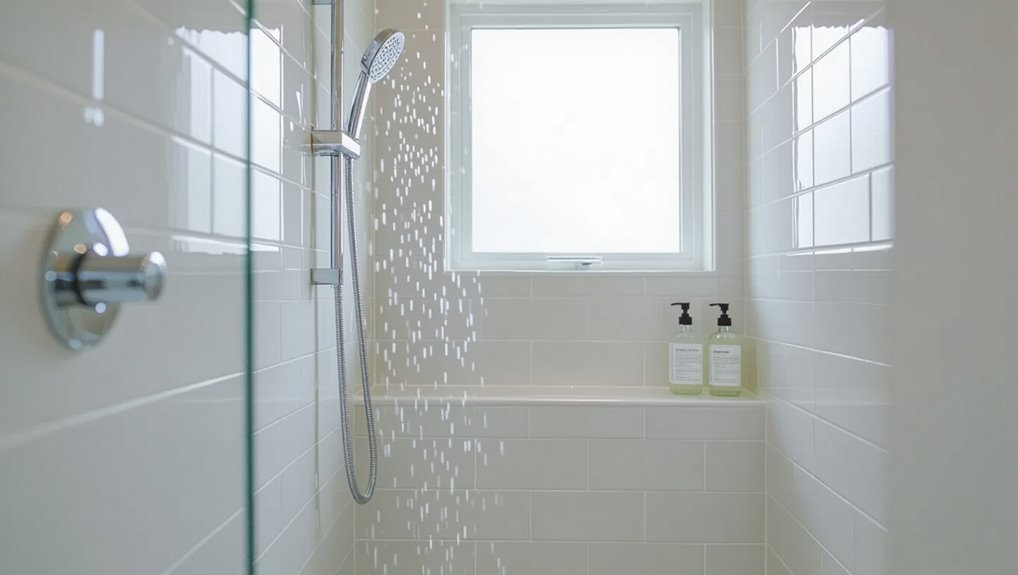
A sparkling walk-in tiled shower presents clean, uniformly colored tile and grout, polished fixtures, and unobstructed drains that all function smoothly.
Signs of buildup include discolored grout lines, soap scum film on tile, mineral deposits on fixtures, and slow-draining water; visible mold or soft, crumbling grout indicate microbial growth or water damage.
Persistent staining, warped tiles, or grout that flakes away are indicators of permanent damage requiring repair or replacement.
Visual and functional goals for tile, grout, fixtures, and drains
Brilliance and function converge when tile, grout, fixtures, and drains meet clear standards: tiles should show even color and a consistent sheen, grout lines remain uniform and free of staining or crumbling, fixtures operate smoothly with no mineral buildup or corrosion, and drains flow freely without visible debris or biofilm.
Guidance on how to clean a walk in tiled shower emphasizes routine care, gentle cleaners, and prompt drying.
Common signs of buildup, mold, and permanent damage
Regularly inspecting a walk-in tiled shower reveals early indicators of buildup, mold, and irreversible damage: discoloration or dark streaks along grout lines, a fuzzy or slimy film on tile surfaces, persistent musty odors, cracked or powdery grout, loose or chipped tiles, and corrosion or pitting on metal fixtures and drain components.
Prompt remediation prevents spread; stubborn stains, persistent dampness, or structural failures indicate professional assessment or replacement.
Quick Summary: Fast Steps to Clean a Walk-In Tiled Shower
A concise, actionable checklist outlines the steps for a 30–60 minute clean: remove debris, apply cleaner, scrub tile and grout, rinse, and dry.
A brief supplies list names the essentials—gloves, scrub brush, squeegee, microfiber cloths, bucket, and an appropriate tile/grout cleaner.
This summary prepares the reader to follow an efficient, timed cleaning routine.
One-paragraph actionable checklist for a 30 to 60 minute clean
Begin by gathering supplies—microfiber cloth or sponge, stiff nylon brush, grout brush or old toothbrush, all-purpose tile cleaner or diluted vinegar solution, glass cleaner (if applicable), bucket, and rubber gloves—and set a 30–60 minute timer; then ventilate the bathroom and remove shampoo bottles and mats.
Spray cleaner on tile and grout, scrub grout lines, wipe tiles and fixtures, rinse thoroughly, squeegee glass, dry surfaces, replace items.
Supplies and tools checklist
Several essential tools and supplies make a quick, effective walk-in tiled shower clean possible: soft-bristle brush, grout brush, nonabrasive sponge, microfiber cloths, squeegee, spray bottles, rubber gloves, and a bucket.
Cleaning agents include pH-neutral tile cleaner, diluted bleach or hydrogen peroxide for grout, and white vinegar for soap scum.
Optional: steam cleaner and old toothbrush for tight spots.
Safety and Preparation Before You Clean
Before cleaning, one should don appropriate personal protective equipment and guarantee good ventilation to limit exposure to fumes and splashes.
Glass and metal fixtures, as well as non-tiled surfaces, should be covered or wiped to prevent damage from cleaners.
A small, inconspicuous spot must be tested with any chosen cleaner to confirm it will not discolor or etch the tile or grout.
Personal protective equipment and ventilation
When cleaning a walk-in tiled shower, appropriate personal protective equipment and adequate ventilation are essential to reduce exposure to chemical cleaners, mold spores, and airborne debris.
Wear chemical-resistant gloves, eye protection, and a mask rated for particulates or chemical vapors as needed.
Open windows, run an exhaust fan, and allow fresh-air circulation.
Replace or clean respirators and launder contaminated clothing promptly.
Protecting glass, metal fixtures, and non-tiled surfaces
After addressing personal protective equipment and ventilation, attention should turn to shielding glass, metal fixtures, and other non-tiled surfaces from cleaner splash, abrasive scrubbing, and corrosion.
Apply painter’s tape and plastic sheeting to edges, remove or cover hardware if possible, and place towels beneath fixtures.
Use nonabrasive pads near seals, rinse promptly after cleaning, and dry metal to prevent spotting and tarnish.
Testing cleaners on a small inconspicuous area
How should one confirm a cleaner’s compatibility with tile, grout, glass, and metal without risking visible damage?
A small, hidden spot—behind a fixture, under a shelf, or inside a corner—is dampened, cleaner applied, and timed per instructions.
After rinsing and drying, inspect for discoloration, etching, or residue.
If unchanged, proceed; if not, choose a milder product and retest.
Choosing the Right Cleaners and Tools
Selecting the right cleaners and tools depends on tile type, soil level, and safety considerations.
Commercial options range from acidic and alkaline formulas to enzymatic and oxygen-bleach products, while DIY alternatives include vinegar, baking soda, hydrogen peroxide, and borax.
Brushes, grout tools, steam cleaners, squeegees, and microfiber cloths suit different tasks, and stubborn stains or specialized surfaces may call for professional products or a contractor.
Commercial cleaners: acidic, alkaline, enzymatic, and oxygen bleach
When tackling stubborn soap scum, mineral deposits, mold, or everyday grime in a walk-in tiled shower, commercial cleaners fall into four main categories—acidic, alkaline, enzymatic, and oxygen bleach—each formulated for specific soils and surfaces.
Acidic removes mineral scale; alkaline cuts organic grime and oils; enzymatic digests biological residues and mold; oxygen bleach whitens grout and lifts stains without the fumes of chlorine.
DIY solutions: vinegar, baking soda, hydrogen peroxide, borax
Choose DIY cleaners based on the type of soil and the shower’s materials: vinegar and baking soda work well on light mineral deposits and soap scum but can harm natural stone.
Hydrogen peroxide whitens grout and treats mold without chlorine fumes, and borax provides a mild alkaline boost for cutting grease and sanitizing.
Use diluted solutions, test hidden spots, ventilate, and rinse thoroughly after treatment.
Tools: brushes, grout tools, steam cleaners, squeegees, microfiber cloths
Equip the cleaning kit with tools suited to the shower’s surfaces and soil: stiff nylon brushes and a grout brush for scrubbing textured tile and grout lines, a soft-bristled brush for delicate ceramic or glazed surfaces, a handheld steam cleaner to loosen stubborn soap scum and mildew without chemicals, a rubber squeegee for daily water removal to prevent buildup, and microfiber cloths for streak-free drying and polishing.
Use grout picks sparingly and a small bucket for mixing solutions.
When to use professional products or call a pro
Decide on professional products or a contractor based on tile type, severity of buildup, and household health concerns.
For delicate stone or sealed surfaces, and for mold penetrating grout, use manufacturer-recommended cleaners or hire a pro.
Choose low-odor, non-toxic options if sensitivity exists.
Call a contractor for extensive discoloration, damaged grout, persistent odors, or when deep restoration and resealing are required.
Step-by-Step Deep Clean for Tile and Grout (How-To)
The procedure begins with clearing the shower, sweeping and rinsing surfaces to remove loose debris.
Next, appropriate cleaners are applied in sequence—general tile solution for broad surfaces and a grout-specific product where needed—followed by targeted brushing techniques to agitate grout lines and tile faces.
The final steps are a thorough rinse with spot inspection, then drying and buffing to restore shine.
Step 1 Prep: remove items, sweep and rinse
Clear the shower area of all personal items, mats, and removable fixtures so surfaces are fully exposed for cleaning.
Next, sweep or vacuum loose debris from floor and corners, then rinse walls and floor with warm water to loosen soap scum and grime.
Check drains and remove hair or blockages.
Verify ventilation and put on gloves before proceeding to chemical or scrubbing steps.
Step 2 Apply cleaner: sequence for tile vs grout
Begin by applying cleaners to tile and grout in the proper order to maximize effectiveness and protect surfaces: apply grout cleaner first to targeted lines, allowing dwell time per product instructions.
Then apply tile-safe cleaner across larger ceramic or porcelain areas. Avoid overlapping strong grout formulations onto decorative tile.
Rinse grout-treated areas briefly if recommended before full tile application to prevent residue or etching.
Step 3 Agitate: brushing techniques for grout and tile
Use a firm, methodical brushing motion to lift soil from grout lines and tile surfaces without damaging either.
Begin with a stiff nylon grout brush along seams, angling bristles into joints. For tile, use a softer brush or sponge to avoid scratching.
Work in short sections, applying consistent pressure and overlapping strokes.
Finish by loosening residue for removal in the next step.
Step 4 Rinse thoroughly and spot-inspect
Flush the cleaned surfaces with warm water to remove loosened grime and cleaning residue, directing flow from the top of the shower downward so contaminants rinse into the drain.
Inspect grout and tile closely for remaining stains or cleaner residue, using a soft cloth or sponge to rewash small areas.
Repeat targeted rinsing until surfaces appear uniformly clean and free of suds.
Step 5 Drying and buffing for shine
After rinsing, towel-dry the tiles and grout with a clean microfiber cloth or absorbent towel, working from top to bottom to prevent streaks and water spots.
Follow with a dry, lint-free cloth to buff each tile in circular motions, paying attention to grout lines.
Make certain fixtures and corners are moisture-free to deter mildew.
Allow full air-dry before reusing the shower.
Removing Tough Stains, Soap Scum, and Hard Water Deposits
Effective stain removal begins with identifying whether discoloration is organic, oily, or mineral so the appropriate treatment is chosen.
For soap scum and body oil, emulsifying cleaners or alkaline solutions break buildup, while acidic or chelating agents target mineral and hard water deposits.
Gentle abrasives (e.g., non-scratch pads, baking soda) can aid removal, but stronger scrubbing or abrasive powders should be avoided on porous or delicate tiles.
Identifying stain types and matching treatment
How can one tell whether a shower stain is soap scum, hard-water mineral buildup, or organic residue?
Visual cues and simple tests distinguish them: soap scum appears filmy, cloudy, and feels slippery; mineral deposits are white, crusty, and resist wiping; organic residue (mildew/mold) shows black/green spots and often smells musty.
Match treatment by hardness, texture, and odor before selecting cleaners.
Methods for soap scum and body oil buildup
Tackle soap scum and body oil buildup with methods that loosen, emulsify, and lift residues without damaging tile or grout.
Begin with a gentle alkaline cleaner or diluted dish soap to break oils, then agitate with a soft brush or nonabrasive pad.
For stubborn patches, apply a paste of baking soda and water, let sit, scrub, then rinse thoroughly and dry to prevent reformation.
Techniques for tackling mineral/hard water stains
Address mineral and hard water deposits by using acids or chelating agents that dissolve mineral bonds without etching the tile.
Apply product per instructions, allow dwell time, then agitate with a soft brush. Rinse thoroughly and neutralize if required.
For persistent buildup, repeat treatments or use stronger chelators.
Test any product in an inconspicuous area first to confirm compatibility.
Safe abrasive options and when to avoid them
When stronger mechanical action is needed, select abrasives that remove buildup without scratching grout or tile surfaces. Nonwoven nylon pads, fine-grade melamine sponges, and pumice made specifically for porcelain are effective on soap scum and mineral films while minimizing surface damage.
Avoid harsh powders, metal scouring pads, and acidic scrubs on soft stone, polished finishes, or colored grout; always test an inconspicuous area first.
Mold and Mildew Remediation in Grout and Caulk
Mold in grout often penetrates porous joints while mold in caulk typically sits on the surface, so identification guides the remediation approach.
Effective targeted treatments include diluted bleach, hydrogen peroxide, or commercial mold removers applied with proper ventilation and contact time.
If staining, crumbling, or persistent regrowth occurs, the affected grout or caulk should be removed and replaced to restore a watertight seal.
Difference between mold in grout vs caulk
How does mold behave differently in grout compared with caulk?
Mold penetrates porous grout, embedding in joints and requiring deeper cleaning or replacement; it often appears as dark stains.
In contrast, caulk—typically nonporous silicone or latex—allows surface growth that is easier to scrape away but more prone to separation and recurring colonies when adhesion fails.
Maintenance and replacement needs differ.
Targeted solutions: bleach, hydrogen peroxide, and mold removers
Addressing mold and mildew in grout and caulk requires selecting agents that match the material and extent of growth: bleach, hydrogen peroxide, and commercial mold removers each work differently and have distinct advantages and limitations.
Bleach whitens and kills surface mold on non-porous grout; hydrogen peroxide is less corrosive, suitable for colored grout and caulk.
Commercial removers offer formulated fungicides but require ventilation and follow label precautions.
When to remove and replace grout or caulk
When is replacement necessary, and how can one tell the difference between salvageable surfaces and those that require full removal?
Experts recommend replacing grout or caulk when mold penetrates, grout is crumbling, hairline fractures appear, or caulk detaches.
Superficial stains that bleach and scrubbing remove are salvageable.
Full removal guarantees a watertight seal, prevents recurrence, and restores joint integrity.
Restoring and Whitening Grout
Restoring grout begins with choosing an appropriate whitening method, from intensive scrubbing and oxygen bleach treatments to professional steam cleaning.
Homeowners must weigh stain-removing products and colorants that can mask or penetrate stains against the longevity and appearance of the results.
When deciding between regrouting and grout painting, the trade-offs are clear: regrouting offers a permanent structural fix while painting is quicker and less costly but may require more frequent touch-ups.
Deep-clean grout whitening methods
Deep-clean grout whitening methods focus on removing ingrained stains and residue from grout lines using a combination of mechanical agitation, targeted cleaners, and repeat treatments as needed.
They employ stiff brushes or rotary tools, oxygen bleach or alkaline cleaners, poultices for localized stains, and steam for sanitation.
Procedure includes testing, timed applications, rinsing, and repeating until desired contrast returns without altering grout texture.
Grout stain products and colorants
After completing mechanical and chemical whitening, attention often turns to products that restore uniform color or permanently cover stubborn discoloration.
Manufacturers offer epoxy-based stains, pigment pens, water-based colorants, and sealant-tinted options. Application varies by porosity and traffic; compatibility with sealers matters.
Choose mildew-resistant formulas and test inconspicuously before full use.
- Epoxy grout stain
- Pigment pens
- Water-based colorants
- Tinted sealants
Regrouting vs grout painting: pros and cons
Which approach best revives tired grout depends on the severity of damage and the desired longevity: regrouting replaces compromised material for a durable, structural fix, while grout painting (colorant application) offers a quicker, less invasive cosmetic refresh. Regrouting suits cracked or missing grout; painting suits surface stains. Consider cost, time, durability, and mildew resistance when choosing.
| Factor | Consideration |
|---|---|
| Durability | Regrouting lasts longer |
| Cost | Painting is cheaper |
| Time | Painting is faster |
| Appearance | Both improve look |
| Maintenance | Regrouted grout easier to clean |
Sealing Tile and Grout: When and How to Apply Sealant
After grout has been cleaned and repaired, attention turns to selecting an appropriate sealant—penetrative or topical—matched to the tile material (porcelain, ceramic, natural stone) and grout composition.
The sealing process follows a clear sequence: allow full cure, apply sealant evenly with recommended tools, wipe excess, and respect manufacturer dry and recoat times.
Frequency of resealing depends on traffic and tile type, typically every 1–3 years for grout and longer for nonporous tiles, with spot tests to confirm protection before delaying maintenance.
Types of sealants and compatibility with tile materials
When selecting a sealant for a walk-in tiled shower, consider both the tile material and grout composition to guarantee chemical compatibility and effective protection; porous natural stone and unglazed ceramic demand penetrating sealers, while glazed porcelain and vitreous tiles typically require only grout sealing.
Silicone or hybrid caulks suit joints; fluoropolymer or silane/siloxane penetrants protect stone and cementitious grout without altering appearance.
Step-by-step sealing process and dry times
Before sealing, the shower surface must be spotless, fully cured, and completely dry; this guarantees proper penetration and adhesion of the chosen sealer.
Apply sealer in small sections with a low-lint cloth or applicator brush, following manufacturer coverage. Wipe excess after recommended dwell time.
Allow initial dry time, then cure undisturbed per label (typically 24–72 hours) before light use.
How often to reseal based on use and tile type
Resealing frequency depends chiefly on tile material, grout type, and shower usage: porcelain and glazed ceramic typically require resealing every 3–5 years (or not at all if fully vitrified and factory-sealed).
Natural stone like marble, travertine, and unglazed slate usually need resealing every 6–12 months, and porous grout often benefits from annual attention.
High-use showers, homes with hard water, or steam-heavy environments shorten these intervals and may require more frequent checks.
Inspect sealant annually, perform water tests, and reseal sooner if water beads fail, discoloration appears, or grout darkens.
Use penetrating sealers for stone and grout, follow manufacturer dwell times, and allow full cure before wetting to guarantee lasting protection.
Maintenance Routine to Keep Shower Sparkling
A clear maintenance routine separates quick upkeep from periodic deep cleaning: daily and weekly checklists tackle soap scum and wet spots, while monthly and seasonal tasks address grout, drains, and sealant inspection.
Simple habits—running the fan, squeegeeing after each use, and choosing low-residue cleaners—significantly reduce buildup.
The following checklist and schedule outline specific actions to keep the walk-in tiled shower consistently sparkling.
Daily and weekly quick-maintenance checklist
Although daily care requires only minutes, a consistent short routine prevents buildup and preserves grout and tile finishes.
The checklist that follows outlines simple, repeatable tasks for both daily and weekly attention to keep a walk-in shower sparkling and trouble-free.
- Squeegee walls and glass after each use to reduce water spots.
- Wipe fixtures and ledges with a microfiber cloth.
- Spray a mild daily cleaner and rinse weekly.
- Check grout visually; spot-clean small stains promptly.
Monthly and seasonal deep-maintenance tasks
Consistency preserves both appearance and function: monthly and seasonal deep-maintenance tasks address mineral buildup, grout deterioration, and hidden mold before they become costly problems.
Inspect grout and caulk, deep-clean with appropriate descalers and grout cleaners, reseal grout annually or as needed, repair cracked tiles or failing caulk, clean shower drains and fixtures thoroughly, and monitor ventilation systems.
Schedule professional inspections for persistent issues.
Best habits to prevent buildup (ventilation, squeegeeing, product choices)
Monthly and seasonal checks reduce major repairs, but daily and weekly habits keep mineral deposits, soap scum, and mold from forming between deep-cleanings.
Regularly squeegee walls and glass after each use, ventilate thoroughly with a fan or open window, and dry fixtures.
Use mild, pH-neutral cleaners and occasional vinegar rinses on grout.
Replace or reseal grout and shower curtains as needed.
Tools, Cleaners, and Products Recommended for Different Tile Types
Different tile materials call for specific tools and cleaners to protect their finish and longevity.
For ceramic and porcelain, mild detergents and nonabrasive scrubbers are recommended; natural stone requires pH-neutral cleaners and avoidance of acids; and glass tile and mosaics benefit from streak-free cleaners and soft cloths or squeegees.
The following section outlines precise product suggestions and precautions for each tile type.
Ceramic and porcelain tile recommendations
When selecting tools and cleaners for ceramic and porcelain tile, prioritize nonabrasive brushes, microfiber mops, pH-neutral cleaners, and a soft grout brush to prevent scratching and preserve glazes; stronger, acid-based products should be reserved only for manufacturer-approved situations such as stubborn mineral buildup on glazed porcelain. Recommended items and uses:
| Item | Use | Notes |
|---|---|---|
| Microfiber mop | Daily cleaning | Traps dirt |
| Soft grout brush | Spot grout | Gentle scrubbing |
| pH-neutral cleaner | Regular wash | Safe for glazes |
| Vinegar (limited) | Mineral deposits | Use sparingly |
Natural stone tile recommendations and precautions
Handle natural stone with greater caution than ceramic or porcelain: porous materials like marble, travertine, limestone, and slate require pH-neutral, nonacidic cleaners, soft brushes, and regularly resealed grout and stone to prevent etching, staining, and moisture penetration. Recommended: gentle stone soap, microfibers, soft nylon brushes, and a penetrating sealer applied per manufacturer guidance.
| Product | Emotion |
|---|---|
| Stone soap | Confidence |
| Microfiber | Relief |
| Soft brush | Care |
| Penetrating sealer | Trust |
Glass tile and mosaic care tips
A careful approach is required for glass tile and mosaics, which demand nonabrasive tools and cleaners to preserve shine and grout integrity.
Use soft microfiber cloths, nylon brushes, and squeegees. Apply pH-neutral, ammonia-free cleaners or diluted dish soap; avoid vinegar, bleach, and abrasive powders.
For grout, use gentle enzymatic cleaners. Rinse thoroughly and dry to prevent water spots and mineral buildup.
Common Mistakes to Avoid When Cleaning Tiled Showers
Many homeowners use cleaners or tools that react poorly with certain tile and grout, or scrub so hard that finishes and sealants are worn away.
Inadequate sealing and poor ventilation are common oversights that accelerate staining and mold growth.
The section will explain how to recognize and repair cleaning damage and how to prevent these errors.
Harmful cleaner and tool combinations
Mixing cleaners or pairing harsh chemicals with abrasive tools can damage tile, grout, and fixtures.
Chlorine bleach with ammonia creates toxic gas; acid cleaners on natural stone etch surfaces.
Steel wool, wire brushes, and coarse pads scuff glaze and wear grout joints.
Use manufacturer-recommended products, test in an inconspicuous spot, and match tool aggressiveness to material to avoid irreversible harm.
Over-scrubbing, improper sealing, and ventilation errors
Scrubbing too vigorously, failing to reseal grout, and neglecting proper ventilation each accelerate wear and invite recurring problems in a tiled shower.
Abrasive scrubbing erodes grout and dulls tiles, while missed resealing allows moisture penetration and stains.
Poor ventilation sustains humidity, fostering mold and adhesive breakdown.
Consistent gentle cleaning, scheduled sealing, and adequate airflow prevent premature deterioration and repeated remediation needs.
How to fix damage caused by improper cleaning
Address visible wear by evaluating the specific damage—eroded grout, etched glaze, mold stains, or loose tiles—so that repairs target the root cause rather than masking symptoms.
Replace or regrout compromised joints, use color-matched epoxy for stability, and apply appropriate tile repair kits for surface etching.
Treat mold with enzyme cleaners, improve ventilation, and reseal with a quality penetrating sealer to prevent recurrence.
When to Call a Professional
If persistent stains, soft or bowed tiles, or signs of water intrusion appear, a professional inspection is warranted to assess potential structural or water-damage issues.
Qualified technicians can perform specialized services such as deep grout restoration, high-temperature steam cleaning, or full tile replacement that exceed standard DIY methods.
Homeowners should consider hiring a pro when problems risk further damage or when repairs require specialized tools and expertise.
Signs of structural or water-damage issues
Signs that a walk-in tiled shower may have underlying structural or water-damage issues include persistent damp odors, soft or sagging floor tiles, discolored grout that spreads rather than cleans, and mold growth behind grout lines or fixtures; these symptoms warrant prompt professional assessment to prevent worsening damage.
Additional indicators include peeling caulk, water stains on adjacent ceilings or walls, loose or hollow-sounding tiles, and recurring leaks.
Professional services: deep grout restoration, steam cleaning, tile replacement
Call a professional when routine cleaning and DIY repairs fail to restore grout integrity, remove deep-set stains, or resolve recurring leaks that suggest hidden damage.
Trained technicians assess substrate issues, perform deep grout restoration or regrouting, apply steam cleaning for sanitization and stain extraction, and replace cracked or loose tiles.
Professional intervention prevents mold spread, structural deterioration, and costly future repairs.
Quick Reference: Cleaning Schedule and Product Cheat Sheet
Consistency matters: a simple, regular routine prevents soap scum and mildew from taking hold and keeps grout and tile in good condition.
A concise schedule and product cheat sheet helps prioritize tasks, choose appropriate cleaners, and extend tile life.
- Daily: squeegee, ventilate
- Weekly: mild detergent, soft brush
- Monthly: grout cleaner, stiff brush
- Annually: sealant inspection, professional deep clean
Conclusion
A gleaming walk-in shower is achievable with regular care and the right methods; even those short on time can follow the quick steps and targeted deep-clean to restore tile and grout without costly replacements. For readers worried cleaning will damage delicate finishes, the guide’s tailored product and technique recommendations guarantee safe, effective results for porcelain, ceramic, stone and glass. Consistent maintenance prevents buildup, keeps surfaces sanitary, and prolongs the shower’s lifespan.