How to Repair Dishwasher Racks: Simple DIY Fixes to Stop Rust and Rewire Wheels
If your dishwasher racks are rusted or have damaged wheels, you can often fix them with simple DIY steps. Begin by checking for chipped vinyl, surface rust, bent tines, and any loose or missing rollers. Remove the rack from the dishwasher and sand away rust spots. Treat the affected areas with vinyl repair paint or epoxy, and cover exposed wires with caps. Replace any worn clip-on wheels or axles, ensuring everything is properly aligned. For minor repairs, use corrosion-resistant crimps and sealant. Continue reading for detailed guidance on necessary tools, estimated costs, and advice on when it might be better to replace the rack.
What Causes Dishwasher Rack Damage and When to Repair
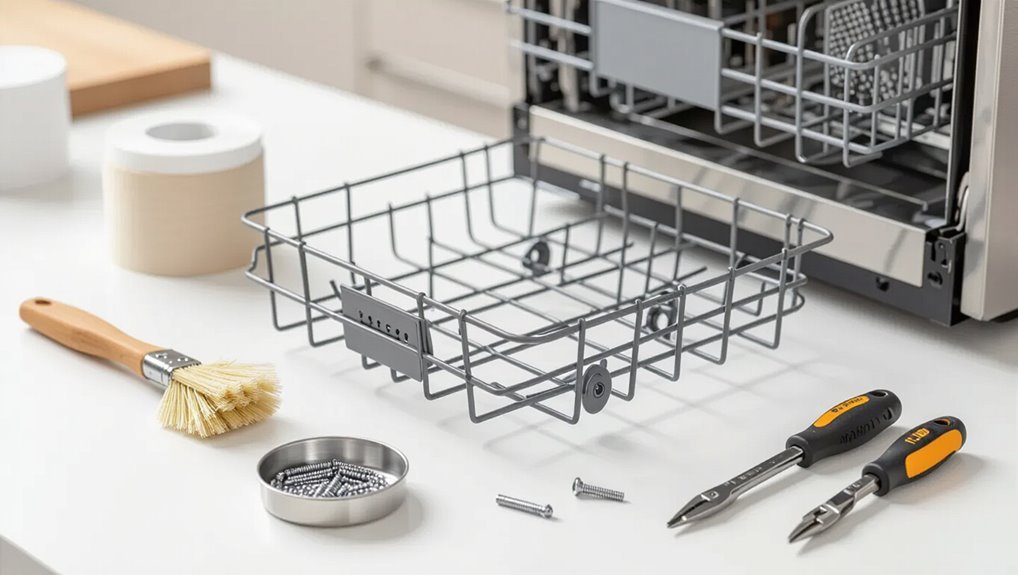
Common causes of dishwasher rack damage include rust from worn or chipped vinyl coating, chipping from heavy or dropped items, and wire coating failure due to age or abrasive detergents.
Indicators that repair suffices versus replacement include localized coating loss or loose tines versus widespread corrosion, bent structural elements, or broken welds.
Before beginning work, weigh safety risks (sharp edges, electricals), estimated repair cost and time, and whether replacement offers better long-term value.
Common causes of rack rust, chipping, and wire coating failure
Several factors accelerate dishwasher rack deterioration, including prolonged exposure to hard water minerals, abrasive detergents, and repeated mechanical impact from loading and unloading.
Chemical corrosion, salt and mineral deposits, and chipped vinyl coating expose metal to moisture, prompting rust.
Poor rack maintenance and overcrowding worsen wear.
Understanding these causes informs how to repair dishwasher rack coatings, recoat wires, or replace affected sections promptly.
Signs your rack needs repair vs replacement
When should a dishwasher rack be repaired and when is replacement necessary?
Minor surface rust, isolated wire coating chips, loose or missing wheels, and small bent tines are usually repairable with coatings, clips, or wheel replacements.
Extensive corrosion, multiple broken tines, warped frames, or widespread coating failure warrant full rack replacement for durable performance and to prevent ongoing damage to dishes and dishwasher components.
Safety and cost considerations before starting repairs
Before attempting repairs, assess potential hazards and total costs to determine whether a fix is prudent.
Evaluate sharp edges, electrical components, chemical exposure, and stability.
Compare replacement rack or part prices, tool and coating costs, and time investment.
Factor warranty status and skill level; when safety risks or expenses exceed benefits, opting for professional service or replacement is recommended.
Materials, Tools, and Replacement Parts You’ll Need
The section outlines appropriate coating materials and rust-repair kits for restoring protective finishes and stopping corrosion.
It also lists compatible replacement wheels, rollers, and axle types to match common rack designs.
Finally, it summarizes the basic tools needed for rewiring and re-coating racks, including pliers, wire cutters, and touch-up applicators.
Coating materials and rust repair kits to consider
Several reliable coating options and rust repair kits exist to restore dishwasher racks and prevent further corrosion.
Epoxy and vinyl rack repair paints, touch-up enamel, and rubberized coatings bond to metal and resist detergents. Rust converters neutralize corrosion before coating.
Kits commonly include primer, brush-on or spray coatings, and replacement vinyl tips. Choose high-temperature, dishwasher-safe products and follow manufacturer cure instructions.
Replacement wheels, rollers, and axle types
Identify the specific wheel, roller, and axle types required for a dishwasher rack replacement by inspecting the existing components and consulting the model’s parts diagram.
Common options include nylon clip-on wheels, ball-bearing rollers, and straight or hooked steel axles.
Match size, mounting style, and heat/water resistance to the model to guarantee smooth operation and corrosion resistance.
- Nylon clip-on wheels
- Ball-bearing rollers
- Straight/hooked axles
Tools for rewiring and re-coating racks
Gathering the right tools and materials guarantees a durable rewiring and recoating job for a dishwasher rack.
Essential items include vinyl repair kit, nylon-coated replacement wire, rust converter and high-temperature appliance paint. Proper tools speed work and secure adhesion and safety.
- Wire cutters, pliers, and crimping tool
- Sandpaper, rust brush, and masking tape
- Heat gun, respirator, and gloves
How to Stop Rust: Step-by-Step Rack Recoating
The section outlines how to prepare a rack by removing grime and loose rust before recoating.
It compares vinyl repair kits and dishwasher-safe paints, explains even application and proper curing, and notes when epoxy or powder coating are better choices.
Practical tips and product recommendations follow to help select and apply the right solution.
Preparing the rack: cleaning and removing loose rust
Begin by clearing the dishwasher rack of all dishes and detachable accessories.
Then remove loose rust and flaking coating with a stiff nylon brush or fine steel wool.
Wipe residue with a damp cloth.
Degrease with mild detergent or isopropyl alcohol, rinse, and dry thoroughly.
Mask surrounding areas to prevent overspray and inspect for remaining pitting or structural damage before proceeding.
Choosing the right coating: vinyl repair vs dishwasher-safe paint
Several factors determine whether a vinyl sleeve kit or a dishwasher-safe epoxy paint is the better choice for recoating a rusty rack: extent of damage, desired durability, ease of application, and budget.
Vinyl sleeves suit localized wear and quick repairs, offering immediate protection but limited longevity.
Epoxy paint covers broader corrosion and yields a tougher, more uniform finish, requiring more prep and time.
Applying coating evenly and curing tips
After choosing between vinyl sleeves and epoxy paint, attention shifts to applying the chosen coating evenly and ensuring proper curing for lasting protection.
Surfaces must be clean, dry, and rust-free. Apply thin, uniform layers, avoiding drips and gaps; overlap minimally.
Allow recommended cure times at specified temperatures and humidity. Inspect for missed spots and recoat only after full cure to guarantee adhesion and durability.
When to use epoxy or powder-coating alternatives
Choose epoxy when durability and precision repairs are needed, and opt for powder-coating alternatives when factory‑grade toughness and full‑coverage finish are priorities.
Epoxy suits small spots, quick touchups, and indoor DIY with limited equipment.
Powder-coating alternatives (liquid dip, high‑temp spray) fit full‑rack restoration, heavier wear, and professional booths.
Consider cost, equipment, cure time, and desired longevity before choosing.
Repairing Exposed or Broken Wires on Racks
The section outlines how to spot exposed or broken rack wires and which areas—corners, bends, and load-bearing supports—require immediate attention.
It then summarizes methods for repairing or replacing sections using vinyl tips, coating sleeves, and proper splices to restore the frame.
Finally, it covers testing procedures to confirm insulation integrity and that repaired sections can safely bear normal dishwasher loads.
Identifying wire damage and areas to prioritize
Inspecting the rack carefully reveals where the vinyl coating has worn away, where rust has eaten through, and where wires have snapped or bent sharply.
These defects determine what must be repaired first to prevent further corrosion and to protect dishes from chipping.
Priority is given to sharp breaks, load-bearing supports, and areas near hinges or wheel mounts.
Mark locations, assess extent, and plan targeted repairs.
Techniques for rewiring with vinyl tips and coating sleeves
Begin by preparing a clean, dry work area and gathering vinyl tips, coating sleeves, wire cutters, pliers, and heat-shrink or adhesive-lined sleeves; proper tools guarantee neat, durable repairs.
Trim frayed wire ends, slide on a coating sleeve or heat-shrink, then seat vinyl tips over terminations.
Apply heat or adhesive as directed, ensuring full coverage and snug fit to prevent moisture and abrasion.
How to splice or replace sectioned wire frames
When a rack’s protective coating fails and wires are exposed or broken, one common solution is to splice in a new section of wire or replace the damaged segment entirely; this restores structural integrity and prevents further rust and tear.
Cut back to solid metal, measure and bend a replacement piece, join with corrosion-resistant crimps or stainless steel wire twist, then seal with high‑temp epoxy and vinyl coating.
Testing insulation and load-bearing integrity after repair
After splicing or replacing damaged sections and sealing exposed metal, the repaired area must be tested for both insulation integrity and load-bearing strength to guarantee safe, long-term use.
Inspect coating continuity visually and probe gently for exposed wire.
Apply a flexible insulation test: submerge sealed area in water briefly, then dry and check for flaking.
Load-test with incremental weight to confirm no deformation or loosened joints.
Replacing and Rewiring Wheels and Rollers
The rack is first removed to expose the wheel assemblies and gain safe access for replacement.
Matching replacement wheels are selected by comparing size, mounting style, and material to the originals.
The procedure then proceeds step-by-step: remove old wheels, install new ones, and adjust axles and alignment until the rack rolls smoothly.
Removing the rack and accessing wheel assemblies
Begin by sliding the rack fully outward and locating the end stops that secure it to the rails; removing these stops allows the rack to lift free so the wheel assemblies are accessible.
Support the rack, detach any clips or retention tabs, and lift straight up.
Inspect wheel mounts, note orientation and wiring clips, and clear debris before proceeding with removal or rewiring.
How to choose matching replacement wheels
When selecting replacement wheels, make certain they match the original in size, axle type, and mounting style to guarantee proper fit and smooth operation.
Verify wheel diameter, width, and material—nylon resists wear; rubber reduces noise.
Confirm axle thickness and whether a snap-on, riveted, or threaded mount is required.
Cross-reference model numbers or photos with parts suppliers for exact matches.
Step-by-step wheel removal and installation
After confirming the correct replacement wheels by size, axle type, and mounting style, preparation for removal and installation should follow a clear sequence.
Disconnect the dishwasher and slide out the rack. Remove retainers or clips, then lift old wheels off axles.
Clean mounting points, position new wheels, secure with clips or screws, and test rotation.
Reinsert rack and reconnect the appliance.
Adjusting axles and alignment for smooth movement
Several simple adjustments to axles and wheel alignment can restore smooth rack movement and prevent premature wear.
The technician inspects axles for bends, cleans corrosion, and replaces damaged shafts. Wheels are realigned to track grooves, spacers repositioned, and fasteners torqued to specification.
After lubrication and test runs, the rack should glide evenly, eliminating binding and prolonging component life.
Quick Fixes and Temporary Solutions
A few simple temporary measures can keep a rack functional while waiting for permanent repairs. Protective caps and clips cover exposed wires and sharp edges, and rust inhibitors or adhesive tape can slow corrosion and stop snags.
These short-term fixes are suitable for cosmetic damage or minor hazards but should not replace full repair when structural integrity or safety is compromised.
Using protective caps and clips to cover sharp edges
Slip protective caps or clips onto broken tines and exposed wire to instantly eliminate sharp edges and prevent chips, snags, or cuts.
The installer selects heat-shrink caps, vinyl end caps, or small plastic clips sized to the tine diameter. Press caps firmly, trim excess if needed, and check fit.
Replace damaged caps regularly; inspect for loosening after cycles to verify continued protection.
Temporary rust inhibitors and tape solutions
Many quick dishwasher-rack repairs rely on temporary rust inhibitors and tape to slow corrosion and cover exposed metal until a permanent fix is applied.
Rust converters, silicone-based sprays, and clear enamel provide short-term protection.
High-temperature plumbing tape, vinyl electrical tape, or waterproof fabric tape wrap damaged areas to prevent scratching and moisture contact.
These measures buy time but require later proper rewiring or replacement.
When temporary fixes are acceptable and when they’re not
When is a quick patch acceptable and when does a repair demand permanence?
Temporary fixes suit minor rust spots, loose wheel clips, or short-term delays until replacement parts arrive. They should be safe, non-toxic, and inspected regularly.
Permanent repairs are required for structural corrosion, exposed metal causing damage to dishes, persistent wheel failure, or recurring issues that compromise function or safety.
Preventive Maintenance to Extend Rack Life
Preventive maintenance focuses on simple habits that keep racks functional and rust-free.
Regular cleaning to remove deposits, choosing detergents and loading methods that minimize wear, and performing seasonal inspections with minor touch-ups can all extend rack life.
These measures reduce the need for repairs and help preserve coating and structural integrity.
Cleaning routines to prevent rust buildup
Establishing a simple, regular cleaning routine greatly reduces the risk of rust forming on dishwasher racks.
Regular monthly inspections remove debris, food particles, and mineral deposits. Use a soft brush and mild vinegar solution to clear trapped grime and salt buildup.
Dry exposed coating after cycles, address chips promptly with touch-up paint, and store removable racks dry between long unused periods to prevent corrosion.
Best detergents and loading practices to avoid damage
Select detergents formulated for dishwasher use and follow manufacturer dose recommendations to minimize abrasive residues and chemical wear on rack coatings.
Choose phosphate-free, low-bleach formulas when possible and avoid coarse powders.
Load plated or delicate items separately to prevent chipping of protective coating.
Space dishes to allow water flow, secure lightweight items, and avoid overcrowding that causes rubbing and localized wear on rack vinyl and paint.
Seasonal inspections and minor touch-ups
Inspect racks at the start of each season for chips in the vinyl coating, rust spots, loose tines, and accumulated debris, addressing small issues promptly to prevent accelerated deterioration.
Perform targeted touch-ups: sand and apply rust converter, repaint with appliance-grade vinyl repair paint, recoat exposed metal with vinyl dip, tighten or realign tines, and clean tracks and rollers to maintain smooth operation and extend rack lifespan.
Cost Comparison: Repair vs Replace
A brief cost comparison helps determine whether a rack repair is a budget-friendly DIY project or warrants professional service. Typical DIY repair costs are usually limited to parts and basic tools, while professional service adds labor and diagnostic fees; sometimes replacement parts or a new rack are the cheaper long-term option. The table below summarizes common cost ranges to guide that decision.
| Item | Typical Cost Range |
|---|---|
| DIY parts (coating, clips, wheels) | $10–$60 |
| Professional service (labor + parts) | $75–$200 |
| Full rack replacement | $100–$400 |
Typical DIY repair costs vs professional service
Many homeowners find that DIY repairs for dishwasher racks typically cost between $10 and $60 for parts—coating paint, replacement rollers, or rack clips—while professional service calls often start around $75 to $150 and can rise if labor or extensive parts are required.
DIY saves money but needs time, tools, and confidence; professionals offer speed, warranty, and diagnostic expertise that can justify higher fees.
When replacement parts are more economical
Several factors determine when replacing dishwasher parts is more economical than full rack replacement: the age of the machine, availability and cost of specific components (rollers, clips, tine inserts, coating kits), and the extent of damage.
If parts are inexpensive and fit current models, targeted fixes save money. Conversely, extensive corrosion, discontinued parts, or high labor costs justify full rack or machine replacement.
Troubleshooting Common Repair Problems
Common post-repair issues include coating peeling, misaligned racks or noisy wheels, and persistent rust spots, each requiring different responses.
Causes and remedies for peeling coatings range from improper preparation to low-quality coatings, and can be addressed with proper surface prep and re-coating.
Quick wheel adjustments or track realignment often stop noise and binding, while persistent rust may need rust converters, primer and high-quality coatings for long-term prevention.
Coating peeling after repair: causes and remedies
Coating peeling after a dishwasher rack repair indicates a breakdown in adhesion between the replacement material and the original metal or an incomplete cure of the coating itself.
Causes include inadequate surface preparation, oil or rust left beneath the coating, wrong coating type, or insufficient curing time.
Remedies: strip loose coating, sand to bare metal, remove rust, apply compatible primer and coating, and follow manufacturer cure instructions.
Misaligned racks or noisy wheels: quick adjustments
Inspect the alignment and wheels before assuming a major repair: many rack misalignments and squeaky or grinding wheels stem from simple issues such as debris in the track, a bent guide, loose axle clips, or worn rollers.
Clean tracks, realign bent guides, tighten or replace axle clips, and swap damaged rollers. Test smooth travel and adjust wheel height or clip position for an immediate, reliable fix.
Persistent rust spots: prevention and long-term fixes
When simple track cleaning and wheel adjustments fail to stop brown spots from appearing, the problem often lies in exposed metal and ongoing moisture that create persistent rust on racks.
Inspect coatings, sand to bare metal where flaked, treat with rust converter, then apply dishwasher-safe epoxy or replacement vinyl-coated tips.
Prevent recurrence by drying racks between cycles, avoiding harsh detergents, and replacing damaged sections.
When to Hire a Professional or Replace the Rack
Decision criteria for hiring a professional include severity of damage, cost versus replacement, and availability of qualified technicians.
Sourcing compatible replacement racks or OEM parts requires checking model numbers, authorized dealers, and verified online retailers.
Before disposal, consider warranty status, recyclability of materials, and local e-waste or appliance recycling options.
Criteria for choosing professional repair services
Several clear factors determine whether a homeowner should hire a pro or replace a dishwasher rack outright.
Assess damage severity, safety risks, cost comparison of repair versus replacement, and availability of parts.
Consider warranty coverage, technician certification, estimated turnaround time, and local reviews.
Prioritize licensed specialists for structural or electrical issues; opt for replacement when repairs exceed 50% of replacement cost.
How to source compatible replacement racks or OEM parts
Locate compatible replacement racks or OEM parts by confirming the dishwasher’s make, model number, and production date—information typically found on the door frame or owner’s manual—before shopping.
Then compare part numbers and dimensions, prioritize OEM for fit, or choose high-quality aftermarket with clear returns.
- Check manufacturer parts catalogs
- Verify measurements and mounting points
- Use authorized dealers or reputable marketplaces
Environmental and warranty considerations before disposal
Assess environmental impact and warranty status before disposing of a damaged dishwasher rack: determine whether repairs, professional service, or replacement best balance cost, warranty coverage, and responsible disposal.
Check manufacturer warranty terms and authorized repair options to avoid voiding coverage. Consider recycling metal or plastic components, local hazardous-coating rules, and certified e-waste or appliance disposal services.
When repair exceeds value, replace responsibly.
Step-by-Step Repair Checklist and Materials Ready List
Begin by laying out a concise checklist of tasks and a corresponding materials list so the repair proceeds methodically and without interruption.
The technician reviews rust spots, wheel assemblies, and coating repair steps. Gather vinyl repair coating, sandpaper, rust remover, replacement wheels, pliers, screwdriver, and gloves.
Follow sequence: inspect, remove/replace, coat and cure.
- Inspect
- Replace
- Protect
Conclusion
Dishwasher rack repairs often prevent premature replacement: according to industry data, recoating or rewiring extends rack life by up to 60%, saving both money and waste. Simple fixes—rustproof coatings, wire repairs, and roller replacement—restore function and delay replacement. For persistent structural damage or extensive corrosion, professional assessment is advised. Homeowners who tackle routine maintenance can considerably reduce repair costs while keeping dishwashers operating safely and efficiently.