How to Repair a Toilet Tank Leak: Step-by-Step Fixes for Common Causes
If you’re dealing with a leaking toilet tank, you can identify the issue by checking for constant running water, pooling around the base, or using a dye test to spot seepage. Common causes include a faulty flapper, worn fill valve, cracked porcelain, or loose tank bolts and gaskets. Repairing the leak typically involves replacing the flapper or fill valve, swapping tank-to-bowl gaskets, or using epoxy for minor cracks. Testing seals and water levels is essential for ensuring a proper fix. The guide will provide step-by-step instructions for each repair, outline potential costs, and advise when to seek professional help.
How to Diagnose a Toilet Tank Leak Quickly
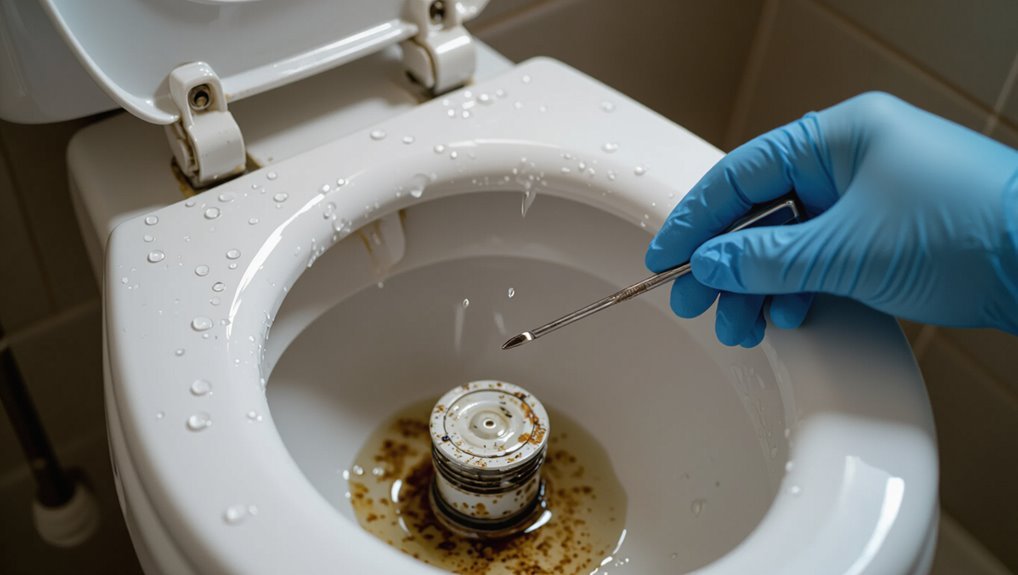
Signs such as constant running, water on the floor, or a slowly dropping tank water level can point to a leak and should be checked first.
A simple dye test — placing food coloring in the tank and watching the bowl for color transfer — helps pinpoint whether the flapper, fill valve, or a crack is at fault.
If the source is hard to access, the leak is large, or repairs require specialized parts, a professional plumber should be contacted rather than continuing DIY efforts.
Signs that indicate a leaking toilet tank
Several clear indicators can point to a leaking toilet tank, making quick diagnosis possible.
Water pooling around the base, constant running sounds, or frequent refills suggest a leak.
Stains or dampness on the floor, mildew odor, and fluctuating water bills also signal problems.
Recognizing these signs helps homeowners decide whether to learn how to repair a toilet tank leak or call a pro.
How to perform a dye test to find leak source
A simple dye test quickly pinpoints whether water is escaping from the tank into the bowl or elsewhere: add a few drops of food coloring or a commercial dye to the tank, wait 10–15 minutes without flushing, and then inspect the bowl and tank base for colored water, which reveals the leak’s source.
Repeat after testing components (flapper, overflow, tank bolts) while observing external fittings.
When to call a professional versus DIY
When should a homeowner tackle a toilet tank leak and when is professional help warranted?
A DIY approach suits simple issues: flapper replacement, float adjustment, or visible corroded bolts.
Call a professional for persistent leaks, cracked tanks, hidden supply-line damage, or if water spreads into walls/floors.
Also hire a plumber when diagnosis is uncertain or previous fixes fail, to prevent structural or mold issues.
Common Causes of Toilet Tank Leaks
Common toilet tank leaks typically stem from a handful of mechanical failures and material damage.
Frequent culprits include a worn or cracked tank-to-bowl gasket, a faulty flush valve or flapper assembly, problems with the fill valve or overflow tube, cracks in the porcelain, and loose or corroded tank bolts and washers.
Identifying which of these is present guides the appropriate repair steps.
Worn or cracked tank-to-bowl gasket
Several toilets develop leaks where the tank meets the bowl due to a worn or cracked tank-to-bowl gasket.
The gasket, a compressible seal between porcelain surfaces, can deteriorate with age, chemicals, or improper installation.
Signs include moisture under the tank, mineral staining, or intermittent dripping.
Replacement involves draining the tank, unbolting it, removing the old gasket, installing a new one, and reassembling securely.
Faulty flush valve or flapper assembly
After addressing a deteriorated tank-to-bowl gasket, inspection should turn to the flush valve and flapper assembly, another frequent source of tank leaks.
The flapper may warp, crack, or fail to seal, allowing water to seep into the bowl.
Replace a deteriorated flapper and clean or reseat the valve seat; test multiple flushes to confirm a watertight seal.
Faulty fill valve or overflow tube issues
One frequent cause of tank leaks stems from a worn or misadjusted fill valve or a damaged overflow tube: a malfunctioning fill valve can fail to shut off, allowing continuous refill, while a cracked or improperly positioned overflow tube can permit water to escape into the bowl or out of the tank.
Replacement or adjustment of the fill valve and securing or replacing the overflow tube stops persistent running and loss.
Cracks in the tank porcelain
While a malfunctioning fill valve or overflow tube produces internal leaks, structural damage to the tank itself creates a different, often more serious problem: cracks in the porcelain can allow water to seep externally or cause sudden, catastrophic failure.
Inspect for hairline or visible fractures, noting location and wetness.
Small non-structural chips may be cosmetic; major cracks require tank replacement to guarantee safety and prevent flooding.
Loose or corroded tank bolts and washers
Tighten and inspect the tank-to-bowl connection: loose or corroded bolts and deteriorated rubber washers are a common source of external leaks where the tank meets the bowl.
Turn off water, drain the tank, then check bolt nuts and washer condition.
Replace corroded bolts and hardened washers with stainless or plastic hardware and new rubber gaskets.
Reassemble, tighten evenly, and test for leaks.
Condensation versus actual leaks
When bathroom humidity is high, moisture can form on the outside of a cold toilet tank and mimic a plumbing leak.
Distinguishing condensation from a true leak requires inspection: wipe the tank dry, place paper towels under fittings, and observe after several flushes.
Persistent wetness at seals, bolts, or the tank-to-bowl joint indicates a leak; uniform beading and evaporation suggest condensation.
Tools and Parts You’ll Need
A concise list of basic tools—adjustable wrench, pliers, screwdriver, and a sponge—helps guarantee the job proceeds smoothly.
Common replacement parts to keep on hand include flappers, fill valves, tank-to-bowl gaskets, and mounting bolts.
Guidance on matching parts to the toilet model focuses on measuring existing components and checking manufacturer specs for compatibility.
Basic tools checklist
Necessary tools and a few common replacement parts make diagnosing and fixing a toilet tank leak straightforward.
A concise toolkit prevents delays and unnecessary calls to a plumber.
Essential items include:
- Adjustable wrench and pliers for nuts and fittings.
- Screwdriver set for covers and components.
- Tape measure, towels, and bucket to contain water and measure parts.
Common replacement parts to keep on hand
Several common replacement parts should be kept on hand to address most toilet tank leaks quickly: flapper valves, fill valves (ballcock assemblies or modern refill valves), refill tubes, tank-to-bowl gaskets, flush valve seals, and mounting nuts and bolts with rubber washers.
- Flapper, refill tube, and flush valve seal sets.
- Fill valve assemblies and adjustment clips.
- Tank-to-bowl gasket and mounting hardware.
How to choose compatible parts for your toilet model
When selecting replacement components, the homeowner should match parts to the toilet’s make, model, and age to guarantee proper fit and function.
Confirm measurements (bolt spacing, fill-valve height, flush-valve diameter), consult the manufacturer’s manual or model number inside the tank, and bring removed parts to the store if unsure.
Prioritize OEM or certified compatible kits and verify seal materials suit water conditions.
Step-by-Step Repairs for Each Leak Type
The following steps address common leak sources, including replacing a flapper or flush valve seal and adjusting or replacing the fill valve.
Instructions also cover tightening or replacing tank-to-bowl gaskets and bolts, repairing small porcelain cracks, and stopping condensation-related dripping.
Each repair is presented with clear actions and safety notes to guide the reader through the work.
Replacing a flapper or flush valve seal
First, the water supply is shut off and the tank drained to prevent spills.
Next, the old flapper is removed and the flush valve seat inspected for wear or debris.
Finally, a new flapper is installed, the chain length adjusted, and the assembly tested and fine-tuned for leaks.
Step 1: Shut off water and drain the tank
Shut off the toilet’s water supply at the shutoff valve located on the wall or floor near the base, then flush to empty the tank and hold down the handle to remove remaining water.
Place a towel or small container inside the bowl to catch drips.
Close the tank’s refill valve if present, and verify no new water enters before proceeding to repairs.
Step 2: Remove old flapper and inspect flush valve seat
Remove the old flapper by unhooking it from the flush lever arm and detaching its chain or ring from the overflow tube, then lift it away to expose the flush valve seat.
Inspect the seat for mineral buildup, cracks, or warped surfaces. Clean deposits with a soft brush and vinegar; dry thoroughly.
Note any damage requiring replacement of the seal or entire flush valve assembly.
Step 3: Install new flapper and adjust chain length
With the flush valve seat cleaned and inspected, the new flapper can be positioned over the seat and secured to the flush lever arm using the provided hooks or clips.
Attach the chain to the lever slot, leaving slight slack so the flapper rests fully closed but lifts freely.
Trim or reattach links to prevent dragging or excessive lift; guarantee smooth, unobstructed movement.
Step 4: Test for leaks and adjust as needed
Begin by restoring the water supply and allowing the tank to fill to its normal level.
Observe for continuous running, hissing, or drops at the flapper and seal.
Flush several times, watch refill and shutoff.
If leakage persists, tighten or reposition hardware, shorten or lengthen the chain, or reseat the flapper.
Repeat testing until no water escapes and refill shuts off cleanly.
Replacing or adjusting the fill valve
The next repair focuses on replacing or adjusting the tank’s fill valve to stop continuous filling or slow leaks.
First, the water should be shut off and the tank emptied. Then, the supply line disconnected and the old valve removed.
A new fill valve is installed, the water level adjusted, and refill and shutoff operation tested for proper function.
Step 1: Turn off water and empty tank
Shut off the toilet’s water supply at the shutoff valve located near the base of the tank to stop incoming flow to the fill valve.
Flush to drain most water, then sponge or towel remaining water from the tank to create a dry workspace.
Confirm no residual flow by lifting the float; verify the tank is empty before beginning any adjustments or replacements to the fill valve.
Step 2: Disconnect water supply and remove old valve
Loosen the coupling at the tank’s bottom and disconnect the water supply line to isolate the fill valve assembly for removal.
Drain remaining water with a sponge.
Unscrew the locknut securing the valve beneath the tank. Support the valve while turning to prevent damage.
Remove the old valve, inspect the tank hole and washer surfaces for corrosion or debris, and clean before preparing for replacement.
Step 3: Install new fill valve and set water level
Begin by inserting the replacement fill valve into the tank opening, ensuring the valve’s seal seats evenly against the tank gasket and the shank threads protrude below the tank.
Tighten the locknut from beneath without overtightening.
Reattach refill tube to the overflow.
Connect water supply and hand-tighten coupling.
Adjust the valve height or float to position the water fill line at the marked level.
Step 4: Check refill and shutoff operation
One should verify that the fill valve refills the tank to the marked waterline and that the shutoff stops incoming water completely when closed.
Operate the flush and observe refill speed, float action, and overflow alignment.
Close the shutoff to confirm water stops and reopen to check gradual pressure recovery.
Listen for drips and leakage at valve connections; tighten or replace as needed.
Fixing a leaking tank-to-bowl gasket or tank bolts
First the water is shut off, the tank drained, and the supply line disconnected to prevent spills.
Next the tank is lifted off the bowl, the old gasket and bolts removed, and new gasket and washers fitted.
Finally the tank is reattached, bolts tightened evenly and the connection tested for leaks.
Step 1: Drain tank and disconnect water supply
Shut off the water supply to the toilet and empty the tank so repairs can proceed safely and cleanly.
After flushing, hold the handle down to drain residual water; use a sponge or towel to remove remaining moisture.
Close the shutoff valve fully, then disconnect the flexible supply line at the tank inlet with an adjustable wrench.
Place a bucket and towels to catch any drips.
Step 2: Remove tank from bowl safely
Loosen the tank-to-bowl connection by unscrewing the tank bolts and lifting the tank straight up to avoid stressing the porcelain; two people are recommended for heavier or waterlogged tanks.
Support the tank while backing off nuts beneath, catching any falling washers or debris.
Place the tank on a padded, level surface.
Inspect bolt holes and bottom flange for cracks before proceeding to gasket replacement.
Step 3: Replace gasket and bolts with new washers
Begin by clearing the work area and gathering the replacement tank-to-bowl gasket, tank bolts with matching washers and nuts, a flat-head and Phillips screwdriver, adjustable wrench, and a towel for cleanup.
Remove old gasket and corroded bolts, clean mating surfaces, seat the new rubber gasket into the tank outlet, insert bolts with rubber washers, hand-thread nuts, and snug fittings to secure components without overcompressing the gasket.
Step 4: Reattach tank, tighten evenly, and test
Carefully lower the tank back onto the bowl, aligning the tank-to-bowl gasket and the bolt holes so the tank sits flush and centered.
Insert bolts with new washers, hand-tighten nuts, then alternate small turns on each side with a wrench to compress evenly.
Reconnect water supply, open valve, observe for leaks, and flush several times to confirm a secure, watertight seal.
Repairing small cracks in porcelain
First, the crack should be inspected to determine its size and exact position, as location and severity dictate the repair approach.
For hairline fractures, a suitable epoxy or a porcelain repair kit can seal the damage and restore strength when applied and cured according to the product instructions.
If the crack is wide, runs through structural areas, or leaks persist after repair, the tank should be replaced to avoid sudden failure and water damage.
Step 1: Assess crack severity and location
A visible inspection determines whether a porcelain tank crack is superficial or structural: small hairline fractures near the waterline or seams often allow slow leaks, while wider or radiating cracks indicate deeper damage that may worsen under pressure.
Document crack length, orientation, and proximity to fittings; dry the area, mark endpoints, and check underside and mounting points for seepage to inform repair versus replacement decisions.
Step 2: Use epoxy or porcelain repair kit for hairline cracks
If the inspection identifies a fine, non-structural hairline crack, repair with an epoxy or porcelain kit can stop leaks without replacing the tank.
Clean and dry the area, sand lightly, and apply manufacturer-recommended epoxy or porcelain filler.
Smooth per instructions, allow full cure, then test by refilling.
Reapply if necessary; document location and monitor periodically for recurrence.
Step 3: When to replace the tank instead of repairing
When does a cracked porcelain tank cross the line from repairable to replaceable?
Small hairline cracks that leak minimally and are stable may be sealed with epoxy.
Replace the tank when cracks widen, radiate, cross seams or bolt holes, leak internally into the bowl, or when multiple repairs recur.
Also replace if porcelain fragments, structural weakness, or age compromise long-term reliability.
Stopping condensation-related dripping
The author first distinguishes true tank leaks from condensation by checking for water only on cool mornings or after long showers and feeling the tank surface for cold spots.
If condensation is the cause, installing an anti-sweat tank liner or lowering incoming water temperature can stop dripping.
Improving bathroom ventilation with a fan or window reduces humidity and prevents recurrence.
Step 1: Identify condensation vs. leak
How can one tell whether water on or around a toilet tank comes from condensation rather than a plumbing leak?
The observer checks timing, location, and patterns: condensation appears during high humidity or cold water use, forming beads on the tank surface and pooling beneath the tank’s midsection.
Leaks produce steady drips, wet spots near fittings, or water after inactivity.
Track progress to confirm.
Step 2: Install anti-sweat tank liner or adjust water temperature
If condensation is confirmed rather than a plumbing leak, attention turns to preventing moisture buildup on the tank surface.
Install a fitted anti-sweat tank liner: drain tank, dry interior, adhesive-fit liner to insulation specifications.
Alternatively, reduce incoming cold-water temperature by adjusting the water heater slightly or mixing warm and cold supply lines with a tempering valve.
Refill and monitor for dripping.
Step 3: Improve bathroom ventilation
Because poor airflow lets warm, humid air linger and condense on cool tank surfaces, improving ventilation is a key step in preventing recurring drip from condensation.
Install or upgrade an exhaust fan sized to the bathroom, run it during and after showers, add a timer or humidity sensor, keep doors or windows ajar when practical, and guarantee vents and ductwork are clear for effective moisture removal.
How to Test and Confirm the Repair
After completing the repair, the tank should be refilled and observed for steady water level and normal flush operation.
A dye test can confirm hidden leaks by revealing any slow seepage from the tank into the bowl or onto the floor.
The inspector should monitor for delayed or intermittent leaks and follow a brief checklist to verify a successful repair.
Refill, observe, and dye-test after repair
Refill the tank slowly and watch the water level, checking for steady rises or sudden drops that indicate a persistent leak.
Observe fittings, seals, and the bowl for any new seepage for several minutes.
Add a few drops of food coloring to the tank, wait ten minutes, then inspect the bowl; colored water confirms a leak needing further attention.
Monitoring for delayed or intermittent leaks
Several short tests and a period of observation help confirm whether a toilet tank repair truly resolved an intermittent or slow leak.
Inspect joints and fittings after multiple flush cycles, then leave the tank undisturbed for several hours and recheck for moisture or dye migration.
Repeat under varied conditions (overnight, after long inactivity). Note any recurrence and document timing for further diagnosis.
Checklist for a successful repair
1 clear checklist gives a systematic way to verify a toilet tank repair and catch lingering issues before they cause damage.
Inspect visible seals and connections for moisture. Flush repeatedly, observe refill behavior, and confirm water stops at the fill line.
Dye-test for hidden leaks. Recheck after one hour and 24 hours. Document findings and tighten or replace components if any anomaly appears.
Cost, Time, and When Replacement Is Better
Typical parts for common tank repairs—flappers, fill valves, and flush valves—usually cost between $5 and $40, while gasket or tank-to-bowl kits run higher.
Small repairs often take 15–45 minutes, while valve replacements or gasket work can require an hour or more.
If the tank or bowl shows widespread cracks, chronic leaking despite repairs, or repeated replacement-part failures, full replacement of the tank or toilet is usually more cost-effective.
Typical costs for parts and common repairs
Costs for parts and labor to fix a leaking toilet tank generally range from a few dollars for a flapper to $100–$200 for a complete fill-valve assembly plus professional installation. Typical parts, DIY versus pro, and replacement thresholds follow.
| Part | Typical Cost | Replacement Indicator |
|---|---|---|
| Flapper | $3–$15 | Worn seal |
| Fill valve | $20–$80 | Persistent running |
| Flush valve | $30–$150 | Cracked tank |
Estimated time required for each repair type
After outlining parts, prices, and replacement indicators, estimating how long each repair takes helps decide whether a DIY attempt is practical or a professional call is warranted.
Common repairs:
- flapper replacement 10–20 minutes;
- fill valve swap 20–45 minutes;
- flush valve or overflow tube repairs 30–60 minutes;
- tank-to-bowl gasket replacement 45–90 minutes.
Complex or multiple simultaneous issues may extend to several hours.
Signs that suggest replacing the toilet or tank
When recurring leaks, extensive corrosion, or repeated component failures outpace the cost and time of repairs, replacement of the toilet or tank becomes the more economical and reliable option; evaluating age, frequency of service calls, visible structural damage (hairline cracks, warped flanges), and chronic performance problems (persistent running, poor flush efficiency, or repeated seal failures) helps determine whether a new fixture will save money and time over continued patchwork.
Consider replacement when repair costs exceed half the value of a new unit, repairs are frequent, parts are obsolete, or water use is inefficient; prioritize full replacement for structural damage, persistent leaks, or ongoing reliability issues.
Preventive Maintenance to Avoid Future Leaks
A routine inspection schedule helps identify hairline cracks, mineral buildup, and loose fittings before they cause leaks.
Proper water pressure and correctly adjusted fill and shutoff valves reduce stress on seals and connections.
Replacing flappers, fill valves, and supply lines at manufacturer-recommended intervals prevents age-related failures.
Regular inspection schedule and what to look for
Establishing a consistent inspection schedule—monthly for older fixtures and every three to six months for newer ones—helps catch small issues before they become leaks.
During checks, inspect tank interior for cracks, mineral buildup, and warped or brittle flappers.
Verify fill and flush valve seating, examine supply line and shutoff for corrosion or drips, and confirm tank-to-bowl gasket integrity.
Record findings and repairs.
Best practices for water pressure and valve settings
Properly balanced water pressure and correctly set shutoff and fill valves greatly reduce stress on tank joints and internal components, lowering the risk of leaks over time.
Maintain household supply pressure between 40–60 psi, use a pressure regulator if higher, and adjust the fill valve to stop water at the manufacturer’s recommended level.
Periodically exercise the shutoff valve and check for slow drips.
Recommended replacement intervals for wear-prone parts
Because small components wear predictably with use, routine replacement of certain toilet tank parts prevents most common leaks and costly repairs.
- Flush valve flapper: every 2–3 years to maintain seal integrity.
- Fill valve assembly: every 4–6 years or when refill speed slows.
- Tank-to-bowl gasket and bolts: inspect annually, replace every 5–7 years or after corrosion.
Troubleshooting Guide for Persistent or Hidden Leaks
The guide outlines advanced leak-detection techniques such as dye tests, pressure checks, and infrared or acoustic tools to locate persistent or hidden leaks.
It also describes temporary fixes—sealants, shutoff valve adjustments, and quick gasket swaps—to stop water loss immediately.
Finally, it explains when to hire a plumber and what information (leak symptoms, prior repairs, and test results) to provide for a faster, accurate diagnosis.
Advanced leak-detection techniques
When basic checks fail, how can one locate a persistent or hidden toilet tank leak?
Use dye in the tank to reveal silent flapper leaks; inspect overflow tube height and fill valve alignment.
Apply paper towels around connections and base to detect seepage.
Employ moisture meter, infrared camera, or listening stethoscope for concealed cracks.
Document findings before replacement or repair.
Temporary fixes to stop water loss immediately
Act quickly to minimize water loss while preparing for a permanent repair: shut off the toilet’s shutoff valve at the wall, lift the tank lid and place a temporary float spacer or clip on the flapper to stop continuous drain, and add food coloring to the tank to confirm whether the flapper remains the leak source.
Use plumber’s tape on visible tank-to-bowl bolts, a rubber patch for small cracks, and a temporary bucket to catch overflow.
When to hire a plumber and what information to provide
If persistent leaks, hidden seepage, or recurring symptoms occur despite basic fixes, it’s time to call a licensed plumber. Provide clear details to expedite diagnosis and repair.
- Describe symptoms: constant running, puddles, stains, sound patterns.
- Note recent fixes, parts replaced, and tools used.
- Share location, water shutoff accessibility, photos, model/age of toilet, and any water meter readings.
Conclusion
Like a seasoned mechanic tuning a stubborn engine, the homeowner can methodically diagnose and repair toilet tank leaks by following clear steps and using the right parts. Identifying common causes, performing targeted fixes, and testing for a watertight seal saves time and money. When repairs prove ineffective or parts are badly corroded, replacement becomes the practical choice. Regular inspections and simple maintenance prevent recurrence, ensuring reliable operation and peace of mind.