How to Use Pipe Thread Tape: Step-By-Step Guide for Leak-Proof Plumbing
How to Use Pipe Thread Tape for Leak-Proof Plumbing
To ensure a leak-proof seal in your plumbing, use pipe thread tape (PTFE) effectively. It fills microscopic gaps in threaded connections and provides a low-friction barrier. Here’s a quick guide:
- Choose the Right Tape: Select the appropriate grade and thickness for the material and application.
- Prepare the Threads: Clean and inspect the threads thoroughly.
- Apply the Tape: Wrap the male threads clockwise with 3–6 tight, even turns. Smooth the end to be flush.
- Tighten the Connection: Hand-tighten the fitting, then finish with one to two turns using a wrench.
- Special Considerations: Use fewer wraps on plastic fittings, avoid the first thread on tapered fittings, and always test under low pressure.
This process will help you achieve a secure, leak-free connection. For more details on specific cases and troubleshooting, continue reading.
What pipe thread tape is and why it prevents leaks
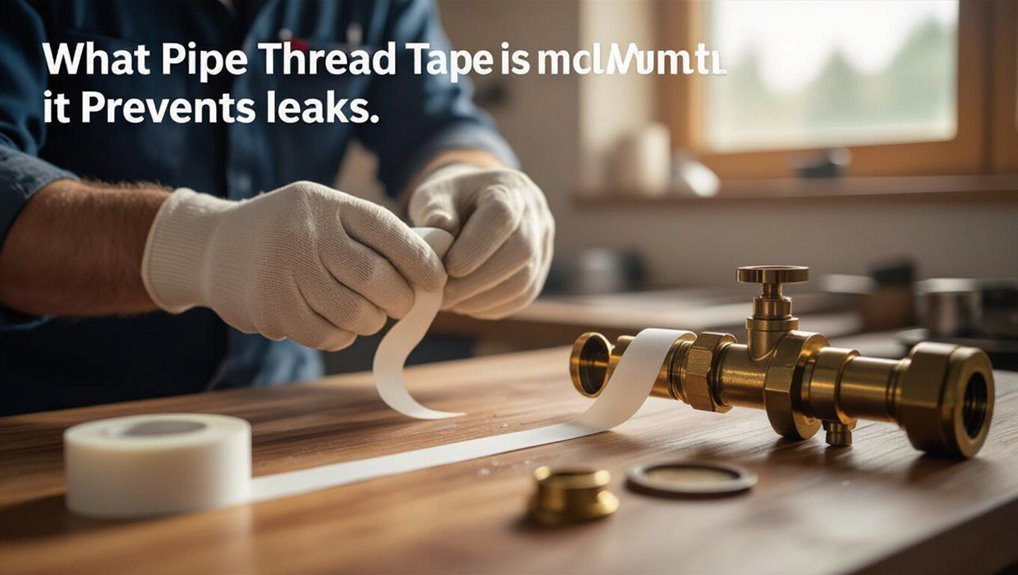
Pipe thread tape is typically made from PTFE but is also available in other materials designed for specific pressures, temperatures, or chemical compatibilities.
It prevents leaks by filling microscopic gaps and providing a low-friction layer that both mechanically seals threads and, in some formulations, adds chemical resistance.
Guidance follows on when tape is appropriate for tapered threaded fittings and when alternatives—pipe dope, anaerobic sealants, or gaskets—are preferable.
Composition and types of pipe thread tape (PTFE vs. other materials)
Thread seal tape, commonly known by the brand PTFE, is a thin, flexible film used to seal threaded pipe joints by filling gaps and creating a lubricious barrier that resists water, gas, and most chemicals.
PTFE tapes dominate for chemical inertness and temperature tolerance. Other types—nylon, hemp, and anaerobic tapes—offer different softness, sealing method, and compatibility.
Guidance on how to use pipe thread tape varies by material.
How tape seals threads: mechanical vs. chemical action
Sealing tape works by combining mechanical filling and surface chemistry: the thin film physically occupies the microscopic gaps between male and female threads while its low-friction, chemically inert surface prevents fluid passage and eases tightening.
Compression of the tape during assembly creates a deformable barrier; its conformability and chemical resistance maintain a seal under pressure, vibration, and temperature variations without bonding to metal.
When tape is appropriate vs. when alternatives are better
When is tape the right choice and when should another method be used?
Pipe thread tape suits metal NPT fittings, easy repairs, and potable-water lines when applied correctly.
Alternatives like pipe dope, thread sealant paste, or anaerobic sealants are preferable for tapered plastic fittings, high-pressure systems, gas lines requiring specific-rated tape, or permanently bonded joints.
Choose by material, pressure, and code requirements.
Tools and materials needed for a leak-proof application
To apply pipe thread tape correctly, gather the essentials: tape, an adjustable wrench, a thread brush, and a clean rag.
Optional aids such as pipe joint compound, thread sealant, or a pipe dope applicator can improve sealing in challenging joints.
Basic safety gear—gloves and eye protection—should be used when cleaning threads and applying sealants.
Required items: tape, adjustable wrench, thread brush, rag
A few basic tools and materials make a leak-proof pipe thread tape job efficient and reliable: quality PTFE tape, an adjustable wrench sized to the fittings, a thread brush to remove debris and old sealant, and a clean rag for final inspection and wiping.
These essentials guarantee proper tape placement, secure tightening, thorough thread cleaning, and immediate cleanup, reducing the risk of leaks and simplifying installation.
Optional items: pipe joint compound, thread sealant, pipe dope applicator
Supplemental sealing products such as pipe joint compound, thread sealant, and a dope applicator offer added assurance for joints that demand extra protection against leaks or corrosion.
These optional items complement PTFE tape by filling thread irregularities, improving resistance to vibration and chemicals, and ensuring a uniform coat.
Apply sparingly to clean threads per manufacturer instructions; avoid combining incompatible sealants.
Safety considerations and PPE
Wear appropriate personal protective equipment and follow safety protocols when preparing and sealing pipe threads.
Gloves protect against sharp burrs and chemical sealants; safety glasses prevent debris and splatter; a mask limits inhalation of dust or solvent fumes.
Confirm adequate ventilation, use tools correctly, keep work area clear, and read product instructions and SDS for compatible materials and emergency measures.
Preparing threaded fittings for tape
Before applying tape, the fittings should be inspected for thread damage and verified for compatibility with the designated connector.
Any old sealant, debris, or oil must be cleaned from the threads to guarantee a proper seal.
The thread standard (NPT, BSPT, BSPP) and whether the threads are tapered or parallel should be identified so the correct tape technique is used.
Inspecting threads for damage and compatibility
A quick visual and tactile inspection of both male and female threads establishes whether tape application will form a reliable seal.
The inspector checks for burrs, flattened or cross-threaded sections, and corrosion that alters thread profile.
Verify thread type and size match (NPT, BSPT, etc.) and guarantee threads engage smoothly; damaged or incompatible fittings should be repaired or replaced before tape is applied.
Cleaning threads: removing old sealant, debris, and oil
Clean threads guarantee the tape adheres and seals properly, so any old sealant, debris, or oil must be removed before wrapping.
Use a wire brush or rag with solvent to strip residue, then dry thoroughly.
Pick out trapped particles with a pick or compressed air.
Verify threads are clean and dry; remaining contaminants compromise adhesion and can cause leaks despite correct tape application.
Determining thread type: NPT, BSPT, BSPP and direction of taper
Several quick visual checks and simple measurements let a user identify whether fittings are NPT, BSPT, or BSPP and whether the threads are tapered or parallel.
Count threads per inch or measure pitch; inspect thread angle (60° NPT/BSPP vs 55° BSP); check taper by measuring diameter change along length; verify standards marking or match with known fitting to guarantee correct tape application and sealing method.
Step-by-step guide to applying pipe thread tape
The following steps outline the practical application of pipe thread tape, from selecting the right tape to final tightening. Each step emphasizes technique and care to guarantee a reliable, leak-free joint without damaging threads.
Clear attention to thickness, orientation, wrap counts, and proper torque makes the process repeatable and safe.
- Relief: confidence that the joint will hold
- Assurance: knowing the right tape and technique are used
- Caution: awareness of tension and overlap to avoid damage
- Satisfaction: a smooth, leak-free connection when finished
Step 1 Choosing the correct tape thickness and grade
When selecting pipe thread tape, attention to both thickness (measured in mils or number of wraps) and grade (standard PTFE, lubricated, or gas-rated variants) guarantees a proper seal and compatibility with the designated service.
Thicker tape suits coarse or damaged threads and low-pressure water lines; thinner tape fits fine threads and precision fittings.
Use gas-rated or anaerobic alternatives for fuel and high-pressure systems.
Step 2 Orienting the tape correctly on the male threads
Begin by aligning the tape’s end at the start of the male threads so it feeds smoothly in the direction of the thread helix; wrapping against the tightening direction guarantees the tape does not bunch or unravel as the fitting is engaged.
Maintain a flat, wrinkle-free lay with the tape pressed into each thread root using fingers or a cloth, ensuring coverage stops before the shoulder.
Step 3 Wrapping technique: number of turns, overlap, and tension
Several tight, even wraps are typically applied, with most plumbers recommending three to six turns depending on thread coarseness and pipe diameter.
Wrap clockwise so tape follows thread engagement, overlapping each pass by about half the tape width.
Maintain firm, consistent tension to compress tape into thread valleys without tearing.
Avoid excess bulk near the pipe end to prevent interference with seating and flow.
Step 4 Finishing the wrap and smoothing the tape
Smooth the tape with steady finger pressure to seat it into the thread crests and remove wrinkles.
After completing the final wrap, tear or cut the tape cleanly, leaving the edge flush with the end of the male thread.
Press the loose edge firmly to prevent unraveling.
Inspect for gaps or bunching and add a thin patch if necessary before assembling fittings.
Step 5 Threading fittings together and torque guidance
Align the male and female fittings carefully, then hand-tighten them until resistance increases and the tape seats into the joint without bunching.
Once seated, apply measured wrench torque—typically one to two additional turns for metal fittings, less for plastic—avoiding over-tightening.
Stop when threads compress and joint feels solid; excessive torque risks thread damage or cracking.
Verify snugness without forcing the connection.
Step 6 Final checks for alignment and hand-tight plus wrench-tight
Confirm final alignment and torque before pressurizing the system: visually inspect that fittings sit squarely with tape compressed evenly into the first two to three threads.
Verify hand-tight engagement aligns parts; apply wrench only to specified torque, typically one to two additional turns or per manufacturer.
Recheck thread engagement, sealing surface contact, and orientation.
Slowly pressurize while monitoring for leaks and tighten if necessary within torque limits.
Special-case applications and adjustments
The article next addresses special-case applications and adjustments where thread type, material, and service conditions alter tape use.
It compares tape practices for tapered (NPT) versus parallel threads, advises on plastic and PVC fittings, and outlines requirements for high-pressure, gas, and oxygen systems.
Guidance is also provided on when and how to combine tape with pipe joint compound for a reliable seal.
Taping tapered (NPT) vs. parallel threads
Distinguishing between tapered (NPT) and parallel threads is essential because their sealing methods and tape application differ: tapered threads seal by wedging and require careful tape placement on the male thread to avoid interfering with thread engagement, while parallel threads rely on a gasket, O-ring, or metal-to-metal face seal and typically receive tape only when paired with an appropriate sealing washer or when a thread-sealing compound is explicitly specified.
For NPT, wrap tape clockwise, 2–3 turns, avoid tape on first thread; for parallel, prefer gasket/O-ring and omit tape unless manufacturer permits, then apply sparingly to threads not contacting the sealing face.
Using tape on plastic fittings and PVC considerations
Handle plastic fittings with care: their softer materials and thinner walls make overwrapping or aggressive thread tape use risky, so adjust tape type, wrap count, and tension accordingly.
Use PTFE tape rated for plastics, apply fewer wraps (one to two), wrap smoothly in thread direction, and avoid excessive tension.
Inspect joints for cracking, and consider compatible thread sealants for larger or stressed PVC connections.
High-pressure, gas, and oxygen system requirements
When working with high-pressure, gas, or oxygen systems, installers must follow stricter tape selection, application, and safety protocols to prevent leaks, contamination, or combustion hazards.
Use tape rated for gas or oxygen service, apply fewer thin wraps to avoid extraneous debris, orient wrap downstream, inspect threads, and perform pressure testing per code.
Follow manufacturer and regulatory guidelines without improvisation.
Combining tape with pipe joint compound: when and how
Combine pipe thread tape with compatible pipe joint compound only in specific situations where neither sealant alone provides adequate sealing or where code, manufacturer, or service conditions require a dual approach.
Apply tape first on clean male threads, wrap clockwise three to five turns, then brush or smear compound thinly over tape and threads.
Tighten fittings per torque specs; avoid excess compound that can contaminate systems.
Common mistakes that cause leaks and how to avoid them
Mistakes with pipe thread tape often lead to persistent leaks and safety hazards when not corrected. The most common errors include incorrect wrap count, wrapping direction, applying tape to damaged or unclean threads, and choosing the wrong tape grade for gas or high-temperature systems. Addressing these points prevents leaks and reduces the need for rework.
- Overwrapping or underwrapping threads — frustration and wasted time
- Wrapping in the wrong direction — sudden failure and anxiety
- Applying tape to damaged or dirty threads — false confidence and embarrassment
- Using the wrong tape grade for gas or high-temperature systems — danger and alarm
Overwrapping or underwrapping threads
A surprising number of leaks trace back to improper tape coverage—either too many wraps that prevent proper fitting or too few that leave gaps—so correct wrap count and technique are essential.
Overwrapping can bulk the joint, misalign threads and cause stress; underwrapping leaves exposed threads and poor sealing.
Use three to five snug, even layers, smooth tape into threads, and inspect before assembly.
Wrapping in the wrong direction
After ensuring the correct number of snug, even layers, attention must turn to wrap direction: tape applied against the thread rotation will unwrap as the fitting is tightened, defeating the seal.
Install tape so it follows the tightening rotation, overlap slightly, and keep edges smooth. If tape bunches or peels, remove and rewrap; choose appropriate tape thickness to prevent gaps without distorting threads.
Applying tape to damaged or dirty threads
Inspect the threads before applying tape: damaged, corroded, or dirty threads prevent proper adhesion and sealing, often causing leaks regardless of wrapping technique.
Clean threads with a wire brush and solvent; remove rust, old sealant, and debris.
Replace severely damaged fittings or chase threads with a die.
Only apply tape to dry, intact threads to guarantee an effective seal and reliable joint.
Using the wrong tape grade for gas or high-temperature systems
With threads cleaned and repaired, attention must turn to selecting the correct tape type for the service.
Using standard white PTFE on gas or high-temperature lines risks degradation, leaks, or regulatory violation. Only approved yellow gas-grade or high-temp specialty tapes should be used.
Inspect manufacturer specifications, temperature and pressure ratings, and local codes to guarantee compatibility and safe, leak-free connections.
Troubleshooting leaks after tape application
When a joint continues to leak after tape application, the first step is to determine whether the leak originates at the threads, the mating fitting, or from a failed component such as a cracked valve.
If threads are suspected, the tape should be carefully removed and replaced without cross-threading or abrading the male threads; if damage is visible, replacement of the fitting is preferable.
For persistent leaks despite correct tape placement, assess whether a pipe sealant is more appropriate or if the fitting must be replaced.
Identifying source: thread vs. fitting vs. component failure
Diagnosing a persistent leak after applying pipe thread tape requires distinguishing whether the failure originates at the threaded joint, the mating fitting, or an internal component; each source presents different clues and corrective steps.
Inspect for tape extrusion, cross-threading, or loose engagement for threads; examine fitting faces, seals, and corrosion for mating failures; pressure-test or disassemble to reveal valve, O‑ring, or seat defects.
Replacing tape without damaging threads
Carefully remove the old tape and any trapped debris without nicking or deforming the threads. Then inspect the male threads for burrs, cross‑threading, or corrosion before applying fresh tape.
Use a lint‑free cloth and a soft brush; avoid metal tools.
Rewrap clockwise with even tension, overlapping by half the tape width for 3–6 full turns.
Test for leaks and recheck tightness.
When to use sealant or replace fittings instead
Sometimes a simple tape wrap cannot correct leaks caused by damaged threads, incompatible materials, or degraded fittings; in such cases a thread sealant or full replacement is warranted.
Evaluate thread integrity, corrosion, and mismatched metals. Use anaerobic or pipe-specific sealants for minor thread damage or dissimilar-metal joints.
Replace fittings when cracks, severe wear, or repeated sealing failures occur to guarantee reliable, long-term leak prevention.
Maintenance, inspection, and longevity tips
A regular inspection schedule for threaded connections helps catch wear before leaks develop.
Indicators that tape has failed—such as visible fraying, compression, or persistent seepage—should prompt immediate replacement.
Following best practices like correct tape application, avoiding over-tightening, and reapplying tape during major service extends seal life.
Periodic inspection schedule for threaded connections
When should threaded connections be inspected to guarantee seal integrity and prevent leaks?
Inspections should occur after initial installation, following system pressurization, and at regular intervals:
- quarterly for high-use or critical systems,
- biannually for standard residential lines,
- and annually for low-risk or dormant lines.
Additional checks are warranted after temperature extremes, vibration events, or maintenance that disturbs fittings.
Signs tape has failed or needs replacement
Several clear indicators show pipe thread tape has failed or needs replacement, and prompt attention prevents leaks and corrosion.
Visible gaps, fraying, or missing tape at joints, persistent drips or moisture, mineral buildup or rust near threads, and loosened fittings after torqueing all signal failure.
Difficulty achieving a tight seal during reassembly also indicates degraded or improperly seated tape requiring replacement.
Best practices to extend seal life
Inspect and maintain threaded connections regularly to maximize tape seal life: schedule periodic checks for wear, clean threads before applying fresh tape, and replace tape anytime signs of degradation appear.
Store tape in a cool, dry place to prevent brittleness. Apply correct tape thickness and direction. Avoid over-tightening fittings.
Inspect for leaks after installation and re-torque as recommended by component specifications.
Quick reference: recommended tape and turn counts for common fittings
A concise chart is provided to show typical pipe sizes with recommended tape grade and wrap counts for common fittings. The table below lists quick-reference guidance to aid correct application. Technicians are advised to adjust slightly for thread condition and tape quality.
| Pipe Size | Tape Grade & Wraps |
|---|---|
| 1/8″ | PTFE tape (standard) — 3–4 wraps |
| 1/4″ | PTFE tape (standard) — 3–4 wraps |
| 1/2″ | PTFE tape (standard) — 4–6 wraps |
| 3/4″ | PTFE tape (thicker/high-density) — 6–8 wraps |
| 1″ | PTFE tape (high-density/industrial) — 8–10 wraps |
Chart: pipe size vs. recommended wraps and tape grade
The chart condenses practical guidance for common fittings by pairing nominal pipe sizes with recommended wrap counts and tape grades. It aids quick selection for PTFE tape type and turns to guarantee reliable seals across typical household and commercial threads.
| Pipe size | Wraps | Tape grade |
|---|---|---|
| 1/8″–1/4″ | 4–6 | Thin (gas) |
| 1/2″–1″ | 6–8 | Standard |
Visual guide and step photos for a proper tape application
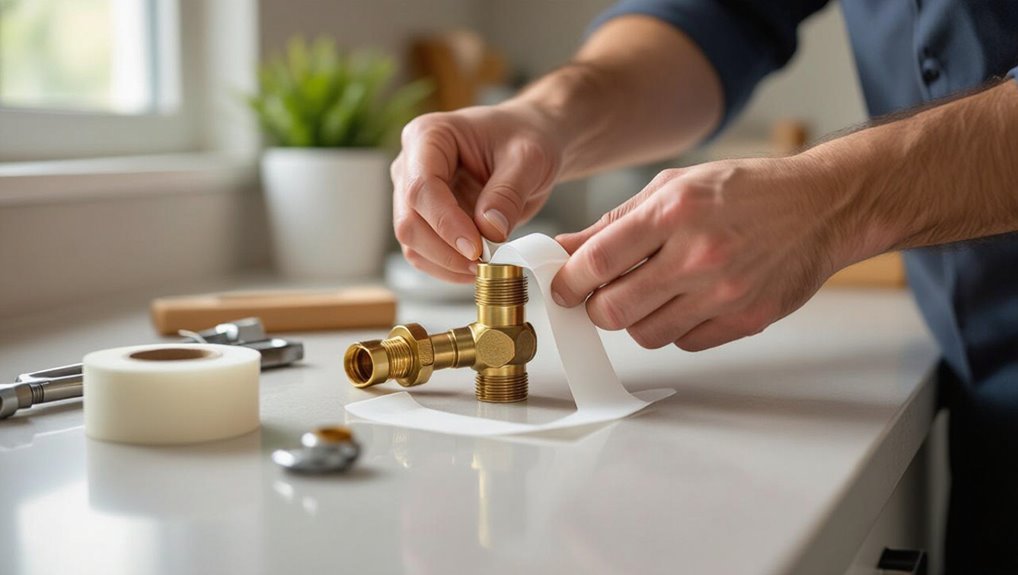
Start by photographing the fitting and thread direction to establish a clear before-and-after reference.
Subsequent step photos should show the tape roll, the lead-in wrap, and the final wrapped joint from multiple angles.
Capture close-ups of tape alignment on thread crests, overlap consistency, number of wraps, and tension.
Include wide shots for context and annotate images with brief captions noting direction, wrap count, and inspection points.
Conclusion
Like a well-tied knot that holds a sail to its mast, pipe thread tape binds fittings into a leak-resistant whole. It transforms rough threads into a tight seal, provided the surfaces are clean, the wrap follows thread direction, and appropriate tape and turns are chosen. Regular inspection and correct adjustments keep connections reliable. With practiced technique and proper maintenance, this simple tape becomes a small guardian against drips and the disruptions they bring.