
How to Repair Bathroom Pipes: Step-by-Step DIY Guide for Leaks, Clogs, and Burst Pipes
To effectively repair bathroom pipes, start by diagnosing the issue—identify leaks, evaluate flow rates, and inspect for corrosion or frozen pipes. For minor leaks and clogs, you can often handle repairs yourself. Begin by shutting off the water and draining the lines. Replace seals or flexible lines, apply plumber’s tape, and use plungers or augers to clear blockages. In the case of burst pipes, turn off the main water supply, cut power if necessary, and use temporary sleeves until you can replace the damaged section. Follow this guide for detailed techniques, essential tools, and advice on when to seek professional help.
Overview of Bathroom Pipe Problems and When to DIY
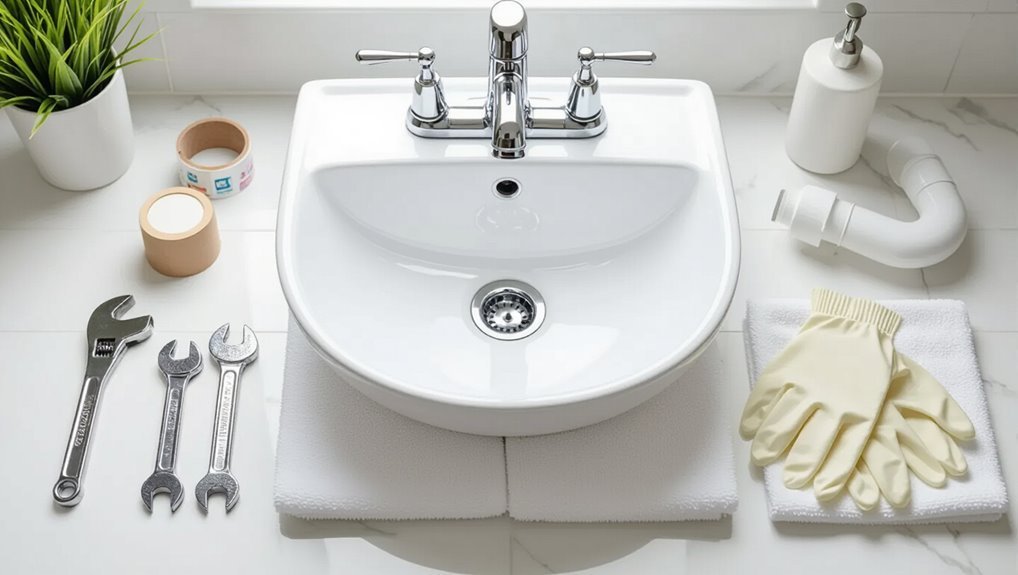
Bathroom pipe failures often stem from corrosion, mineral buildup, frozen lines, poor fittings, or physical damage, which can cause leaks, clogs, or bursts.
The decision to attempt repairs hinges on visible signs, access, and the scope of damage—small leaks, accessible blockages, and simple valve replacements can be DIY, while extensive corrosion, hidden leaks, or structural impact warrant a professional.
Required skills, estimated time, and safety precautions such as shutting off water and wearing protective gear should guide that choice.
Common causes of leaks, clogs, and burst pipes in bathrooms
When pipes fail, the result is usually one of three problems—leaks, clogs, or bursts—each with distinct causes and warning signs.
Leaks stem from corrosion, loose fittings, or worn seals; clogs arise from hair, soap buildup, and foreign objects; bursts occur from freezing, age, or water hammer.
Understanding these causes helps homeowners decide how to repair bathroom pipes or when to escalate.
Signs you can safely repair versus when to call a professional
Knowing the root cause—corrosion, loose fittings, hair clogs, freezing, or water hammer—helps determine whether a repair is suitable for a homeowner or requires a pro.
Simple leaks from loose joints, isolated clogs, or minor fixture replacements are usually DIY.
Extensive corrosion, hidden leaks, sewage backups, repeated failures, high-pressure issues, or structural damage warrant professional assessment and repair.
Required skills, time, and safety considerations
Evaluating whether a homeowner can tackle a pipe repair depends on three clear factors: the specific skills required, the time available, and the safety risks involved.
Assess mechanical aptitude (basic plumbing, tool use, sealants), realistic time for diagnosis and repair, and hazards (water damage, mold, electrical proximity).
If complexity, confined spaces, or health risks appear, seek licensed help.
Essential Tools, Materials, and Safety Gear
A concise list of essential tools—adjustable wrenches, pliers, pipe cutters, plungers, and a basic toolbox—prepares a homeowner for common bathroom plumbing tasks.
Stocking common pipes, fittings, compression rings, plumber’s tape, appropriate sealants, and a few replacement parts reduces repair time and prevents trips to the store.
Personal protective equipment and clear steps to locate and shut off the water supply are necessary safety measures before any work begins.
Basic toolbox for bathroom plumbing repairs
Tools and materials form the backbone of successful bathroom plumbing repairs, allowing even minor leaks and clogs to be fixed quickly and safely.
A compact toolbox should include basic hand tools, consumables, and safety gear.
- Adjustable wrench, slip-joint pliers, basin wrench
- Plumber’s tape, joint compound, coarse emery cloth
- Gloves, eye protection, dust mask
Pipes, fittings, sealants, and replacement parts to stock
Spare lengths of common pipe types, several sizes of fittings, and a handful of reliable sealants form the core of a practical bathroom plumbing stockpile.
Essential items include compatible PVC, copper, and PEX sections, compression and slip fittings, epoxy putty, thread tape, and replacement washers, cartridges, and O-rings.
Recommended basic list:
- Pipes and fittings
- Sealants and tapes
- Small replacement parts
Personal protective equipment and water shutoff procedure
With pipes, fittings, and sealants on hand, attention shifts to protecting the person doing the work and controlling water flow.
Recommended PPE includes gloves, eye protection, knee pads, and a mask for debris or mold.
Locate and test the main and local shutoff valves, drain residual water, and label valves.
Confirm power to any electric fixtures is off before beginning repairs.
How to Locate and Diagnose Bathroom Pipe Issues
Locating and diagnosing bathroom pipe issues begins with isolating the source of leaks around sinks, toilets, showers, and tubs through visual inspection and targeted tests.
Clogs are evaluated with fixture-specific checks—drain clearing for sinks, overflow and tub/shower trap inspection, and bowl mechanics for toilets—while corrosion, hairline leaks, and freeze damage are identified by discoloration, mineral buildup, and dampness patterns.
Simple tools and tests such as bucket and dye tests, pressure checks, and inspecting joints and traps quickly confirm the problem area before repairs begin.
Identifying the source of leaks behind sinks, toilets, showers, and tubs
Although hidden leaks can start as minor drips, they often reveal themselves through stains, odors, or unexplained water on floors and ceilings. Identifying their source behind sinks, toilets, showers, and tubs requires systematic inspection, testing, and an understanding of common failure points such as supply lines, trap joints, shutoff valves, and shower/bath waste assemblies.
Check visible connections, dry surfaces, run fixtures, feel for dampness, use dye or tissue, and isolate fixtures to pinpoint the leak.
Diagnosing clogs: sink, shower/tub, and toilet-specific checks
How can a homeowner differentiate between a minor slowdown and a true clog? Observe flow rate, draining time, and gurgling.
For sinks, remove and inspect the pop-up and P-trap for debris.
For showers/tubs, test multiple drains and look for hair buildup or slow overflow.
For toilets, check flush power, partial fills, and use a plunger or auger to confirm obstruction location.
Detecting early signs of pipe corrosion, hairline leaks, and ice damage
When routine checks reveal unexplained moisture, staining, or a faint metallic odor, these can signal early pipe corrosion, hairline leaks, or freeze-related cracking.
Prompt, targeted inspection—visually for green or rust-colored deposits, tactilely for dampness along joints and fittings, and audibly for hissing or ticking as pipes expand or contract—helps distinguish one problem from another before water damage escalates.
Inspect insulation gaps, sagging sections, and discolored drywall; note low-pressure symptoms and seasonal timing to narrow the cause.
Using simple tests and tools (bucket test, dye test, pressure checks)
After noting visual, tactile, or auditory warning signs, the technician moves on to simple, low-cost tests and basic tools to pinpoint the source and severity of a problem.
They use a bucket test to isolate leaks, dye in fixtures to trace hidden flows, and pressure gauges to detect drops.
Results guide targeted repairs or further diagnostics like camera inspection or valve checks.
Step-by-Step Repair for Sink Leaks
The section outlines practical steps for common sink leak repairs, beginning with replacing worn faucet seals to stop drips.
It then covers removal and replacement of the P-trap and its seals to address under-sink leaks.
Finally, it explains how to inspect and replace supply lines and shutoff valves to restore reliable water flow.
Fixing a leaking faucet (drip/nozzle seal replacement)
Begin by turning off the water supply to the sink and opening the faucet to relieve any remaining pressure.
Remove handle, bonnet nut, and old cartridge or stem.
Inspect O-rings and nozzle seal; replace worn seals with matching parts and apply plumber’s grease sparingly.
Reassemble components, restore water, and test for leaks.
Tighten as needed; avoid over-torquing to prevent damage.
Replacing sink P-trap and seals
Loosen the slip nuts and remove the P-trap assembly to inspect for clogs, corrosion, or damaged washers; replacing the trap and its seals is a common, straightforward fix for sink leaks and requires only basic tools and a new trap kit matched to the drain size.
Clean mating surfaces, install new washers and gaskets, hand-tighten nuts then test for leaks under normal flow before final snugging.
Repairing or replacing supply lines and shutoff valves
Several common sink leaks originate at supply lines and shutoff valves, so inspecting and addressing these components early can prevent water damage.
The technician should shut water off, drain lines, then inspect connections, flex hoses, compression fittings, and valve bodies for corrosion or cracks.
Replace damaged flex lines and faulty valves with appropriately sized parts, using plumber’s tape and tight but not overtightened fittings.
Test for leaks.
Step-by-Step Repair for Shower and Bathtub Leaks
The section explains how to stop leaks at shower valves and cartridges, including diagnosis and cartridge replacement.
It also covers repairing tub spout leaks and worn diverter valves to restore proper flow.
Finally, it outlines methods for repairing grout, tile seams, and waterproofing to prevent future water intrusion.
Stopping leaks around shower valves and cartridges
Begin by shutting off the water supply to the shower at the main valve or local shutoff. Then open the faucet to drain residual water and confirm no flow.
Remove the handle and trim. Inspect the cartridge or valve for wear, mineral buildup, or damaged O-rings.
Replace faulty seals or the cartridge. Lubricate with plumber-approved grease, reassemble, restore water, and test for leaks.
Fixing tub spout leaks and worn diverter valves
One clear way to stop water wasted from a dripping tub spout is to identify whether the spout itself is leaking or if a worn diverter valve is failing to redirect flow to the showerhead.
Inspect spout type, remove it, check O-rings and seats, replace seals or the spout.
If the diverter sticks, replace or rebuild it, then test for proper redirection and leaks.
Repairing grout, tile seams, and waterproofing around the tub/shower
After addressing spout and diverter issues, attention turns to grout, tile seams, and the waterproofing that protects the substrate from persistent moisture.
Inspect for cracked grout, loose tiles, and failed caulk. Remove damaged material, clean and dry surfaces, apply appropriate waterproof membrane where needed, regrout and seal joints, and finish with mildew-resistant caulk.
Test for leaks and monitor over several showers.
Step-by-Step Repair for Toilet Leaks and Malfunctions
The section outlines clear procedures for common toilet problems, beginning with tank-to-bowl leaks caused by worn gaskets and loose bolts.
It then covers remedies for a running toilet, including flapper replacement, fill-valve servicing, and float adjustment.
Finally, it explains how to identify and seal base leaks and replace a failed wax ring.
Repairing tank-to-bowl leaks (gaskets and bolts)
Several common toilet leaks occur at the tank-to-bowl connection, where a failing gasket or loose bolts allow water to seep between the two components.
To repair, shut off water, drain tank, remove tank bolts, replace the cork or rubber flush valve gasket with a compatible kit, install new washers and bolts, hand-tighten evenly, and test for leaks before full use.
Fixing running toilet (flapper, fill valve, and float adjustments)
Once the tank-to-bowl connection is secure, attention shifts to internal components that commonly cause a toilet to run: the flapper, fill valve, and float.
Inspect the flapper for warping or mineral buildup; replace if leaking.
Adjust or replace the fill valve to stop continuous flow.
Set the float height to maintain proper water level, testing between adjustments until the fill cycle stops.
Sealing base leaks and replacing wax ring
Begin by cutting water to the toilet and flushing to empty the tank and bowl.
Then disconnect the supply line and remove the mounting bolts holding the fixture to the floor.
Lift the toilet, scrape old wax from flange, inspect for cracks, install a new wax ring (or wax-free seal), reseat the toilet, torque bolts evenly, reconnect supply, and test for leaks while checking flange alignment.
Clearing and Preventing Bathroom Clogs
Clearing common bathroom clogs begins with manual and mechanical methods such as plungers and augers to remove blockages safely and effectively.
Chemical and enzyme-based cleaners are discussed next, with guidance on appropriate use, temperature limits, and precautions to avoid pipe damage or hazardous reactions.
Long-term prevention focuses on hair traps, routine maintenance, and mindful drain care to reduce recurrence.
Manual and mechanical clog removal methods (plungers, augers)
Manual and mechanical methods like plungers and augers address most bathroom blockages by physically dislodging or extracting the obstruction rather than relying on chemicals.
Use a flange plunger for toilets, a cup plunger for sinks. Operate plungers with steady seals and forceful strokes.
For deeper clogs, feed a hand auger into the drain, rotate to break or hook debris, then retract and flush.
Chemical and enzyme options: when and how to use them safely
When mechanical methods fail or are impractical, chemical and enzyme-based cleaners offer alternative ways to dissolve or digest organic clogs.
However, selecting the right product and following safety instructions is essential to avoid pipe damage, hazardous reactions, or health risks.
Use enzyme cleaners for organic buildup and biodegradable pipes; reserve caustic or acidic chemicals for severe clogs.
Never mix types, ventilate, wear PPE, and follow label instructions.
Long-term prevention: hair traps, regular maintenance, and drain care
Regular preventive measures dramatically reduce the frequency and severity of bathroom clogs by stopping hair and debris before they enter the drain, maintaining pipe flow, and catching minor issues early.
Recommended practices include:
- Install and clean fine mesh hair traps weekly.
- Schedule quarterly inspections and basic snaking.
- Flush drains monthly with hot water and enzyme cleaners to prevent buildup and odors.
Emergency Response to Burst Pipes
When a bathroom pipe bursts, the first priority is shutting off the water supply and isolating the affected fixtures to limit flooding.
Temporary repairs—such as compression fittings for copper, wrap-and-clamp patches for PVC, or push-fit couplers for PEX—can provide short-term containment until a permanent fix is made.
If freezing is involved, controlled thawing with a hairdryer or warm towels while keeping the area insulated afterward reduces the risk of refreezing and further ruptures.
Immediate steps to stop water flow and minimize damage
At the first sign of a burst pipe, the homeowner should act quickly to stop the flow and limit damage by shutting off the main water valve, cutting power to affected areas if water has reached electrical outlets, and directing escaping water away from valuables using buckets or towels.
Next, open nearby faucets to drain residual pressure, document damage with photos for insurance, and ventilate the space.
Temporary patching options for copper, PVC, and PEX
Begin temporary repairs by evaluating pipe material and the size of the leak to choose an appropriate quick fix:
Copper can be sealed with epoxy putty or soldered patches if power and skill are available;
PVC responds to solvent cement or a rubber sleeve clamped over the breach;
and PEX can be temporarily closed using a compression repair coupling or a rubber patch secured with hose clamps.
Use pressure relief, dry the area, and monitor.
How to safely thaw frozen pipes and prevent refreezing
A frozen section of pipe presents an acute risk of rupture and requires immediate, controlled action: isolate the water source, open nearby faucets to relieve pressure, and confirm power is available for safe thawing methods.
Apply gentle heat with a hair dryer, heat lamp, or electric space heater, working toward the faucet; never use open flames.
Insulate exposed pipes, maintain indoor warmth, and monitor for leaks until fully thawed.
Replacing and Upgrading Bathroom Pipe Sections
The decision to replace a pipe section rather than patch it hinges on damage extent, age, and code or performance concerns.
Common materials—copper, PVC, CPVC, and PEX—each offer distinct trade-offs in cost, durability, temperature tolerance, and ease of installation.
A typical replacement follows steps of isolating water, removing the damaged segment, fitting the new material with appropriate connections, and pressure-testing the repair.
When to replace sections versus patching
When should a homeowner opt to replace a section of bathroom piping rather than apply a patch?
Replacement is preferable for extensive corrosion, recurring leaks, multiple repairs in one area, significant damage from freezing, compromised joints, or when pipes are undersized or nonstandard.
Patching suits isolated, small leaks on otherwise sound piping.
Long-term reliability, accessibility, and cost-effectiveness guide the decision.
Material comparison: copper, PVC, CPVC, and PEX
Having determined whether a section needs replacement, homeowners must weigh the pros and cons of common piping materials—copper, PVC, CPVC, and PEX—since each affects durability, installation complexity, cost, and water quality. Copper: durable, costly; PVC: cheap, cold-water only; CPVC: hot-water safe, brittle with age; PEX: flexible, easy install, not UV-resistant.
| Material | Key trait |
|---|---|
| Copper | Long-lasting |
| PVC | Inexpensive |
| CPVC | Heat-rated |
| PEX | Flexible |
Basic installation steps for replacing a pipe segment
Begin by isolating the work area: shut off the main water supply, drain downstream lines by opening faucets, and relieve pressure to prevent leaks during removal.
Measure and cut the damaged section, deburr edges, and fit replacement pipe. Use appropriate connectors and apply flux/solder or primer/cement or crimp fittings as required.
Pressure-test the repair, inspect for leaks, and restore water gradually.
Testing Repairs and Restoring Service
Once repairs are complete, the work must be verified with pressure testing and systematic leak checks to confirm integrity.
The lines should then be flushed and balanced to clear air and debris and to restore steady water flow.
If leaks persist, reduced pressure, discolored water, or unusual noises indicate failure and prompt steps such as re-tightening fittings, redoing seals, or calling a professional.
Pressure testing and leak checks after repair
After repairs are completed, pressure testing and systematic leak checks confirm the integrity of the work before restoring service.
The technician isolates repaired sections, applies recommended test pressure using a gauge or pump, and monitors for pressure loss.
Visible joints receive dye or soapy solution checks; meters and fixtures are observed.
Any drop or seepage mandates repair, retest, and documentation prior to full system reactivation.
Flushing and balancing water lines to remove air and debris
Flush and balance the repaired water lines to purge trapped air and dislodge residual debris that can impair flow or damage fixtures.
Open cold then hot taps fully, one fixture at a time, until steady, bubble-free flow appears.
Flush toilets and run showers briefly.
Check aerators and strainers for sediment, then close taps slowly to prevent pressure spikes.
Verify consistent pressure across fixtures.
Signs a repair failed and next steps
Several clear indicators can show that a pipe repair has failed and that further action is required.
Persistent dripping, new stains, damp smells, pressure loss, or recurrent clogs signal incomplete fixes.
Shut main water, document issues, and isolate affected fixtures.
Reassess joints, seals, or replacement parts.
If uncertainty persists, contact a licensed plumber to prevent wider damage and guarantee a reliable repair.
Common Mistakes to Avoid and Troubleshooting Tips
The section highlights frequent errors such as over-tightening, using the wrong fittings, and applying improper sealants that can worsen leaks.
It also outlines troubleshooting steps for persistent leaks and recurring clogs to help isolate root causes.
Finally, it notes situations where DIY repairs may void warranties or contravene building codes, advising when to seek professional help.
Over-tightening, wrong fittings, and improper sealant use
Over-tightening fittings, using incompatible connectors, and misapplying sealants are among the most common errors that lead to leaks, stripped threads, and premature failures in bathroom plumbing.
Proper torque, matching materials (PVC to PVC, copper to copper, approved adapters), and using the correct sealant—thread tape for metal threads, solvent cement for plastic—prevent damage.
Inspect joints and replace damaged parts rather than forcing connections.
Troubleshooting persistent leaks and recurring clogs
Persistent leaks and recurring clogs often signal underlying issues beyond surface repairs, such as hair and mineral buildup, damaged seals, improper pipe slope, or hidden fractures.
Inspect traps, clean vents and aerators, and snake drains before replacing parts.
Check joint alignment, gasket condition, and water pressure.
Document findings, test after each step, and escalate to a professional when problems persist or diagnosis is unclear.
When DIY fixes void warranties or building codes
Although many homeowners tackle minor bathroom repairs to save time and money, improper DIY work can void manufacturer warranties and violate local building codes, leading to costly corrections.
DIYers should verify warranty terms, obtain required permits, and follow code-compliant materials and methods.
When unsure, consult manufacturers or licensed plumbers.
Document repairs with photos and receipts to support future claims or inspections.
Cost Estimates, Timeframes, and When to Call a Professional
Typical DIY bathroom pipe repairs—such as replacing a shutoff valve, fixing a small leak, or unclogging a trap—often require modest parts and a few hours, while more involved jobs take longer and cost more.
Immediate attention from a licensed plumber or emergency services is advised for sewage backups, major bursts, gas-scented leaks, or when water cannot be shut off.
Before calling a pro, the homeowner should document the problem with clear photos, record measurements and appliance/model numbers, and have any warranty or installation paperwork ready.
Typical DIY cost and time for common repairs
Estimate expenses and time realistically before starting a bathroom pipe repair project: simple fixes like replacing a leaky compression fitting or unclogging a trap typically require $10–$60 in parts and 30–90 minutes, while replacing a section of copper or PVC pipe or repairing a shower valve can cost $50–$300 in materials and take 2–6 hours for a competent DIYer.
| Repair | Cost | Time |
|---|---|---|
| Trap unclog | $10–$30 | 30–60 min |
| Compression fitting | $10–$60 | 30–90 min |
| Pipe section/valve | $50–$300 | 2–6 hrs |
Red flags that require licensed plumbers or emergency services
When a bathroom plumbing issue shows signs of major failure—such as rapidly spreading water, foul-smelling sewage backup, visible structural damage, or loss of hot water and pressure across multiple fixtures—it’s no longer suitable for a DIY fix and requires a licensed plumber or emergency services.
These situations often indicate burst pipes, main sewer line blockages, compromised water heaters, or gas-related hazards that can escalate quickly and incur higher repair costs and longer downtimes.
Call professionals for persistent leaks, sewage backups, visible mold, electrical contact, or widespread outages.
Expect higher hourly rates, emergency surcharges, and repair timelines from hours to days depending on severity and parts availability.
Preparing for a professional visit: photos, measurements, and documentation
Gather clear photos, measurements, and basic documentation before the technician arrives to speed diagnosis and guarantee accurate cost and time estimates.
Include date-stamped images of damage, close-ups of fittings, pipe locations, and any visible labeling.
Note appliance models, recent repairs, water meter readings, and access constraints.
Prepare purchase receipts or warranty papers.
Organized records reduce on-site time and prevent estimate surprises.
Preventive Maintenance Checklist for Long-Term Pipe Health
A preventive maintenance checklist helps preserve bathroom pipe integrity and reduce emergency repairs.
Recommended actions include:
- Seasonal tasks to reduce risk of leaks and bursts
- Routine inspections and homeowner maintenance habits
- Documenting observations and scheduling professional follow-up as needed.
Seasonal tasks to reduce risk of leaks and bursts
Inspecting pipes seasonally prevents many common causes of leaks and bursts by catching wear, corrosion, and thermal stress early.
Winterize exposed plumbing, insulate vulnerable sections, drain exterior lines, and protect outdoor fixtures.
In spring and fall, flush hot-water heaters, check for sediment buildup, test pressure relief valves, and clear gutters to prevent water ingress.
Schedule professional checks for aging systems.
Routine inspections and homeowner maintenance habits
Regular, simple checks form the backbone of long-term pipe health, helping homeowners spot small issues—drips, loose fittings, minor corrosion—before they escalate into failures.
Inspect visible piping monthly, test shutoff valves, check under sinks for dampness, and run drains with hot water weekly.
Keep records, tighten fittings gently, replace worn washers, and schedule professional inspections every few years to prevent surprises.
Recommended Replacement Parts and Brands for Reliability
Many homeowners find that selecting proven parts and reputable brands prevents repeat repairs and reduces long-term costs.
Recommended parts emphasize durability, compatibility, and warranty support.
Suggested reliable brands and components include:
- Brass compression fittings (e.g., Nibco, Mueller)
- PVC/CPVC replacement pipes (e.g., Charlotte, Genova)
- High-quality cartridge faucets and seals (e.g., Moen, Delta)
Conclusion
A homeowner once found a tiny drip behind a mirror, ignored for weeks until a walnut-sized stain blossomed into a ruined ceiling—proof that small leaks grow like unattended seeds. This guide equips readers with tools and clear steps to stop drips, clear clogs, and patch bursts before they become floods. By treating early warning signs with prompt care, long-term damage, stress, and expense can be greatly reduced.
