How to Check a Sump Pump Float Switch: Step-by-Step Troubleshooting and Maintenance
To check a sump pump float switch, start by cutting the power to the pump. Remove the pump from the basin and inspect the float mechanism for any debris, damage, or waterlogging. Ensure the float moves freely and has buoyancy by testing it in clean water. Manually actuate the float to confirm it triggers the electrical response. Check the wiring and contacts for corrosion or looseness. You can clean or tighten minor issues, but severe damage will necessitate replacement. Follow these detailed steps for effective troubleshooting and maintenance.
What a Sump Pump Float Switch Does and Why It Matters
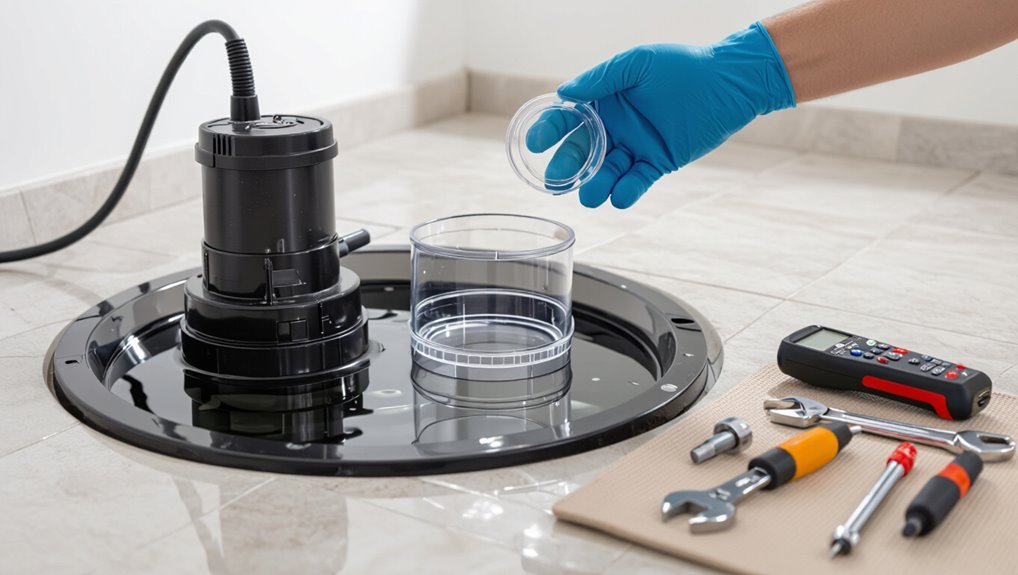
A sump pump float switch automatically turns the pump on and off based on basin water level, preventing flooding and dry-run damage.
Common designs include vertical floats, tethered floats, and solid-state electronic sensors, each with different activation points and failure modes.
Early signs of a malfunctioning float switch include a pump that runs constantly, fails to start at high water, or starts and stops erratically.
How a float switch controls the sump pump
When water in the sump pit rises to a preset level, the float switch converts that change in position into an electrical signal that starts the pump; as the water falls, the float returns to its off position and breaks the circuit, stopping the pump.
Observers may note mechanical movement, electrical continuity, and response timing; advice on how to check sump pump float switch focuses inspections on linkage, wiring, and switch contacts.
Common types of float switches (vertical, tethered, electronic)
Float switches come in three common styles—vertical, tethered, and electronic—each offering distinct sensing methods and installation trade-offs.
Vertical switches slide on a guide rod and provide reliable on/off points.
Tethered floats pivot with water level and suit irregular basins.
Electronic sensors use solid-state detection for compact installs and fewer moving parts, often at higher cost and sensitivity.
Signs a malfunctioning float switch causes sump pump failure
Several clear signs indicate a malfunctioning float switch is causing sump pump failure, and recognizing them quickly can prevent basement flooding and equipment damage.
Typical symptoms include:
- Pump running continuously or not at all
- Erratic cycling
- Failure to start despite rising water
- Intermittent operation only when nudged
- Unusual noises during activation
- Visible obstructions or stuck floats preventing proper movement
Quick Checklist to Determine If the Float Switch Is the Problem
Before inspecting the float switch, the reader should follow basic safety precautions such as disconnecting power and wearing gloves.
A quick visual checklist covers unusual noises, how often the pump cycles, and whether the water level rises or falls as expected.
Also note the tools and materials required—flashlight, multimeter, and basic hand tools—so the inspection can proceed efficiently.
Safety precautions before inspecting the pump
Anyone about to inspect a sump pump should first follow a concise safety checklist to reduce risk of injury and equipment damage.
Verify power is disconnected at the breaker and unplug the pump.
Wear rubber gloves and eye protection.
Confirm dry footing and adequate lighting.
Avoid reaching into the pit with bare hands.
Have a nonconductive tool on hand for adjustments.
Visual checklist: noises, cycling frequency, water level behavior
A brief visual checklist helps isolate float-switch faults by focusing on three observable signs: unusual noises from the pump, abnormal on/off cycling frequency, and unexpected water-level behavior in the sump pit.
Listen for grinding, clanking, or constant motor hum.
Note rapid or infrequent cycling versus steady intervals.
Observe whether water rises above the normal cut-in or fails to trigger pump at expected levels.
Tools and materials you’ll need
Several basic tools and a few common materials are required to perform a quick, reliable check of a sump pump float switch.
Recommended items: multimeter or continuity tester, flashlight, insulated gloves, screwdriver set, pliers, tape, zip ties, replacement float or switch (if available), rag and bucket for water capture, and electrical tape.
These guarantee safe, accurate inspection and simple on-site repairs.
Step-by-Step Inspection of the Float Switch
Before inspecting the float switch, power should be disconnected and the pump removed from the basin to guarantee safety.
The following steps outline a focused, hands-on inspection of the float arm, tether, buoyancy, and switch actuation. Any irregularities observed during these checks indicate where repair or replacement is needed.
- Disconnect power and remove pump; inspect float arm and tether for obstructions or damage.
- Test float mobility and buoyancy in clean water and manually lift the float to actuate the switch.
- Listen for internal switch clicks and confirm the pump activates when the float is raised.
Disconnect power and remove sump pump from basin
Shut off the pump’s power and unplug it from the electrical source, then lift the unit from the basin to access the float switch for inspection.
Place the pump on a stable, protected surface.
Drain residual water away from electrical components.
Note cord condition and plug integrity.
Allow clear workspace and adequate lighting before proceeding to examine the float switch assembly and connections.
Inspect float arm and tether for obstructions or damage
Inspect the float arm and tether visually and by hand to confirm they move freely and show no cracks, bends, fraying, or other physical damage.
Examine attachment points, clips, and pivot pins for corrosion, looseness, or missing fasteners.
Remove debris, mineral buildup, or obstructions caught under the arm.
Note any deformation that could impede travel and record parts needing replacement before reassembly.
Check float mobility and buoyancy in clean water
Next, place the pump or the float assembly in a basin of clean water and operate the float through its full range of motion to confirm smooth travel and reliable buoyancy.
Observe for sticking, wobble, trapped air, or water ingress.
Verify the float returns upright and settles consistently at varying depths.
Note any irregular drift or sluggishness for repair or replacement.
Test switch actuation by manually lifting the float
Begin by lifting the float slowly and evenly to observe the switch’s response and to verify reliable electrical actuation without jerking or hesitation.
Hold at the on-position to confirm firm engagement, then lower to guarantee clean release.
Repeat several cycles to detect intermittent behavior.
Note any sticking, delayed action, or inconsistent travel that indicates mechanical wear, obstructions, or failing contacts needing repair or replacement.
Listen for internal switch clicks and observe pump activation
After confirming smooth, repeatable travel of the float, attention shifts to audible and operational cues: the technician listens for a distinct internal click as the switch actuates while watching the pump motor start and stop in response.
A clear click paired with reliable motor cycling indicates functional switching; absence, inconsistent clicks, or delayed motor response suggests internal contact wear or intermittent failure requiring further diagnostics or replacement.
Inspect wiring, connectors, and corrosion
One critical inspection step is to examine the float switch wiring, connectors, and any signs of corrosion to guarantee reliable electrical continuity.
Inspect insulation for cracks, kinks, or abrasion. Check terminal tightness and solder joints for looseness.
Look for green or white deposits, rust, or pitting on metal parts. Clean contacts with appropriate cleaners and replace damaged connectors to prevent failure.
Reinstall and test in the basin under live conditions
Lower the float switch assembly back into the sump basin and secure it to the pump or guide rail so the float can move freely without rubbing the basin walls.
Restore power, pour water gradually to raise the float, and observe activation and deactivation points. Confirm pump starts promptly, runs steadily, and stops at the correct level.
Listen for abnormal noises and check for leaks or erratic cycling.
How to Diagnose Specific Float Switch Problems
The technician begins by observing common mechanical issues such as a float stuck against the basin wall or tangled on debris, a tethered float that is misaligned, or a broken float arm or cracked housing.
They then check for a waterlogged or damaged float that sinks instead of rising.
Finally, electrical faults are tested for intermittent contacts or burnt connectors that can cause unreliable operation.
Float stuck against basin wall or debris
A common cause of intermittent or failed sump pump activation is a float that becomes trapped against the basin wall or jammed by debris; this prevents the float from rising and signaling the pump to start.
Inspect the basin for obstructions, gently free the float and tether, and clear accumulated silt or roots.
Verify unobstructed travel and test multiple activation levels to confirm reliable operation.
Waterlogged or damaged float causing sinking
Inspecting the float for waterlogging or physical damage is essential when a sump pump fails to activate because a sinking or punctured float cannot signal the switch.
Visually examine for cracks, holes, or heavy condensation. Gently lift the float; if it fills with water or feels unusually heavy, replace it.
Corrosion or deformity also warrants replacement to restore reliable buoyancy and operation.
Tethered float tangled or misaligned
Tethered floats can become tangled, snagged, or misaligned, preventing the float from rising freely and activating the switch.
Inspect the tether for knots, debris, or snag points and verify attachment hardware is secure.
Manually lift the float to observe smooth travel and consistent switch engagement.
Realign or replace the tether if friction, binding, or misrouting impedes movement.
Broken float arm or cracked housing
Examine the float arm and housing for visible cracks, bends, or fractures that can prevent proper movement or allow water intrusion into the switch assembly.
If damage is present, confirm looseness or misalignment by gently manipulating the float; a broken arm may wobble or snag.
Replace cracked housings or snapped arms to restore sealed operation and reliable actuation; temporary adhesives are not recommended.
Electrical faults: intermittent contacts, burnt connectors
Check the float switch’s electrical connections for signs of intermittent contact or heat damage, as these faults commonly cause erratic pump behavior or failure to start.
Inspect terminals, wires, and plugs for corrosion, melting, discoloration, or looseness.
Wiggle connectors while observing operation.
Replace damaged leads, crimp or solder secure joints, and use heat-shrink tubing.
Test continuity and recheck under load to confirm repair.
When to Repair vs Replace the Float Switch
When a sump pump float switch shows minor issues, simple repairs such as cleaning, re-seating, or tightening electrical connections can restore reliable operation.
Replacement should be considered if the switch is old, has failed repeatedly, or shows irreparable damage.
When replacing, a compatible float switch matching the pump’s specifications and mounting style should be chosen.
Repair options: cleaning, re-seating, tightening connections
Start by evaluating whether simple maintenance can restore reliable operation before deciding on replacement.
Cleaning debris, mineral buildup, and corrosion from the float and housing often restores movement.
Re-seat a stuck float, ensuring unobstructed travel and correct alignment.
Tighten loose electrical and mounting connections to eliminate intermittent contacts.
Test function after each step and document results to determine if further action is necessary.
Replacement indicators: age, repeated failures, irreparable damage
After attempting cleaning, reseating, and tightening, assessment should shift to whether the float switch is worth repairing or should be replaced.
Indicators favoring replacement include advanced age with brittle components, recurring failures after prior fixes, visible corrosion, cracked housings, or internal electrical faults.
If repairs are temporary, safety or reliability is compromised, replacement is the prudent choice.
Choosing a compatible replacement float switch
If repair is deemed impractical, selecting a compatible replacement float switch requires matching electrical ratings, mounting style, and float type to the existing pump and basin geometry.
Verify voltage, amperage, and switch action (normally open/closed).
Confirm vertical, tethered, or diaphragm fit and clearance in the pit.
Check connector compatibility and materials for corrosive conditions.
Follow manufacturer specs and local codes.
How to Replace a Sump Pump Float Switch:
A replacement should match the pump’s mounting and electrical requirements and be sized to operate properly within the basin.
The old switch must be removed and safely disconnected before fitting the new float type—vertical, tethered, or integrated—and routing and securing the wiring to prevent tangles.
Final verification includes a bench test and an in-basin test to confirm reliable operation.
- Choose compatible replacement: type, length, and connection.
- Remove old switch, disconnect wiring, install and secure new float.
- Test on the bench, then in the basin, and secure anti-tangle measures.
Selecting the right replacement (type, length, compatibility)
Choose a replacement float switch that matches the original unit’s type, length, and electrical specifications to guarantee reliable operation.
Assess switch style (tethered, vertical, electronic), mounting method, and activation range.
Verify voltage, current rating, and compatibility with the pump model and controller.
Measure cable length and float travel needed for proper on/off points.
Prefer OEM or equivalent-rated parts for durability.
Removing old switch and disconnecting wiring safely
Begin by cutting power to the sump pump at the breaker and confirming the circuit is dead with a non-contact voltage tester.
Drain and remove the pump per manufacturer instructions.
Label and photograph wire connections before loosening terminals or wire nuts.
Use insulated tools, wear gloves and eye protection, and cap exposed wires with wire nuts.
Remove the old float switch and retain mounting hardware for reuse or replacement.
Installing new float (vertical mount, tethered, or integrated)
Install the replacement float by matching its style—vertical, tethered, or integrated—to the pump’s mounting provisions and routing the wiring as originally arranged.
For vertical floats, align and secure the guide rod or bracket.
For tethered floats, attach the tether at the designated anchor point and verify free pivoting.
For integrated units, seat the assembly and fasten mounting screws.
Confirm smooth travel.
Securing wiring and securing anti-tangle measures
Secure the wiring and anti-tangle measures to prevent snags, electrical hazards, and false activations of the new float.
Route and fasten power and switch wires with corrosion-resistant clips or cable ties, keeping them clear of moving parts and the pump discharge.
Add a weighted anti-tangle sleeve or guide for tethered floats.
Inspect for chafing, secure strain relief at the pump, and trim excess slack.
Bench test and in-basin test after installation
After wiring and anti-tangle measures are checked, the float switch should undergo a two-step verification: a controlled bench test to confirm electrical function and a carefully observed in-basin test to guarantee reliable operation under real conditions.
First, actuate the float manually on a test bench, verify continuity and pump activation.
Then install, fill the basin slowly, observe switch travel, repeat cycles, and note any irregularities.
Preventive Maintenance to Keep the Float Switch Reliable
Preventive maintenance keeps a sump pump float switch functioning reliably and reduces the risk of failure during heavy rainfall.
Regular checks, cleaning, and simple protective measures address common causes of sticking or electrical issues. Integrating backups and alarms further guarantees continuous operation when primary systems are compromised.
- Establish a routine inspection schedule with seasonal checks and pit cleaning.
- Use lubrication, corrosion inhibitors, and install guards or float guides to prevent catching.
- Add battery backup and alarm integration for added safety and early warning.
Routine inspection schedule and seasonal checks
How often should a sump pump float switch be inspected to remain reliable? Inspect monthly during wet seasons and every three months during dry periods.
Include visual checks, manual float movement, cord condition, and electrical connections.
Perform additional inspections before forecasted heavy rain or winter freeze.
Document findings, note trends, and schedule repairs or replacements promptly to prevent failure.
Cleaning the sump pit and removing debris
Clean the sump pit regularly to remove sediment, leaves, trash, and other debris that can obstruct the float switch or jam the pump.
A person should power off the pump, scoop out solids, vacuum fine sediment, and inspect for hidden obstructions.
Confirm the float moves freely and check the inlet screen and discharge opening.
Dispose of waste and rinse the pit before restarting the system.
Lubrication and corrosion prevention tips
Although the float switch is largely a mechanical device, occasional lubrication and attention to corrosion can greatly extend its service life and reliability.
Apply a light, waterproof lubricant to pivot points and hinges annually. Inspect metal components for rust and remove with a wire brush.
Use corrosion-resistant sprays or replace corroded parts. Make certain electrical connections remain dry and sealed to prevent deterioration.
Installing guards or float guides to prevent catching
Install guards or float guides to keep the float switch from snagging on debris, cables, or tank walls, which can prevent false activations or mechanical binding.
Select corrosion-resistant materials and secure guides to the sump wall without restricting float travel.
Position guards so the float moves freely through its full range.
Inspect periodically for damage, adjust alignment, and remove trapped debris to maintain reliable operation.
Battery backup and alarm integration for added safety
After fitting guards or guides to prevent snags, attention should turn to backup power and alarm systems to guarantee the float switch continues to protect the sump during outages or failures.
Install a dedicated battery backup with automatic switchover, test runtime monthly, and integrate a high-water audible/visual alarm.
Verify wiring and sensor compatibility, replace batteries per manufacturer schedule, and log tests for reliability.
Troubleshooting Advanced Issues and Workarounds
When a float switch behaves erratically under heavy flow or trips falsely from turbulence or air bubbles, the homeowner should inspect flow conditions and switch positioning for obvious causes.
Simple temporary fixes—such as shielding the float, adding a guide, or adjusting the pump’s intake—can reduce false activations until replacement parts arrive.
If intermittent activation persists or electrical concerns appear, a licensed plumber or electrician should be contacted.
Intermittent activation under heavy flow conditions
Diagnose intermittent float switch activation during heavy flow by observing patterns and isolating variables: rapid water level changes, turbulence, or debris can cause the float to oscillate and trigger the pump briefly or erratically.
Inspect for obstructions, verify float travel and hinge freedom, secure or reposition the float to minimize mechanical interference, and test under simulated high-flow to confirm steady activation thresholds and reliable cycling.
False trips caused by turbulence or air bubbles
Although a sump pump float is designed to respond to steady rises in water level, turbulence and entrained air can produce rapid, erratic movements or momentary loss of buoyancy that mimic true high-water conditions and cause false trips.
Inspect intake and discharge locations for turbulent inflow, secure or reposition the float away from agitators, and add simple baffling or weighted stabilizers to damp motion and prevent spurious activations.
Temporary fixes until parts arrive
Prepare simple, temporary measures to keep the sump pump functional and the basement dry while replacement parts are en route.
Elevate sensitive items, use a backup submersible pump or rental, secure the float with a nonconductive clamp to prevent false activation, and route excess water to a safe drain.
Monitor hourly, test operation periodically, and conserve power to reduce failure risk.
When to call a professional plumber or electrician
When should a homeowner escalate sump pump float switch issues to a professional?
A plumber or electrician should be called if wiring faults, persistent tripping breakers, burned connectors, motor overheating, or unexplained intermittent operation occur.
Also seek help for inaccessible installations, damaged discharge lines, repeated float failures after replacement, or when local code compliance, permit concerns, or sump basin structural issues complicate repairs.
Comparison of Float Switch Types and Their Pros/Cons
Different float switch designs offer distinct operational characteristics that affect reliability, maintenance, and installation. The following brief comparison highlights key advantages and drawbacks of vertical floats, tethered floats, and electronic sensors to guide selection. Readers can use this table to match features to their pump and basin conditions.
| Type | Quick pros/cons |
|---|---|
| Vertical float | Compact, consistent activation; can jam if debris enters basin |
| Tethered float | Flexible placement, less prone to jamming; may snag or wear over time |
| Electronic sensor | No moving parts, precise control; higher cost and sensitivity to electrical faults |
Vertical floats vs tethered floats vs electronic sensors
Although all sump pump float mechanisms serve the same basic purpose—activating the pump as water rises—their designs and operating characteristics differ considerably.
Vertical floats offer reliable, fixed travel and resist tangling but require precise installation.
Tethered floats provide wider activation range and easier retrofits yet can snag.
Electronic sensors enable adjustable sensitivity and no moving parts but depend on power and cost more.
Common Mistakes to Avoid During Inspection and Replacement
Inspection and replacement of a sump pump float switch require attention to simple but critical errors that can compromise safety and performance.
Technicians should prioritize power isolation, proper wiring and connector condition, and correct float positioning to prevent failures. Overlooking basin alignment or anti-tangle measures can also lead to malfunction.
- Disconnecting power before work, avoiding reuse of damaged connectors, and ensuring correct wiring.
- Selecting the proper float type and length for the pump and basin.
- Verifying basin alignment and installing anti-tangle setups to keep the float free-moving.
Working without disconnecting power
Never attempt to inspect or replace a sump pump float switch while the unit remains powered.
Working live risks electric shock, short circuits, and accidental pump activation. Always shut off power at the breaker and verify with a noncontact voltage tester before touching components.
Lockout/tagout if possible. Failure to de-energize endangers the inspector and can damage the pump or nearby wiring.
Reusing damaged connectors or improper wiring
Avoid reusing frayed or corroded connectors and take care with wiring orientation, because compromised terminals and incorrect splices are frequent causes of pump failure and electrical hazards.
Inspect all wiring for insulation breaks, heat damage, and looseness. Replace damaged terminals and use proper waterproof connectors or heat-shrink seals.
Verify polarity and secure strain relief; improper wiring or cheap repairs risk shorts, corrosion, and premature failure.
Installing incorrect float length or type
After checking and replacing damaged connectors and verifying wiring, attention must turn to selecting the correct float length and type for the sump pump.
Using an overly long, short, or incompatible float can prevent proper activation, cause frequent cycling, or rub against the basin.
Confirm manufacturer specifications, match float style to pump model and basin depth, and test operation before finalizing installation.
Ignoring basin alignment and anti-tangle setup
While inspecting or replacing a sump pump, overlooking basin alignment and an anti-tangle setup can lead to misfiring, premature wear, and pump failure.
Failure to center the pump or secure the float cable allows snagging, restricted movement, and false triggers.
Proper shimming, a leveled basin, and a tethered or weighted anti-tangle kit guarantee reliable float travel, preventing downtime and costly repairs.
Recommended Tools, Replacement Parts, and Resources
A concise set of tools, trustworthy replacement parts, and accurate resources makes inspection and replacement more efficient and safer.
The following list highlights what a homeowner or technician should have on hand and where to find reputable guidance. Links to manuals and manufacturer support can clarify fit, wiring, and warranty questions.
- Basic tools (multimeter, adjustable wrench, screwdriver set) and safety gear (gloves, eye protection).
- Recommended float switch models and brands known for reliability and compatibility with common sump pumps.
- Instructional videos, official manuals, and manufacturer support/contact links for model-specific guidance.
Essential tools for inspection and replacement
Gather the right tools and parts before beginning any sump pump float switch inspection or replacement to guarantee the job proceeds safely and efficiently.
Essential items include insulated screwdrivers, adjustable wrench, needle-nose pliers, multimeter, flashlight, replacement float switch or assembly, waterproof wire connectors, silicone sealant, and safety gloves.
Also have a bucket, rags, and manufacturer’s manual for reference.
Reliable float switch models and brands to consider
When selecting a replacement float switch, homeowners should prioritize proven reliability, compatibility with the existing pump, and ease of installation.
Reputable brands such as Zoeller, Little Giant, Wayne, and Liberty Pumps frequently appear in trade reviews and service recommendations for their durable designs and widely available parts. Other solid options include Franklin Electric and Superior Pump.
Choose models rated for sump conditions, check mounting type, and confirm cord length.
Helpful videos, manuals, and manufacturer support links
After considering reliable float switch brands and compatibility factors, homeowners benefit from specific how-to videos, downloadable manuals, and direct manufacturer support to guarantee correct installation and troubleshooting.
Recommended resources include official manufacturer support pages, PDF manuals with wiring diagrams, and step-by-step video tutorials demonstrating float movement, testing with a multimeter, and safe pump removal.
Keep model numbers handy for accurate parts and tech assistance.
Conclusion
In the grand theater of basement appliances, the sump pump float switch emerges as the diva: dramatic when stuck, silent when needed, and always keen for attention. Readers are reminded that a little inspection, timely cleaning, or swapping a tired switch spares soggy floors and frantic phone calls. When cynicism meets common sense, practical maintenance and knowing when to replace the part keep the drama to a minimum — and the basement mercifully dry.