How to Caulk a Toilet: Step-by-Step Guide for a Watertight Seal
To caulk a toilet effectively, follow these steps for a watertight seal that prevents leaks and stabilizes the fixture. Start by turning off the water supply, draining the toilet bowl, and removing any old caulk with a utility knife and cleaner. Use a bathroom-grade silicone or hybrid caulk, load it into a caulk gun, and apply a bead of caulk measuring 1/8–3/16 inches while holding the gun at a 45-degree angle. Smooth the caulk with a caulk tool or your finger, wiping away any excess, and allow it to fully cure. For additional tips on preparation, troubleshooting, and timing, continue reading.
What Caulking a Toilet Achieves and When It’s Necessary
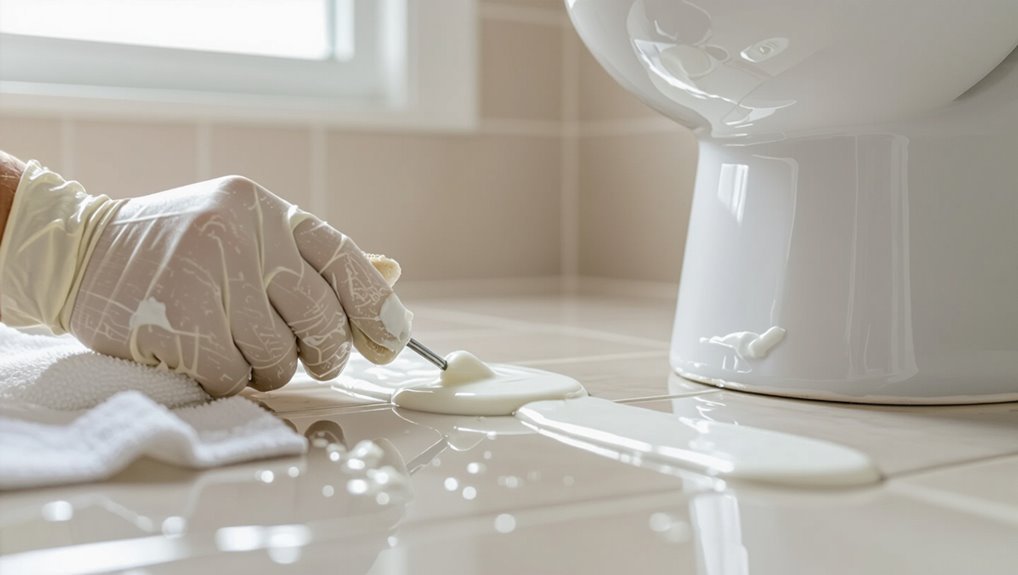
Caulking around a toilet primarily provides a waterproof seal to prevent leaks, helps stabilize the fixture, and limits bacterial buildup for improved hygiene.
Visible water pooling, mold growth at the base, gaps in the bead, or a loose toilet are signs that re-caulking is needed now.
If persistent leaks under the bowl, a rocking toilet despite intact caulk, or sewage odors occur, the wax ring likely needs replacement instead of merely re-caulking.
Purpose of Toilet Caulking: Waterproofing, Stability, and Hygiene
A proper bead of sealant around a toilet serves three practical functions: it prevents water from seeping under the base, helps keep the fixture stable against lateral movement, and limits crevices where bacteria and odors can accumulate.
Caulking provides waterproofing, reinforces stability, and improves hygiene.
Knowing how to caulk a toilet guarantees an effective seal, prolongs flooring integrity, and reduces maintenance.
Signs You Need to Re-caulk Now
With the protective functions of toilet sealant in mind, homeowners should watch for clear signs that re-caulking is needed.
Visible cracks, peeling, mold growth, or gaps between the toilet base and floor indicate failed sealant.
Persistent water pooling, damp odors, or loose toilet wobble also signal deterioration.
Prompt re-caulking prevents water damage, microbial growth, and further fixture instability.
When to Replace the Wax Ring Instead of Re-caulking
Inspect the gap between the toilet and floor to determine whether surface sealant or the underlying wax ring is at fault.
If water leaks from the toilet base, persistent odors, wobbling despite tightened bolts, or visible sewer gas, the wax ring likely fails.
Re-caulk only when the flange and wax seal are intact; otherwise remove the toilet and replace the wax ring for a reliable, lasting seal.
Materials and Tools Required
To caulk a toilet properly, the article outlines recommended caulk types—silicone for water resistance, acrylic for paintability, and hybrids for combined benefits—and explains why each is suitable.
It then lists essential tools such as a caulk gun, utility knife, masking tape, rags, and a cleaner.
Finally, it mentions optional items that improve results, including a heat gun, painter’s tape, and toothpicks.
Recommended Caulk Types and Why (Silicone vs. Acrylic vs. Hybrid)
Select a caulk based on the toilet location and desired durability: silicone for water resistance and longevity, acrylic for paintability and ease of use, or hybrid formulations that combine adhesion and flexibility.
Consider these trade-offs when choosing:
- Silicone: best for moisture, longest lifespan
- Acrylic: easy to smooth, paintable
- Hybrid: balanced adhesion and flexibility
- Color match: aesthetic and mildew resistance
Tools Checklist: Caulk Gun, Utility Knife, Masking Tape, Rags, Cleaner
After choosing the appropriate caulk type for the toilet area, gathering the right tools and materials assures a clean, durable bead and a safe workspace.
A basic checklist guarantees efficiency and cleanliness:
- Caulk gun with compatible cartridge
- Utility knife for old caulk removal and cartridge tip
- Masking tape for neat edges
- Rags and cleaner to remove residue and dry surface
Optional Tools for Better Results (Heat Gun, Painter’s Tape, Toothpicks)
Using a heat gun, painter’s tape, and toothpicks can improve the speed, precision, and finish of toilet caulking jobs. A heat gun softens old caulk for easier removal. Painter’s tape guarantees straight edges. Toothpicks clean small gaps and shape beads. Optional items make results cleaner and faster.
- Heat gun
- Painter’s tape
- Toothpicks
- Small container for softened caulk
Safety and Preparation Steps Before You Start
Before caulking, the water supply should be shut off and the tank flushed and drained to prevent leaks and water damage.
Surrounding surfaces—floor, baseboards, and nearby fixtures—should be protected with drop cloths or tape to keep sealant off finishes.
Guarantee good ventilation and use gloves and eye protection to limit exposure to fumes and skin contact.
Turning Off Water and Draining the Tank
Shut off the toilet’s water supply at the shut-off valve near the base and flush the bowl to empty the tank; this prevents water from leaking while the wax ring and base are exposed.
Close the valve fully, hold the flush lever until the tank drains, and sponge remaining water from the bowl and tank.
Verify no refill occurs before proceeding.
Protecting Surroundings: Floor, Baseboards, and Fixtures
While the toilet is being worked on, protect the floor, baseboards, and nearby fixtures by covering them with drop cloths or plastic sheeting and securing edges with painter’s tape to prevent adhesive, caulk, or water damage.
Remove rugs and small items, wrap exposed pipes or fittings, and place a bucket beneath the supply line.
Keep tools organized on a covered tray to avoid scratches or spills.
Ventilation and Personal Protective Measures
Adequate ventilation and basic personal protective equipment reduce inhalation and skin exposure to fumes, mold, and cleaning chemicals during caulking.
Open windows, run an exhaust fan, and position a portable fan to direct air outward.
Wear nitrile gloves, safety goggles, and a mask rated for organic vapors or particulate filtration.
Remove pets and bystanders until odors dissipate.
Step-by-Step Guide to Removing Old Caulk
The guide explains how to soften stubborn caulk with heat or solvent and carefully cut it away using appropriate tools to avoid damaging the toilet or floor.
It then covers removing residue, disinfecting the toilet base, and ensuring the area is dry before recaulk.
Finally, it outlines inspecting the flange and surrounding floor for damage or active leaks that may require repair.
How to Soften and Cut Away Old Caulk Safely
Begin by softening the existing caulk to reduce tearing and protect the toilet finish.
Apply a commercial caulk softener or rubbing alcohol, let sit per product directions, then score along the bead with a utility knife.
Use a plastic scraper or caulk removal tool to lift softened material.
Remove strips gently, disposing of debris, and inspect the flange area for remaining fragments.
Cleaning Residue and Disinfecting the Toilet Base
After removing bulk caulk, clean remaining residue from the toilet base and surrounding floor with a stiff nylon brush and warm, soapy water to loosen grime and old sealant particles.
Rinse, dry thoroughly, then apply a household disinfectant or diluted bleach solution per label instructions.
Wipe surfaces with a clean cloth, allow full air-dry, and guarantee no cleaning residues remain before proceeding.
Inspecting for Damage or Leaks Under the Toilet
Before re-caulking, inspect the area beneath the toilet for signs of damage or leaks by checking for water stains, warped flooring, soft spots, mold growth, and any lingering moisture around the flange or base; lift the toilet if necessary (and safe) to examine the wax ring, flange condition, and drain pipe for cracks or corrosion, documenting any issues to determine whether repair or replacement is required before applying new caulk.
Inspectors should note loose bolts, gasket deterioration, and hidden mold, photograph findings, and prioritize repairs: replace a damaged flange or wax ring, reinforce subflooring, and address plumbing corrosion before sealing to guarantee a durable, watertight finish.
Step-by-Step Guide to Applying New Caulk
The next phase covers selecting an appropriate bead size and nozzle angle, securing clean edges with masking tape, and applying a single continuous bead around the toilet base.
It explains smoothing options—using a caulk tool or the finger method—and how to maintain an even finish.
Guidance on skin-over time and full cure duration is provided so the seal achieves proper adhesion before use.
Choosing the Right Bead Size and Angle
A steady, appropriately sized bead and the correct gun angle determine both the seal’s effectiveness and its finished appearance.
A bead about 1/8–3/16 inch wide suits most toilet bases; larger gaps need slightly wider beads.
Hold the caulk gun at roughly 45 degrees, moving steadily to avoid blobs or thin spots.
Consistent pressure yields uniform coverage and proper adhesion.
Using Masking Tape and Smoothing Techniques
Prepare a clean, dry perimeter and lay parallel strips of masking tape about 1/8 inch from the toilet base to define a straight caulk line and protect adjacent surfaces.
Apply caulk within the taped channel, then wet a finger or use a silicone finishing tool to smooth the bead evenly.
Remove tape immediately after smoothing for crisp edges and wipe excess with a damp cloth.
How to Apply a Continuous, Even Bead Around the Toilet Base
Begin by positioning the caulk gun at the toilet base so the tip sits just above the gap; steady, continuous pressure on the trigger will produce an even bead as it is guided around the bowl.
Maintain a consistent speed and distance, pausing briefly at tight curves.
Overlap slightly at the start point to guarantee continuity, and avoid stops or starts that create gaps or bulges.
Smoothing the Caulk with Tools or Finger Method
Smooth the fresh bead promptly to create a uniform seal and neat appearance. A dampened finger or a caulking tool glides along the bead, pressing it into the joint and removing excess.
Maintain consistent pressure and angle, working around the toilet uninterrupted. Wipe the tool or finger after each pass to avoid smearing.
Clean stray caulk with a damp cloth for a crisp finish.
Timing: Skin Over Time and Final Cure Time
Timing is critical when applying bathroom caulk: the bead will “skin over”—forming a thin film on the surface—within a specific window, yet full cure requires much longer.
Skin-over often occurs in 10–60 minutes depending on temperature and humidity. Handle cautiously after skin forms; avoid water for at least 24 hours.
Full cure typically takes 24–72 hours, sometimes up to 7 days for maximum strength.
Finishing Touches and Post-Application Checks
After tooling the bead, the installer carefully removes any masking tape and wipes away excess caulk without disturbing the seal.
They allow the manufacturer-recommended cure time before restoring toilet use.
Finally, they inspect the joint for a continuous, watertight bond and check the toilet for wobble or leaks.
Removing Tape and Cleaning Excess Without Damaging the Bead
Peel the masking tape away at a low angle while the caulk is still tacky to preserve the bead’s clean edge; pulling too quickly or too late can lift or string the seal.
Use a damp sponge or a single-pass fingertip wrapped in a damp cloth to smooth minor imperfections.
For cured smears, gently trim with a sharp utility knife, avoiding the flange and floor.
How Long Before You Can Use the Toilet Again
How long should one wait before using the toilet again depends on the type of caulk applied and the manufacturer’s cure times; generally, silicone requires 24 hours to fully cure while latex or acrylic blends may be serviceable after 2–4 hours.
During curing, avoid heavy use, splashing, or cleaning near the bead.
Follow label instructions and allow full cure before resuming normal cleaning routines.
Verifying a Watertight and Stable Seal
Inspect the caulked joint visually and by touch to verify a continuous, smooth bead with no gaps, lumps, or missed sections.
Allow full cure time per product instructions, then run a brief water test around the base and observe for seepage.
Check toilet stability by gently rocking; tighten bolts if needed.
Reinspect after 24–48 hours to confirm adhesion and no shrinkage or cracking.
Common Problems and How to Fix Them
The section outlines common caulking issues and straightforward remedies.
It covers how to correct an uneven bead, fill gaps, and remove air bubbles to restore a proper seal.
It also explains prevention and treatment for mold or discoloration and step-by-step diagnostics for persistent leaks after caulking.
Uneven Bead, Gaps, and Air Bubbles: Correction Methods
When the caulk bead appears uneven, shows gaps, or contains air bubbles, effective correction focuses on removing flawed sections and restoring a continuous, well-adhered seal.
Techniques range from simple tooling and smoothing to partial removal with a putty knife or narrow utility blade followed by re-caulking smaller segments.
Clean the area, pry out compromised caulk, dry thoroughly, apply steady new bead, and tool for uniform contact.
Mold, Mildew, or Discoloration: Prevention and Treatment
Because bathrooms are humid and toilets sit at floor level, mold, mildew, and discoloration commonly develop along caulk lines unless moisture and organic residues are controlled.
Prevention hinges on good ventilation, regular cleaning with a mild detergent or diluted bleach solution, and choosing a mold-resistant silicone caulk.
Treatment requires removing affected caulk, thoroughly drying the area, treating underlying surfaces with an antimicrobial agent, and re-caulking with a product labeled for mold resistance.
Regular inspection prevents recurrence.
Persistent Leaks After Caulking: Diagnostic Steps
Frequently, leaks persist after caulking not from the bead itself but from underlying issues that require systematic diagnosis: inspect the flange and wax ring for toilet-to-floor seal failure, check for cracks in the porcelain or supply line fittings, verify that the floor is level and the toilet is properly seated (no rocking), and confirm the caulk was applied to a dry, clean surface and allowed to cure fully.
Addressing the correct source—replacing a compromised wax ring, tightening or replacing fittings, repairing cracks, shimming and re-bolting the toilet, or removing and reapplying caulk after proper surface preparation—prevents wasted effort and recurring leaks.
Maintenance and Longevity Tips
Routine inspections every few months and re-caulking when cracks or gaps appear will keep the seal effective.
Gentle, non-abrasive cleaning and avoiding harsh chemicals help extend caulk life.
If persistent leaks, mold growth, or recurring failures occur, a professional plumber should be consulted.
How Often to Inspect and When to Re-caulk
How often should a toilet’s caulk be checked depends on usage and bathroom conditions; a practical guideline is to inspect the seal every six months and after any plumbing work or leaks.
Re-caulk when gaps, mold infiltration, hardening, or persistent dampness appear, or if water tracks under the base.
Prompt replacement prevents damage; prioritize visible deterioration over rigid timelines.
Best Cleaning Practices to Extend Caulk Life
Maintain caulk by cleaning gently and regularly to prevent mold, deterioration, and loss of adhesion.
Use mild, non-abrasive cleaners and a soft cloth or sponge; avoid bleach gels that can break down silicone or latex.
Rinse thoroughly and dry the bead after cleaning.
Address spills promptly, ventilate the bathroom to reduce humidity, and inspect caulk edges during routine cleaning for early signs of failure.
When to Call a Professional Plumber
If regular gentle cleaning and prompt spot repairs fail to stop recurring mold, gaps, or peeling at the toilet base, it may be time to call a professional plumber.
A plumber can assess hidden leaks, damaged flange or wax ring, and subfloor rot.
Professional replacement, proper flange alignment, and moisture remediation prevent further damage and guarantee a durable, code-compliant seal that homeowner fixes cannot reliably achieve.
Quick Troubleshooting Guide
When common caulking issues arise, a brief troubleshooting checklist helps pinpoint causes and corrective steps.
The guide highlights typical failures to check and immediate fixes to try. Suggested focus areas include:
- Problem: Caulk won’t adhere
- Problem: Caulk peels soon after application
- Problem: Visible gaps after curing
Verify surface cleanliness, compatibility, and cure conditions.
Problem: Caulk Won’t Adhere
Check the flange and toilet base for oil, old caulk, mineral deposits, or moisture before applying new caulk, as these contaminants prevent proper adhesion.
If adhesion fails, remove residues with a scraper and solvent, dry thoroughly, and abrade glossy surfaces with sandpaper.
Use a mildew-resistant, bathroom-grade silicone or hybrid sealant compatible with porcelain and PVC.
Press and tool the bead firmly for contact.
Problem: Caulk Peels Soon After Application
Caulk that peels shortly after application signals an issue with surface preparation, product choice, or curing conditions and requires swift diagnosis to prevent water damage and mold.
Inspect for residual moisture, soap, or loose old caulk; confirm use of bathroom-grade silicone or latex with mildew resistance; guarantee correct bead size and tool smoothing.
Reapply only after thorough cleaning and full drying for proper adhesion.
Problem: Visible Gaps After Curing
Why did gaps appear in the bead after curing? Air bubbles, trapped moisture, or improper bead size can cause shrinkage and voids.
Contaminated or damp surfaces, low-quality caulk, or applying in cold conditions reduce adhesion and cure consistency.
Remedy by removing failed caulk, thoroughly cleaning and drying surfaces, using appropriate primer if needed, and reapplying a continuous, properly sized bead at recommended temperature.
Comparison of Caulk Types for Toilet Bases
When choosing caulk for a toilet base, the trade-offs between durability, ease of application, and paintability guide the decision. The most common options—silicone, acrylic, and polyurethane—vary noticeably across those criteria and in long-term performance. The brief table below highlights key differences to prompt a practical choice.
| Caulk Type | Strengths | Limitations |
|---|---|---|
| Silicone | Excellent durability and water resistance | Not paintable |
| Acrylic | Paintable and easy to apply | Less durable in constant moisture |
| Polyurethane | Very durable and bonds well | More difficult to tool and paint prep needed |
Silicone vs. Acrylic vs. Polyurethane: Durability, Ease of Use, Paintability
Although all three caulk types seal the toilet base, they differ considerably in durability, application ease, and whether they can be painted.
Silicone offers superior water resistance and flexibility but resists paint and is harder to tool.
Acrylic is paintable and easy to smooth but less durable and prone to shrinkage.
Polyurethane combines durability and adhesion, is paintable after curing, but requires careful application.
Visual Reference Guide
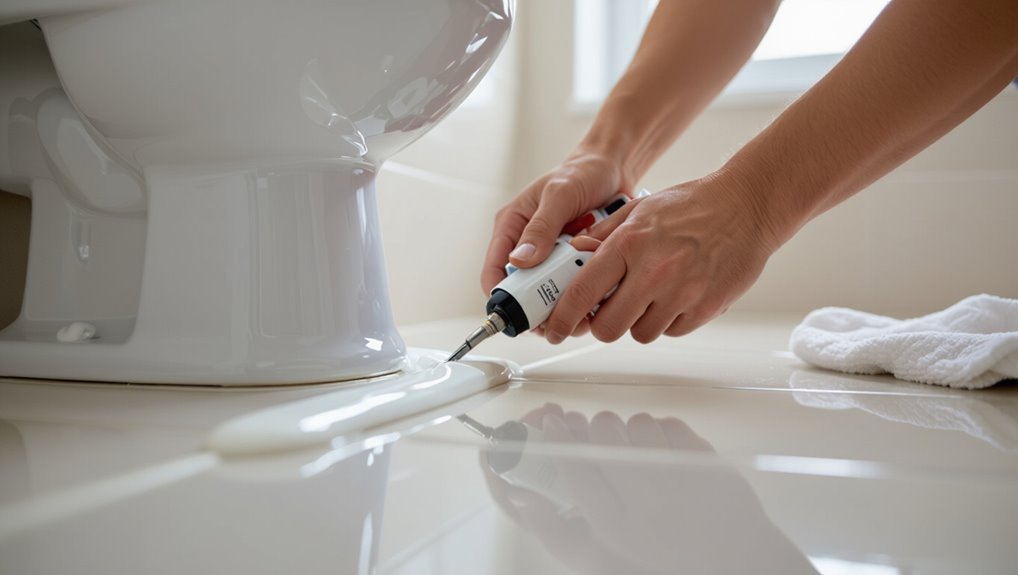
A clear visual reference simplifies each step of caulking a toilet by showing correct joint profiles, recommended caulk bead sizes, and common mistakes to avoid.
Illustrations should include flush and angled bead examples, tool placement, and surface preparation indicators. A color-coded key distinguishes acceptable versus problematic seals, while close-ups demonstrate proper smoothing technique, bead continuity, and how to fix gaps or excess material.
Conclusion
Like a careful gardener sealing the base of a young tree, the final bead of caulk tethers toilet to floor—quiet protection against seepage and slow decay. When applied with patience and the right tools, the thin ribbon becomes a small, steadfast guardian, warding off moisture and mildew. Proper removal, application, and upkeep transform a simple maintenance task into a subtle act of preservation, ensuring the bathroom’s peace endures a little longer.