How to Use a Pipe Wrench Without Scratching Pipes: Step-by-Step Tips and Tricks
To use a pipe wrench without scratching pipes, start by inspecting both the wrench and the pipe, ensuring they are clean and free of debris. Match the wrench size to the pipe for a secure grip. Employ protective padding or soft jaws to prevent damage, and position the fixed jaw to handle the load effectively. Apply steady, controlled pull pressure without sudden jerks or hammering. If needed, use a second tool for counterholding. Reposition the wrench instead of forcing it, and after completion, check for any marks and touch up minor scratches. For further guidance, explore detailed techniques, material-specific tips, and repair steps.
How to Use a Pipe Wrench Without Scratching Pipes: Quick Guidance
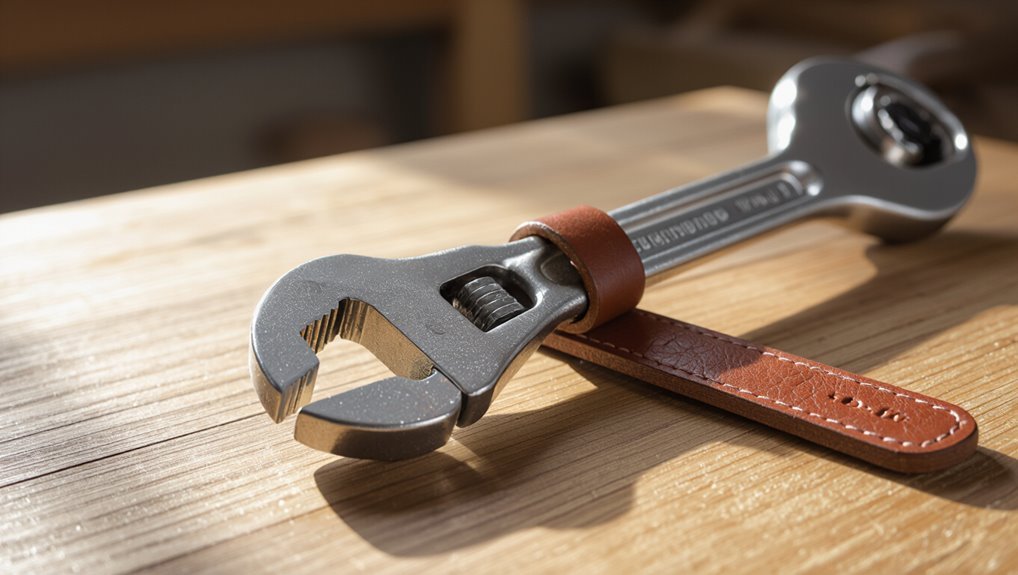
Before applying a pipe wrench, the user should inspect the jaw teeth, clean the pipe surface, and consider protective padding or a cloth to prevent marring.
Verify the wrench is the correct size and the jaws are properly adjusted to bite without over-torquing.
For safe operation, position the wrench so it pulls on the pipe in the direction of the fixed jaw, using steady pressure rather than sharp jerks.
Immediate precautions before using a pipe wrench
Inspect the pipe and wrench closely for damage and contaminants that could cause slips or surface marring.
Before work, confirm proper grip, select correct wrench size, and remove oil, rust, or debris. Protect softer surfaces with tape or jaw covers.
Verify secure footing, adequate lighting, and stable pipe support. Confirm wrench teeth are sharp and aligned to prevent slippage when learning how to use a pipe wrench without scratching.
One-sentence safe method overview
Having verified tool condition, grip, and pipe support, the safest quick method is to fit a correctly sized wrench with jaw covers or tape.
Position the wrench so the fixed jaw bears most load, apply steady pressure on the handle in the wrench’s pull direction, and avoid sudden force or hammering to prevent slippage and scratching.
The operator should also recheck alignment, adjust grip, and use gradual force.
Understanding Pipe Wrenches and Pipe Materials
A pipe wrench grips by biting its serrated jaws into the pipe surface, which provides strong torque but can easily mar softer finishes.
Different pipe materials—steel, copper, PVC, and brass—vary in hardness and consequently in susceptibility to gouging and scratching.
When a pipe’s finish or material is delicate, or when a sealed connection is required, alternative gripping methods should be used instead of a pipe wrench.
How a pipe wrench grips and why it can scratch
Because its jaw teeth bite into the pipe rather than merely press against it, a pipe wrench achieves a secure grip by converting applied torque into localized bite points that resist rotation.
Those serrated teeth concentrate force, deforming surface layers and leaving scratches or gouges.
Hard, pointed teeth plus high torque increase surface penetration, so careful bite control and limited force reduce visible damage.
Common pipe materials and their scratch susceptibility
Knowing that a pipe wrench’s serrated teeth concentrate force and can mar surfaces, it becomes important to contemplate what pipes are made of and how their materials respond to biting contact.
Steel and iron tolerate aggressive grip but show gouges; copper, brass and aluminum dent and scratch easily; PVC and CPVC deform under pressure; chrome plating chips; stainless resists marks better but can still scar.
When to avoid a pipe wrench entirely
When pipe surfaces are finished, thin-walled, plated, or made of soft metals, a pipe wrench should be avoided to prevent irreversible damage; its serrated jaws are designed for heavy grip, not delicate work.
Use adjustable wrenches, strap or chain wrenches, or internal expanders for fragile or small-diameter tubing.
Also avoid on polished fixtures, compression fittings, and press-fit joints to prevent deformation or seal failure.
Essential Tools and Protective Accessories
The section outlines essential accessories that protect pipes and improve grip, such as soft-jaw inserts and protective covers.
It also reviews alternatives to a pipe wrench—strap wrenches, adjustable wrenches, and pliers—highlighting when each is preferable.
Recommended wrap and padding materials include rubber, leather, cloth, and appropriate tape for surface protection.
Soft-jaw inserts and protective covers
Several manufacturers offer soft-jaw inserts and protective covers designed to fit pipe wrenches, providing a softer contact surface that prevents marring, crushing, or slipping on delicate pipes and fittings.
They clip or slip onto jaws, made from rubber, nylon, or silicone, and resist oils and solvents. Properly sized inserts improve grip while distributing pressure to protect finishes.
- rubber sleeve hugging chrome pipe
- nylon pad compressing brass fitting
- silicone cover with textured face
- clip-on jaw liners snapping into teeth
- replaceable foam strips cushioning contact
Alternatives to pipe wrenches (strap wrench, adjustable wrench, pliers)
After noting that soft-jaw inserts and protective covers can protect finishes while using a pipe wrench, attention turns to other tools that serve similar functions without the wrench’s tooth pressure.
A strap wrench grips smoothly, an adjustable wrench offers flat-jaw control, tongue-and-groove pliers provide strong non-marring bite, locking pliers hold stubborn fittings, and basin wrench reaches confined spaces for safe turning.
- rubber strap coiled
- smooth flat jaws
- serrated plier grip
- clamped locking tool
- long-handled basin reach
Recommended materials for wraps and padding (rubber, leather, cloth, tape)
Protective wraps and padding come in a handful of reliable materials—rubber, leather, cloth, and tape—each chosen for specific surface protection, grip, and durability needs.
Rubber offers high grip and cushioning for metal pipes; leather resists tearing and molds to irregular shapes; cloth (cotton or microfiber) prevents marring and absorbs oil; adhesive or friction tape secures padding and adds abrasion resistance.
Step-by-Step Safe Pipe Wrench Technique
Before beginning, the work area and pipe should be cleaned and secured, with the correct wrench size selected and oriented for the task.
Padding or soft jaws are applied as needed and the wrench is positioned to reduce marring while the user establishes a firm grip.
Controlled, steady force is used—employing a second wrench for counterhold when required—to prevent slippage and damage.
Preparing the pipe and workspace
Clear the work area and secure adequate lighting so the operator can inspect the pipe and fittings without obstruction.
Remove nearby clutter, cover adjacent surfaces, and apply absorbent pads for leaks.
Clean the pipe exterior of dirt, grease, and corrosion; mark fittings and joints.
Verify support and accessibility, stabilize the pipe with clamps or stands, and keep needed tools within easy reach.
Choosing the correct wrench size and orientation
Selecting the correct pipe wrench size and proper orientation guarantees secure grip and reduces slippage or damage to fittings.
The technician selects a wrench that matches pipe diameter, using one slightly larger for better leverage on thicker pipes.
Position the wrench so the jaw teeth bite with the pull direction, align handle for straight force, and confirm adjustable jaw clearance is minimal for firm contact.
Applying padding or soft jaws correctly
One careful layer of padding or a matched set of soft jaws should be applied to protect pipe finishes and improve grip.
The padding must fully cover contact surfaces, be non-slip, and free of debris. Secure padding so it won’t shift under torque.
Use materials compatible with pipe coating and tool jaws; replace worn pads to maintain protection and consistent grip performance.
Proper positioning and grip to minimize marring
Position the wrench so its jaws contact the padded or soft-faced areas squarely, with the pipe centered between them and the handle aligned with the planned turning direction; this alignment concentrates force through the padding and reduces lateral slip that causes marring.
The operator grips the handle near its midpoint for control, keeps wrists straight, and applies steady, perpendicular pressure to maintain jaw seating and prevent scalloping or gouging.
Applying controlled force and using two wrenches when needed
Begin by applying steady, controlled pressure to the wrench handle so the jaws bite evenly into the pipe without sudden jerks that can slip or deform the fitting.
If more torque is required, use a second wrench on the adjacent fitting to counterhold, preventing twisting stress.
Apply incremental force, repositioning the primary wrench as needed to maintain secure, centered jaw engagement and pipe integrity.
Releasing and inspecting the pipe after use
Release the wrench slowly while keeping hands clear of the jaws to prevent pinching or sudden movement of the pipe.
The user then backs off the adjustable jaw, removes the wrench, and stabilizes the pipe.
Inspect fittings and surfaces for marring, deformation, or residue.
Clean contact areas, note damage for repair or replacement, and test alignment before reassembly or returning the system to service.
Specific Scenarios and Adjustments
The guide next addresses common variations that require adjusted technique and tool choices.
It covers working on chrome‑plated or polished pipes, protecting thin‑walled or soft metals like copper, brass, and aluminum, and handling enlarged or corroded pipes.
It also outlines methods for loosening tight or seized fittings while minimizing surface damage.
Working on chrome-plated or polished pipes
Many chrome-plated or polished pipes require extra care to prevent surface damage when using a pipe wrench; their smooth finish offers less bite for the jaws and scratches or denting can easily occur if standard technique is applied.
Use protective layers (rubber, cloth, or specialized jaw covers), minimize clamping force, reposition wrench frequently, and use padded pliers or strap wrenches when possible to preserve finish.
Handling thin-walled or soft metal pipes (copper, brass, aluminum)
Exercise extra care when working with thin-walled or soft metal pipes—such as copper, brass, and aluminum—since their reduced wall thickness and malleable nature make them prone to crushing, kinking, and surface deformation under conventional pipe-wrench force.
Use padded jaws, distribute pressure with a sacrificial sleeve or wood block, apply minimal torque, tighten oppositely oriented backup grips, and consider alternative tools like strap or basin wrenches to prevent damage.
Enlarged or corroded pipes: special considerations
When thin-walled or soft metal pipes risk deformation under standard gripping, thicker or corroded pipes present a different set of hazards: swollen threads, mushroomed ends, and irregular diameters that prevent secure jaw engagement and increase slippage or sudden release.
The user should clean corrosion, use adjustable or pipe-specific jaws, fit leather or rubber shims to spread pressure, and test grip before applying full torque.
Tight or seized fittings: techniques that avoid surface damage
Loosen seized fittings by combining controlled mechanical force with measures that protect metal surfaces and threads: apply penetrating lubricant at the joint and allow time to work, use heat sparingly on steel fittings to expand metal while avoiding nearby seals,
back off with short, firm taps from a brass or rubber mallet to break corrosion, and employ a pipe wrench fitted with leather or rubber shims or a strap wrench to distribute gripping pressure and prevent marring.
Apply steady leverage, avoid over-torquing, and, if necessary, cut and replace badly damaged sections to preserve overall integrity.
Common Mistakes That Cause Scratches and How to Avoid Them
Common mistakes with pipe wrenches often lead to scratches on fittings and pipes, compromising seals and finishes.
Typical causes include excessive force, wrong tool size, missing or improper padding, and poor alignment that allows slippage. Identifying and correcting these errors preserves the workpiece and guarantees safer, cleaner results.
- A jagged gouge from sudden extra torque when the wrench slips
- Scuffing around a fitting edge from a wrench that’s too large or small
- Indentations where hard metal contacts an unpadded surface
- Scratches along the pipe from gradual slippage during turning
- Surface marring caused by misaligned jaws catching on the finish
Over-torquing and sudden force
Applying excessive torque or sudden force with a pipe wrench frequently leads to gouges, flattened flats, and crushed fittings that compromise seals and threads.
The operator should apply steady, measured pressure, use incremental adjustments, and avoid hammering the handle.
Back off and reposition if resistance spikes.
Employ torque-limiting tools or a breaker bar for stubborn joints to prevent surface damage and preserve component integrity.
Using wrong-sized wrench
After resisting the urge to force a stubborn joint, the next frequent mistake is using a pipe wrench that does not match the workpiece size.
Employing an oversized or undersized wrench concentrates pressure unevenly, gouging finishes and slipping. Select the correct jaw span, adjust securely, and confirm firm contact across flats.
Proper fit reduces bite depth and prevents surface marring.
Missing or improper padding
Padding such as cloth, leather, or rubber guards the pipe surface from the wrench’s serrated jaws; when it is missing or improperly applied, the tool’s teeth dig in and leave deep scratches.
Proper padding distributes pressure, prevents metal-to-metal contact, and conforms to irregularities.
Use non-slip, clean pads sized to the pipe, replace worn guards, and secure padding firmly before tightening to avoid damage.
Allowing slippage and poor alignment
Grip and align the wrench deliberately to prevent slippage and misalignment, common causes of gouges and score marks on pipe surfaces.
The operator should seat jaws squarely, apply steady pressure along the pipe axis, and avoid twisting or sudden force.
Periodic checks of grip and repositioning reduce slippage.
Use correct jaw size and clean contact points to guarantee consistent bite and alignment.
Inspection, Repair, and Cosmetic Touch-Ups
A visual and tactile inspection should be performed to identify marring, gouges, or burrs on pipe surfaces before attempting repairs.
Small scratches and shallow abrasions can often be smoothed with fine emery cloth, light filing, or metal polish, while deeper damage may require light reaming or replacement of the affected section.
If corrosion, structural compromise, or hard-to-access damage is found, a professional should be consulted to prevent leaks or further harm.
How to inspect for marring or gouges
Before applying repairs, the inspector closely examines the pipe wrench jaws and surrounding surfaces for any marring, gouges, or deep scratches that could affect grip or damage workpieces.
Small surface blemishes may only require light dressing, but deeper gouges demand more extensive remediation or part replacement to guarantee safe, reliable operation.
The inspector uses good lighting, magnification, and tactile inspection, documenting defects, measuring depth, and deciding whether service, welding, or replacement is necessary.
Minor scratch repair methods for metal pipes
Inspectors assess minor scratches on metal pipes by determining depth, length, and location relative to stress points or sealing surfaces. Surface-level abrasions that do not compromise structural integrity or threads can often be smoothed and protected with simple techniques.
Practical steps include cleaning, light sanding, polishing, protective coating, and thread preservation.
- Wire brush dusting
- 400–600 grit sanding
- Polishing paste buff
- Thin protective lacquer
- Thread-wrap attention
When to call a professional to avoid further damage
After smoothing minor surface abrasions and applying protective measures, evaluators must determine when damage exceeds DIY remedies and warrants professional intervention to prevent worsening leaks, corrosion, or compromised fittings.
Signs requiring a plumber include persistent leaks, deformities, threaded or joint damage, significant corrosion, inaccessible locations, or failing pressure tests.
Professionals assess structural integrity, perform pipe replacement or welding, and guarantee code-compliant repairs.
Maintenance and Storage to Preserve Pipe Finish
Protective covers and soft jaws should be cleaned, inspected, and replaced when worn to prevent marring of pipe finishes.
Regular wrench maintenance — including checking threads, lubrication, and jaw alignment — preserves safe gripping without excess force that can damage surfaces.
Tools should be stored with padding or in separate compartments to avoid contamination and contact with finished pipes.
Caring for protective covers and soft jaws
Maintain soft jaws and protective covers regularly to extend their life and keep pipe finishes unmarked.
Inspect covers for tears, contamination, and compression; replace when padding thins.
Clean removable soft jaws after use with mild detergent and dry thoroughly to prevent corrosion transfer.
Store covers flat or hung to avoid deformation.
Label replacements by size and material to match pipe types and job needs.
Wrench maintenance to ensure safe gripping
With soft jaws and covers kept in good condition, attention turns to the wrench itself to preserve pipe finish and guarantee reliable gripping.
Regularly clean teeth and pivot, remove debris, and lubricate moving parts. Inspect for worn or damaged teeth, replace or refile per manufacturer guidelines, and tighten loose fasteners.
Maintain alignment and store in dry conditions to prevent corrosion that compromises grip.
Storing tools and padding to prevent contamination
Proper storage and careful padding of wrenches and accessories prevent surface contamination and preserve pipe finishes.
Tools are cleaned before storage, separated by soft liners or foam, and kept in closed racks or chests to avoid dust, grease, and metal transfer.
Protective caps or cloth sleeves cover jaws.
Regular inspection guarantees padding remains intact and replaced when compromised to maintain pipe-safe conditions.
Quick Reference: Do’s and Don’ts for Using a Pipe Wrench Without Scratching
A concise list of do’s and don’ts helps prevent damage when using a pipe wrench on finished or soft metal surfaces. Follow protective pads, correct jaw placement, and steady pressure; avoid over-tightening, slipping, or using wrong-size tools.
| Do | Don’t | Tip |
|---|---|---|
| Use pads | Over-tighten | Align jaws |
| Choose fit | Hammer wrench | Clean before use |
Conclusion
A pipe wrench, when guided with care, becomes a sculptor’s chisel rather than a butcher’s cleaver; the tool’s teeth are tamed by pads, wraps, and a steady hand. Like a gardener pruning without scarring bark, the user preserves the pipe’s skin, letting metal keep its quiet sheen. Respectful technique and simple protections transform force into artistry, so the plumbing endures unmarred—a quiet bridge between utility and beauty.