How to Tell If Your Water Heater Is Leaking Gas: 9 Clear Signs and What to Do Next
If you suspect your gas water heater is leaking, look for these signs: a rotten-egg smell, hissing noises at connections, a yellow or unstable pilot flame, unexplained headaches or nausea, dead plants nearby, frost or wetness on fittings, higher gas bills, visible corrosion, or audible whistling. If you notice any of these indicators, evacuate the area immediately, avoid touching electrical switches, ventilate from a safe distance, and contact your gas company or emergency services. Professional inspection and repairs are crucial for safety. Further guidance is available on safe checks, detectors, and essential next steps.
How to Recognize a Gas Leak from Your Water Heater: Quick Overview
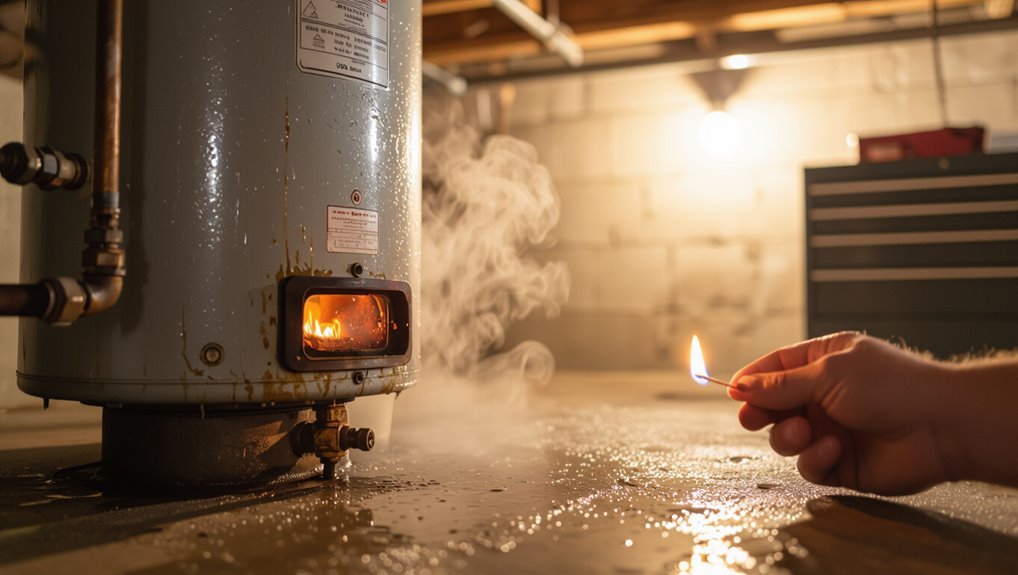
The section outlines immediate danger signs from a leaking water heater that warrant evacuation and contacting emergency services without delay.
It then presents a concise, nine-item checklist of clear indicators to inspect right away.
Readers are advised to act on any single urgent sign rather than wait for confirmation.
Immediate danger signs that require evacuation and emergency services
How should one respond when a water heater emits signs of a gas leak?
Observers should treat it as imminent danger: evacuate immediately, avoid switches, open doors/windows en route, and move upwind.
Call emergency services and the gas company from a safe location.
If anyone feels dizzy, nauseous, or smells strong gas, prioritize evacuation and medical attention without re-entering the building.
Fast checklist: 9 clear signs to look for right now
Looking for quick signs that a water heater is leaking gas? Check for:
1) rotten egg odor,
2) hissing near connections,
3) dead indoor plants,
4) unexplained headaches or nausea,
5) pilot light instability or yellow flame,
6) bubbling around fittings,
7) visible corrosion on gas lines,
8) sudden high gas bills,
9) faint gas smell outdoors near the unit.
If found, ventilate and evacuate.
Why a Water Heater Can Leak Gas: Basic Causes
Gas water heaters can leak gas for several basic reasons, including mechanical failures of valves and seals.
Faulty or loose gas supply lines and fittings, pilot light or burner malfunctions, and corrosion of components each create pathways for gas to escape.
Blocked or damaged vents and inadequate combustion air can also cause incomplete combustion or pressure issues that lead to leaks.
Common mechanical failures in gas water heaters
Because several components must work together precisely, a gas water heater can develop leaks when common mechanical parts fail.
Faulty thermocouples, worn pilot assemblies, corroded burner housings, and deteriorated valve seats can allow gas escape. Malfunctioning gas control valves or regulator failures also contribute.
Regular inspection and prompt replacement of degraded components reduce leak risk and guarantee safe operation.
Problems with gas supply lines and fittings
Failures in internal components often coincide with problems in the external gas delivery system; supply lines and fittings are common sources of leaks that can undermine otherwise properly functioning heater parts.
Corrosion, vibration, improper joint sealing, or loose connectors allow gas escape at hose ends, unions, or shutoff valves.
Detection requires visual inspection, soap-test checks, and professional tightening or replacement of compromised lines and fittings.
Pilot light and burner malfunctions
How can a malfunctioning pilot light or burner lead to a gas leak? A weak or unstable pilot fails to ignite gas reliably, allowing unburned gas to accumulate.
Dirty or misaligned burners prevent proper combustion, causing gas to pool or escape through pressure imbalances.
Faulty thermocouples and ignition systems can also leave valves open, maintaining a hazardous gas flow until repaired.
Corrosion, vents, and combustion air issues
Corrosion, blocked vents, and inadequate combustion air are common physical factors that compromise a gas water heater’s containment and combustion, creating pathways for gas to escape.
Rusted tanks, deteriorated fittings, or corroded burner assemblies can leak gas. Obstructed flues or vents and poor intake air cause incomplete combustion, backdrafting, and pressurization that force gas into living spaces, increasing leak risk and carbon monoxide hazards.
Detailed Breakdown of the 9 Signs of a Gas Leak
The following section examines nine specific indicators that a water heater may be leaking gas.
It highlights sensory cues like a rotten egg odor and audible signs such as hissing, as well as visual clues like frost on fittings and damaged vegetation near outdoor units.
Unexplained rises in gas bills are also considered as a measurable warning sign.
Rotten egg or sulfur smell near the heater
A distinct rotten egg or sulfur odor near a water heater often indicates the presence of natural gas or a related fuel leak. The scent derives from mercaptan added to odorize otherwise odorless gas.
Persistent or increasing odor warrants immediate evacuation, avoiding sparks or electronics, and contacting the gas company or emergency services.
Do not attempt repairs; leave inspection and isolation to professionals.
Hissing or whistling sounds from gas lines or valves
Why is a faint hiss near gas fittings alarming? A persistent hissing or high‑pitched whine at valves, joints, or along gas lines indicates escaping gas under pressure.
It often precedes stronger odor or physical symptoms and signals an active leak.
Immediate steps include evacuating the area, avoiding ignition sources, shutting off supply only if trained, and contacting the gas utility or emergency services promptly.
Visible gas or frost on pipes and fittings
Visible signs such as frost buildup or misting on pipes and fittings can indicate a gas leak when escaping gas cools surrounding metal by rapid expansion or when pressurized gas draws moisture from the air.
Observers should note localized frost, wetness, or ice on connections, joints, or valves. Such anomalies warrant immediate evacuation, shutoff of the gas supply if safe, and professional inspection.
Dead or dying vegetation near outdoor units
Noticing frost or wetness on fittings, observers should also scan the area around outdoor gas appliances for plant stress.
Patches of dead or wilting vegetation confined near a unit can indicate escaping gas displacing oxygen or accumulating in soil.
Such localized damage, especially absent drought or pests, warrants immediate inspection, evacuation if smell is present, and contacting utility or a qualified technician.
Unexplained increases in gas bills
How can a steady rise in gas charges signal a leak? Unexpected increases without higher usage can indicate escaping gas from the water heater or associated piping.
Comparing bills, checking for constant flow patterns, and noting sudden unexplained spikes help identify anomalies.
If higher costs persist despite consistent consumption, contact the utility or a qualified technician to inspect for leaks and assess safety.
Pilot light behavior: yellow flame, flickering, or failing to light
Why does a pilot light change color or behavior unexpectedly?
A normally steady blue flame turning yellow, flickering, or failing to light can indicate combustion issues, inadequate ventilation, or gas pressure irregularities.
Soot or yellowing suggests incomplete combustion; flicker may signal drafts or burner buildup; failure to light might reflect clogged pilot or faulty thermocouple.
Prompt inspection by a qualified technician is advised.
Physical symptoms: headaches, nausea, dizziness, or eye irritation
Changes in pilot light behavior can signal combustion problems, but sometimes the clearest indicators of a gas leak are physical symptoms experienced by occupants.
Headaches, nausea, dizziness, and eye irritation can result from exposure to leaking gas or combustion byproducts. These symptoms often improve upon leaving the area; persistent or severe effects warrant immediate evacuation, fresh air, and contacting emergency services and a qualified technician.
Black soot or scorch marks around the burner or vent
Black soot or scorch marks around the burner or vent are visible signs that combustion is incomplete or flames are impinging on nearby surfaces.
Such deposits indicate improper burner adjustment, blocked vents, or fuel-air mixture issues.
Left unchecked, soot can clog components, reduce efficiency, and increase carbon monoxide risk.
Prompt inspection by a qualified technician is advised to correct combustion and guarantee safe operation.
Household appliances malfunctioning or unusual odors throughout the home
Soot or scorch marks around the burner often signal combustion problems that can coexist with other, less obvious warning signs.
Household appliances may behave erratically—pilot lights that dim, ovens that fail to heat, or gas stoves smelling faintly of sulfur.
Persistent unusual odors in rooms, especially near vents, suggest gas migration.
Prompt inspection and shutting off the supply are advised.
How to Safely Check for a Gas Leak Yourself
A concise, methodical approach helps determine whether a water heater is emitting gas without putting anyone at risk.
It should outline a visual inspection of the heater and gas lines, a soapy-water test on fittings, guidance on reading portable gas detectors and recommended models, and clear criteria for when to stop testing and evacuate.
Emphasis is placed on safety protocols, when to call professionals, and avoiding actions that could ignite gas.
Step-by-step visual inspection of the water heater and gas lines
Before touching anything, the observer should shut off the gas supply and ventilate the area to minimize risk.
This paragraph outlines the visual checks to perform once the immediate environment is safe. Inspect the burner area for soot or corrosion, confirm pilot flame presence and color, examine gas line fittings for loose joints or damage, check vents and flues for obstructions, and note any unusual odors or stains.
Using a soapy-water test on fittings and connections
Begin by turning off the gas supply and ensuring the area is well ventilated; this allows a safe environment for the soapy-water test.
Mix dish soap and water, apply to joints, fittings, and valve connections with a brush or spray.
Observe for persistent bubbles indicating escaping gas.
If bubbles appear, do not light appliances; ventilate, retighten fittings if qualified, and contact a professional.
How to interpret a gas detector reading and recommended devices
How should a homeowner read and respond to a portable gas detector? The device displays concentration (ppm) and alarm levels; low readings (below 10–50 ppm) indicate trace gas—recheck connections.
Moderate readings (50–200 ppm) warrant ventilation and isolation of the appliance. High readings and continuous alarms require immediate evacuation and calling the gas company.
Recommended detectors: combustible gas sensors with catalytic bead or semiconductor sensors, from reputable brands.
When to stop testing and leave the property
A steady hissing, a strong rotten-egg odor, or a detector showing sustained high ppm are clear signals to stop testing and leave the property immediately.
Individuals should avoid switches, flames, and electronics, exit calmly via the safest route, and move to a neighbor’s home or open area.
Once safe, contact emergency services and the gas utility; do not reenter until professionals declare it safe.
Immediate Actions to Take If You Suspect a Gas Leak
If a gas leak is suspected, the immediate priority is to shut off the water heater’s gas supply using the appliance’s emergency shutoff valve and then leave the building promptly.
Occupants and nearby neighbors should be alerted while avoiding use of electronics, open flames, or re-entering the premises.
The gas company or emergency services should be contacted from a safe location and informed of the leak so professionals can respond.
Emergency shutdown procedure for gas water heaters
Shut off the gas supply immediately upon any suspicion of a leak, then evacuate the premises and call the gas company or emergency services from a safe location.
After evacuation, isolate the water heater by closing its gas shutoff valve and turning off the appliance’s pilot light or main control.
Do not attempt repairs; wait for qualified technicians to verify safety and restore service.
Evacuation and notification steps for occupants and neighbors
Everyone in the building should leave immediately by the nearest safe exit, moving upwind and away from the structure to avoid inhaling gas.
Occupants should guarantee others evacuate, assist vulnerable persons, and gather at a predetermined safe meeting point.
Neighbors within potential exposure range should be alerted calmly without re-entering.
Do not operate electrical switches, appliances, or vehicles near the scene.
When and how to call the gas company or emergency services
Contact the gas company or emergency services immediately upon any reasonable suspicion of a leak, prioritizing a quick call from a safe location upwind and away from the building.
Provide clear details: address, symptom descriptions (smell, hissing), appliance involved, and number of occupants.
Follow dispatcher instructions, do not re-enter, and await authorized personnel.
Document the incident for follow-up and repair verification.
Professional Diagnosis and Repair Options
A qualified HVAC, plumbing, or gas technician will conduct a pressure and leak test, inspect fittings, vents, and the combustion chamber, and check gas lines and safety controls to pinpoint the source.
Common fixes include tightening or replacing fittings, repairing or replacing valves, and addressing corrosion or venting issues, while full replacement is recommended for severe corrosion, repeated leaks, or units past their expected service life.
Estimates vary widely—minor repairs may cost under a few hundred dollars, major repairs or replacement can run into the thousands, and factors such as unit age, extent of damage, warranty status, and local labor rates determine the best option.
What to expect from a HVAC/plumbing/gas technician inspection
How will a technician assess a suspected gas leak at a water heater?
The technician will secure the area, shut off gas, and perform visual and olfactory checks.
They will use electronic gas detectors, pressure tests, and soap solution on fittings.
Venting, burners, and pilot assembly are inspected.
They will explain findings, risk level, and recommended next steps, including timelines and safety precautions.
Typical repairs and replacements for leaking gas heaters
Technicians commonly address gas leaks at water heaters through targeted repairs or component replacements based on the leak source and severity.
They diagnose valves, fittings, burners, and connectors, prioritize safety, and recommend warranty-appropriate parts or full assemblies when needed.
- Replace faulty gas control valves or fittings.
- Repair or replace corroded gas lines and connectors.
- Service or swap burner assemblies and pilot components.
Signs a water heater should be replaced rather than repaired
When repairs like valve replacements or burner servicing fail to restore reliable, safe operation, a technician will assess whether replacement is the more prudent option.
Indicators favoring replacement include chronic leaks, extensive corrosion or rusted tanks, repeated ignition or pilot failures, visible combustion chamber damage, breached heat exchanger, and age beyond expected service life.
Safety risks or frequent breakdowns prompt replacement over repair.
Cost ranges and factors that influence repair vs replace
Although repair can be cheaper upfront, the decision to repair or replace a gas water heater hinges on a blend of cost ranges, expected remaining lifespan, and severity of the fault. Typical repairs: $150–$800; replacement: $800–$2,500. Age, warranty, energy efficiency, and safety risks guide choice. Professional diagnosis is recommended.
| Item | Repair | Replacement |
|---|---|---|
| Cost | $150–$800 | $800–$2,500 |
| Consideration | Short-term fix | Long-term value |
Preventive Maintenance to Reduce Gas Leak Risk
A regular inspection schedule helps identify loose fittings, corrosion, burner condition, venting obstructions, and pilot assembly issues before they become hazardous.
Seasonal tasks—such as checking burners and vents before winter, flushing the tank, and testing seals—support reliable, safe operation.
Proper combustion air, clear ventilation, and upgraded safety devices like automatic gas shutoff valves, gas leak detectors, and CO alarms further reduce risk.
Regular inspection schedule and what to check each visit
Regular inspections every six months create a predictable rhythm for spotting early signs of gas leaks and related failures before they escalate.
Each visit documents odors, fittings, venting, and burner performance. Technicians note corrosion, loose connections, and pilot stability, logging readings and actions taken.
- Visual: fittings, vents, corrosion
- Functional: pilot, burner, gas pressure
- Safety: detectors, shutoff valve, documentation
Seasonal maintenance tasks for safe operation
Building on the six-month inspection rhythm, seasonal maintenance tasks align with changes in usage and weather to reduce the risk of gas leaks and related failures.
Tasks include draining sediment in warmer months, checking pilot and burner operation before heavy use, testing pressure-relief valves after temperature extremes, inspecting gas lines and fittings for corrosion, and scheduling professional servicing annually to address wear and guarantee safe, efficient operation.
Proper ventilation and combustion air considerations
Because combustion requires a steady supply of clean air, adequate ventilation and properly sized combustion-air openings are crucial to prevent incomplete burning, carbon monoxide production, and gas accumulation around a water heater.
Regular inspection guarantees vents are unobstructed, louvers functional, and ducting intact.
Installations must follow manufacturer and code specifications for intake/exhaust sizing and room ventilation to minimize leak and combustion risks.
Upgrading safety devices: gas shutoff valves, detectors, and CO alarms
Upgrading safety devices—such as automatic gas shutoff valves, combustible gas detectors, and carbon monoxide alarms—provides a layered defense that greatly reduces the consequences of a fuel leak or incomplete combustion.
Professionals recommend installing certified detectors near the water heater and sleeping areas, adding an automatic shutoff valve to interrupt supply during leaks, and testing alarms regularly.
Regular maintenance guarantees reliable, early warnings and rapid shutdown.
Safety Equipment and Monitoring Recommendations
Recommended safety equipment and monitoring strategies include selecting appropriate gas detectors and positioning them according to fuel type and airflow patterns.
The distinction between carbon monoxide alarms and combustible gas detectors should be clarified so each hazard is monitored with the correct sensor.
Consideration should also be given to smart-home integration and remote alerts to guarantee timely notification of leaks.
Best types of gas detectors and placement guidelines
Which detector suits a given home depends on the fuel type, layout, and local code: for natural gas and propane, catalytic bead or semiconductor sensors provide reliable methane detection, while electrochemical sensors are preferred for carbon monoxide produced by combustion.
Fixed detectors with plug-in power and battery backup are best for continuous monitoring, and portable units complement them during inspections or outages.
- Install natural gas detectors near potential leak sources and at knee-height for heavier-than-air gases.
- Place combustion-sensor units at breathing level in living spaces, away from drafts.
- Test monthly, replace per manufacturer, and locate detectors per local code near the water heater and sleeping areas.
Carbon monoxide alarms vs natural gas detectors: differences
After covering detector types and placement, attention shifts to how carbon monoxide (CO) alarms and natural gas sensors differ in purpose, sensing technology, and installation priorities. CO alarms detect odorless lethal CO via electrochemical cells; natural gas detectors sense combustible hydrocarbons, often with catalytic bead or semiconductor sensors. Installation height and alarm thresholds differ; both require regular testing and battery checks.
| Feature | Difference |
|---|---|
| Target gas | CO vs methane/propane |
| Sensor type | Electrochemical vs catalytic/semiconductor |
| Mounting | Breathing level vs ceiling/knee height |
| Response goal | Life safety vs explosion prevention |
Smart home integrations and remote monitoring options
When integrated with a home automation system, gas and CO detectors can provide real-time alerts, event histories, and automated responses—improving situational awareness and facilitating faster mitigation.
Remote monitoring via apps, SMS, or professional alarm services enables immediate notification and remote verification. Integrations can trigger HVAC shutoffs, smart valves, or lighting and grant access for responders.
Confirm compatibility, encrypted communications, and regular testing.
Legal, Insurance, and Warranty Considerations
When a water heater emits gas, homeowners must be aware of local reporting requirements and building codes that govern emergency notifications and inspections.
They should keep clear records—photos, dates, repair receipts, and communication with authorities—to support insurance claims and service histories.
Finally, owners need to check manufacturer warranties and service terms to determine coverage and any actions that could void protection.
Reporting requirements and local codes for gas leaks
Local regulations, insurance policies, and manufacturer warranties each impose specific obligations for reporting suspected gas leaks, and failure to follow them can affect legal liability and coverage.
Homeowners must notify utility providers and, where required, local authorities or building inspectors promptly.
Compliance with shutoff, evacuation, and inspection mandates preserves safety, legal standing, and eligibility for claims; undocumented noncompliance may void protections.
What to document for insurance claims and service records
Because insurance claims, warranty requests, and potential legal disputes hinge on clear evidence, homeowners should compile a concise, dated record of every step taken from the first sign of a suspected gas leak through final repair and testing.
Include photos, timestamps, and contact details; retain receipts and technician reports; log communications with utilities, insurers, and contractors.
- Photos and timestamps
- Receipts and repair reports
- Communication log
Manufacturer warranties and when they apply
Several manufacturers provide warranties that cover defects in materials and workmanship for defined periods, but coverage for gas leaks often depends on installation, maintenance, and proof of adherence to specified conditions.
Warranty claims typically require registration, original purchase proof, and authorized installation.
Damage from improper use, DIY repairs, or lack of maintenance is usually excluded.
Consult the specific warranty and retain service records to support claims.
Real-Life Scenarios and Case Examples
Several homeowner accounts illustrate common warning signs and mistakes that led to delayed detection and costly repairs.
Technician case studies then show how professionals traced subtle or concealed leaks to faulty fittings, venting issues, or regulator failures.
Together these examples highlight practical lessons for prevention, safe response, and when to call a qualified service.
Typical homeowner stories and lessons learned
When a faint chemical smell prompted one homeowner to check the pilot light, the ensuing discovery of a corroded flex line and a hairline gas leak turned a routine maintenance task into an urgent safety fix; this example, along with others, highlights common warning signs and the practical steps residents took—calling their gas company, ventilating the area, and replacing faulty components—to prevent escalation.
Neighbors reported similar smells, hissing, and unexplained pilot outages.
Technician case studies: diagnosing hidden leaks
Technicians recount multiple cases where subtle gas leaks around water heaters were uncovered only after combining methodical inspection with diagnostic tools.
One case involved a hairline fitting crack revealed by a gas sniffer and soap test; another required pressure decay testing to isolate a hidden valve leak.
Reports emphasize systematic checks, cross-referencing odors, instrument readings, and immediate safe repairs or shutoffs.
Summary: Key Steps to Stay Safe and Resolve a Gas Leak
The article closes with a concise action plan: a rapid checklist of steps to take immediately upon detecting any of the nine warning signs.
It then outlines a practical long-term prevention schedule and the next recommended inspections or maintenance tasks.
Together these measures prioritize safety and reduce the likelihood of future gas leaks.
Rapid action checklist to follow if you detect any of the 9 signs
If any of the nine warning signs appear, immediate steps should be taken to protect people and property while addressing the leak.
The person on scene should act calmly, prioritize evacuation, and notify professionals.
Follow this rapid checklist to minimize risk and enable swift resolution:
- Evacuate occupants and pets to fresh air immediately.
- Shut off the gas supply at the meter if safe.
- Call emergency services and a licensed gas technician.
Long-term prevention plan and next scheduled actions
Once immediate dangers are addressed, a long-term prevention plan should prioritize scheduled inspections, routine maintenance, and documented response procedures to reduce recurrence and secure accountability.
Assign qualified technicians for annual checks, replace aging components on a timeline, install gas detectors with battery backups, log findings and repairs, train occupants on emergency protocols, and set reminders for follow-up appointments to maintain continued safety and compliance.
Conclusion
When a water heater emits signs of a gas leak, swift, informed action is essential. One should recognize warning signs, shut off supply, ventilate, and call professionals rather than improvise repairs. Could a small odor or hissing sound become a life‑threatening hazard if ignored? By following safety checks, using monitoring equipment, understanding legal and warranty implications, and relying on qualified technicians, a household minimizes risk and guarantees timely, effective resolution.