
How to Fix a Bathtub Drain Stopper That’s Stuck: Quick, Step-by-Step Repair Guide
If your bathtub drain stopper is stuck, you can usually fix it with some simple steps. Start by identifying the type of stopper you have. Remove any visible hair or debris using gloves and pliers, then test its movement by toggling or pressing it. For deeper clogs, use a drain snake, and if there’s mineral buildup, pour in some vinegar. Check and realign or replace springs, pivot pins, or clips as necessary. Once everything is reassembled, test the stopper for smooth operation and apply plumber’s grease for ongoing maintenance. Follow the step-by-step guide below for detailed troubleshooting.
How to Tell If Your Bathtub Drain Stopper Is Stuck or Malfunctioning
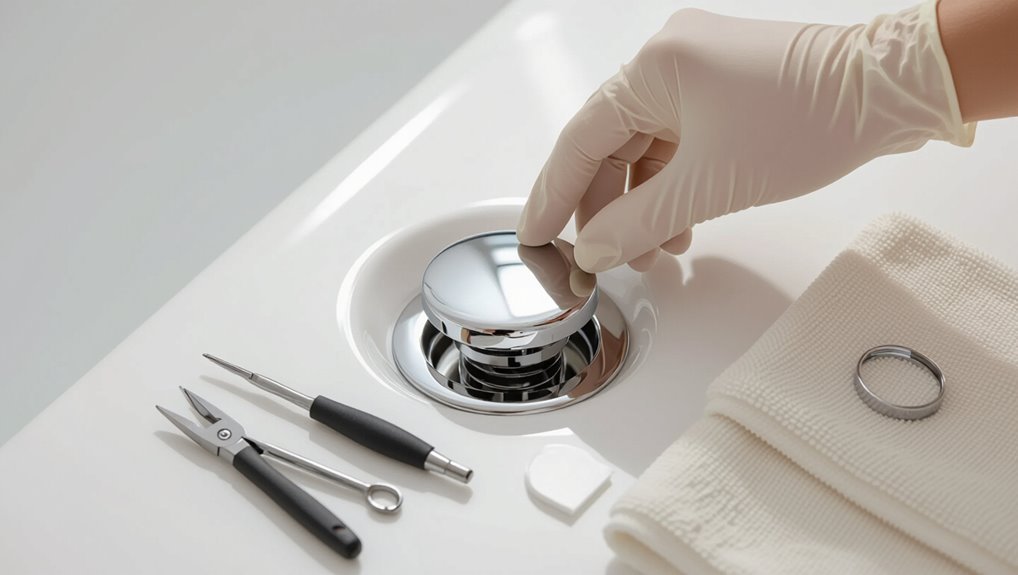
A few clear signs indicate a bathtub drain stopper is stuck or malfunctioning, including failure to seal, inability to move, slow drainage, or water that won’t hold.
Symptoms vary by stopper type: lift-and-turn and push-pull stoppers often jam or strip. Toe-touch and pop-up models can lose spring tension, and flip-it stoppers may break at the hinge.
Identifying the specific behavior and matching it to the stopper style helps determine whether cleaning, adjustment, or replacement is needed.
Common signs of a stuck stopper
When a bathtub drain stopper fails to operate smoothly, several clear signs can indicate it’s stuck or malfunctioning.
Water drains slowly or not at all, the stopper won’t lift or lower, or it moves unevenly.
Unusual noises, persistent puddling, and difficulty coordinating with the overflow lever also signal problems.
These symptoms prompt homeowners to learn how to fix a bathtub drain stopper that is stuck.
Types of bathtub stoppers and how symptoms differ (lift-and-turn, push-pull, toe-touch, pop-up, flip-it)
Different stopper designs produce distinct failure modes, so identifying the type—lift-and-turn, push-pull, toe-touch, pop-up, or flip-it—helps pinpoint likely symptoms and fixes.
Lift-and-turn often sticks when threads corrode.
Push-pull may jam mid-position.
Toe-touch springs fail or detach.
Pop-up linkages seize or misalign.
Flip-it clips break or collect debris.
Each symptom suggests specific inspection and repair steps.
Quick, Direct Fixes You Can Try Right Now
A few quick tests can help determine whether the stopper is simply jammed, clogged, or mechanically broken.
Next are straightforward, no-tools fixes—flushing with hot water, removing visible debris by hand, or lifting and reseating the stopper—that readers can try immediately.
Clear guidance will also be given on signs that warrant stopping and calling a professional.
Fast tests to diagnose the issue
Curious what’s wrong with the stopper? Inspect alignment by toggling the lever or knob while watching the stopper for movement.
Press the stopper to test suction and release. Run water to observe sealing and drainage speed.
Shine a flashlight into the drain to spot visible debris or broken parts.
Listen for clicking or scraping during operation to indicate mechanical failure.
Simple fixes requiring no tools
After the quick tests identify likely causes—misalignment, suction loss, visible debris, or a sticking linkage—several no-tools fixes can be tried immediately.
Try lifting and lowering the stopper repeatedly to free a jam, rub a soapy finger around the seal to break suction, remove visible hair by hand or with tweezers, and cycle the pivot arm gently.
Test operation after each attempt.
When to stop and call a pro
Know when to stop and call a professional: if simple, tool-free attempts don’t restore smooth operation, visible damage is present, or attempts risk worsening the problem.
A plumber should be contacted when corrosion, stripped parts, persistent leaks, or unclear internal problems exist.
Professionals prevent further damage, guarantee proper parts replacement, and handle complex linkage or pop-up mechanisms safely and efficiently.
Tools and Supplies You’ll Need
A concise list of basic household tools—screwdrivers, pliers, an adjustable wrench, and a flashlight—covers most simple stopper repairs.
For stubborn problems, optional specialty tools such as a tub drain key, snap-ring pliers, or a basin wrench may be needed.
Replacement parts like rubber gaskets, new stoppers, or linkage kits should be on hand if components are worn or broken.
Basic household tools list
Basic hand tools and a few common supplies make most bathtub drain stopper repairs straightforward.
A concise kit covers inspection, disassembly, cleaning, and minor adjustments without specialized parts. Safety and cleanliness are included.
- Phillips and flathead screwdrivers
- Pliers or adjustable wrench
- Cleaning brush, rag, and mild cleaner
Optional specialty tools and replacement parts
Although most fixes proceed with common hand tools, some stoppers benefit from specialty items and spare parts that save time and prevent repeat disassembly.
Recommended optional tools and parts speed diagnosis and guarantee lasting repair: a seal pick for gasket removal, a tub drain wrench for stubborn fittings, and replacement plungers or linkage kits matched to the stopper type.
Step-by-Step Repair: Lift-and-Turn Stopper
The lift-and-turn stopper repair begins by removing the knob and pulling out the stopper assembly to expose the shaft and threads.
Any buildup on the shaft and drain body is then cleaned and descaled before applying fresh lubricant.
After reassembling the parts, simple troubleshooting steps address persistent sticking or alignment issues.
How to remove the knob and stopper assembly
Begin by shutting off any running water and clearing the area around the tub to provide unobstructed access to the lift-and-turn stopper.
Locate the small set screw on the knob’s side or underside. Loosen it with the appropriate hex or flathead driver, then lift the knob straight up.
Unscrew the stopper assembly counterclockwise from the drain shaft and lift out gently for inspection.
Cleaning and descaling the shaft and threads
Inspect the exposed shaft and threads for mineral buildup, hair, and grime before proceeding; these deposits impair smooth operation and proper sealing.
Use a small brush, toothpick, or nylon scrub pad to remove debris.
Apply a mild descaler or vinegar-soaked cloth for calcium or lime, let sit briefly, then scrub.
Rinse thoroughly and dry with a lint-free cloth before inspection.
Re-lubricating and reassembling
Apply a thin, water-resistant plumber’s grease to the shaft, threads, and the rubber gasket before reassembling to guarantee smooth operation and a watertight seal.
Align the stopper on the shaft, engage the lift-and-turn mechanism, and screw down the cap or retaining nut hand-tight.
Cycle the stopper several times to seat the gasket, then trim or reposition any excess grease for cleanliness.
Troubleshooting if it still sticks
If the stopper still sticks after re-lubrication and reassembly, proceed with a targeted troubleshooting sequence to identify the cause.
Inspect the lift-and-turn shaft for bent or corroded parts.
Check for mineral buildup inside the drain and pivot.
Verify the set screw is tight but not overcompressed.
Confirm the stopper height aligns with the seat.
Test operation after each adjustment until smooth.
Step-by-Step Repair: Push-Pull or Toe-Touch Stopper
The push-pull (toe-touch) stopper is accessed by pulling the cap up and unscrewing or releasing the retaining clip to remove the assembly.
Once removed, hair, soap scum, and mineral deposits are cleared from the stopper and throat, and the internal spring and plunger are inspected for wear or blockage.
After adjusting or reseating the spring mechanism, the stopper is reassembled and tested for smooth operation and a watertight seal.
How to access and remove the stopper
Begin by clearing the area around the tub and gathering basic tools—screwdriver, pliers, and a rag—so the stopper can be accessed safely.
Inspect the stopper type: push-pull or toe-touch.
For push-pull, lift and rotate counterclockwise to reveal retaining screw; remove screw and pull out assembly.
For toe-touch, depress, twist to release, then extract.
Wipe surfaces and inspect linkage before reassembly.
Clearing hair, debris, and mineral buildup
With the stopper removed and linkage inspected, attention turns to clearing hair, soap scum, and mineral deposits that commonly impede drainage.
Gloves and needle-nose pliers remove visible hair and gunk. A flexible drain snake extracts deeper clogs.
For mineral buildup, apply white vinegar, let sit 15–30 minutes, scrub with a bottle brush, then flush with hot water.
Recheck flow before reassembly.
Adjusting and reseating the internal spring mechanism
Inspect the push-pull or toe-touch assembly visually to locate the internal spring, pivot pin, and any worn or misaligned parts before attempting adjustment.
Compress or reposition the spring onto its seat, align the pivot pin through the linkage, and guarantee the plunger moves freely without binding.
Replace any bent clips or corroded springs; verify smooth travel and proper tension prior to reassembly.
Reassembly and test
After confirming the spring, pivot pin, and linkage move freely and any bent clips or corroded parts have been replaced, the assembly can be reinstalled into the drain.
Seat the stopper assembly, align linkage with the pivot slot, and secure the retaining clip.
Reattach trim and tighten screws.
Operate the stopper several times, checking for smooth motion and a watertight seal; adjust linkage if leaking or binding.
Step-by-Step Repair: Pop-Up Stopper (Lever-Operated)
The procedure for a lever-operated pop-up stopper begins with removing the overflow plate and disconnecting the linkage to expose the pivot rod assembly.
The pivot rod and clevis should be cleaned and realigned, with worn pivot nuts, washers, or linkage clips replaced as needed.
Reinstallation requires careful adjustment of the linkage and pivot so the stopper seats evenly and seals properly.
How to remove the overflow plate and disconnect the linkage
Loosen the two screws securing the overflow plate with a screwdriver, then gently pull the plate away from the tub to expose the pivot rod and linkage assembly; take care not to drop any parts into the drain.
Note the linkage orientation, then unhook the clevis clip or remove the retaining nut holding the pivot rod.
Withdraw the rod and separate the linkage from the stopper mechanism.
Cleaning and realigning the pivot rod and clevis
Begin by examining the pivot rod and clevis for mineral buildup, corrosion, or worn spots that could impede smooth movement.
Remove debris and scale with a soft brush and white vinegar; rinse and dry thoroughly.
Lightly lubricate pivot contact points with a plumber-safe grease.
Realign the clevis slot and rod so linkage moves freely, then test operation before reassembling the overflow plate.
Replacing worn pivot nuts, washers, or linkage clips
Inspect the pivot nuts, washers, and linkage clips for wear, rust, or deformation before proceeding.
Replace damaged pivot nuts with correctly sized brass or stainless fasteners to prevent corrosion.
Swap compressed or torn washers for new rubber or neoprene ones to restore seal and movement.
Clip replacements should match original tension and fit; secure all components hand-tight then test linkage free movement.
Reinstalling and adjusting for proper sealing
With the cleaned or replaced pivot nuts, washers, and linkage clips in place, the pop-up assembly is ready to be reinstalled and adjusted for a watertight seal.
Reattach the stopper and linkage, align the pivot rod so the stopper seats flush, tighten nuts without overcompressing seals, and operate the lever repeatedly.
Test for leaks and fine-tune linkage height until the drain holds water reliably.
Step-by-Step Repair: Flip-It and Other Specialty Stoppers
Flip-It and other specialty stoppers are removed by unscrewing or lifting the top plate and pulling the assembly out for inspection.
The parts should be cleaned of mineral buildup and debris, and worn seals can be replaced to restore a watertight fit.
If corrosion or damage is found, replacing the entire unit is often the most reliable solution.
Typical removal and cleaning steps
Begin by identifying the stopper type and gathering basic tools—needle-nose pliers, a flathead screwdriver, a hex key or Allen wrench, and a bucket—to streamline removal and cleaning.
Remove visible caps or set screws, lift or unscrew the stopper assembly, and collect loose parts.
Clear hair and gunk with a brush and vinegar, rinse thoroughly, inspect moving parts, lubricate pivot points, and reassemble.
Replacing seals or entire unit if damaged
If the stopper’s seal is cracked, warped, or the mechanism sticks despite cleaning, the next step is to replace the seal or the entire unit.
Measure diameter and model, purchase compatible replacement parts or a full assembly.
Remove old components, install new seal or unit per manufacturer instructions, test operation and leak-tightness, trim or adjust linkage if needed, and retest until smooth sealing and release occur.
How to Clean and Remove Tough Mineral Deposits
When mineral buildup impedes a bathtub stopper, the article outlines safe commercial cleaners and simple homemade solutions such as diluted vinegar.
It explains proper use of vinegar and CLR and demonstrates gentle physical scrubbing techniques that remove deposits without scratching or loosening components.
The section also covers precautions to prevent corrosion, including rinsing thoroughly and avoiding incompatible chemical mixtures.
Safe cleaners and homemade solutions
Several effective cleaners—commercial and homemade—can dissolve the mineral buildup around a bathtub drain without harming most finishes.
They should be chosen for compatibility with metal and porcelain and used sparingly. Gentle options target limescale and soap scum while avoiding abrasive damage.
- Baking soda paste for light deposits
- Dilute citric acid solution for mineral removal
- Mild, non-abrasive commercial lime remover
How to use vinegar, CLR, and physical scrubbing without damage
A small mixture of household vinegar or a commercial calcium-and-lime remover (CLR) combined with careful physical scrubbing can safely dissolve and lift stubborn mineral deposits without harming porcelain or metal when used correctly; attention to dilution, contact time, and gentle tools prevents surface damage.
Apply diluted solution, let sit per label, then use a soft brush or nylon pad. Rinse thoroughly and repeat sparingly.
Preventing corrosion during cleaning
After removing mineral buildup with vinegar or CLR and gentle scrubbing, attention shifts to measures that prevent corrosion during further cleaning.
Rinse thoroughly, neutralize residues with baking soda solution, and dry metal parts promptly. Use nonabrasive pads and dilute cleaners per instructions.
Apply a light coat of plumber’s grease to moving components and inspect seals; repeat maintenance periodically to inhibit rust and deterioration.
When to Replace the Stopper or Drain Assembly
When persistent leaks, broken parts, or corrosion prevent proper sealing, replacement of the stopper or entire drain assembly becomes necessary.
The author explains how to select a compatible replacement by matching stopper type, drain size, and finish.
Basic replacement steps for common pop-up, lift-and-turn, and push-pull stoppers are then summarized to guide the repair.
Signs replacement is necessary
How can one tell that a bathtub stopper or drain assembly needs replacement?
Persistent leaks, visible corrosion, or cracked plastic parts indicate failure.
Frequent clogging despite cleaning, a stopper that won’t seal or release properly, and wobbling or loose hardware are clear signs.
Recurring rust stains, stripped threads, or missing components also justify replacing the stopper or entire drain assembly.
How to choose a compatible replacement
Which features matter most depends on the drain type and the tub’s existing fittings: the replacement must match the diameter, mounting style (lift-and-turn, push-pull, toe-touch, pop-up, or trip lever), and overflow configuration to guarantee proper sealing and operation.
Select materials resistant to corrosion and compatible finishes; confirm trim and linkage fitment; check included gaskets and hardware for seal integrity.
- Material and finish compatibility
- Mounting and linkage match
- Gasket and hardware included
Basic replacement steps for common stopper types
Begin by identifying the stopper type and whether the problem is wear, clogged linkage, or a damaged seal, since each fault dictates a different replacement approach.
For lift-and-turn, unscrew and remove stem; for pop-up, detach pivot rod and lift out assembly; for toe-touch or push-button, disengage retaining clip and pull cartridge.
Install matching replacement, reconnect linkage, test seal and operation.
Preventive Maintenance to Keep Your Stopper Working
Preventive maintenance helps extend the life of a bathtub stopper and reduce the need for repairs.
A simple weekly and monthly checklist — including clearing visible hair, rinsing with hot water, and testing operation — prevents buildup before it becomes a problem.
Using hair traps, gentle enzyme cleaners, and occasional silicone lubricant are recommended practices and products to keep the mechanism functioning smoothly.
Weekly and monthly maintenance checklist
A brief weekly and monthly checklist helps guarantee the bathtub drain stopper remains functional and prevents small issues from becoming repairs.
Inspect movement and alignment; lubricate pivot or O-ring annually if needed. Test sealing and drainage after adjustment. Clean visible residue without deep-clean chemicals.
- Check operation weekly
- Wipe and test monthly
- Replace worn parts as identified
Best practices to avoid hair and debris buildup
Weekly checks and monthly wipe-downs reduce small problems, but keeping hair and debris out of the drain stops issues before they start.
Install a mesh strainer, clear it after each use, and brush visible hair from the stopper. Flush with hot water weekly. Avoid rinsing large clumps or solids.
Periodically lift the stopper to remove trapped gunk before it compacts and restricts operation.
Recommended products to extend lifespan
Several simple products can greatly extend a bathtub stopper’s lifespan when used correctly.
A silicone-safe lubricant prevents sticking without degrading rubber gaskets.
A gentle enzyme drain cleaner breaks down organic buildup; use monthly.
A hair-catcher screen stops clogs before they reach the stopper.
Replace worn seals with OEM or compatible neoprene O-rings.
Periodic inspection and light cleaning maintain smooth operation.
Common Mistakes and How to Avoid Them
Many homeowners unknowingly use removal or cleaning methods that damage the stopper or its finish.
Using incorrect replacement parts or over-tightening fasteners can strip threads or warp seals.
Attempting complex repairs without proper tools or knowledge can turn a fixable issue into a bigger problem.
Damage-causing actions during removal and cleaning
Handle the stopper and surrounding hardware with care to avoid common mistakes that worsen damage during removal and cleaning.
Using excessive force, prying with inappropriate tools, or twisting sealed components can crack finishes, warp gaskets, and strip threads. Ignoring corrosion or debris risks breaking fragile linkages.
Loosen fasteners gradually, protect surfaces, and inspect parts before applying pressure to prevent costly repairs.
Incorrect parts or over-tightening pitfalls
When incorrect replacement parts are used or components are over‑tightened, the result is often a leaky, seized, or damaged drain assembly that requires further repairs.
Using wrong-size seals, cheap pop-ups, or mismatched screws distorts fit and causes leaks. Excessive torque strips threads, crushes gaskets, or fractures housings.
Verify part numbers, test-fit before sealing, and tighten to manufacturer torque recommendations.
When DIY can worsen the problem
Mistaking a simple stopper repair for a straightforward weekend task can make a small leak escalate into a more extensive, expensive problem.
Amateur attempts can strip threads, crack housings, misalign linkage, or worsen clogs. Using wrong parts, excessive force, or improper sealants often triggers leaks or corrosion.
When unsure, stop and consult manufacturer guidance or a professional plumber to prevent costly damage.
Cost Estimates and Time Required
Typical repair times vary by stopper type, from a few minutes for a pop-up stopper to an hour for lift-and-turn or trip-lever mechanisms.
Parts commonly cost between $5 and $40, while professional service typically ranges from $75 to $200 depending on complexity and local rates.
The following section breaks down expected time and cost estimates for each stopper type and repair scenario.
Typical time to fix by stopper type
Estimating repair time depends largely on the stopper type and the installer’s experience. Typical durations: pop-up stoppers often require 15–30 minutes, lift-and-turn 20–45 minutes, and trip lever assemblies 30–60 minutes. Complex issues add time. Quick reference:
| Stopper Type | Typical Time | Notes |
|---|---|---|
| Pop-up | 15–30 min | Fast access |
| Lift-and-turn | 20–45 min | May need tools |
| Trip lever | 30–60 min | Linked assembly adjustments |
Expected costs for parts and professional repair
Repair time often informs cost, since longer jobs typically require more labor hours; for bathtub drain stoppers this means parts and professional fees vary by stopper type, complexity, and local labor rates.
Basic replacement parts cost $5–$25; premium or specialty components reach $50–$100.
DIY saves labor; hiring a plumber typically adds $75–$200 per hour, plus a $50–$150 service call.
Quick Troubleshooting Flowchart
A concise flowchart guides users from observed symptom to specific fix for common stopper problems.
It presents each decision point in order—e.g., does the stopper move, does the drain hold water—and directs to the appropriate action.
The chart is designed for quick diagnosis and minimal tools.
Stepwise decision guide from symptom to solution
How should someone proceed when a bathtub stopper fails to operate correctly? A concise stepwise guide directs diagnosis from symptom to remedy: inspect visible obstruction, test mechanism movement, then decide repair scope.
Follow clear checks to avoid unnecessary disassembly and select appropriate fix—cleaning, adjustment, or replacement—based on findings.
- Inspect for debris or misalignment
- Test linkage and spring action
- Choose cleaning, adjust, or replace
Useful Safety Tips and Final Checks
Before reassembling, a protective layer such as a towel or painter’s tape should be placed to prevent scratches and gloves worn to protect hands and finishes.
After the stopper is reinstalled, water should be run and the drain observed for leaks while the stopper is tested to confirm a proper seal.
Any seepage or poor closure should be addressed immediately before regular use.
Protecting finishes and using gloves
Protective measures preserve fixtures and prevent minor injuries while working on a bathtub drain stopper.
Use soft cloths or painter’s tape to shield enamel, chrome, and surrounding surfaces from tools and dropped parts.
Wear nitrile or work gloves to improve grip, resist chemicals, and avoid cuts.
Remove jewelry and keep cleaning agents contained to prevent finish damage during disassembly and reassembly.
Testing for leaks and proper seal after repair
Run a controlled fill to verify the repair: plug the drain, fill the tub to a typical depth, and watch for any slow seepage around the stopper, flange, or visible seals.
Inspect beneath the tub if accessible, check for moisture after a few minutes, and operate the stopper to confirm a firm, watertight seal.
Tighten or reseal fittings if any leak appears.
Conclusion
Persistent problems with a pesky, stuck plug need not provoke panic. Calmly consulting the concise steps, the reader can confidently clear crud, coax corroded components, or carefully replace compromised parts. With simple supplies, steady hands, and sensible safety, soothing satisfaction follows successful service. Swift savings, smoother sewage flow, and stress-free soaks are possible when one methodically moves through testing, tuning, and timely repairs, preserving peaceful, pristine bathing.
