
How to Paint a Pedestal Table: Step-by-Step Guide for a Smooth, Durable Finish
To achieve a smooth, durable finish on your pedestal table, start by cleaning and repairing any imperfections. Progressively sand the surface up to 220 grit, then apply a compatible bonding or stain-blocking primer. Use thin, even coats of furniture-grade acrylic or alkyd paint—whether by brush, roller, or spray—sanding lightly between each coat. Finish with a clear topcoat, such as polyurethane or conversion varnish, for added abrasion resistance. After reassembling, inspect for any defects and maintain the finish with gentle cleaning. For detailed techniques and troubleshooting tips, continue reading.
What a Smooth, Durable Painted Pedestal Table Should Look Like
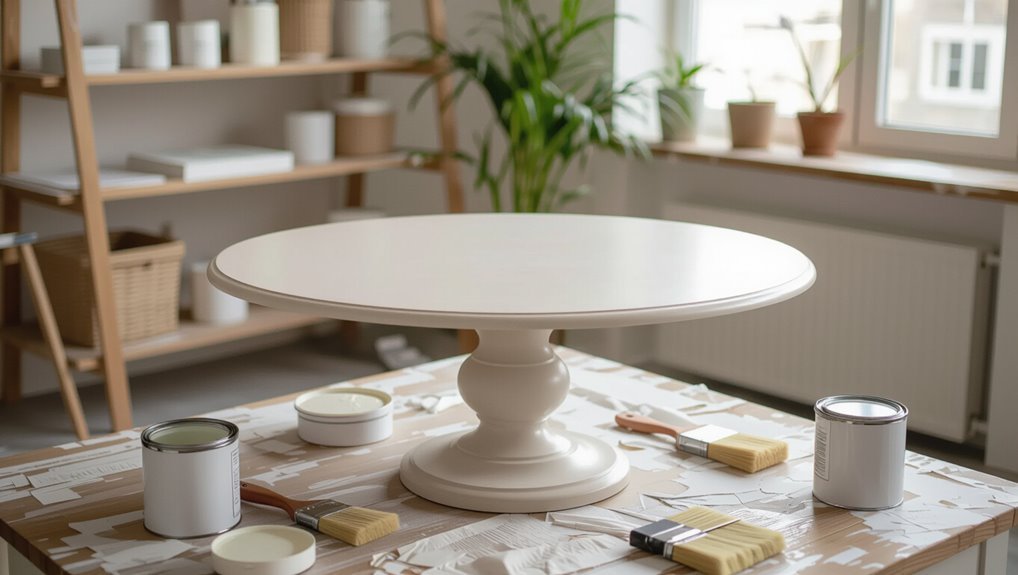
A properly finished pedestal table displays a smooth, uniform surface with strong adhesion, even color, and a durable, scuff-resistant top layer.
The best results typically come from using furniture-grade acrylic or alkyd paints with a compatible clear topcoat such as polyurethane or conversion varnish.
Expect a moderate skill level and a project timeline of several days to allow for proper prep, multiple thin coats, and adequate drying between layers.
Expected finish characteristics (smoothness, durability, adhesion, even color)
Envision a painted pedestal table that presents a uniformly smooth surface, resilient film, strong adhesion to substrate, and consistent color without streaks or blotches.
Observers note edge-to-edge evenness, no orange peel, and resistance to scuffs or chips under normal use.
Proper preparation, technique, and curing—core to how to paint a pedestal table—yield a long-lasting, uniform, professionally finished piece.
Best paint types and topcoats for pedestal tables
Choose paints and topcoats that balance flow, toughness, and compatibility with the table’s material to achieve a smooth, durable finish.
Oil-based or alkyd-modified paints offer leveling and impact resistance; waterborne enamel and acrylics provide easier cleanup and fast curing.
For topcoats, polyurethane (water- or oil-based) and conversion varnish deliver abrasion and chemical resistance; wax or lacquer may be used selectively for sheen or repairability.
Typical project timeline and difficulty level
Timing and skill requirements for painting a pedestal table depend on surface condition, chosen materials, and the desired finish.
A basic refinish takes 1–2 days (cleaning, light sanding, primer, two coats, quick cure).
Full restoration with repairs and multiple sandings requires 3–5 days and intermediate skills.
Advanced techniques (glazing, distressing) need experience and add time for precision and drying.
Tools, Materials, and Workspace Preparation
Before beginning, the article lists the essential tools and materials—brushes, rollers, sandpaper, primers, paints, and finishes—alongside their specific purposes.
It outlines required safety gear and ventilation practices to protect the painter.
It also describes how to set up an efficient, dust-free workspace for smooth, professional results.
Essential tools checklist
A compact, clearly organized toolkit is the foundation of any successful pedestal table painting project.
Essential tools streamline prep, application, and cleanup while ensuring safety and a professional result.
- Sandpaper (various grits), sanding block, tack cloth
- Brushes (angled and sash), foam rollers, paint tray
- Primer, painter’s tape, drop cloths
- Screwdrivers, clamps, respirator/mask
Recommended paints, primers, and finishes with brief purposes
Select paints, primers, and finishes based on the table’s material, desired durability, and sheen:
use a bonding primer for slick surfaces like laminate or previously lacquered wood,
an oil- or shellac-based primer to block tannin stains on hardwoods,
and a water-based primer for raw or painted wood when low odor and quick recoat are priorities.
- Latex paint — flexible, easy cleanup.
- Acrylic enamel — hard, durable finish.
- Polyurethane — clear protective topcoat.
- Chalk paint — matte, minimal prep.
Safety gear and ventilation requirements
When working with paints, primers, and clear coats, the user should wear appropriate personal protective equipment—nitrile gloves to prevent skin contact, safety glasses or a full-face shield for splash protection, and an NIOSH-rated respirator cartridge suited to the chemical (organic vapor cartridges for solvent-based products; P100 for fine particulates) to protect against fumes and spray.
Adequate ventilation, such as open windows and exhaust fans, minimizes vapor buildup; avoid confined spaces.
Setting up an efficient, dust-free workspace
Having covered protective gear and ventilation, the next step is arranging tools, materials, and the workspace to minimize dust and streamline workflow.
Choose a clean, well-lit area; lay down drop cloths and tack cloths; elevate the table on blocks for access.
Organize brushes, rollers, sandpaper, and cleaners on a nearby tray.
Seal off the space, use a box fan with a HEPA filter, and keep movement minimal.
Assessing Your Table and Planning the Job
The first step is to identify the table’s material and construction—solid wood, veneer, MDF, or metal—to determine compatible prep and products.
Next, inspect for damage, loose joints, and existing finishes that may require repair, stripping, or special primers.
Finally, select color, sheen, and a durable finish strategy while estimating time, costs, and necessary drying and curing periods.
Identifying table material and construction (wood, veneer, MDF, metal)
Although appearances can be similar, identifying whether a pedestal table is solid wood, veneered, MDF, or metal is essential because each material requires different preparation and paint products.
Check edges, grain continuity, and weight: solid wood shows end grain; veneer has repeating patterns and thin edges; MDF is uniform with no grain; metal is cold, heavy, and often welded.
Choose primers and fillers accordingly.
Inspecting for damage, loose joints, and previous finishes
Begin by conducting a systematic inspection of the pedestal table to locate cracks, loose joints, surface dings, and remnants of old finishes; note structural issues that will affect dismantling, clamping, or repair.
Check underside, joint seams, and tabletop edge for movement or separation.
Identify previous coatings—paint, varnish, shellac—and damage extent to determine necessary consolidation, filler, or partial disassembly before sanding.
Choosing a color, sheen, and finish strategy for durability
With structural issues identified and old finishes evaluated, attention turns to selecting a color, sheen, and overall finish approach that balances appearance with durability.
Consider traffic, cleaning frequency, and desired style: high-traffic pieces benefit from satin or semi-gloss for resilience; matte hides imperfections but may wear faster.
Choose compatible primers and topcoats—waterborne polyurethanes or conversion varnishes—for long-lasting protection.
Estimating time, costs, and necessary drying/curing times
Once the table has been assessed for size, condition, and finish type, the owner can break the project into discrete tasks—sanding, priming, painting, and topcoating—and assign realistic time and cost estimates to each.
Include prep, masking, and cleanup. Factor drying/flash times: tack-free, recoat, and full cure.
Budget for materials, tools, possible repairs, and unexpected delays to avoid rushed, uneven results.
Preparing the Pedestal Table for Painting
Before any paint touches the surface, the table must be thoroughly cleaned and degreased. Hardware should be removed, and removable parts disassembled for safer handling.
Cracks, chips, and loose joints should be repaired and allowed to cure before progressing through a planned sanding sequence that matches the pedestal’s contours and moves from coarse to fine grit.
Special materials such as veneer, laminate, or particleboard require tailored preparation—scuffing, sealing, or priming—to guarantee proper adhesion and a durable finish.
Cleaning and degreasing surfaces
Begin by removing dust, grime, and old wax from the pedestal’s surfaces using a stiff brush and a vacuum or tack cloth.
Then follow with a degreasing solution to lift oils and fingerprints that interfere with adhesion.
Work methodically, wiping in the grain, rinsing with clean water if required, and allowing complete drying.
Inspect for remaining residue before sanding or priming.
Removing hardware and disassembling parts safely
After surfaces are clean and fully dry, attention turns to removing hardware and disassembling the pedestal for safer, more effective painting.
Use appropriate screwdrivers, label fasteners, and store small parts in sealed bags.
Remove detachable leaves, apron panels, and drawer slides if applicable.
Support components to prevent damage, work on a padded surface, and photograph assembly for accurate reinstallation after finishing.
Repairing cracks, chips, and loose joints
Assess the pedestal for structural and surface damage, noting splits, chips, and wobbly joints that will compromise finish adhesion and longevity.
Stabilize loose joints with glue and clamps; replace missing screws or dowels.
Fill chips and small gaps with wood filler or epoxy, shaping flush once cured.
For hairline cracks, inject adhesive and clamp.
Confirm repairs are solid and dry before proceeding to priming.
Sanding progression: grit sequence and technique for pedestal shapes
With repairs fully cured and joints tightened, attention shifts to sanding the pedestal to create an even, paint-ready surface.
Begin with 80–120 grit to remove old finish and shape contours. Follow with 150–180 grit to smooth changes, then finish with 220 grit for a uniform tooth.
Sand with the grain where possible, use flexible sanding pads for curves, and vacuum between steps.
Dealing with veneer, laminate, or particleboard surfaces
When painting a pedestal table with veneer, laminate, or particleboard surfaces, the preparatory approach must change to address adhesion and surface integrity:
Inspect for lifting edges or swollen particleboard; repair or replace as needed.
Clean thoroughly, degloss laminate with a liquid sandpaper or scuff pad, and fill gaps with appropriate wood filler.
Prime with a bonding primer designed for smooth or engineered surfaces before topcoating.
Priming and Sealing for a Long-Lasting Base
Selecting a primer suited to the table’s substrate and the chosen topcoat is essential for adhesion and durability.
Special attention should be given to applying thin, even coats into tight curves and carved details, allowing proper drying and light sanding between layers to prevent raised grain and address any bleed-through.
For tannin-rich woods or slick surfaces, a stain-blocking or bonding primer should be used before proceeding to paint.
Choosing the right primer for substrate and paint type
Why does primer matter for a pedestal table? The correct primer guarantees adhesion, blocks tannins, and matches both substrate and topcoat.
For bare wood choose a shellac or oil-based primer to seal knots; use an epoxy or bonding primer for previously finished or glossy surfaces.
For waterborne paints select a compatible acrylic primer. Match primer chemistry to paint for durability and uniform sheen.
How to apply primer on tight curves and carved details
Start by evaluating the pedestal’s curves and carvings to determine access and required tools.
Then work systematically from recessed areas outward so primer is applied evenly without drips or buildup.
Use a small brush or foam brush for crevices, stippling motions to avoid pooling, and thin, controlled passes.
Feather edges into adjacent surfaces for consistent coverage and avoid overloading the brush.
Drying, sanding between coats, and addressing bleed-through
Allow adequate drying time between coats to guarantee proper adhesion and a smooth finish; primer that feels dry to the touch can still be soft underneath, so follow the manufacturer’s recommended cure times rather than relying on appearance alone.
Lightly sand between coats with fine-grit paper, remove dust, and inspect for bleed-through. Seal affected areas, re-prime if necessary, then continue thin, even topcoats for durability.
When to use a stain-blocking or bonding primer
Several situations call for a stain-blocking primer: raw wood with tannin-rich species (like oak or mahogany), water- or smoke-stained surfaces, knotty pine, and areas with previous stains that bled through paint.
Use bonding primer on slick finishes, laminate, glossy factory paint, or repaired areas to guarantee adhesion.
Choose oil-based or shellac-based stain blockers for severe bleed-through; water-based bonding primers suit lighter jobs.
Painting Techniques for a Smooth, Even Finish
The section compares brushing, rolling, and spraying for pedestal shapes, outlining pros and cons and recommended equipment settings.
It then gives concise, step-by-step methods for brush/roller and spray application, with tips for preventing and correcting drips, runs, and brush marks on curved surfaces.
Finally, it covers techniques for achieving crisp, clean edges where the tabletop meets the pedestal.
Brushing vs. spraying vs. rolling: pros and cons for pedestals
When choosing between brushing, spraying, or rolling a pedestal table, each method offers distinct trade-offs in finish quality, speed, and required skill. Brushing gives control for detail but shows strokes; spraying yields the smoothest, fastest coat yet needs masking and equipment; rolling suits flat expanses but can texture rounded parts.
| Method | Best for |
|---|---|
| Brushing | Detail |
| Spraying | Smoothness |
| Rolling | Flats |
Step-by-step brush/roller application method
After selecting brush or roller based on detail and surface shape, proceed with a systematic application to achieve an even, smooth coat.
Work from top to bottom, maintaining a wet edge. Thin coats and follow grain or contour; use light, consistent strokes.
Feather edges, avoid overworking.
Allow recommended drying between coats, sand lightly with fine grit, then remove dust before subsequent layers.
Step-by-step spray application method, including equipment settings
Begin by preparing the workspace and equipment to guarantee consistent spray patterns and proper atomization: set an HVLP or LVLP spray gun to a medium fan (about 6–8 inches wide at working distance), adjust air pressure to the manufacturer’s recommendation (commonly 10–20 psi at the nozzle for HVLP), thin the paint to the specified viscosity, and test on cardboard to confirm droplet size and flow before moving to the pedestal table.
Then apply overlapping 50% passes, maintain a steady 8–10 inch distance, keep the gun perpendicular, use thin, even coats, allow recommended flash time between coats, and sand light between final coats for adhesion and smoothness.
Managing drips, runs, and brush marks on curved surfaces
Control drips and brush marks on curved surfaces by working in thin, controlled layers and adjusting technique to the contour.
The painter uses light, steady strokes following the curve, feathering ends to blend. Between coats, sanding with fine grit removes imperfections.
Vertical orientation and gravity-aware passes prevent runs; quick tack cloth cleanup and prompt recoating guarantee an even, durable finish without buildup.
Achieving crisp edges between tabletop and pedestal
A crisp shift between the tabletop and pedestal defines a professional-looking paint job and prevents unsightly bleed or overlap.
Painter’s tape applied with a burnished edge, thin coats of paint, and brushing away from the taped line create control.
Remove tape while paint is tacky for a clean line.
For complex joins, use a steady hand and a small angled brush to refine edges.
Layering, Sanding, and Achieving Professional Smoothness
A clear plan for layering and sanding determines the final look: typically two to three full coats with light sanding between each, plus a final fine sand before topcoat.
Both wet-sanding and scuff-sanding techniques are used to achieve ultra-smooth surfaces depending on paint type and dryness.
Any dents or runs are filled after the initial coats and spot-repaired prior to the final finish to guarantee a flawless result.
How many coats to apply and when to sand between coats
Most pedestal tables require two to three thin, even coats of paint for full coverage and durability, with an additional clear topcoat if protection is desired.
Allow recommended drying between coats, typically 2–24 hours depending on paint. Lightly sand with fine-grit paper (220–320) only after paint is dry to remove imperfections and promote adhesion.
Apply subsequent coats thinly, repeating as needed.
Wet-sanding and scuff-sanding techniques for ultra-smooth results
Begin wet-sanding or scuff-sanding only after each paint layer has fully cured to the manufacturer’s recommendation. Then use progressively finer abrasives and clean the surface between passes to remove dust and nibs.
This controlled layering—thin coats, light sanding, tack-cloth cleanup—produces the ultra-smooth finish sought on pedestal tables. Work evenly, keep sanding grit sequence consistent, rinse and dry after wet-sanding, and inspect under raking light.
Filling imperfections after first coats and spot-repair workflow
After wet- or scuff-sanding has smoothed the initial coats and the surface has been wiped clean, attention shifts to locating and correcting remaining flaws before applying additional layers.
Small dents, nibs, or brush marks are filled with a fine-grain filler, allowed to cure, then sanded flush.
Solvent-wipe, re-prime spot if needed, and blend edges before proceeding with subsequent thin coats for a seamless, durable finish.
Topcoats and Protective Finishes for Durability
Choosing the right clear topcoat—polycrylic, polyurethane, or conversion varnish—determines both appearance and long-term protection.
Sheer sheen choices (satin, semi-gloss, gloss) affect wear resistance and visual durability, while curing times and controlled conditions are critical to achieving maximum hardness.
For decorative but durable options, rubbed, antiqued, or distressed topcoats can be applied with techniques that preserve protection without sacrificing style.
Clear topcoat options: polycrylic, polyurethane, conversion varnish
Select a clear topcoat based on the table’s use and the desired sheen: polycrylic, polyurethane, and conversion varnish each offer distinct balances of durability, ease of application, and resistance to chemicals and heat.
Polycrylic: water-based, low odor, easier cleanup but less heat resistance.
Polyurethane: oil or water-based, tougher, good abrasion resistance.
Conversion varnish: factory-grade hardness and solvent resistance, requires professional application.
Applying satin, semi-gloss, and gloss topcoats for wear resistance
Having chosen the appropriate clear topcoat like polycrylic, polyurethane, or conversion varnish, the next consideration is sheen—satin, semi-gloss, or gloss—because sheen level affects both appearance and wear resistance.
Satin hides imperfections and resists scuffs modestly; semi-gloss balances reflectivity with durability for tabletops; gloss offers maximum surface hardness and abrasion resistance but highlights flaws.
Choose based on usage and aesthetic.
Curing times and conditions to maximize hardness
Allow adequate curing time and controlled conditions to guarantee a topcoat reaches its full hardness and wear resistance.
Ambient temperature, humidity, and ventilation affect solvent evaporation and crosslinking; follow manufacturer cure schedules (often 24–72 hours initial, 7–30 days full cure).
Avoid heavy use during curing, keep dust-free, and maintain stable conditions.
Extended curing enhances abrasion resistance and adhesion for long-term durability.
Special finishes: rubbed, antiqued, or distressed durable looks
Once the topcoat has cured sufficiently to provide a stable surface, attention can turn to creating rubbed, antiqued, or distressed effects that remain durable under use.
Techniques include light sanding of edges, selective glaze application wiped back, and controlled abrasion sealed with an additional clear coat.
Use thin, durable sealers (polyurethane or conversion varnish) and test methods on scraps to verify longevity without compromising finish adhesion.
Reassembly, Final Touches, and Long-Term Care
Once the finish has cured, reattach hardware and secure the pedestal, checking fasteners for proper torque and alignment.
A systematic final inspection should verify adhesion, smoothness, and consistent sheen before regular use.
For long-term care, recommend gentle cleaning, periodic touch-ups for chips or wear, and prompt repairs to preserve the finish.
Reattaching hardware and stabilizing the pedestal
Reattach hardware carefully, aligning screws and brackets to the predrilled holes to prevent stripping painted surfaces.
Tighten incrementally, alternating fasteners to distribute stress.
Use felt pads under contact points to protect finish and improve stability.
Check for wobble and adjust leg bolts or pedestal anchor plate.
Apply threadlocker sparingly on metal-to-metal joints for long-term firmness without damaging paint.
Final inspection checklist for adhesion and finish quality
Begin a systematic final inspection to verify adhesion and finish quality before returning the pedestal table to regular use.
Examine surface for uniform sheen, runs, or orange peel; press-test edges for lifting; check joints and hardware for secure reattachment; and confirm cured hardness with a fingernail or coin.
Record any defects and plan targeted touch-ups or additional curing time.
- Surface appearance
- Edge adhesion
- Joint integrity
- Hardness test
Recommended maintenance and cleaning to extend finish life
Carefully reassemble the pedestal table and adopt a simple maintenance routine to preserve the finish: allow full cure time before heavy use, tighten fasteners without over‑torquing, and place felt pads under contact points to prevent abrasion.
Wipe regularly with a soft, lint‑free cloth and mild pH‑neutral cleaner; avoid ammonia or harsh solvents. Use coasters, avoid direct sunlight, and inspect periodically for loose hardware.
Repairing chips and wear spots in the future
Address minor chips and worn areas promptly to prevent moisture intrusion and further deterioration: assess the damage, clean the area of dust and loose finish, and determine whether spot-sanding and touch-up or a localized refinishing is required.
For small chips use matching paint or stain and thin coats; for larger damage fill, sand, prime, and refinish.
Finish with protective topcoat and monitor periodically.
Common Problems and How to Fix Them
Common painting problems can arise even with careful preparation, including poor adhesion that leads to peeling or flaking, surface texture faults like runs, orange peel, or excessive brush marks, and staining from tannin bleed.
Remedies range from sanding and proper priming to using the correct viscosity and application techniques, as well as sealers or stain-blocking primers to stop bleed-through.
A systematic approach—identifying the symptom, correcting the underlying cause, and refinishing the affected area—typically restores a smooth, durable finish.
Peel, flaking, or poor adhesion causes and remedies
Peeling, flaking, and poor adhesion occur when paint fails to bond to the pedestal’s surface, often due to contamination, incompatible materials, insufficient surface preparation, or old, brittle coatings; identifying the root—grease, chalky residue, glossy finishes, moisture, or wrong primer—guides the remedy: clean and degloss, strip or sand loose paint, apply a compatible primer, and allow appropriate drying between coats to restore a durable finish.
Sand feathered edges, recoat with recommended products, and monitor humidity for proper cure.
Runs, orange peel, and texture issues with corrective steps
Inspect the surface for runs, orange peel, and other texture defects immediately after paint application, since early detection makes correction easier and less invasive.
If runs appear, sand smooth with fine grit, feather edges, and reapply thin coats.
For orange peel, wet-sand with 800–1500 grit after curing, then buff or recoating.
Adjust spray technique, thinner, or ventilation to prevent recurrence.
Tannin bleed or staining through paint and how to stop it
Why does dark discoloration sometimes seep through fresh paint? Tannin-rich woods (oak, mahogany) release stains that bleed through finishes.
To stop it, clean surfaces, seal with a shellac-based or blotter primer designed for tannin blocking, then prime fully before topcoating. Allow proper drying between coats.
Test on scrap first; repeat sealing if any staining reappears.
Preventing and fixing brush marks, dust nibs, and sags
Prevent blemishes by controlling technique and environment: brush marks, dust nibs, and sags usually result from incorrect application, contaminated surfaces, or paint drying too slowly.
Use thin, even coats with a high-quality brush or foam applicator, sand lightly between coats, remove dust with tack cloth, and maintain moderate temperature and humidity.
To fix flaws, sand smooth, vacuum, and recoat once surface is clean and dry.
Time-Saving Tips and Professional Shortcuts
Practical time-savers include starter-friendly pre-mixed kits and a few recommended brands that reduce prep and color-matching guesswork.
For complex restorations or high-value antiques, professionals may be more cost-effective when labor, tools, and risk of damage are considered.
When tackling multiple pieces, staging an efficient workflow—batch sanding, simultaneous priming, and organized drying zones—cuts total project time.
Pre-mixed kits and recommended brands for beginners
Looking for an easier route, a beginner can save hours by choosing a quality pre-mixed paint kit designed for furniture.
Kits with primer, topcoat, and easy-mix instructions reduce guesswork. Recommended beginner-friendly brands emphasize adhesion, low odor, and durable finishes.
Compare sample sizes and color matching before buying.
- Rust-Oleum
- Annie Sloan
- Behr
- Valspar
When to hire a pro: cost vs. complexity considerations
When a pedestal table project involves extensive structural repair, intricate surface preparation, or a desired finish beyond basic brushwork, hiring a professional often makes financial and practical sense.
Professionals save time, reduce risk of costly mistakes, and provide specialized tools and finishes.
Consider labor rates versus material costs, project complexity, and warranty on workmanship.
Choose a pro when skill or time constraints outweigh DIY savings.
Efficient workflows for painting multiple pieces
Batch tasks to streamline painting multiple pedestal tables: setting up dedicated stations for sanding, priming, painting, and drying reduces downtime and keeps workflow moving.
Use assembly-line sequencing, grouping similar steps to minimize tool changes. Label stages, rotate pieces to optimize drying cycles, and employ quick-dry products and tack cloths.
Schedule regular quality checks and maintain consistent environmental controls for uniform finishes.
Quick Reference: Step-by-Step Checklist for Painting a Pedestal Table
A concise, numbered checklist guides each phase of painting a pedestal table from preparation to finish, enabling efficient workflow and fewer mistakes.
The sequence covers evaluating condition, disassembly, sanding, cleaning, priming, painting, sealing, and reassembly so the user can quickly reference required tools, materials, and time estimates.
- Inspect, remove hardware, and note repairs needed.
- Sand, clean, and mask areas.
- Prime, apply two paint coats, dry between coats.
- Seal, cure, reassemble, and perform final touch-ups.
Conclusion
A well-executed painted pedestal table blends form and function, its smooth, durable finish reflecting careful prep and technique. By following the outlined steps—assessment, sanding, priming, paint application, and reassembly—the piece endures daily use and gains renewed character. Even a touch of nineteenth-century patience (and a Bluetooth playlist) elevates the process from chore to craft, ensuring results that look professional today and hold up for years to come.
