How to Shut Off a Water Leak Fast: Step-by-Step Guide to Stop a Leaking Pipe or Fixture
To quickly stop a water leak, immediately shut off the nearest valve or the main water supply. If appliances are involved, isolate electricity or gas as well. Contain any water with towels, buckets, and plugs, and check that the flow has stopped. Next, inspect visible supply lines and fittings to locate the leak. For small holes, use a temporary clamp, repair tape, or epoxy putty. Document any damage for insurance purposes and protect your belongings. Follow this guide for detailed fixes and prevention tips.
Stop the Leak Immediately: Quick Actions to Take Right Now
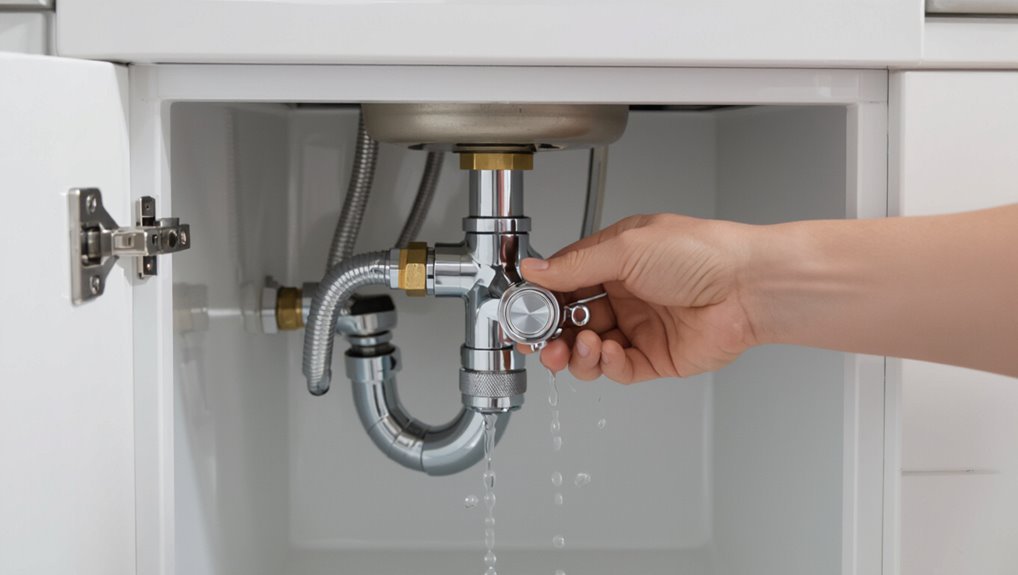
First, the affected area’s water should be cut off at the closest shut-off valve. If the leak is widespread or cannot be contained, the entire house supply should be turned off at the main.
If the leak involves electrical fixtures or gas appliances, electricity and gas should be shut off following safety procedures or by calling the utility if uncertain.
While arrangements are made for repairs, use towels, buckets, and shut-off plugs to limit water spread and protect valuables.
How to cut water to the affected area immediately
Locate and turn off the valve supplying the leaking fixture or shut the main water valve to isolate the affected area immediately.
Next, identify local isolation valves—under sinks, behind appliances, or at branch lines—and close them firmly.
If valves are stuck, use pliers gently.
Confirm cessation of flow by running the fixture.
Learn how to water shut off leaking sources to prevent further damage.
When to shut off the whole house water supply
Shut off the whole-house water supply when a leak is large, uncontrollable, or unpredictable—such as a burst pipe, flooding from a failed appliance, or when the source cannot be isolated quickly—because stopping all incoming water prevents rapid property damage and reduces risk to electrical systems.
After shutting off, call a plumber, document damage for insurance, and avoid using fixtures until repairs confirm system integrity.
How to turn off electricity and gas if leak risk involves fixtures or appliances
If a leak involves electrical fixtures or gas appliances, power and gas should be cut off immediately to prevent fire, shock, or explosion; do so calmly by using the nearest circuit breaker and the appliance’s gas shutoff valve or the main gas shutoff if necessary.
Then evacuate and call professionals.
Confirm no sparks or odor before reentry, ventilate if safe, and report to utility responders.
Temporary measures to reduce water damage (towels, buckets, shut-off plugs)
Grab absorbent towels, buckets, and a shut-off plug to limit spreading water while waiting for repairs.
Place towels to soak puddles, wringing into buckets regularly. Position buckets beneath drips and immediately fit a rubber shut-off plug or drain stopper to slow flow.
Elevate valuables and move furniture away. Document damage with photos for insurance before cleanup begins.
Identify the Type and Location of the Leak
The homeowner should first distinguish whether the leak originates from visible sources—supply lines, fixtures, appliances, pipes, or the water heater—or from hidden areas such as behind cabinets, ceilings, or in the basement.
A quick inspection for damp spots, mold, unexplained water sounds, or a sudden rise in the water bill helps narrow the location.
Using simple tools like a flashlight, moisture meter, and listening devices speeds detection and informs the next shutoff steps.
Common leak sources: supply lines, fixtures, pipes, appliances, water heater
Leaks commonly originate from a handful of predictable sources: supply lines, fixtures, pipes, appliances, and the water heater.
Supply lines and fixture seals fail; corroded or frozen pipes crack; appliance hoses and connectors split; water heaters leak at fittings, tanks, or pressure-relief valves.
Identifying the source narrows required action—tighten, replace a hose, isolate a fixture, or shut off the heater supply.
How to inspect visible pipes, behind cabinets, ceilings, and basements
Begin by scanning all accessible pipe runs—under sinks, inside cabinets, along basement joists, and at ceiling penetrations—for signs of moisture, corrosion, drips, stains, or mineral buildup.
Note fitting types, joints, valves, and visible damage. Photograph locations, feel for cool dampness, and trace pipes to fixtures and appliances.
Mark suspected leak points for repair or professional evaluation.
Signs of hidden leaks: damp spots, mold, sound of running water, high water bill
Although not always visible, hidden leaks often announce themselves through indirect clues: unexplained damp spots on walls or ceilings, persistent musty odors and visible mold growth, the faint steady sound of running or dripping water when fixtures are off, and a sudden unexplained rise in the water bill.
Noting patterns and timing helps narrow likely locations for targeted inspection and repair.
Tools to locate leaks quickly (flashlight, moisture meter, listening devices)
One set of basic tools makes locating hidden water leaks far faster: a bright flashlight to reveal damp stains and water trails in dark cavities, a handheld moisture meter to quantify wetness behind walls or under flooring, and acoustic listening devices to pinpoint the sound of flowing water in pipes.
Combine readings with visual cues; mark suspected areas, trace toward supply lines, and verify by drying and retesting.
Step-by-Step Guide to Stopping Specific Leaks
The guide outlines clear, practical steps for stopping common household leaks, including faucets, showerheads, toilets, appliances, water heaters, and under-sink lines.
Each section explains how to isolate the water, tighten or replace fittings, and when to shut off valves or call a professional.
Readers are directed to basic tools and safety precautions for each leak type.
Leaking faucet or showerhead
Begin by stopping the flow at the source: turn off the fixture’s shutoff valves or, if none are present, close the home’s main water supply.
Drain remaining water by opening the faucet or shower valve.
Inspect connections, aerator, cartridge, and seals.
Tighten loose fittings, replace worn washers or cartridges, or cap lines temporarily.
Contact a plumber if leaks persist or internal parts are corroded.
Leaking toilet (tank, base, or supply line)
Shut off the toilet’s water supply at the shutoff valve near the wall and flush to empty the tank before inspecting the leak source.
Check tank components, tighten or replace the fill valve, flapper, or bolts if corroded.
Inspect base for loose closet bolts or deteriorated wax ring and tighten or replace as needed.
Examine supply line and fittings; replace a damaged hose.
Leaking washing machine or dishwasher supply hose
Locate the leak at the supply hose connection, where water most commonly escapes under pressure.
Turn off the appliance valve and main water supply if needed.
Inspect hose ends, fittings and clamp for cracks or loose threads.
Tighten connections, replace damaged hoses with braided stainless steel, and use new washers.
Test by slowly restoring water, watching for drips; retighten or replace if leakage persists.
Leaking water heater connections
Identify the source of a water heater leak before taking action, since connections at the cold-water inlet, hot-water outlet, pressure-relief valve, and drain valve are the most common culprits.
Shut off the heater’s water supply and power. Inspect fittings for corrosion or loose compression nuts, tighten or replace leaking connectors, and replace failed valves.
Drain tank partially to relieve pressure if needed.
Leaking under-sink supply line or P-trap
After addressing leaks at a water heater, attention turns to under-sink problems, where supply lines and P-traps commonly fail.
Inspect flexible supply hoses, shut off the sink’s shutoff valves, and hand-tighten or replace worn connectors.
For P-trap leaks, catch water, remove and clean threads, replace washers or the trap if corroded, then test for drips before restoring normal use.
Leaking exposed copper or PVC pipe
Begin by isolating the affected section and shutting off the nearest upstream valve or the main supply so pressure is relieved; then confirm the leak is visible on the exposed copper or PVC run and note its size, orientation, and any nearby fixtures or supports that could affect repair access.
Dry the area, drain residual water, and inspect for pinholes, cracks, or joint failures.
Apply appropriate temporary clamp, epoxy putty, or replace the damaged section.
Leaking within wall or ceiling (immediate containment and professional escalation)
When a leak is detected behind drywall or above a ceiling rather than on an exposed run, immediate containment and rapid escalation to a qualified professional become the priority.
Shut water at the main if isolation valves aren’t accessible. Protect belongings below, catch drips with tubs or buckets, and open cabinets to assess.
Document damage and contact a licensed plumber or restoration service promptly.
Tools and Materials for Emergency Repairs
A compact kit of essential tools—adjustable wrench, pipe cutter, pliers, and a flashlight—enables immediate action when a leak is discovered.
Quick-fix materials such as repair tape, pipe clamps, rubber and hose clamps, and epoxy putty should be included for temporary sealing.
Guidance on when a patch will suffice versus when a section must be replaced helps prioritize speed and long-term reliability.
Essential tools to keep on hand
Although emergencies vary, preparing a small kit of reliable tools and materials guarantees a quick, safe response to most household water leaks.
Essential items focus on control, assessment, and temporary isolation. Keep compact selections readily accessible:
- Adjustable wrench, slip-joint pliers, and basin wrench.
- Flashlight with fresh batteries and a screwdriver set.
- Utility knife, work gloves, and absorbent towels.
Quick-fix materials: repair tape, pipe clamps, rubber and hose clamps, epoxy putty
Stocking a small selection of quick-fix materials lets a homeowner stem most leaks immediately while arranging a permanent repair.
Repair tape wraps leaking joints; self-fusing silicone works on wet surfaces.
Pipe clamps and rubber sleeves provide mechanical compression for pinhole leaks. Hose clamps secure temporary sleeve repairs.
Epoxy putty fills small cracks and cures hard, creating a short-term waterproof seal until professional replacement.
When to use a pipe patch vs. replace a section
Decide between patching and replacing based on the leak’s size, location, pipe material, and long-term risks:
A patch suits small pinholes, accessible spots, compatible materials, and short-term fixes.
Replace a section for large holes, corrosion, multiple leaks, compromised joints, or when reliability matters.
Consider water pressure, freeze damage, and inspection ease.
Prioritize permanent replacement for safety and cost-effectiveness over time.
How to Perform Proven Temporary Repairs
The section outlines quick, proven temporary repairs to stop or slow a leak until a permanent fix is possible.
It covers correct application of repair tape and pipe wrap, installation of pipe clamps or repair sleeves, and use of epoxy putty for small holes and cracks.
It also explains fast replacement of flexible supply hoses and methods to secure leaking fixtures.
Applying repair tape and pipe wrap correctly
Begin by preparing the damaged section: shut off the water, drain the pipe, and dry the area thoroughly so repair tape or pipe wrap can bond securely.
Cut away corrosion or loose material, then wrap tape tightly overlapping by half its width or apply self-fusing wrap under tension.
Smooth layers to remove air pockets.
Allow cure time per product instructions before restoring water pressure slowly.
Installing a pipe clamp or repair sleeve
After preparing and sealing the damaged area with tape or wrap, attention can shift to more robust temporary measures like pipe clamps or repair sleeves.
Select a clamp or sleeve sized to the pipe, position over the leak, and tighten evenly to compress the seal.
Verify no leaks remain, monitor pressure, and replace with a permanent repair or professional service as soon as possible.
Using epoxy putty for small holes and cracks
Mixes quickly in hand, epoxy putty provides a fast, durable seal for small holes and hairline cracks on metal, PVC, and other common plumbing materials.
Surfaces must be clean and dry; knead to a uniform color, press firmly into the defect, and shape to overlap surrounding pipe.
Allow recommended cure time before restoring pressure. This is a temporary repair; monitor for leaks.
Replacing a flexible supply hose in minutes
Turn off the shutoff valve, then remove the old flexible supply hose and replace it with a new one sized and rated for the fixture—this straightforward swap restores water flow reliably within minutes.
Guarantee fittings match, use new washers or compression ferrules as required, hand-tighten then finish with a wrench without overtightening.
Slowly restore water, and check for leaks before fully restoring service.
Securing leaking fixtures until a permanent fix
Stabilize the area and contain escaping water immediately by isolating the fixture, shutting off local valves if available, and applying short-term seals—such as plumber’s tape, rubber patches, or hose clamps—to slow or stop the leak until a permanent repair can be made.
Use absorbent pads or buckets, secure loose fittings, label shutoffs, and schedule a qualified plumber.
Recheck seals periodically for deterioration.
When to Call a Professional Plumber
Certain signs—rapid flooding, sewage backup, gas smell near plumbing fixtures, or inability to shut off the main valve—warrant immediate professional intervention.
Homeowners should succinctly describe the location, severity, visible damage, and any odors or health risks when calling so dispatch can send appropriate equipment and provide an upfront estimate.
Expect emergency plumbers to prioritize response, offer a time window, perform a safety-focused assessment, and give repair options and cost estimates on arrival.
Red flags that require immediate professional help
Urgency is warranted when a leak exhibits signs beyond a homeowner’s safe capacity to manage: rapidly expanding water coverage, sewage backup, visible mold growth behind walls or ceilings, water spraying under high pressure, or the sound of running water with no obvious source.
Immediate professional help is also needed for structural compromises, live electrical contact with water, recurring leaks after repairs, or inability to locate shutoff valves.
How to describe the problem to get proper dispatch and estimate
How should the situation be conveyed to guarantee the right crew and tools arrive?
Callers should state location, visible leak source (pipe, fixture, ceiling), leak severity (dripping, steady stream, flooding), water color, nearby hazards (electrical, gas, structural), any shutoff attempts, and access constraints.
Mention urgency and whether temporary measures are in place.
Provide contact details and permission for entry to expedite accurate dispatch and estimate.
What to expect from emergency plumbing service and response times
After providing clear details to dispatch, the caller should understand what an emergency plumbing response typically looks like and when to escalate to a professional.
Technicians usually arrive within 1–4 hours for urgent leaks, assess damage, stop flow, and recommend repairs. Expect temporary fixes, cost estimates, and safety protocols.
For severe flooding, gas involvement, or structural risk, request immediate priority service.
Preventing Future Leaks and Reducing Damage Risk
A regular inspection and maintenance checklist helps identify wear before it becomes a leak, and recommended replacement intervals for hoses, valves, and fixtures provide clear timing for preventative action.
Seasonal steps such as winterizing pipes and insulating vulnerable areas reduce the risk of freeze-related bursts.
Upgrading main and localized shut-off valves and adding water-sensing automatic shutoffs further limit damage when failures occur.
Routine inspections and maintenance checklist
Because small problems often precede major leaks, a concise routine inspection and maintenance checklist helps property owners spot vulnerabilities early and prioritize repairs.
Inspect visible pipes, joints, and fittings for corrosion, dampness, or drips. Check fixtures, drains, and appliance connections for proper seals. Maintain accessible shutoffs and clear drain lines.
- Visual scan
- Functional test
- Record and schedule
Recommended replacement intervals for hoses, valves, and fixtures
Many components wear predictably over time, so establishing clear replacement intervals for hoses, valves, and fixtures reduces leak risk and limits damage.
Recommend replacing flexible supply hoses every 5–7 years, shutoff valves every 10–15 years or upon stiffness/leakage, and frequently used fixtures (faucets, shower valves) every 10–20 years depending on wear.
Prioritize visible corrosion, mineral buildup, or performance decline for earlier replacement.
Winterizing pipes and protecting against freezing
Prepare for cold months by winterizing exposed and vulnerable piping to prevent freezing and burst-related leaks.
Insulate pipes with foam sleeves or heat tape, seal gaps where cold air enters, drain and shut off outdoor faucets, and move indoor hoses.
Maintain a low thermostat, open cabinet doors to circulate warm air around plumbing, and schedule professional inspection for vulnerable or poorly insulated systems.
Upgrading shut-off valves and installing water-sensing shutoffs
Upgrade aging shut-off valves and add water-sensing shutoffs to reduce leak frequency and limit damage when failures occur.
Replace corroded or unreliable valves with ball-style shutoffs for quick, reliable isolation.
Install water sensors with automatic shutoff modules near appliances, under sinks, and in basements.
Test monthly, maintain batteries, and integrate with home automation or a plumber’s contact for rapid response and repairs.
Assessing and Documenting Damage for Insurance
After stopping the leak, the homeowner should immediately document the scene with dated photos, videos, and notes on times and affected areas.
Insurance companies typically require proof of cause, extent of damage, and any receipts or contact information for emergency services.
The policyholder should also record temporary mitigation steps taken—such as tarping, water extraction, or shutting off utilities—to show reasonable efforts to prevent further loss before repairs.
Steps to document the leak and water damage (photos, timestamps)
A clear, time-stamped visual record is the foundation of any insurance claim.
Photograph the leak source, affected areas, and close-ups of damage from multiple angles. Include a visible clock or use device timestamps.
Capture before-and-after shots of mitigation steps. Log dates, times, locations, and brief captions for each image.
Back up files to cloud storage immediately.
What information insurers typically require
With a time-stamped visual record in place, the next step is to collect the specific details insurers typically request to process a water-damage claim.
Include policy number, incident date and time, cause and location of leak, inventory of damaged items with approximate values, photos and videos, repair estimates or contractor contact, mitigation actions taken, and any relevant receipts or prior maintenance records to support the claim.
Temporary mitigation actions insurers expect before repairs
Begin emergency measures immediately to prevent further loss and show insurers that reasonable mitigation was taken.
The homeowner should shut off water, remove standing water, place buckets and towels, and move valuables to dry areas.
Photograph damage and temporary measures, document times and actions, keep receipts for supplies, and record contractor or mitigation service contacts.
Prompt, documented steps support claims and limit loss.
Cost and Time Estimates for Common Emergency Fixes
The section compares typical DIY and professional emergency repair times and costs to help homeowners decide when to act themselves or call help. Below is a quick reference table summarizing common fixes, estimated DIY time/cost, and typical professional time/cost. Use these ranges as a starting point; actual figures depend on location and damage severity.
| Repair | DIY time / cost | Pro time / cost |
|---|---|---|
| Shutoff valve replacement | 30–90 min / $10–$50 | 30–60 min / $100–$300 |
| Pipe patch (temporary) | 10–45 min / $5–$30 | 15–60 min / $75–$250 |
| Small leak solder/repair | 45–120 min / $15–$100 | 60–180 min / $150–$400 |
Typical DIY emergency repair times and costs
Efficiency matters during a leak, so homeowners benefit from clear expectations about how long common fixes take and what they cost.
Typical DIY tasks:
- tightening a fitting or replacing a washer—15–30 minutes, $0–$10;
- patching a small copper pinhole—30–60 minutes, $5–$20;
- applying epoxy or clamp—15–45 minutes, $10–40;
- replacing a simple valve—45–90 minutes, $20–60.
Typical professional repair times and costs
Professional plumbers typically resolve emergency leaks faster and with higher material and labor costs than DIY attempts, reflecting travel, expertise, and after-hours premiums.
Typical response and repair range from 1–3 hours for simple fixtures ($150–$400) to 3–6+ hours for hidden pipe work or slab repairs ($500–$2,500+).
Estimates vary by region, complexity, parts and required permits.
Practical Safety Tips While Handling a Leak
When addressing a water leak, attention to safety is paramount: keep power sources off and watch for slippery floors to prevent electrical shock and falls.
Hot water leaks require caution to avoid scalding, using insulated gloves or shutting the hot supply before intervening.
After exposure, wear protective gear, dry and disinfect affected areas, and launder or discard contaminated clothing.
Avoiding electrical hazards and slippery surfaces
Cut power to affected areas and clear the floor before attempting repairs to minimize risk from energized circuits and slippery surfaces.
The responder should unplug devices, switch off breakers if uncertain, and cordon off wet zones.
Use nonconductive footwear and insulated tools, place absorbent mats or towels to control pooling, and guarantee adequate lighting and ventilation until the leak is contained and surfaces are dry.
Safe handling of hot water leaks and scald risk
After addressing electrical hazards and slippery floors, attention must turn to hot water leaks, which present a serious scald risk.
The individual should stop water at the nearest valve, avoid direct contact with escaping steam or water, and use thick towels or insulated gloves to redirect flow.
Cool affected skin with lukewarm water for at least 10 minutes and seek medical help for severe burns.
Protective gear and sanitation after water exposure
Put on appropriate protective gear before handling any contaminated water to reduce injury and illness risk.
The responder should wear gloves, eye protection, and waterproof boots; consider a respirator if mold or sewage is present.
After exposure, remove and bag contaminated clothing, wash skin with soap and clean water, disinfect affected areas, and launder garments on hot cycle.
Seek medical attention for wounds or symptoms.
Conclusion
In urgent moments, one can act decisively: shutting water at the fixture or main, applying a temporary patch, and calling a professional stabilizes the situation quickly. If someone worries temporary fixes will cause hidden harm, they should note that these measures are designed to limit immediate damage and buy time for a qualified repair without worsening the problem. Following basic safety steps and documenting the scene preserves claims and guarantees efficient permanent restoration.