How to Fix a Geyser Pipe: Step-by-Step Repair Guide for Leaks and Bursts
To fix a geyser pipe leak or burst, first, isolate the power and water supply. Assess potential hazards, including hot water and pressure. Look for signs of corrosion, moisture, and temperature changes to pinpoint leaks. Use basic tools like wrenches, PTFE tape, epoxy putty, and clamps. For minor leaks, apply temporary rubber patches or epoxy. For a permanent solution, drain the system, cut out the damaged section, and replace it with matching pipe and fittings. Slowly re-pressurize and test for leaks. Regular maintenance will help prevent future issues. Further steps below detail comprehensive repair and testing procedures.
What to know before you start repairing a geyser pipe
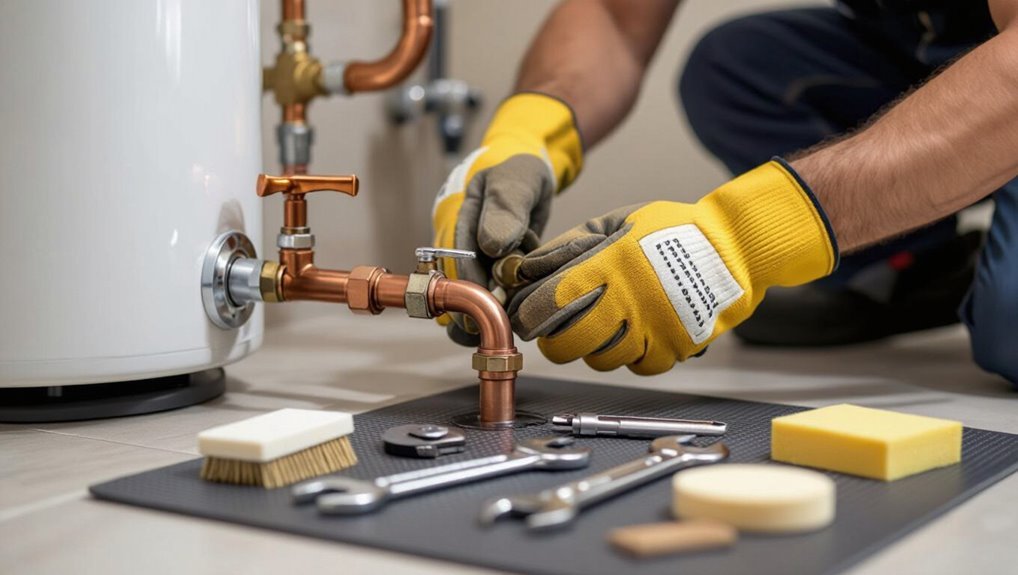
Before attempting repairs, the reader should understand common causes of geyser pipe leaks and bursts, such as corrosion, frozen lines, and pressure faults.
Clear safety precautions and appropriate personal protective equipment must be observed, and the limits of DIY work versus when to call a professional should be considered.
Additionally, any required permits and local regulations that apply to plumbing or gas work must be checked beforehand.
Common causes of geyser pipe leaks and bursts
Several frequent causes contribute to geyser pipe leaks and bursts, and recognizing them quickly helps target repairs correctly.
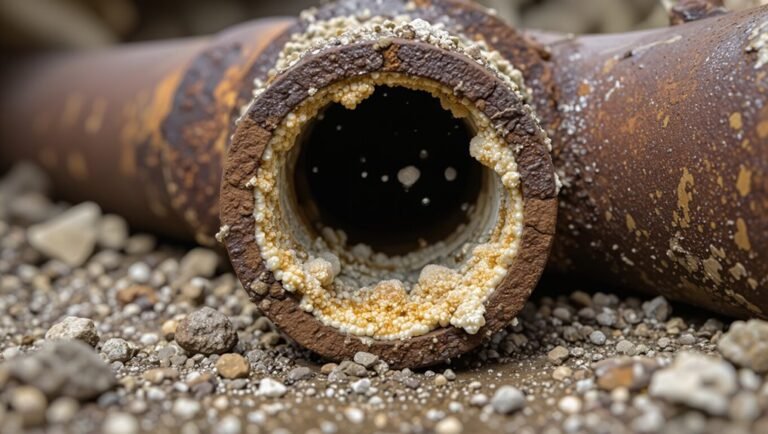
Corrosion from mineral-rich water, thermal expansion stressing joints, frozen pipes cracking in cold climates, poor installation or inadequate fittings, and mechanical damage from impact or settling are common.
Identifying the cause guides how to fix a geyser pipe effectively and prevents recurrence.
Safety precautions and personal protective equipment
Recognizing the cause of a geyser pipe failure guides the repair approach, but attention to safety measures and proper personal protective equipment (PPE) is the immediate priority to prevent injury and further damage.
Assess hazards: hot water, steam, sharp metal, pressurized lines, electrical connections.
Wear insulated gloves, splash goggles, long sleeves, sturdy footwear.
Isolate power and water, vent pressure, work with adequate lighting and ventilation.
When to call a professional vs. DIY limits
When should a homeowner attempt a geyser pipe repair and when is a professional required?
Simple leaks, accessible joints, and basic valve replacements suit competent DIYers with proper PPE and tools.
Major bursts, inaccessible piping, boiler connections, persistent pressure issues, or uncertain diagnostics require licensed plumbers.
If gas, electrical, structural risk, or warranty concerns exist, contact a qualified professional immediately.
Required permits and local regulations (if applicable)
Before starting any repair, homeowners should verify local plumbing and building codes and confirm whether a permit is required, since jurisdictions commonly regulate work on water heaters, gas lines, and structural penetrations.
Failure to obtain permits can void warranties and incur fines.
Check permit timelines, inspection requirements, and licensed contractor rules.
When unsure, contact the local building department for guidance and documentation.
Tools and materials checklist
A concise list of tools and materials helps guarantee repairs proceed efficiently and safely.
This section outlines essential diagnostic and repair tools, common replacement parts for temporary and permanent fixes, and recommended sealants, tapes, and fittings with brief notes on their uses.
Readers can use the checklist to gather items before beginning work.
Essential tools for diagnosing and repairing leaks
Gathering the right tools guarantees accurate diagnosis and efficient repair of geyser pipe leaks.
Inspection and repair require safe, precise instruments to find sources, assess damage, and execute temporary or permanent fixes without discussing replacement parts.
- Adjustable wrench, pipe wrench
- Leak detector spray, flashlight
- Pressure gauge, multimeter
- Pipe cutter, deburring tool
Replacement parts and materials for temporary and permanent fixes
Several specific replacement parts and materials are essential for both temporary and permanent geyser pipe repairs, ensuring each intervention addresses the leak type and system pressure.
Recommended items include spare pipe sections, couplings, compression fittings, and pressure-rated valves. Use corrosion-resistant metals and appropriate plastic grades.
Keep clamps and emergency sleeves for short-term stops; full replacements require matching diameter and pressure ratings.
- Spare pipe sections
- Couplings
- Compression fittings
- Pressure-rated valves
Recommended sealants, tapes, and fittings with brief use cases
Following the list of spare parts and valves, the tools and consumables that seal joints and stop leaks are outlined next.
Recommended items and uses follow:
- PTFE tape — for threaded joints; quick sealing of water lines.
- Plumber’s epoxy putty — for small pinhole repairs; cures underwater.
- Silicone sealant — for flange and gasket sealing; flexible waterproof bonds.
- Compression fittings — for permanent, solder-free joins on copper/PEX.
How to locate the leak or burst in a geyser system
The practitioner begins with a systematic visual inspection of pipes, valves, and connections to spot corrosion, drips, or wet stains.
Next, pressure and temperature checks are used to reveal hidden leaks, while listening and moisture-detection techniques help locate less obvious breaches.
If the source remains unclear, isolating sections of the system one at a time narrows the problem to a specific segment.
Visual inspection steps for pipes, valves, and connections
When inspecting a geyser system for leaks or bursts, begin with a systematic visual sweep of accessible pipes, valves, and connections to identify obvious moisture, corrosion, or deformation.
Check joints, unions, and fittings for hairline cracks, mineral buildup, or loose clamps.
Examine valve bodies and drainpipes for wetness, rust streaks, or bulges.
Note exact locations, severity, and surrounding discoloration for repair planning.
Pressure and temperature checks to identify hidden leaks
Begin by isolating the geyser and recording static system pressure and water temperature at multiple points—near the inlet, outlet, and at any accessible service valves—to establish a baseline for comparison.
Monitor for pressure decay over time and temperature discrepancies indicating flow loss.
Compare readings under closed and open circuits, and after short-duration draws, to pinpoint sections with abnormal drops suggesting hidden leaks or ruptures.
Using listening and moisture-detection techniques
Following pressure and temperature checks, technicians move on to active detection methods that reveal the leak location through sound and moisture signatures.
They use acoustic amplifiers and electronic leak detectors to listen for hissing or dripping in walls and along pipe runs.
Complementary tools include moisture meters and thermal cameras to map dampness and cold spots, confirming leak positions for targeted repair without unnecessary demolition.
Isolating sections of the system to pinpoint the problem
A systematic isolation of pipe segments narrows the search area by eliminating portions of the geyser system that are confirmed sound.
Valves are closed sequentially, zones tested for pressure loss, and fixtures inspected. Observing pressure gauges and listening downstream locates the failing section.
Once isolated, access panels are opened and targeted repairs or temporary clamps are applied before full system restoration.
Step-by-step temporary repairs for leaking geyser pipes
First, the person guarantees power and water to the geyser are safely shut off before attempting any repair.
Next, they select an appropriate temporary fix—clamping with a rubber patch, molding epoxy putty for hairline cracks, or tightly wrapping silicone or self-fusing tape—applied directly to the leak.
Finally, the repair is tested under low pressure and monitored closely until a permanent replacement can be arranged.
How to safely shut off power and water supply
Before attempting any repairs, the homeowner must cut power to the geyser and isolate its water supply to prevent electric shock and flooding.
Turn off the dedicated circuit breaker or unplug electric heaters; verify with a non-contact voltage tester.
Close the cold-water shutoff valve feeding the geyser, and open a hot faucet to relieve pressure.
Confirm no power and no incoming water before proceeding.
Applying a temporary clamp or rubber patch
With power and water confirmed off, the homeowner can move on to a temporary seal to stop the leak and buy time for a permanent repair.
Clean and dry the pipe, position a rubber patch or rubber piece over the hole, and secure it with a stainless steel hose clamp or pipe repair clamp tightened evenly.
Monitor for continued dripping and schedule permanent replacement.
Using epoxy putty for hairline cracks
Mix epoxy putty to a uniform color and press it firmly over the cleaned, dry hairline crack, creating a smooth, slightly overlapping seal that cures into a hard, water-resistant patch.
Allow full cure per manufacturer instructions, then test under low pressure.
Epoxy adheres best to metal and properly prepped surfaces; remove corrosion, oil, and moisture first.
Use only as a temporary repair before permanent replacement.
Wrapping with silicone/self-fusing tape for quick stops
After applying epoxy putty for a small crack, a quicker stop can be achieved by wrapping the leak area with silicone or self-fusing tape.
The technician stretches and overlaps tape tightly, starting beyond wet edges, maintaining pressure to activate fusion. Multiple layers increase strength; smooth out air gaps.
This method is temporary, suitable for small leaks until proper replacement or professional repair is performed.
Testing the temporary repair and monitoring
Begin by pressurizing the repaired section and observing for leaks: slowly restore water flow or turn the heater on to normal operating pressure, then inspect the wrap and surrounding joints for drips, seepage, or softening of the tape.
Maintain pressure for several minutes, then lower and recheck after cooling. Monitor hourly for 24 hours, documenting any deterioration and planning permanent repair if leakage recurs.
Step-by-step permanent repair and replacement procedures
The next section outlines permanent repair and replacement procedures beginning with identification of pipe materials (copper, CPVC, PEX, galvanized) and connection types to determine appropriate methods.
It then covers safety steps to drain and depressurize the geyser and piping before removing the damaged section.
Finally, clear instructions are provided for preparing and joining pipes: cutting and soldering copper, and cutting, priming, and solvent-welding CPVC.
Assessing pipe material (copper, CPVC, PEX, galvanized) and connection types
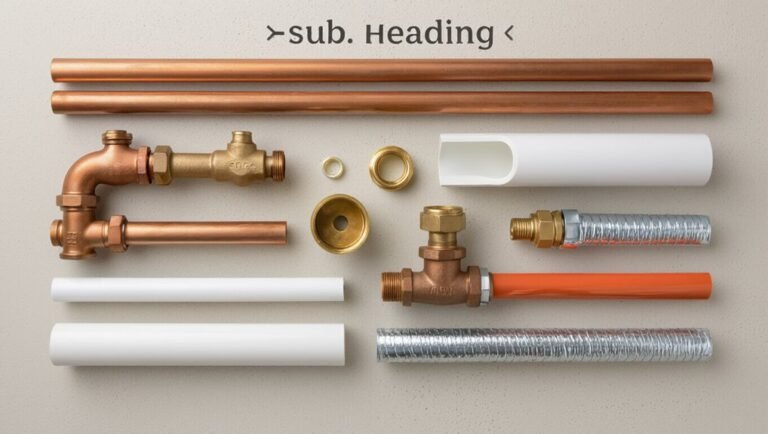
A clear identification of pipe material and connection type guides every permanent repair or replacement decision; copper, CPVC, PEX, and galvanized steel each demand different tools, fittings, and procedures.
The inspector notes wall thickness, color, markings, and joint style—soldered, compression, solvent-weld, crimp, or threaded.
Match replacement materials, compatible fittings, and appropriate joining methods to guarantee code compliance and long-term integrity.
Draining and depressurizing the geyser and piping system
Shut off the cold-water supply and the unit’s power source, then confirm pressure has been relieved before opening any fittings; this prevents scalding, water damage, and accidental activation during repairs.
Drain the tank via the drain valve into a suitable container or hose, open hot taps to vent lines, and bleed residual pressure at the highest and lowest points.
Verify zero pressure with a gauge.
Removing damaged pipe section safely
With the system depressurized and drained, proceed to isolate and remove the damaged pipe section methodically.
Inspect adjoining fittings, loosen clamps or unions, and cut back to sound metal or plastic.
Support adjacent pipe to prevent stress.
Deburr edges, collect and dispose of debris, and clean surrounding area.
Verify no hidden damage before fitting replacement components and restoring system integrity per manufacturer guidelines.
Cutting and preparing pipes and fittings for copper (soldering) repairs
Begin by marking and measuring the prepared pipe ends and fittings to verify exact cuts and proper joint spacing for capillary flow. Use a square-cut pipe cutter for copper, remove burrs with a reamer or fine file, and clean mating surfaces with abrasive cloth or a wire brush until bright metal is visible to secure reliable solder adhesion.
Flux is applied sparingly, parts assembled dry-fit, and reheated for even solder flow.
Cutting and joining CPVC pipes (primer, solvent cement) procedure
Prepare to cut and join CPVC by gathering the correct-size pipe cutter or fine-toothed saw, CPVC primer, solvent cement, appropriate fittings, and safety gear (gloves, eye protection).
Measure and mark; squarely cut and deburr.
Dry-fit components, apply primer to pipe and fitting sockets, then coat with solvent cement.
Insert fully with a quarter-turn, hold for recommended set time, wipe excess, and allow cure before pressure testing.
Installing PEX using crimp or push-fit connectors
Installers should choose between crimp and push-fit connectors based on access, permanence, and available tools; crimp rings with copper or stainless-steel fittings require a crimp tool and guarantee a durable mechanical seal.
On the other hand, push-fit fittings offer faster installation and are useful in tight spaces but may be bulkier.
Measure, cut squarely, deburr, slide ring or insert fully, crimp or seat to manufacturer spec, and pressure-test.
Replacing valves, unions, and fittings correctly
Shut off water and drain the line before removing any component, then verify the supply is isolated with a pressure gauge or by loosening a downstream fitting to confirm no flow.
Remove damaged valve or union, clean mating surfaces, replace seals and use correct-rated fittings.
Apply thread sealant or tape where specified, torque to manufacturer specs, support piping to prevent stress, and confirm alignment before restoring service.
Re-pressurizing, bleeding air, and leak-testing the repair
With valves replaced, unions tightened, and fittings torqued to spec, the system may be slowly re-pressurized to restore normal service while controlling air and verifying seals.
Open inlet gradually, watch pressure gauge; crack high points or built-in bleeds to purge trapped air.
Inspect all joints under working pressure for leaks.
Hold pressurization for several minutes, re-check, then document results and restore normal operation.
Dealing with burst pipes and major failures
When a geyser pipe bursts or a major failure occurs, immediate shutdown and isolation of the water and power supply limit flooding and electrical hazards.
Temporary bypasses or rerouted lines can restore limited service while containment and drying measures reduce further damage.
If the tank or core components are compromised beyond repair, full replacement or a system overhaul should be arranged promptly.
Emergency shutdown and mitigation to prevent water damage
Act quickly to isolate the problem and minimize water damage: immediately turn off the main water supply to the geyser using the isolation valve or building shutoff, then cut power to the unit to prevent electrical hazards.
Drain remaining hot water via a safe drain point, contain leaks with buckets and towels, clear electronics, document damage for repairs, and contact a qualified plumber for assessment and permanent fixes.
Temporary bypass and rerouting options
After isolating the main supply and securing the area, attention turns to temporary bypass and rerouting options to maintain water service or safely divert flow around the damaged section.
- Install a temporary hose or flex pipe between intact fittings.
- Use a saddle valve or clamp-on bypass.
- Reroute with PEX tubing and push-fit connectors.
- Employ isolation valves to segment and control flow.
When tank replacement or major system overhaul is necessary
In cases of catastrophic failure—such as a burst tank, widespread corrosion, or multiple compromised joints—replacement of the geyser tank or a thorough system overhaul becomes the prudent course.
Assessment should confirm the extent of damage, safety risks, and whether patching would be temporary or untenable. A full replacement restores reliability, updates safety controls, eliminates hidden defects, and often reduces long-term costs versus repeated repairs.
Testing, validation, and safety checks after repair
After repairs are completed, the technician performs pressure testing within acceptable ranges and monitors for hidden leaks and signs of thermal expansion.
They verify temperature controls and confirm proper operation of the TP relief valve.
All tests, observations, and parts used are documented for future maintenance.
Pressure testing methods and acceptable ranges
Begin pressure testing by isolating the repaired section and applying a measured, controlled test pressure using an appropriate gauge and pump to verify integrity.
Maintain test pressure for a specified dwell time (typically 10–30 minutes) while monitoring for drops.
Acceptable ranges: pressure should match system rating or slightly below (commonly 1.5–2.0 bar for domestic geysers); any decay indicates faulty repair requiring rework.
Inspecting for hidden leaks and thermal expansion issues
Technicians should conduct a focused inspection for concealed leaks and thermal expansion effects once visible repairs pass pressure testing.
They examine joints, fittings, insulation and surrounding structures for moisture, corrosion stains, or soft spots.
Thermal expansion is assessed by checking pipe movement, expansion loops, and anchor integrity.
Any detected issues prompt corrective measures—additional supports, expansion devices, or resealing—followed by retesting.
Verifying temperature controls, TP (temperature-pressure) relief valve function
Once hidden leaks and expansion issues are resolved and the system holds pressure, attention shifts to temperature control settings and the TP (temperature‑pressure) relief valve to confirm safe operation.
Test thermostat accuracy, set maximum temperature to recommended limits, and verify differential cut‑in/out.
Manually lift the TP valve to confirm discharge and reseating.
Monitor for leaks, abnormal noises, and stable pressure during a heat cycle.
Documenting repairs and parts used for future maintenance
After completing tests and safety checks, a clear, concise record of all repairs and parts used must be created to support future maintenance and liability claims.
The technician documents dates, serial numbers, part specifications, torque/settings, applied sealants, and test results.
Photographs of affected areas and before/after conditions are attached.
Signatures, contact details, warranty information, and recommended inspection intervals complete the maintenance log.
Preventive maintenance to avoid future geyser pipe problems
A concise preventive maintenance plan helps minimize recurrence of geyser pipe problems by combining routine inspections, water quality controls, and targeted hardware upgrades.
Inspections follow a checklist for leaks, corrosion, and pressure anomalies while water treatment reduces scaling and corrosive elements.
Where needed, installing expansion vessels, pressure regulators, or modernized components is recommended for older systems.
Regular inspection schedule and checklist
Because small leaks and corrosion often start unnoticed, establishing a regular inspection schedule is essential to catch problems early and extend the life of geyser pipes.
Inspect quarterly, document findings, and act on anomalies. Focus on joints, valves, insulation, and signs of moisture.
Replace compromised components promptly to prevent escalation.
- Check joints and fittings
- Test pressure relief valve
- Inspect insulation and mounts
- Note corrosion or dampness
Water quality measures to reduce corrosion and scaling
While water chemistry often goes unnoticed, controlling hardness, dissolved oxygen, and pH is essential to reduce corrosion and scale in geyser pipes.
Water softening, corrosion inhibitors, and pH adjustment minimize mineral deposits and metal degradation.
Regular testing identifies trends; targeted treatments—ion exchange, sequestrants, or buffering—extend component life.
Flushing and descaling schedules complement chemical control to maintain efficient, reliable hot-water delivery.
Installing expansion vessels and pressure regulators
Having controlled water chemistry to limit corrosion and scale, attention turns to managing pressure changes that can damage geyser pipes.
Install a correctly sized expansion vessel near the tank to absorb thermal expansion and prevent backflow.
Add a pressure regulator on the incoming supply to maintain safe static pressure.
Test relief valves and inspect fittings routinely to guarantee system reliability and prevent future failures.
Recommended upgrades for older systems
Older systems benefit from targeted upgrades that reduce stress on geyser pipes and extend service life.
Recommended improvements include installing expansion vessels, pressure-reducing valves, and corrosion-resistant pipe sections.
Insulating hot-water lines, fitting sacrificial anodes, and replacing worn fittings also help.
Periodic flushing and adding accessible isolation valves simplify maintenance.
These measures lower failure risk and improve overall system reliability.
Cost considerations and choosing replacement options
Cost decisions balance immediate outlay against expected lifespan and reliability.
Typical DIY fixes often cost less upfront but may use shorter-lived materials, while professional work raises labor costs but can extend longevity with higher-grade pipes.
Homeowners should compare material lifespans and scrutinize warranties, labor guarantees, and parts coverage when selecting a contractor.
Typical costs for DIY vs professional repairs
Repair decisions often hinge on price: DIY fixes for a damaged geyser pipe typically range from minimal—under $50 for common parts like connectors and sealant—to a few hundred dollars if tools or replacement sections are needed, while professional repairs commonly start around $150–$300 for a simple leak and can exceed $600 when access, labor, or tank work is required.
| Option | Feeling |
|---|---|
| DIY | Empowered, anxious |
| Pro | Relieved, costly |
| Hybrid | Balanced, cautious |
Longevity comparison of common pipe materials
Material choice heavily influences a geyser pipe’s lifespan, with common options like copper, CPVC, PEX, and galvanized steel offering distinct durability profiles and cost implications. Copper and PEX balance longevity and moderate cost; CPVC is inexpensive but less heat-resistant; galvanized corrodes faster, raising replacement frequency. Selection depends on budget, local water chemistry, and expected service life.
| Material | Typical lifespan |
|---|---|
| Copper | 50+ years |
| PEX/CPVC | 20–40 years |
How to evaluate warranty, labor, and parts when hiring a contractor
Having selected an appropriate pipe material based on lifespan and local conditions, the homeowner should next assess warranty coverage, labor charges, and parts pricing when hiring a contractor.
Verify written warranties for parts and workmanship, confirm labor hourly rates versus flat fees, request itemized estimates, compare parts brands and markups, check contractor license and references, and document all guarantees before work begins.
Troubleshooting common issues after repair
After repairs, the guide addresses persistent small leaks by identifying common root causes and their targeted fixes.
It then covers loss of hot water or reduced pressure following a repair and the diagnostic steps to restore proper function.
Finally, it explains signs of recurring corrosion and when individual components should be replaced rather than patched.
Persistent small leaks root causes and fixes
Persistent small leaks after a repair often stem from incomplete sealing, mismatched fittings, thermal expansion, or residual corrosion.
Diagnosing the exact cause requires a systematic inspection of joints, valves, and surrounding pipe sections to pinpoint the leak source and its mechanism.
Remedies include retightening or re-sealing joints, replacing incompatible fittings, adding expansion loops or sleeves, and cutting out corroded segments for proper replacement.
No hot water or pressure loss after repair
Diagnose no hot water or pressure loss by systematically checking both supply and fixture-side components: confirm the main shutoff and unit valves are fully open, inspect inlet and outlet fittings for blockages or trapped air, verify the temperature/pressure relief and mixing valves are functioning, and test water pressure at multiple points to distinguish a localized restriction from a broader supply issue.
If isolated, flush lines, bleed air, reseat connectors, and retest.
Corrosion recurrence and when to replace system components
Once supply and fixture-side checks confirm that flow and temperature issues are resolved, attention should turn to corrosion recurrence and the point at which parts should be replaced.
Inspect anode rods, sacrificial fittings, valves, and pipe joints for pitting or scale.
If corrosion compromises structural integrity, causes repeated leaks, or accelerates after patching, schedule component replacement rather than repeat repairs.
Regular monitoring prevents failures.
Real-world repair scenarios and examples
The article presents three practical repair scenarios to illustrate common geyser pipe failures and responses.
First, a step‑by‑step fix for a small hairline leak in a copper pipe is outlined.
Next, a behind‑wall burst PEX replacement strategy and a diagnostic/resolution workflow for a repeatedly leaking temperature‑pressure valve are summarized.
Case: small hairline leak in copper pipe step-by-step
A small hairline leak in a copper geyser pipe can often be repaired quickly with basic tools and materials; the following step-by-step example outlines a practical, safety-minded approach that prioritizes shutting off water and isolating the damaged section before any cutting or soldering occurs.
Drain and dry the line, clean nearby copper, apply flux and solder or use a compression sleeve, pressure-test, then insulate and monitor.
Case: burst PEX line behind wall access and replacement strategy
Addressing a burst PEX line behind a wall access begins with establishing a safe work area and confirming the shutoff to isolate the affected circuit.
The technician inspects damage via the access panel, cuts back to sound PEX, deburrs, and fits a new section using push-fit or crimp fittings.
Pressure-test, secure supports, and restore wall finishes after leak-free verification.
Case: faulty TP valve causing repeated leaks diagnosis and resolution
Several common scenarios reveal a faulty temperature-pressure (TP) relief valve as the source of repeated leaks: relief discharge that continues after the water heater is isolated, wetness concentrated near the valve body, or intermittent drips tied to pressure spikes.
Diagnosis involves isolating inlet, lifting test lever, and checking for seat failure or corrosion.
Resolution requires replacing the TP valve, testing at rated pressure, and restoring safe operation.
Conclusion
In conclusion, timely, informed response to geyser pipe failures greatly reduces damage and cost. One interesting statistic underscores this: studies indicate that nearly 40% of household water damage incidents stem from aging pipes and fittings—meaning proactive inspection and maintenance could prevent a large share of emergencies. By following clear diagnostic steps, applying appropriate temporary fixes, and executing durable replacements when needed, homeowners markedly lower risk, expense, and disruption from leaks or bursts.