How to Use CPVC Pipe: Step-by-Step Guide for Cutting, Joining, and Installing
To effectively use CPVC pipe for your plumbing projects, follow these essential steps: Gather the necessary tools, including ratcheting cutters or fine saws, deburring tools, CPVC primer and solvent cement, supports, and safety gear. Begin by measuring and making square cuts on the pipe. Deburr the edges and perform a dry fit before proceeding with solvent welding, push-fit, or threaded fittings. Allow adequate curing time, install supports to accommodate thermal expansion, and conduct a pressure test to check for leaks. Refer to the detailed step-by-step cutting, joining, and troubleshooting guidance for a successful installation.
What CPVC Pipe Is and When to Use It
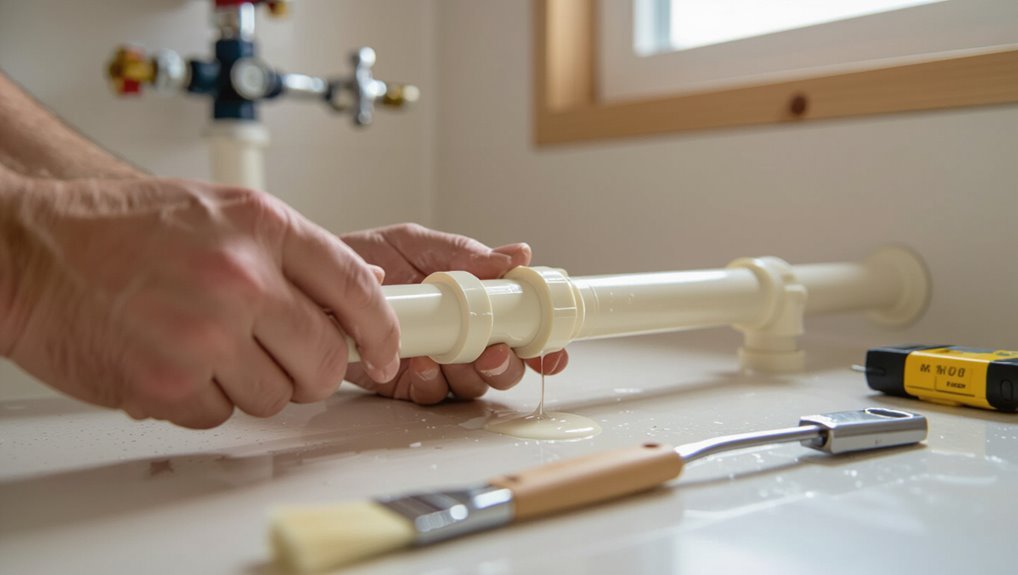
CPVC is a chlorinated thermoplastic valued for its higher temperature and chemical resistance compared with PVC, with specific limits and installation requirements that affect suitability.
It is commonly used for hot- and cold-water distribution in residential and commercial settings, but its advantages and limitations versus PVC, PEX, and copper — including cost, durability, joining methods, and corrosion behavior — should be weighed.
Selection must also account for applicable building codes, fire ratings, and safety considerations such as pressure/temperature ratings and approved solvent cements.
Chemical and temperature properties of CPVC
Resistant to a wide range of common household chemicals and capable of withstanding higher temperatures than standard PVC, chlorinated polyvinyl chloride (CPVC) is engineered for hot- and cold-water distribution where chemical exposure or elevated heat are concerns.
Its heat-deflection temperature, improved chlorine resistance, and altered polymer structure allow reliable service up to about 200°F.
Installers learning how to use cpvc pipe 2 note compatibility limits and solvent-cement specifications.
Common residential and commercial applications
A durable thermoplastic developed for hot- and cold-water systems, chlorinated polyvinyl chloride (CPVC) is commonly used in both residential and commercial plumbing where higher temperature tolerance and chemical resistance are required.
Typical residential uses include domestic hot water lines, branch distribution, and recirculation loops.
Commercial uses encompass potable water mains, boiler makeup lines, and corrosion-resistant chemical transport in light industrial or institutional facilities.
Advantages and limitations compared with PVC, PEX, and copper
Although often compared with PVC, PEX, and copper for similar plumbing roles, chlorinated polyvinyl chloride stands out for its higher temperature tolerance and improved chemical resistance while balancing cost and ease of installation.
CPVC resists corrosion better than copper, handles hotter water than PVC, and is stiffer than PEX; limitations include lower flexibility, solvent-weld joint requirements, and reduced UV resistance compared to alternatives.
Building code and safety considerations
Having compared CPVC with PVC, PEX, and copper for performance and installation, attention must turn to the building code and safety rules that govern its use.
Local plumbing codes dictate approved applications, temperature and pressure limits, and required fittings.
Installers must follow manufacturer instructions, maintain proper clearances from heat sources, use flame-safe joining methods, and adhere to inspection and labeling requirements for compliance.
Tools, Materials, and Safety Gear Needed
The section lists the essential tools for cutting, deburring, and joining CPVC—tube cutters, fine-tooth saws, and reamers—along with the appropriate solvent cement, primer, and compatible fittings.
It also covers measurement and marking tools, clamps and supports, recommended spare parts, and a basic troubleshooting kit.
Safety guidance includes required personal protective equipment and ventilation measures when handling primers and cements.
Essential tools for cutting and joining (cutters, saws, deburring tools)
A few basic tools make cutting and joining CPVC pipe efficient and reliable: a quality ratcheting cutter or PVC-specific hack saw for straight cuts, a deburring tool or round file to remove burrs and chamfer edges, and a solvent-weld primer/ cement applicator for clean joints.
Additional useful items include measuring tape, a marker, clamp or vise, and safety gloves and eye protection.
Solvent cement, primers, and compatible fittings
After cutting and preparing pipe ends, attention turns to the solvent cements, primers, and fittings that create permanent CPVC joints.
Use CPVC-specific primer to clean and soften surfaces, then apply matching solvent cement evenly.
Select compatible fittings—CPVC socket, threaded, or junction types—and verify pressure and temperature ratings.
Wear chemical-resistant gloves and eye protection; work in ventilation to avoid fumes and guarantee proper bonding.
Measurement, marking, and support hardware
Several precise measurements and clear markings confirm CPVC runs fit accurately and remain supported over time.
A tape measure, carpenter’s square, and deburring tool assure straight cuts and clean ends. Permanent marker or scribe marks cut locations and alignment.
Use appropriately sized pipe straps, cushioned clamps, hangers, and anchor screws placed per code spacing to prevent sagging and thermal movement.
Personal protective equipment and ventilation requirements
Moving from layout and support considerations to on-site safety, appropriate personal protective equipment (PPE) and ventilation are required to protect installers from mechanical hazards and fumes produced during cutting and solvent welding of CPVC.
Required PPE includes safety glasses, cut-resistant gloves, hearing protection, and long sleeves.
Use local exhaust or cross-ventilation; respirators with organic vapor cartridges are recommended where ventilation is insufficient.
Recommended spare parts and troubleshooting kit
A compact troubleshooting kit and a small selection of spare parts guarantee quick repairs and minimize downtime on CPVC installations.
Technicians should carry essential spares and diagnostic items to address leaks, joint failures, and fittings issues promptly.
- Spare CPVC pipe segments and couplings
- Assortment of elbows, tees, adapters
- Primer and solvent cement
- Pipe cutter and deburring tool
- Leak sealant and replacement O-rings
Preparing CPVC Pipe and Work Area
Before cutting or cementing, the installer inspects CPVC pipes and fittings for cracks, deformities, or manufacturing defects.
Measurements and marks are made to plan runs that minimize joints, and existing plumbing is supported or clamped to prevent movement during work.
Mating surfaces are cleaned and dried so connections are free of debris, oil, and moisture before assembly.
Inspecting pipe and fittings for defects
Inspecting CPVC pipe and fittings for defects guarantees a reliable, leak-free system and prevents wasted time during installation.
The installer visually and tactilely examines each piece for cracks, crazing, warping, discoloration, or extrusion marks.
Check socket and spigot dimensions for uniformity, verify ends are square and clean, and reject any component showing damage, contamination, or signs of chemical attack before assembly.
Measuring, marking, and planning runs for minimal joints
Measure each run carefully and mark cutting points so the layout minimizes joints and fittings while maintaining proper slopes and clearances.
Plan straight, continuous lengths to reduce joints; cluster necessary fittings near access points.
Account for thermal expansion, service clearances, and fixture locations.
Record measurements on a diagram, double-check dimensions, and dry-fit sections before cutting to confirm alignment and minimize rework.
Supporting and securing existing plumbing before modifications
Secure existing plumbing firmly and isolate adjacent systems to prevent movement, damage, or contamination during cutting and installation.
Temporary supports, straps, or blocking must be placed within recommended intervals to bear pipe weight and prevent sagging.
Shutoffs and drains should be used to relieve pressure and clear lines.
Label and protect nearby fixtures, electrical components, and finishes before beginning modifications.
Preparing mating surfaces and ensuring dry, clean conditions
With plumbing supported and adjacent systems isolated, preparations shift to the pipes and workspace to confirm reliable joints.
Surfaces are cut square, deburred, and chamfered; sockets and spigots are wiped with a clean, lint-free cloth.
Work areas must be dry and free of oil, dust, or chemicals.
Use appropriate cleaners and allow full evaporation before primer and cement application to guarantee secure bonding.
How to Cut CPVC Pipe Cleanly
Selecting the correct cutter for the pipe diameter and available access is the first step to a clean CPVC cut. A precise, steady cutting technique produces square ends, which are then deburred and chamfered to remove burrs and ease fitting.
For tight spaces or behind-wall cuts, use compact tools and measurement aids to maintain straight, verifiable cuts.
Choosing the right cutting tool for diameter and access
Because pipe diameter and workspace accessibility dictate cutting options, choosing the appropriate tool guarantees a straight, burr-free cut and simplifies subsequent fitting.
For small diameters and confined spaces, a mini tubing cutter or fine-toothed hacksaw excels. Larger pipes benefit from ratcheting PVC cutters or power reciprocating saws with fine blades.
Consider portability, blade access, and control to minimize deformation and debris.
Step-by-step cutting technique for straight cuts
Begin by measuring and marking the cut line precisely around the CPVC pipe using a pencil or felt-tip marker and a square or wrap-around guide; ensuring the mark is visible from multiple angles reduces the chance of an angled cut.
Secure the pipe in a vise or clamp with protective jaws, align the blade, and cut steadily with consistent pressure. Keep the saw perpendicular and inspect the cut for straightness.
Deburring, chamfering, and verifying square cuts
After confirming a straight cut, the next tasks are to remove burrs, add a slight chamfer to the outer edge, and verify the end is square to guarantee a reliable joint.
Use a deburring tool or utility knife to clean the inside and outside. Lightly chamfer about 15–30° on the OD.
Check squareness with a square or simple visual alignment before fitting.
Cutting in tight spaces and behind walls
When space is limited or pipes run behind walls, cutting CPVC cleanly requires compact tools, steady support, and clear access to the cut line; a compact hacksaw or ratcheting mini-saw with a fine-tooth blade, a tube cutter designed for small diameters, and a short pry bar or pushrod to stabilize the pipe will produce the best results.
Work slowly, mark cut location, use short strokes, protect surrounding finishes, deburr and square end before fitting.
Joining Methods for CPVC Pipe
The section outlines common joining methods for CPVC, including solvent welding, threaded and mechanical fittings, push-fit connectors, and connections to other materials.
It explains when solvent cement is appropriate and provides a concise step-by-step solvent welding procedure, plus guidance on using threaded or mechanical fittings and the advantages and installation steps for push-fit systems.
It also covers reliable techniques for joining CPVC to copper, PEX, and PVC to guarantee leak-free connections.
Solvent welding: when to use and compatibility
Solvent welding joins CPVC by chemically softening the mating surfaces and fusing them into a single, continuous piece, offering a reliable, leak-resistant connection when done correctly.
It is appropriate for permanent potable-water and fire-suppression systems where rated cement and matching fittings are specified.
Compatibility requires CPVC-specific solvent cement and primers; dissimilar plastics, improper grades, or incompatible primers must be avoided to prevent failures.
Step-by-step solvent cement joining process
Begin by preparing the joint area: cut CPVC pipe squarely, deburr and chamfer the outside edge, and clean both mating surfaces of dirt, grease, and moisture.
Apply primer if required, then a uniform coat of CPVC solvent cement to pipe exterior and fitting interior.
Immediately assemble with a quarter‑turn twist, hold alignment for specified set time, wipe excess, and allow full cure before pressure testing.
Threaded and mechanical fittings: when and how to use them
Following solvent‑welded joints, there are occasions when threaded or mechanical fittings provide a more appropriate solution for CPVC systems—such as for equipment connections, temporary assemblies, or where disassembly for maintenance is required.
Threaded fittings suit small‑diameter runs; use compatible CPVC or metal threads, apply PTFE tape sparingly, and avoid overtightening.
Mechanical couplings and unions allow alignment, vibration isolation, and straightforward replacement.
Push-fit fittings: advantages and installation steps
Push-fit fittings offer a quick, tool-free method for joining CPVC pipe, combining a polymer body, an elastomer O-ring, and stainless steel teeth to create a watertight, mechanically secure connection.
Advantages include speed, reusability, and suitability for tight spaces.
Installation: cut squarely, deburr, mark insertion depth, push firmly until seated, and test for leaks.
Follow manufacturer temperature and pressure limits.
Joining at transitions to other materials (copper, PEX, PVC)
Changes between CPVC and other piping materials—such as copper, PEX, or PVC—require compatible connectors and attention to differences in thermal expansion, chemical compatibility, and pressure ratings.
Changeover methods include solvent-weld adapters for PVC, brass or dielectric unions for copper, and specific CPVC-to-PEX fittings (crimp or push-fit).
Installers must follow manufacturer instructions, use correct seals or primers, and allow proper support and expansion spacing.
Detailed Step-by-Step Installation Guide
The installation guide outlines planning pipe layouts and sizing runs before any cutting or fitting begins.
It then covers installing straight runs, elbows, branches, and tees, plus proper spacing and mounting of supports and hangers.
Techniques for working around fixtures and valves and placing shutoff valves, unions, and service access points are presented to guarantee serviceability.
Planning the piping layout and sizing pipe runs
Starting with a clear plan, the installer evaluates fixture locations, water supply points, and required pipe routes to determine ideal layout and minimize fittings and unnecessary runs.
Next, flow demand calculations, pressure drop estimates, and code requirements guide pipe sizing. Short runs, balanced branch lengths, and accessible service zones are chosen to maintain adequate velocity, reduce noise, and simplify future maintenance.
Installing straight runs, elbows, branches, and tees
Begin each run by confirming the planned route, required pipe lengths, and clearance for fittings before cutting or fitting any pieces.
Cut squarely, deburr, and dry-fit sections. Mark solvent-weld locations, apply primer where required, then cement and insert pipe fully with a quarter-turn twist.
Fit elbows, tees, and branches ensuring correct orientation and slope.
Allow cure time before pressurizing the system.
Properly spacing and mounting supports and hangers
Install supports and hangers at intervals appropriate to pipe size, temperature exposure, and system layout to prevent sagging, stress on joints, and undue movement.
Use cushioned, non-reactive hangers and avoid rigid point contacts. Space supports per manufacturer guidelines, closer near fittings and long horizontal runs.
Allow for thermal expansion with sliding or spring hangers and secure to stable structural elements.
Techniques for working around fixtures and valves
When routing CPVC around fixtures and valves, plan the layout to maintain proper clearances, provide accessible shutoffs, and minimize joint count; this guarantees reliable operation and future serviceability.
Use measured bends, short stub-outs, and offset fittings to clear trim and structural elements. Support close to fixtures, avoid stress on connections, deburr cut ends, and test for leaks before closing walls or ceilings.
Installing shutoff valves, unions, and service access points
After planning routes around fixtures and fitting offset bends, attention turns to placing shutoff valves, unions, and access points to facilitate isolation and service without disturbing surrounding trim or structure.
Position ball or gate valves near fixtures, glue or threaded-union joints for removable sections, and install access panels at concealed unions.
Confirm straight pipe runs for valve clearance, support nearby fittings, and mark locations for future service.
Pressure testing and leak-check procedures
Begin by isolating the CPVC system and preparing it for a controlled pressure test: close all shutoff valves to the building, cap or plug open fittings, and connect a calibrated pressure gauge and test pump to a designated test point or temporary fitting.
Gradually pressurize to specified test pressure, hold for required duration, inspect joints and fittings for drop or visible leaks, record results, and repair any failures before final commissioning.
Troubleshooting Common Problems
The troubleshooting section outlines methods for identifying and repairing common CPVC issues, including solvent-weld joint failures and physical damage such as cuts, cracks, or crushed pipe.
It also covers remedies for leaks at threaded connections and junctions, plus inspection and response to discoloration, brittleness, or heat damage.
Practical diagnostic steps and repair options are presented to restore system integrity and prevent recurrence.
Identifying and repairing solvent-weld joint failures
Detecting and fixing solvent-weld joint failures requires a systematic inspection to distinguish adhesive flaws from mechanical damage or thermal stress.
Inspect joints for gaps, unmixed primer/residue, or soft uncured cement. Dry-fit markings, solvent smell, and misalignment indicate poor prep or application.
Repair involves cutting out the jointed section, re-preparing clean square ends, and reapplying correct primer and solvent cement per manufacturer specs.
Fixing cuts, cracks, or crushed pipe
When cuts, cracks, or crushing appear in CPVC piping, assess damage extent and service pressure before choosing repairs.
Minor surface cracks may be smoothed and reinforced with epoxy rated for CPVC; hairline splits often require cut-out and replacement of the affected section using proper solvent-weld couplings.
Severely crushed or compromised runs must be replaced entirely to restore structural integrity and prevent future failures.
Addressing leaks at threaded connections and transitions
Inspect threaded connections and changeover joints for leaks by looking for wetness, mineral deposits, or softened pipe near fittings.
Tighten slightly; do not overtighten. Disassemble if sealing fails, clean threads, apply appropriate PTFE tape or pipe dope, and reassemble with proper alignment.
Replace damaged male or female fittings and use correct transition adapters where CPVC meets metal to guarantee durable, leak-free joints.
Dealing with discoloration, brittleness, or heat damage
After addressing leaks at fittings, attention should turn to discoloration, brittleness, or heat damage, which often indicate prolonged exposure to high temperatures, UV light, or chemical attack.
Inspect affected sections for softening, cracking, or color shifts.
Replace compromised lengths, protect new runs from sunlight and heat sources, and guarantee compatible chemicals.
Document locations and causes to prevent recurrence.
Maintenance and Long-Term Care
A routine inspection schedule—typically biannually—helps identify leaks, joint integrity issues, discoloration, and signs of stress.
Preventive measures should address freeze protection, allowance for thermal expansion, and avoidance of incompatible chemicals or poor water quality that can accelerate degradation.
Decisions to repair or replace sections should be based on extent of damage, frequency of failures, and long-term system reliability.
Recommended inspection schedule and what to look for
Regular visual checks every six months, supplemented by a more thorough inspection annually, help guarantee CPVC systems remain leak-free and structurally sound.
Inspect joints, fittings, and glued seams for hairline cracks, discoloration, or softening. Check for moisture, mineral deposits, and steady pressure.
Verify support spacing, hangers, and insulation integrity. Document findings, address anomalies promptly, and schedule repairs or replacements as needed.
Preventing freeze damage and thermal expansion issues
With inspection findings recorded and repairs scheduled, attention should turn to protecting CPVC systems from freeze damage and managing thermal expansion.
Pipe insulation, heat tracing in vulnerable areas, and maintaining ambient temperatures prevent freezing.
Allow for movement with properly sized expansion loops, slip joints, or offsets and secure supports to control axial shifts.
Regularly verify clearances and replace degraded insulation promptly to maintain system integrity.
Chemical exposure and water quality concerns
When chemical contaminants or aggressive water chemistry are present, CPVC systems can suffer accelerated degradation, discoloration, or reduced service life.
Regular water testing, corrosion control, and avoiding solvent exposure protect joints and piping. Use compatible sealants and fittings, install filtration or neutralization where needed, and monitor chlorine, pH, and dissolved solids.
Document findings and remedial actions to maintain long-term reliability.
When to replace sections versus repair
Chemical exposure and water-quality issues that indicate accelerated CPVC degradation also inform decisions about repair versus replacement.
If damage is localized—cracks, small pinholes, or joint leaks—targeted repairs or section replacements suffice.
Widespread discoloration, brittle or softened pipe, repeated failures, or long-term chemical attack warrant full runs replaced.
Consider age, access difficulty, and code requirements when deciding scope of replacement.
Cost, Time Estimates, and When to Hire a Pro
Typical material and tool costs for CPVC projects—pipe, fittings, solvent cement, and basic hand tools—are outlined alongside expected labor rates.
Time estimates cover common jobs, from replacing a single fixture in an hour or two to a full repipe taking several days.
The text flags signs that a licensed plumber is needed, such as complex layouts, code issues, or persistent leaks.
It also suggests key contractor questions and reminds readers to check permit requirements before starting work.
Typical material and tool cost breakdown
A clear breakdown of materials, tools, and labor provides homeowners and DIYers a practical basis for budgeting CPVC pipe projects. Typical costs: pipe and fittings, primer/solvent, and basic tools; specialized tools or professional labor increase expenses. Below is a concise example.
| Item | Typical Cost |
|---|---|
| Pipe & fittings | $30–$150 |
| Primer/solvent & glue | $5–$25 |
Estimated time for common projects (single fixture, full repipe)
For common CPVC jobs, expected durations vary widely by scope: replacing a single fixture often takes 1–3 hours, while a full-house repipe can require 2–5 days depending on home size and access.
Typical multi-outlet runs or partial repipes usually occupy one day.
Time estimates assume straightforward access, basic fittings, curing time for solvent welds, and single installer pace.
Signs a job requires licensed plumber intervention
Complexity and risk determine when a licensed plumber should be called: jobs involving main-line work, gas connections, building-code compliance, concealed leaks, extensive rerouting, or permits typically exceed DIY scope.
Additional indicators include repeated failures after repairs, water damage or mold, high-pressure systems, commercial installations, or insurance requirements.
Anticipate higher cost and faster completion with professionals; obtain written estimates before committing.
Questions to ask a contractor and permit considerations
When should a contractor be hired and what should be asked before signing a contract? A homeowner should request credentials, estimates, timeline, permit handling, and warranty details.
Contractors must clarify scope, fees, inspection requirements, and subcontractors. Confirm permits and code compliance; small repairs versus system alterations determine professional need.
- Licensing and insurance
- Written cost estimate
- Project timeline
- Permit responsibility
- Warranty and finish date
Best Practices, Tips, and Common Mistakes to Avoid
The section outlines essential practices for solvent welding, correct support spacing and alignment, and steps to prevent thermal looping.
It highlights common mistakes such as using incompatible adhesives or allowing cross-contamination during assembly.
A concise pre-pressurization checklist for inspections and tests is provided before restoring water.
Solvent welding dos and don’ts
Several straightforward rules govern successful solvent welding of CPVC: prepare clean, square-cut surfaces; apply the correct primer and solvent cement sparingly and evenly; assemble parts within the working time and rotate slightly to spread the cement; and allow adequate cure time before pressurizing the system.
Avoid oil, dirt, overapplication, undercutting, or forcing misaligned joints. Wear gloves, work in ventilation, and follow manufacturer specifications.
Support spacing, alignment, and thermal loop prevention
Proper support spacing, precise alignment, and intentional prevention of thermal loops guarantee CPVC systems remain mechanically stable and functionally reliable over time.
Supports should follow manufacturer spacing charts, with hangers at joints and changes of direction.
Pipes must be aligned to avoid stress and binding. Allow controlled expansion with slotted supports or expansion offsets.
Avoid continuous rigid clamping and close loops that trap heat.
Avoiding cross-contamination and incompatible adhesives
When preventing cross-contamination and using compatible adhesives, installers should separate potable and non-potable systems and strictly follow manufacturer chemical compatibility lists.
They must label lines, maintain physical separation, and avoid shared fittings or storage.
Use only approved primers and cements for CPVC, discard contaminated adhesives, and verify cure times and temperature limits.
Regularly inspect joints for chemical degradation or improper bonding.
Quick checklist before turning water back on
Before restoring water pressure, the installer should run a focused checklist to confirm joints, fittings, and system components are correctly assembled, fully cured, and free of debris.
Follow quick verifications before re-pressurizing:
- Inspect solvent-weld joints for complete contact and cure time.
- Verify correct adhesive and no contamination.
- Clear internal debris and caps removed.
- Confirm shutoff valves operate smoothly.
- Perform a gradual pressure rise while monitoring for leaks.
Conclusion
To summarize, the guide affirms that CPVC piping, when cut, joined, and installed with proper tools and care, delivers reliable hot- and cold-water service. Practitioners should follow safety steps, test joints, and schedule routine inspections to forestall leaks. While modern techniques and primers prevail, a craftsman’s patience—equal parts smartphone timer and ancient sundial—ensures clean cuts and watertight couplings. Knowing limits and hiring professionals for complex systems preserves time, money, and peace of mind.