
How to Plumb a Washer Drain: Step-by-Step Guide for DIYers
To properly plumb a washer drain, ensure it collects wastewater effectively while preventing leaks and backflow. Start with a standpipe, P-trap, vent, and the correct slope. As a DIYer, plan your location, check local codes and permits, shut off water supplies, and use matching pipe types. Cut pipes squarely, solvent-weld or glue fittings, secure the trap and standpipe, and finally, test for leaks and proper flow. For small clogs and worn hoses, you can usually fix them yourself, but for complex reroutes or persistent issues, it’s best to consult a licensed plumber. Follow these steps for a successful installation.
Overview of Washing Machine Drain Plumbing
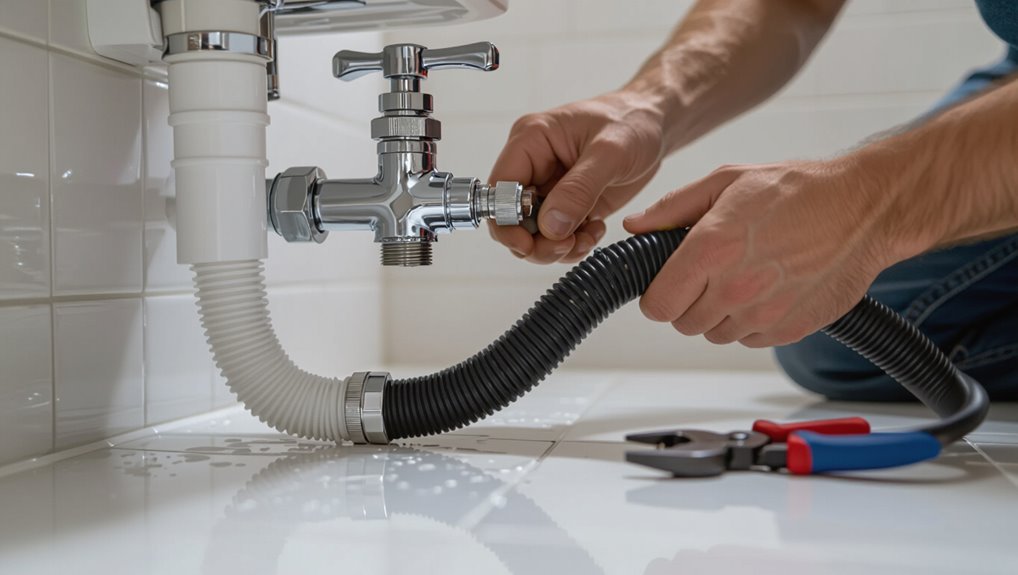
A washing machine drain system collects wastewater from the machine and routes it through a standpipe, trap, and house drain to the sewer or septic system, relying on proper slope and secure connections to prevent leaks and backflow.
Homeowners can handle straightforward installations and simple repairs when they are comfortable with local codes and basic plumbing tools, but should hire a licensed plumber for complex relocations, venting issues, or any work that affects the main waste stack.
A concise tools-and-materials checklist—including standpipe and trap, PVC or ABS fittings, hose clamps, pipe cement or primer, a level, and basic hand tools—prepares one to proceed safely.
What a washer drain system is and how it works
The washer drain system channels used wash water from the appliance to the home’s waste lines, combining mechanical components—drain hose, standpipe or laundry sink, P-trap, and venting—with plumbing connections to prevent backflow, odors, and leaks.
It routes discharge, balances air pressure via vents, traps solids, and seals against sewer gas.
Clear layout and correct fittings are essential for how to plumb washer drain.
When to DIY vs hire a plumber
When is a homeowner best served tackling a washing machine drain project versus calling a licensed plumber?
Simple repairs, clear clogs, minor reroutes, and installations in accessible areas suit competent DIYers with basic plumbing knowledge.
Hire a plumber for code compliance, complex relocations, cast-iron or hidden pipes, persistent leaks, sewer-line involvement, or when local permits and inspections are required to guarantee safety and proper function.
Tools and materials checklist
If preparing to plumb a washing machine drain, gather essential tools and materials before starting to guarantee efficiency and reduce trips to the hardware store.
A concise checklist prevents delays and omissions. Typical items include fittings, hoses, sealants, and safety gear; verify sizes and codes beforehand.
- PVC or ABS pipes, fittings, and trap
- Washing machine drain hose and clamps
- Pipe cutter, primer/solvent, gloves
Codes, Permits, and Safety Considerations
Before beginning work, the installer should check local plumbing codes and verify whether permits are required for modifying a washer drain.
The installation must meet venting and P-trap standards to prevent sewer gas and guarantee proper drainage.
Additionally, electrical and water safety precautions—including shutting off power where applicable and preventing leaks—are essential to reduce hazard and code violations.
Local plumbing codes and permit requirements
Although plumbing codes vary by jurisdiction, compliance with local regulations and permit requirements is crucial for legal, safe washer drain installation.
Homeowners should consult municipal building departments to determine necessary permits, inspection schedules, and licensed contractor requirements.
Failure to obtain permits can result in fines, forced alterations, or voided insurance.
Documentation guarantees adherence to materials, connections, and drainage capacities mandated locally.
Required venting and trap standards
Having confirmed permit and inspection obligations with local authorities, attention must turn to venting and trap requirements that prevent sewer gas entry and maintain proper flow for washer drains.
The washer drain requires an accessible P-trap sized per code, proper trap arm length, and connection to a vented branch or stack.
Air admittance valves may be restricted; follow local code for materials and slope.
Electrical and water safety precautions
When addressing electrical and water safety for a washer installation, the installer must verify that dedicated circuits, GFCI protection where required, and appropriately rated outlets comply with local electrical codes.
Additionally, the installer should ensure water supply lines, shutoff valves, and flexible connectors meet plumbing standards and are installed to minimize leak and flood risk.
Permits and inspections should be obtained as required; combustible clearance, bonding, and drain capacity must be confirmed.
Preparing for the Project
Before beginning work, measurements are taken and a plan is laid out for the drain location relative to the washer and nearby plumbing.
The existing plumbing is inspected for leaks, clogs, incorrect slopes, and other common issues that could affect the new connection.
Based on space, code and waste capacity, the installer selects the appropriate drain type—standpipe, laundry sink, or floor drain.
Measuring and planning the drain location
A clear plan for measuring and siting the washer drain secures proper function and code compliance; this step establishes exact distances to walls, floor drains, and nearby plumbing fixtures, and identifies the best route for piping and venting.
Measurements should record appliance inlet location, drain height, trap placement, and clearances.
Sketches note pipe runs, access points, and required slope to secure efficient drainage and future serviceability.
Inspecting existing plumbing and identifying common problems
Inspect existing plumbing fixtures, pipe runs, and access points to verify condition and compatibility with the planned washer drain.
Check for leaks, corrosion, improper slopes, and inadequate venting. Note blocked or sagging sections, old galvanized fittings, and limited access to cleanouts.
Record pipe materials, diameters, and nearby traps.
Identify electrical or structural obstructions that could affect routing or future maintenance.
Selecting the right drain type (standpipe, laundry sink, floor drain)
Having noted existing pipe conditions, the next step is choosing the most appropriate drain type—standpipe, laundry sink, or floor drain—based on site constraints, local code, and homeowner needs.
The installer evaluates available space, required trap/vent arrangements, elevation, and access for maintenance. Code may mandate standpipe height or sink installation.
Select the option balancing compliance, ease of connection, and future serviceability.
Step-by-Step Guide to Installing a New Washer Drain
The following steps outline the practical process for installing a new washer drain, beginning with marking and cutting access points in the wall or floor to reach the plumbing.
They cover installing a standpipe and trap assembly, connecting the new piping to the existing drain line (PVC, ABS, or metal), and securing supports to prevent movement.
Finally, the procedure concludes with testing for leaks and verifying proper flow.
Marking and cutting access points in wall or floor
Begin by locating the washer’s drain outlet and transfer those measurements to the wall or floor where the new drain will sit, marking the exact centerline and the extents of any required opening.
Confirm stud and joist locations with a detector, mark safe cut lines, protect surrounding finishes, and cut access using appropriate tools.
Deburr edges and test fit the opening before proceeding.
Installing a standpipe and trap assembly
Once the access opening is confirmed and dry, install the standpipe and trap assembly by fitting the trap to the drain stub, securing the trap arm into the waste line, and positioning the standpipe to achieve the required trap seal and height.
Each connection must be square, properly supported, and sealed to prevent leaks and siphoning.
Tighten fittings, check alignment, fasten supports, and test for proper slope and stability.
Connecting to existing drain line (PVC/ABS/metal)
With the standpipe and trap secured, attention shifts to tying the new assembly into the existing drain system.
The installer inspects pipe material, selects compatible fittings and adapters, and guarantees proper solvent, primer, or sealant use.
Key tasks include:
- Match pipe types and joiners (PVC, ABS, metal)
- Cut squarely and deburr ends
- Test for leaks with water and inspect joints
Securing and supporting pipes to prevent movement
Secure the drain assembly by adding supports and fasteners at regular intervals to prevent strain, movement, and noise.
Secure brackets, pipe straps, or cushioned hangers to studs or framing every 3–4 feet for horizontal runs and near fittings.
Use vibration-isolating clamps where the washer connects.
Confirm straps are snug but not compressing the pipe, maintaining proper slope and alignment.
Testing for leaks and proper flow
Begin by running a preliminary water test to verify there are no leaks and that the drain flows freely: fill the washer with a short rinse cycle or pour several gallons of water through the drain, watching all visible joints, fittings, and trap connections for weeps or drips.
Confirm steady flow, listen for gurgles, inspect trap seal, tighten or reseal any leaking joints, then repeat test.
Installing a Washer Drain into a Laundry Sink or Floor Drain
When routing a washer hose into a laundry sink, the installer selects appropriate fittings, secures the hose to prevent dislodgement, and guarantees overflow protection is in place.
For connection to a floor drain, proper slope and a backflow prevention strategy are verified to keep wastewater flowing away and to prevent sewer gas intrusion.
An air gap or anti-siphon device is then specified and positioned to meet code and protect the plumbing system.
Adapting hose to laundry sink: fittings and overflow prevention
Several straightforward fittings allow a washing machine discharge hose to join a laundry sink or floor drain without leaks or backflow.
Use a hose-to-pipe adapter sized to the hose, secure with a stainless clamp, and attach to a sink tailpiece or standpipe.
Install a vented trap adapter or air gap to prevent siphoning, and guarantee the hose tops above the sink rim to reduce overflow risk.
Connecting to a floor drain: slope and backflow considerations
Connect the washer discharge to a floor drain with a continuous, downward-sloping run and a reliable backflow prevention device to guarantee rapid drainage and protect the machine from sewer gas or reverse flow.
Maintain at least 1/4-inch per foot slope, use smooth-walled pipe, minimize traps and bends, secure joints, and install an accessible cleanout.
Confirm local code for required backflow assemblies.
Installing an air gap or anti-siphon device
After guaranteeing the washer discharge line slopes properly toward the floor drain and is equipped against reverse flow, attention turns to preventing siphonage and cross-contamination at the termination point.
The installer selects a code-compliant air gap or anti-siphon fitting, mounts it above the sink or drain rim, secures connections, and tests for proper venting and watertight seals to guarantee sanitary, reliable discharge.
Working with Different Pipe Materials
The guide now addresses common pipe materials used for washer drains, starting with PVC and CPVC connections and the solvent-welding methods required for secure joints.
It then covers ABS fittings and recommended joining techniques for reliable seals.
Finally, it explains options for converting to copper or galvanized lines using proper adapters and fittings.
PVC and CPVC connections and solvent welding
Work with PVC and CPVC carefully, since they require different solvents, primers, and curing times than metal or flexible hoses.
Use the correct primer for PVC or CPVC, apply solvent cement to both socket and pipe, and join with a quarter-turn. Hold until set, allow full cure per manufacturer before pressure testing.
Match schedules and fittings; avoid mixing incompatible materials or adhesives.
ABS fittings and joining techniques
Handle ABS fittings with attention to solvent type, joint preparation, and compatible adhesives to guarantee durable, leak‑free connections.
Clean cut surfaces, deburr, and dry‑fit parts before applying ABS cement or approved primer where required.
Use mechanical restraint for buried or stressed runs.
Avoid PVC solvents on ABS unless manufacturers specify compatible junction cement.
Test assemblies under low pressure before final burial or enclosure.
Copper and galvanized transitions and adapters
Many installations require changes between copper and galvanized steel, and selecting the correct adapter and joining method is essential to prevent corrosion, leaks, and mechanical failure.
Use dielectric unions or brass fittings rated for dissimilar metals, and apply appropriate thread sealant or solder where permitted.
Confirm matching pipe sizes, pressure ratings, and local code compliance; inspect joints for galvanic corrosion and test under operating conditions.
Common Problems and How to Fix Them
Common washer drain problems include clogs and slow drainage, which require diagnosis and targeted clearing methods.
Leaks at joints or the trap that demand specific repair steps.
Odors and potential sewer gas intrusion are addressed through trap maintenance and proper sealing, while improper venting can cause recurring siphoning and pressure issues that must be corrected at the vent or vent connection.
The following section outlines practical diagnostics and step‑by‑step fixes for each of these common failures.
Clogs and slow drainage: diagnosis and clearing methods
Clogs and slow drainage are frequent issues in washer drains and typically stem from lint buildup, soap scum, trapped debris, or a partially blocked standpipe or trap.
Diagnose by checking pump discharge, standpipe flow, and trap access.
Clearing methods:
- Remove trap and clear debris; flush with water.
- Use a plumbing snake for deeper blockages.
- Rinse with hot water and enzyme cleaner.
Leaks at joints or trap: repair steps
Inspect leaks at joints and the trap promptly, since water pooling can damage floors and promote mold.
Shut off water, place a bucket under the trap, and tighten slipped slip-joint nuts.
Replace cracked washers or corroded fittings.
If PVC cement joints leak, cut out and re-glue or replace the section.
Test with a slow wash cycle and recheck for dampness.
Odors and sewer gas prevention
After addressing visible leaks at joints and the trap, attention should turn to odors and the risk of sewer gas entering the laundry area.
Confirm the trap retains water by correct installation and periodic filling.
Install a properly seated rubber washer in the standpipe connection, seal vented access points, and replace cracked traps or gaskets.
Clean buildup and test for persistent smells.
Improper venting and recurring siphoning issues
When a washer drain repeatedly siphons the trap or drains slowly, the underlying cause is often improper venting or an undersized/blocked vent stack.
Without adequate air admission, the standpipe can create negative pressure that pulls water from the trap and allows sewer gas into the laundry area.
Diagnosis requires checking for blockages, verifying vent size and rise, and adding an air admittance valve or correcting vent routing to stop siphoning.
Maintenance and Best Practices
A concise maintenance and best-practices routine helps keep washer drain systems reliable and prevents common failures.
The section outlines a simple checklist for regular inspection, steps to winterize or shield drain lines in freezing climates, and recommended cleaning products and techniques.
Practical tips emphasize safety, material compatibility, and scheduling to extend system life.
Routine maintenance checklist
Several simple checks performed at regular intervals can prevent common washer drain problems and extend system life.
Inspect hoses and clamps for wear, clear lint and debris from trap and pump inlet, and verify venting and slope remain correct. Replace damaged components promptly. Maintain records of inspections and any repairs.
- Check hoses and clamps
- Clean trap and pump inlet
- Confirm venting and slope
How to winterize or protect drain lines in cold climates
If temperatures approach freezing, homeowners should take targeted steps to prevent ice damage and blockages in washer drain lines by insulating exposed pipes, adding heat where needed, and ensuring proper winter slope and runoff.
Seal exterior wall penetrations, drain and store removable hoses, and keep indoor laundry areas above freezing.
Schedule inspection for sagging traps or low spots that collect water and freeze.
Recommended cleaning products and techniques
One set of reliable cleaning products and straightforward techniques keeps washer drain lines clear and odor-free: use enzyme-based drain cleaners for organic buildup, a mild bleach solution for sanitizing PVC and metal fittings (following manufacturer dilution and rinse instructions), and a stiff nylon brush or plumber’s snake for mechanical cleaning of accessible traps and standpipes.
Routine flushing with hot water and quarterly inspections prevent clogs and odors.
Cost, Time Estimates, and When to Call a Pro
Typical DIY materials and basic tools for a washer drain installation generally run from modest to moderate expense depending on pipe type and fittings.
Time required varies with experience—novices can expect a few hours while experienced DIYers may finish in under an hour.
Persistent leaks, poor drainage, foul odors, structural damage, or complex venting and code issues indicate it’s time to call a professional.
Typical DIY material costs and tools
A basic DIY washer drain installation generally requires a handful of common materials—PVC or ABS pipe and fittings, a P-trap, hose adapters, clamps, plumber’s tape, primer and cement—and a few standard tools such as a hacksaw, pipe cutter, adjustable wrench, pliers, tape measure, and level.
Typical material costs range $30–$120; basic tools often available at home.
Hire a pro for complex venting, unusual drains, or code compliance.
Time required by skill level
For most homeowners, installing a basic washer drain takes between 1 and 4 hours depending on experience.
Novices should allocate half a day to measure, cut pipe, fit traps, and test for leaks.
Intermediate DIYers often finish in 1–2 hours.
Experienced DIYers can complete straightforward installs in under an hour.
Allow extra time for unforeseen fitting adjustments and drying of sealants.
Signs the job requires professional assistance
Recognize when a homeowner’s skill set, available time, or the complexity of the plumbing exceeds a do-it-yourself scope and professional help is warranted.
Call a plumber if permits are required, existing drains are corroded or concealed, water damage or mold appears, code compliance is unclear, or multiple trades (electrical, structural) are involved.
Request clear cost estimates, timelines, and warranty terms before hiring.
Quick Troubleshooting Flowchart
A concise, stepwise decision guide helps diagnose common washer drain problems quickly.
Each step directs the reader to a simple action or check, followed by the next logical choice based on the observed result.
This flowchart-style approach streamlines troubleshooting and indicates when to stop and call a professional.
Stepwise decision guide for drain problems
Start at the simplest checks and proceed only as needed: verify that the washer drain hose is properly seated and unobstructed, confirm the standpipe height and trap configuration meet code, then test a short wash cycle while observing for slow drainage, gurgling, or backups. Follow decision steps: inspect, clear, repair, consult pro.
| Problem | Likely Cause | Next Step |
|---|---|---|
| Slow drain | Partial clog | Snake or clean trap |
| Gurgling | Vent issue | Check vent pipe |
| Backup | Blockage/incorrect trap | Remove blockage/reconfigure |
Conclusion
This guide equips the DIYer with clear, safe steps for installing and maintaining a washer drain, covering codes, tools, and common fixes. For those worried they lack plumbing experience, the instructions emphasize simple tasks and when to stop and call a pro, reducing risk. By following the checklist and safety tips, an amateur can confidently handle most installations or identify issues that need a licensed plumber, saving time and avoiding costly mistakes.

