How to Replace a Gas Range Safely: Step-by-Step Guide for Homeowners
Replacing a gas range safely involves careful preparation and adherence to safety codes. To start, turn off and clearly label the gas supply, shut off power to the area, ensure proper ventilation, and wear personal protective equipment (PPE). Disconnect the old range using two wrenches, cap the gas supply, and carefully remove the appliance. Ensure the new range matches the gas type, install approved connectors, level and secure the unit, and conduct a leak test along with functional checks. Follow this step-by-step guide for detailed procedures and essential safety tips.
Quick overview of replacing a gas range safely
A competent DIYer with basic plumbing and appliance experience can replace a gas range, but a licensed technician should be called for gas line work, leaks, or any uncertainty.
Typical replacements take one to three hours for the physical swap, with additional time for inspection or permit processes.
Costs vary widely—expect tools and supplies under $100, labor $100–$300 if hiring help, and new ranges from a few hundred to several thousand dollars.
Who should replace a gas range and when to call a professional
Determine competence before attempting a gas-range replacement: homeowners with solid plumbing and appliance experience, comfort with shutting off gas and verifying connections, and familiarity with local codes may handle a straightforward swap, while anyone unsure about gas lines, fittings, or leak testing should hire a licensed professional.
Those lacking confidence in how to replace gas range, or with atypical installations, must call a certified gas technician.
Estimated time, cost range, and tools required
Most straightforward gas-range replacements take between one and three hours for a competent DIYer, with additional time for permits or inspections if required.
Typical costs range from $150 to $800: new range $400–$2,000, installation materials $50–$200, and professional labor $100–$400.
Required tools: adjustable wrench, pipe thread sealant, tubing cutter, gas leak detector or soapy water, screwdriver, level, and work gloves.
Key safety considerations before you start
Before beginning work, the installer verifies the home’s gas type and connection specifications to guarantee compatibility and safe shutoff.
They confirm applicable local codes, obtain necessary permits, and arrange for any required inspections.
They also select appropriate personal protective equipment and prepare the workspace to control hazards and prevent gas leaks.
Understanding gas types and connections in homes
Identify the type of gas supply and how it’s connected to the appliance, since homes commonly use natural gas (methane) or liquefied petroleum gas (propane), each with different pressures, fittings, and safety requirements.
Verify pipe material (black iron, corrugated stainless steel, or flexible connector), connection type, presence of a shutoff valve, and pressure regulator.
Confirm compatibility between range and supply before proceeding.
Local codes, permits, and inspection requirements
One essential step is confirming local codes, permit requirements, and inspection procedures that govern gas appliance replacement.
Homeowners must verify municipal regulations, licensing for contractors, and whether a permit or post-installation inspection is mandatory.
Exceptions, setback distances, venting rules, and shutoff accessibility often vary.
Obtaining approvals prevents fines and guarantees work meets safety and insurance standards before reconnecting gas service.
Personal protective equipment and workspace preparation
Wear appropriate personal protective equipment and prepare a clear, well-ventilated workspace before any gas-range work begins.
Gloves, eye protection, and sturdy footwear reduce injury risk; a respirator may be needed for sealing compounds or solvents.
Remove combustibles, secure adequate lighting, and keep a fire extinguisher and carbon monoxide detector nearby.
Maintain unobstructed egress and organize tools to minimize movement during the job.
Preparing to remove the old gas range
Before removing the old gas range, the gas supply should be shut off at the shutoff valve and the appliance disconnected from electrical power and unplugged.
The work area must be cleared, with floors and cabinets protected to prevent damage during removal.
Finally, a gas detector or a soap-and-water test should be used to verify there are no leaks before proceeding.
How to shut off the gas supply safely
Shut off the gas supply at the range’s shutoff valve and, if accessible, at the household service valve to guarantee the line is fully isolated; confirm the supply is off by turning a burner briefly to verify no gas flows and by using a smell check or a gas detector.
Close valves fully, label them, ventilate the area, and avoid ignition sources until removal begins.
Turning off electricity and unplugging the appliance
With the gas supply confirmed off and the area ventilated, attention should shift to disabling the appliance’s electrical connections so removal can proceed safely.
Turn off the circuit breaker or unplug the range if accessible.
Verify power is absent using a noncontact tester.
Secure the cord away from the work zone.
Document breaker position and notify household members before proceeding.
Clearing the area and protecting floors/cabinets
Several hands’ worth of clear space should be created around the range to allow safe movement and tool access.
Countertop items, cookware and loose debris are removed.
Floors beneath and adjacent to the appliance are protected with thick cardboard or moving blankets and non-slip tape.
Cabinet edges get corner guards; drawers are secured.
Pathways to exits remain unobstructed for safe appliance removal and placement.
Verifying no gas leaks with a gas detector or soap test
After clearing the workspace and protecting floors and cabinets, attention turns to confirming the gas connection is secure before disconnecting the range.
A handheld gas detector is passed slowly along the flex line and valve, watching for alarms.
Alternatively, a soap-and-water solution is applied to joints; bubbling indicates a leak.
If any leak appears, shut off supply and contact a licensed technician.
Step-by-step removal of the old gas range
The removal process begins with shutting off the gas and carefully disconnecting the flex line or rigid connector, followed by detaching electrical and ancillary hookups such as lights and ventilation.
The appliance should then be moved straight out with assistance and proper protective measures to avoid damage or injury.
Once clear, the existing gas line, connector, and shutoff valve should be inspected for wear, leaks, or corrosion before installing the replacement.
Disconnecting gas flex line or rigid connector
Begin by confirming the gas supply is fully shut off at the appliance valve and that any pilot lights or ignition systems are extinguished; this prevents accidental flow when the connector is loosened.
Then, using two adjustable wrenches, hold the regulator or supply nipple and loosen the connector fitting.
Cap or plug the supply immediately, inspect threads and gasket, and remove the old line for disposal.
Disconnecting electrical and ancillary connections (light, ventilation)
Once the gas connector has been capped and removed, attention shifts to electrical and ancillary hookups such as the outlet plug, under-cabinet lighting, and ventilation hood wiring.
Power is confirmed off at the breaker. The cord or hardwired junction is disconnected, fixtures are detached, wire nuts are removed and insulated, and grounding is noted.
Labeling and photographing connections aids reinstallation.
Safely moving and removing the old range from its position
Slide the range clear of cabinetry with steady, even pressure, keeping hands on the sides and knees bent to protect the back.
Once free, tilt slightly to disengage anti-tip bracket per manufacturer instructions, then pull straight back.
Enlist a helper for heavy units, use furniture sliders or a dolly for transport, and set the appliance upright on a protected surface ready for disposal or storage.
Inspecting existing gas line, connector, and shutoff valve condition
Inspecting the existing gas line, connector, and shutoff valve is a critical safety step before disconnecting the old range.
The inspector checks for corrosion, cracks, loose fittings, and signs of leakage. Flexible connectors and tubing are examined for brittleness.
The shutoff valve is exercised to confirm smooth operation and complete closure. Any defects require repair or replacement by a qualified technician.
Selecting the right replacement range
Before purchasing a replacement, measurements of the opening, required clearances, and ventilation must be verified to confirm proper fit and safe operation.
The new unit should match the home’s gas inlet type and appliance specifications, and the homeowner should choose between standard, slide-in, or freestanding configurations based on countertop and cabinet layout.
Finally, assess whether the gas line or electrical supply needs upgrading to meet the replacement range’s capacity and code requirements.
Measuring space: dimensions, clearances, and ventilation needs
Accurate measurements of the available space, required clearances, and ventilation capacity determine which replacement gas range will fit safely and function properly.
Measure width, depth and height, noting alcoves, cabinets, and counter overhangs.
Verify minimum side, rear and top clearances per code and manufacturer.
Assess range hood CFM, duct size, and makeup air requirements to guarantee adequate ventilation and heat dissipation.
Matching gas inlet type and appliance specifications
When selecting a replacement gas range, confirm that the home’s gas inlet type, line size, and pressure match the appliance’s specifications to guarantee safe operation and compliance with codes.
Verify connector type (NPT, flare), required BTU input, and manifold pressure.
Check whether conversion or regulator adjustments are needed.
Consult the manufacturer’s installation sheet and a qualified gas technician for final verification and safe hookup.
Considerations for standard vs slide-in vs freestanding models
Although kitchen layout and cabinetry often dictate stove choice, selecting between standard, slide-in, and freestanding gas ranges hinges on installation fit, aesthetic integration, and ventilation requirements.
Standard ranges fit between cabinets; slide-ins offer a seamless countertop look with minimal gap and simpler trim installation; freestanding units include finished sides and easier replacement clearance.
Measure clearances, cooktop height, and hood compatibility before purchase.
When to upgrade gas line or electrical supply
Choosing between standard, slide-in, and freestanding models often highlights differences in fit and hood alignment, but attention must also turn to gas and electrical demands that accompany a new range.
A professional evaluates line size, pressure, electrical load, and code compliance. Upgrade when connections mismatch, appliances exceed circuit capacity, or inspections require changes.
- Verify gas line diameter
- Check regulator/pressure
- Confirm voltage and amperage
- Inspect grounding and outlet type
- Follow local code requirements
Preparing the new gas range for installation
Before installation, the new range should be unboxed, transit brackets removed, and leveling legs set to guarantee stability.
The technician verifies that burner and oven specifications match the home’s gas pressure and appliance requirements.
Finally, the correct gas connector and fittings are selected and prepared to meet local code and manufacturer recommendations.
Unboxing, leveling legs, and removing transit brackets
Begin by positioning the boxed range on a clean, level surface close to the installation area and inspect the packaging for obvious damage.
Unbox carefully, keeping hardware and manuals organized.
Extend and adjust the leveling legs until the range sits stable and square.
Locate and remove transit brackets or shipping bolts per manufacturer instructions, then retape or store removed parts for warranty and future transport.
Confirming burner and oven specifications match home supply
Once unboxed and leveled, verify that the range’s burner ratings, inlet pressure requirements, and oven BTU output match the home’s gas type and supply pressure.
Consult the appliance data plate and the home’s gas meter or installer documentation to confirm whether the unit is set for natural gas or LP and whether conversion is required.
Record model, serial, and specified pressures; note required orifice sizes, pilot/ignition specs, and label any needed conversion kit.
Choosing and preparing the correct gas connector and fittings
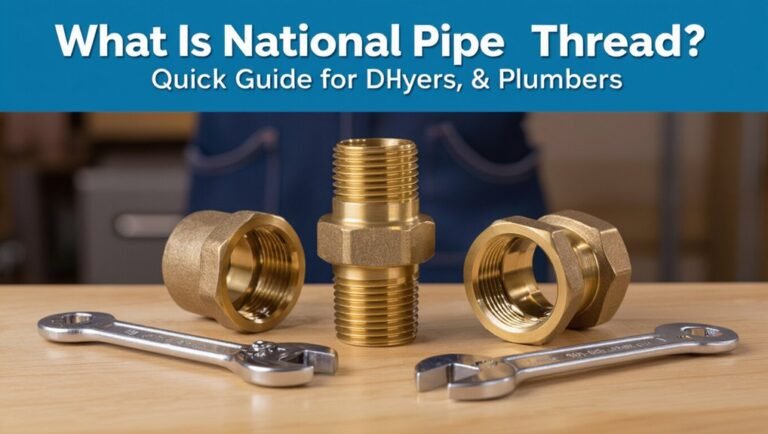
Select the correct gas connector and fittings by matching materials, size, and pressure rating to the range and household supply: use a flexible stainless-steel connector or a black iron pipe sized to the appliance inlet (typically 1/2″ NPT) and rated for the home’s gas type and maximum working pressure.
Choose fittings and adapters that are brass or approved for gas service, and verify all components are listed for use with natural gas or LP as required.
Ascertain thread sealant or tape is rated for gas, avoid using flare fittings unless specified, and confirm shutoff valve accessibility before final connection.
Step-by-step installation of the new gas range
The installer begins by fitting the approved appliance connector and correct gas fittings, using only thread sealants and materials rated for gas service.
After the gas line is secured and checked for leaks, electrical power is reconnected and all functions are tested.
Finally, the range is positioned, leveled, clearances verified, and any required ventilation or hood is connected.
Installing a new appliance connector and proper fittings
Begin by confirming that the gas supply is shut off and the old connector has been removed; this assures a safe starting point for installing the new appliance connector and fittings.
Install a listed flexible connector sized for the range, attach proper fittings hand-tight, then wrench-tighten to manufacturer torque.
Confirm fittings match thread types and use support brackets to prevent strain before testing for leaks per instructions.
Connecting the gas line: thread sealants and approved materials
Carefully connect the new gas line using only approved materials and thread sealants rated for fuel gas to guarantee a safe, leak-free joint.
Use yellow-approved flexible connectors or black iron with certified fittings.
Apply pipe thread compound (PTFE) labeled for gas or gas-rated pipe dope to male threads only.
Hand-tighten, then wrench snugly per manufacturer torque, and inspect for leaks with approved soapy solution.
Reconnecting electrical power and testing functions
Restore electrical power only after confirming all gas connections are secure and leak-free.
The installer then switches the breaker or reconnects the cord, verifies the range powers on, and tests burners, oven ignition, and controls per manufacturer instructions.
Check indicator lights, timers, and safety features.
Observe for unusual smells or noises.
If anomalies occur, cut power and gas and contact a qualified technician.
Positioning and leveling the range; adjusting clearances
Position the new range in its designated opening, sliding it close enough to the gas and electrical connections to allow final hookup while leaving room to access the rear utilities.
Once roughly in place, verify that the floor beneath is clean, level, and free of debris that could impede seating.
Adjust adjustable feet or shims until the appliance sits evenly, then confirm side and rear clearances meet manufacturer and code specifications before final hookup.
Connecting ventilation or range hood if required
If a ventilation hood is required, the installer should verify the duct type, size, and termination meet the range hood and local code specifications before beginning the connection.
Then secure the hood to framing, align the duct, and seal joints with metal tape or approved sealant.
Connect electrical power per manufacturer instructions, test fan operation and airflow, and confirm termination is unobstructed and weatherproof.
Testing and verifying a safe installation
After installation, the technician performs a gas leak test and explains how to interpret the results before proceeding.
Next, burners and the oven are ignited to verify proper ignition, flame appearance, and heat output while noting any irregularities.
If ignition, flame, or leak problems persist, the technician follows basic troubleshooting steps and recommends contacting a licensed professional for unresolved or unsafe conditions.
Performing a leak test and interpreting results
Begin by preparing the area and tools for a leak test: a soapy-water solution or commercial leak detector, a wrench, and a flashlight.
Apply solution to fittings, unions, and the regulator; watch for steady bubbles. No bubbles indicate a secure seal.
If bubbles appear, tighten connections, retest, or shut off gas and call a qualified technician.
Record findings and date.
Initial burner and oven ignition and performance checks
Energize the supply and confirm the appliance’s main valve is open before proceeding with ignition checks.
Verify each burner lights promptly and produces steady, blue flames; observe for even flame distribution and proper simmer response.
Preheat the oven to set temperatures, monitor temperature attainment with an oven thermometer, and confirm consistent heat.
Document results and restore panels when checks are satisfactory.
Troubleshooting common ignition and flame issues
How should a technician proceed when burners sputter, click continuously, or display yellow or uneven flames?
Inspect electrode alignment, clean ports with a soft brush, and guarantee caps seat correctly.
Verify proper gas flow and pressure, check for drafts or ventilation issues, and confirm correct orifice size.
Test ignition module and wiring for continuity.
Record findings and retest until stable blue, steady flames occur.
When to contact a licensed technician
Schedule a licensed technician when testing and verification reveal any persistent faults, ambiguous gas smells, irregular pressure readings, or safety controls that fail to operate.
A professional should also be contacted for visible leaks, damaged connectors, pilot or valve malfunctions, or uncertain repair steps.
They will perform pressure tests, leak detection, compliance checks, and corrective repairs to guarantee code adherence and safe, reliable operation.
Post-installation steps and maintenance
After installation, the homeowner should register the appliance and retain receipts, manuals, and inspection records for warranty and safety purposes.
Regular cleaning of burners, drip pans, and venting, along with basic maintenance, helps prevent grease buildup and potential hazards.
A routine inspection schedule for gas connections—such as an annual check by a qualified technician and periodic visual inspections by the owner—should be established and followed.
Registering the appliance and keeping documentation
Register the new gas range promptly and compile a dedicated file of all related documentation, including the sales receipt, installation checklist, product manual, serial number, warranty information, and any inspection or permit records.
Record registration confirmation, service provider contacts, and installation date.
Store digital copies securely and back them up.
Retain records for warranty claims, resale, insurance, and future inspections.
Routine cleaning and maintenance to prevent hazards
With the paperwork secured, attention shifts to routine cleaning and maintenance to prevent hazards.
Surfaces, burners, and vents are cleaned regularly with nonabrasive, manufacturer-approved cleaners. Grease traps and drip pans are emptied to avoid buildup.
Igniters and pilot areas are kept clear. Flexible gas lines and connections are visually checked for wear or odor; suspected issues prompt immediate professional service.
Recommended inspection schedule for gas connections
When a new gas range is in place, a clear inspection schedule for gas connections helps guarantee ongoing safety and early detection of issues.
Inspect visible fittings and hoses monthly for leaks or corrosion.
Perform a thorough professional inspection annually, including pressure testing and regulator checks.
After any service, relocation, or unusual odor, arrange immediate reinspection.
Document findings and corrective actions.
Common problems, risks, and how to avoid them
Common problems during replacement often stem from homeowner errors such as improper connections, inadequate shutoff procedures, or using incorrect fittings.
Indicators of unsafe installation include gas smells, hissing sounds, pilot instability, or visible leaks. Immediate actions should prioritize evacuation, shutting off the gas, and contacting emergency services or a licensed technician.
Additionally, occupants may face costly but necessary upgrades—improved ventilation, gas line modifications, or electrical circuit changes—that should be assessed before installation to prevent hazards.
Mistakes homeowners make during replacement
Homeowners often underestimate the technical and safety challenges involved in replacing a gas range, leading to errors that can cause leaks, fires, or appliance damage.
Common mistakes include improper connections, using wrong fittings, skipping leak tests, neglecting shutoff procedures, and inadequate ventilation.
Avoidance requires correct parts, following instructions, testing with soapy water, turning off gas, and consulting a pro when unsure.
- Improper connections
- Wrong fittings
- Skipped leak tests
- Neglected shutoff
- Poor ventilation
Signs of unsafe installation and emergency actions
Mistakes during replacement often manifest as clear signs that an installation is unsafe and requires immediate action.
Indicators include the smell of gas, persistent hissing, pilot light instability, soot or yellow flames, and loose or damaged fittings.
If detected: evacuate, shut off the gas supply at the valve, avoid open flames or switches, and call the gas company or licensed technician immediately.
Costly upgrades you might need (ventilation, gas line, electrical)
When replacing a gas range, several costly upgrades—improved ventilation, gas line modifications, and electrical work—are frequently required to meet code, guarantee safety, and optimize performance. Contractors assess hood capacity, pipe sizing, and circuit amperage; permits and inspections add cost. Prioritize licensed pros, obtain permits, and budget for contingencies to avoid delays, leaks, and code violations.
| Upgrade | Risk |
|---|---|
| Ventilation | Backdrafts |
| Gas line | Leaks |
| Electrical | Overload |
| Permits | Fines |
Checklist: Replace a gas range safely (step-by-step printable)
A concise, printable checklist guides each phase of replacing a gas range to minimize errors and hazards.
It begins with a pre-removal safety checklist to guarantee gas and electrical sources are secured and tools and protective gear are ready.
Follow-up sections cover step-by-step removal and installation tasks and a post-installation verification checklist to confirm proper connections and safe operation.
Pre-removal safety checklist
Before any tools are touched, confirm the gas supply is fully shut off and the appliance is electrically disconnected. Then ventilate the area and clear nearby combustible materials.
The homeowner verifies permits, notifies occupants, and readies safety gear before work begins.
- Confirm gas valve position and label it
- Shut off circuit breaker and unplug range
- Open windows for ventilation
- Remove flammable items nearby
- Wear gloves and eye protection
Removal and installation checklist
With gas and power confirmed off and the area secured, proceed to the removal and installation checklist that guides the physical swap of the range.
Follow steps methodically, minimizing risks and avoiding shortcuts.
- Disconnect gas line and cap per code
- Detach electrical connector and isolate wiring
- Remove mounting brackets and slide out old unit
- Position new range, align and level
- Reattach gas, secure brackets, reconnect power
Post-installation verification checklist
Begin post-installation checks by systematically verifying every connection and function to confirm the new range is safe and operational.
The inspector confirms gas tightness, electrical connections, burner ignition, oven temperature accuracy, and ventilation performance. Record results, correct discrepancies, and retest after adjustments.
Provide homeowner with documentation, emergency shutoff location, and operation guidance.
- Check for gas leaks (soapy water or detector)
- Test ignition on all burners
- Verify oven thermostat accuracy
- Inspect venting and clearance
- Confirm stability and anti-tip installation
Conclusion
The homeowner can complete a gas range replacement safely by following the guide’s steps and heeding safety checks; even those uneasy about gas work find that turning off supply, using proper fittings, and testing for leaks makes the task manageable. With patient preparation, correct tools, and a willingness to call a pro if uncertain, the project finishes reliably. Routine post-installation inspections and adherence to local codes guarantee continuing safety and peace of mind.