How to Replace the Guts of a Toilet: Step-by-Step Guide for Flappers, Fill Valves & Flush Valves
To replace the guts of your toilet tank, follow these steps: First, identify the flapper, fill valve, and flush valve. Next, shut off the water supply and drain the tank. Use small tools to remove the old components and install the new ones, ensuring they are adjusted for proper sealing and water levels. Common replacements include a warped flapper, a noisy fill valve, or a faulty flush valve and gasket. After installation, tighten the tank bolts and check for leaks. For additional guidance, see the steps below.
Overview of Toilet Tank Components and When to Replace Them
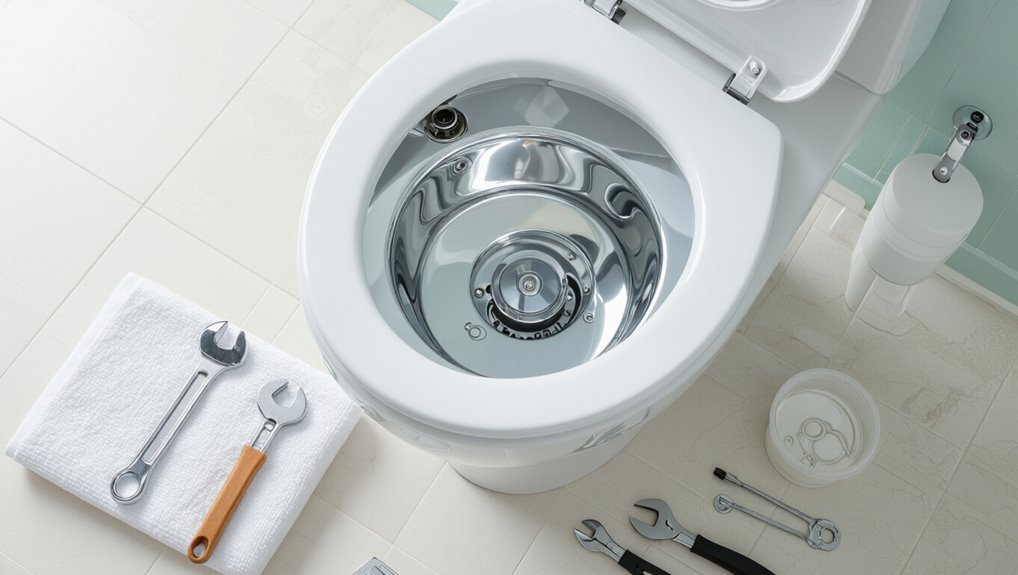
The tank contains several key components—flapper, fill valve, flush valve, overflow tube, refill tube, and tank bolts—each with specific functions and wear points.
Common signs that parts need replacement include continuous running, weak flushes, visible leaks, or difficulty operating the handle.
Before replacing tank guts, the person should gather basic tools and materials and follow simple safety and preparatory steps such as shutting off the water and draining the tank.
Key parts inside the tank: flapper, fill valve, flush valve, overflow tube, refill tube, tank bolts
A toilet tank contains several small but essential components—flapper, fill valve, flush valve, overflow tube, refill tube, and tank bolts—each performing a specific function that affects flushing performance and water economy.
A concise guide explains component roles, materials, and basic maintenance steps, framing how to replace guts of toilet without procedural detail.
Identification and part compatibility are emphasized for efficient replacement.
Common signs each component needs replacement
When common wear or malfunction affects a tank component, specific symptoms—persistent running, weak flushes, slow refill, or leaks—usually indicate which part is failing.
A warped or leaking flapper causes constant running and reduced flush power.
A noisy or slow-filling fill valve signals replacement.
Cracked flush valves or overflow tube damage cause leaks and sinking water.
Corroded bolts or loose fittings also demand attention.
Tools and materials required for a tank guts replacement
Several essential tools and materials are needed to replace a toilet’s tank guts efficiently and without surprises.
Required items include an adjustable wrench, pliers, screwdriver set, bucket, sponge, replacement flapper, fill valve, flush valve or kit, new tank-to-bowl gasket, and tank bolts with washers.
Optional but helpful: Teflon tape, silicone grease, and a rag.
Verify parts match the toilet model.
Safety and preparatory steps before starting work
Having gathered the necessary tools and parts, the next step is to review the tank’s components and take safety and preparatory measures before any work begins.
Turn off water supply, flush to empty the tank, and soak up residual water. Disconnect supply line if needed.
Inspect for cracks or corrosion. Wear gloves and eye protection.
Confirm stable workspace and adequate lighting.
How to Diagnose Problems Before Replacing Parts
Before replacing parts, a systematic inspection identifies whether leaks, seal failures, or valve malfunctions are the root cause.
Simple tests—such as dyeing the tank to spot leaks, pressing the flapper to check its seal, and observing fill valve operation and water level—clarify which component is failing.
Based on those findings, the decision can be made to replace a single worn part or install a full repair kit to guarantee reliable operation.
Identifying leaks and where they originate
Inspect the toilet area closely to determine whether a leak is coming from the tank, bowl, base, supply line, or floor flange.
Observe dry spots, corrosion, mineral deposits, or fresh water after flushing.
Check connections, bolts, and seals for drips.
Use paper towels to trace wetness timing.
Small continuous seepage differs from intermittent overflow, narrowing origin before part replacement.
Testing the flapper for seal and wear
Begin by lifting the tank lid and observing the flapper’s seating and condition while the tank is full.
Inspect for cracks, mineral buildup, warping, or hardening.
Press the flapper to check for a tight seal; listen for slow leaks.
If water level falls with flapper undisturbed, note seepage.
Document findings to decide repair or replacement.
Checking fill valve operation and water level issues
After evaluating the flapper for leaks, attention shifts to the fill valve and water level, since many running-to-tank problems stem from fill-valve faults or incorrect water height.
Inspect fill-valve operation by flushing and observing refill speed, valve shutoff, and silencing.
Measure static water level relative to the overflow tube; adjust float or fill-valve height to restore recommended level and stop siphoning or continuous flow.
Inspecting flush valve and tank-to-bowl seal
Diagnose the flush valve and tank-to-bowl seal by observing how water leaves the tank and enters the bowl during and after a flush.
Watch for slow draining, surging, or continuous trickle indicating seal wear or misalignment.
Inspect the flapper or flush valve seat for cracks, mineral buildup, or uneven contact.
Note any audible siphoning or persistent tank drop signaling replacement or reseating.
When to replace individual parts versus the entire kit
When deciding whether to replace a single component or install a full tank kit, evaluate the scope of wear, compatibility, and failure patterns to determine the most cost-effective and reliable fix.
Replace individual parts for isolated failures, vintage or high-quality components still in good condition, or when budget limits immediate full replacement.
Choose a full kit for multiple failing parts, persistent leaks, or mismatched components causing recurring issues.
Step-by-Step: Replacing a Toilet Flapper
Before beginning, the tank should be prepared and the water supply shut off to prevent spills.
The old flapper is removed and the seat cleaned, then a correctly sized replacement is selected and installed with the chain adjusted for proper lift.
Finally, the new flapper is tested and any sealing or chain-length issues are troubleshooted until the flush operates correctly.
Preparing the tank and shutting off water
Begin by turning off the water supply to the toilet and flushing to empty the tank, ensuring a dry working area and preventing accidental flooding.
Then close the shutoff valve fully, sponge out residual water from the tank, and place towels or a small bucket nearby.
Gather tools and replacement parts, verify the water remains off, and wear gloves and eye protection before proceeding.
Removing the old flapper and cleaning the seat
Disconnect the flapper chain from the flush lever, then lift the old flapper off its posts or unhook it from the overflow tube.
Remove debris, mineral buildup, and old gasket residue from the seat using a soft brush and a cloth.
Inspect the rubber seat and surrounding porcelain for damage.
Rinse thoroughly, dry the seat area, and verify the drain pathway is clear before installing a new flapper.
Choosing the correct replacement flapper
Which flapper fits this toilet model and water-pressure profile?
The technician checks manufacturer specifications, seat diameter, and mounting style (3-inch, 2-inch, or universal), plus material compatibility (rubber, silicone).
Flow-rate and household water pressure guide choice of flush-rate or pressure-assisted flappers.
Prefer durable, corrosion-resistant parts.
Verify valve-seat contour and lever connection type before purchasing to guarantee proper sealing and longevity.
Installing the new flapper and adjusting chain length
Install the new flapper by seating it on the valve opening and securing its ears or hooks to the overflow tube pegs.
Then attach the chain to the flush lever arm so there is slight slack when the flapper rests closed.
Confirm the chain runs straight without kinks, trim excess links if needed, and use a short clip or hook position to fine-tune slack for reliable sealing.
Testing and troubleshooting flapper installation
Begin by flushing the toilet several times to observe the flapper’s operation and check for leaks: the flapper should lift fully, drop back into place without hesitation, and create a watertight seal with no continuous seepage into the bowl.
If water runs, adjust chain length, confirm proper seat alignment, inspect for debris or warped flapper, and replace if wear or misfit persists.
Step-by-Step: Replacing the Fill Valve
To replace the fill valve, the tank is first drained and the water supply disconnected before removing the old valve assembly.
A compatible replacement—preferably an adjustable fill valve—is selected and installed, with the water level set according to the manufacturer’s marks.
Finally, the supply is reconnected, the system checked for leaks, and the fill height fine-tuned for reliable operation.
Draining the tank and disconnecting the water supply
Shut off the water supply at the shutoff valve and flush the toilet to empty most of the tank.
Then sponge or towel any remaining water from the bottom to prevent spills.
Place a bucket beneath the supply line, loosen the coupling nut with an adjustable wrench, and disconnect the water line.
Inspect washers and threads for wear and set aside removed parts for replacement.
Removing the old fill valve assembly
Loosen the locknut beneath the tank and lift the old fill valve assembly straight up and out, taking care not to disturb the refill tube or other small parts.
Inspect the tank for mineral buildup or damaged gasket material. Remove residual debris and old sealant.
Set the old valve aside for disposal.
Verify the tank hole and mounting surface are clean and dry before proceeding.
Selecting a compatible fill valve model
With the tank cleaned and the old fill valve removed, the next step is choosing a replacement that matches the toilet’s specifications and plumbing connections.
Verify fill valve height fits tank, inlet thread size matches supply line (typically 7/8″ or 3/8″ adapter), and compatibility with toilet type (gravity or pressure-assisted).
Prefer certified models for water efficiency and durable materials.
Installing an adjustable fill valve and setting water level
Begin by placing the new adjustable fill valve into the tank and securing it to the threaded refill opening, ensuring the rubber gasket sits flat against the bottom to prevent leaks.
Attach the refill tube to the overflow and fasten the locknut.
Adjust the valve height so the refill cup aligns with the overflow tube.
Set the float to the manufacturer’s recommended waterline mark.
Reconnecting supply, checking for leaks, and fine-tuning
After confirming the fill valve height and float setting, the supply line is reattached to the valve’s threaded shank and hand-tightened before applying a quarter turn with an adjustable wrench; overtightening is avoided to protect the threads and gasket.
Water is turned on slowly, the tank and base are inspected for drips.
Adjustments to float and refill tube are made until fill stops at the marked waterline.
Step-by-Step: Replacing the Flush Valve and Tank-to-Bowl Seal
The next section explains when a flush valve needs full replacement instead of temporary sealants and how to safely separate the tank from the bowl.
It outlines removing the old valve, cleaning mating surfaces, fitting a new flush valve and rubber tank-to-bowl gasket, and reassembling the tank with correct bolt torque.
Finally, it covers leak-testing to confirm a watertight seal.
When to replace the flush valve versus using sealants
When should a homeowner replace a flush valve rather than try a sealant?
Replace when cracks, warped components, persistent leaks after sealant attempts, or corrosion compromise function.
Use sealants only for small, localized gasket leaks or hairline tank cracks confirmed watertight after curing.
Consider age, parts availability, and repeat failures; replacement guarantees reliable flushing and long-term watertight integrity.
Removing the tank from the bowl safely
Having decided replacement is necessary, the homeowner should prepare to remove the tank from the bowl by shutting off water, draining the tank, and clearing the area.
Next, disconnect the water supply, unfasten tank bolts with appropriate tools, support the tank to prevent tipping, lift straight up to avoid cracking, and place the tank on a padded surface.
Check bolt hardware for corrosion.
Removing the old flush valve and cleaning mating surfaces
Begin by removing residual water and loose debris from the tank interior.
Disconnect remaining linkages and unfasten the tank-to-bowl seal hardware.
Lift out the old flush valve assembly, inspecting for corrosion, cracks or mineral buildup.
Scrape and wipe mating surfaces with a non-abrasive pad and vinegar solution.
Verify surfaces are dry and free of residue before proceeding to the next installation step.
Installing a new flush valve and new rubber gasket
Install the new flush valve assembly and seat the rubber tank-to-bowl gasket carefully, ensuring alignment with the tank outlet and bolt holes.
Lower the valve into place, pressing the gasket firmly against the tank rim.
Thread and hand-tighten the valve retaining nut beneath the tank.
Trim excess gasket if needed.
Verify the valve sits squarely and moves freely before proceeding.
Reassembling tank, torqueing bolts, and leak testing
Lower the tank onto the bowl carefully, aligning the tank-to-bowl gasket and bolt holes so the tank sits evenly.
Once seated, hand-start the tank bolts through the base, then alternately tighten the nuts a quarter-turn at a time with a wrench until snug.
Reconnect the water supply, open the shutoff slowly, observe for leaks at bolts and gasket, tighten slightly if needed, and test several flushes.
Replacing Multiple Components and Using Complete Tank Repair Kits
A full tank rebuild kit can simplify repairs by replacing worn components at once and ensuring parts are compatible.
Installing a thorough kit follows a combined workflow that sequences removal, inspection, and staged installation of the flush and fill assemblies.
Careful adjustment coordination—setting float height, checking flush valve seating, and testing refill timing—ensures reliable operation after reassembly.
Benefits of full tank rebuild kits versus individual parts
When multiple tank components show wear or a single source of trouble is unclear, opting for a full tank rebuild kit often delivers more reliable results than piecemeal replacements.
The kit guarantees compatibility among parts, reduces the chance of missed failures, and typically simplifies installation and future maintenance.
Kits also save time sourcing parts, often cost less than buying separately, and provide matched seals and fasteners for longer-term reliability.
Installing a comprehensive kit: combined workflow
Begin by shutting off the water supply and draining the tank to create a safe, dry workspace; then lay out the kit components and required tools in logical order.
Remove old parts systematically, replacing flapper, flush valve, and fill valve in sequence while following manufacturer instructions.
Verify seals, tighten fasteners evenly, reconnect water, and test multiple flushes for leaks and proper operation before finishing.
Tips for coordinating adjustments between fill valve and flush valve
Several key adjustments must be balanced so the fill valve refills to the correct waterline without interfering with the flush valve’s seal or flush timing.
Adjust fill height to the manufacturer’s mark, then set float to stop at that line.
Verify flush valve seal clearance during a test flush.
Fine-tune refill rate and chain length to prevent siphoning, double-checking for leaks.
Troubleshooting Common Post-Repair Issues
After replacing toilet components, common post-repair issues often surface and require systematic checks.
Technicians should inspect causes of persistent running water, weak flush or siphoning failures, incorrect water levels, and leaks at tank bolts or the tank-to-bowl seal.
Each symptom points to specific parts or adjustments that can be targeted for a quick, effective fix.
Persistent running water after replacement
Persistent running water after replacing toilet parts indicates an incomplete seal or improper adjustment somewhere in the refill or flapper assembly, and it warrants prompt diagnosis to prevent water waste and higher bills.
The technician should inspect flapper seating, chain length, and fill-valve float height.
Check for warped flappers, debris under the seat, misaligned refill tubes, and confirm the shutoff valve fully closes to isolate leaks.
Weak flush or siphoning problems
Diagnose weak flush or failed siphoning by systematically checking the bowl, trapway, and tank components for obstructions, incorrect water levels, or misaligned parts that disrupt flow.
Inspect rim jets and siphon jet for mineral buildup, clear blockages, and verify flapper seating and chain length.
Confirm refill tube placement and flush valve seal integrity.
Test multiple flushes to ascertain restored siphon action.
Water level too high or low despite adjustments
Several common causes explain why a toilet’s water level remains too high or too low despite apparent adjustments. Resolving them requires systematic checks of both tank and bowl components.
Inspect fill valve height and float alignment.
Verify refill tube placement and cup/float operation.
Check for partial bowl blockage or rim jet clogging.
Confirm flush valve seal and overflow tube position to guarantee correct equilibrium.
Leaks at tank bolts or tank-to-bowl connection
Inspect the tank-to-bowl junction and bolt mounting whenever water appears on the floor beneath a toilet after repairs.
Corroded or loose tank bolts, compressed or misaligned rubber washers, and degraded tank-to-bowl gaskets commonly cause leaks.
Tighten bolts evenly, replace washers and gaskets as needed, and recheck for level to prevent stress.
Test by filling tank and observing for slow seepage or drips.
Maintenance Tips to Extend Life of Toilet Components
A simple maintenance routine can greatly extend the life of toilet components by combining regular inspections, targeted cleaning, and timely professional intervention.
Technicians or homeowners should check seals, fill valves, and flappers for wear, watch for leaks or slow fills, and remove mineral buildup from jets and tank surfaces.
If persistent problems, recurring leaks, or corrosion are found, professional service is advisable to prevent more extensive damage.
Regular inspection schedule and what to look for
Because small problems often start quietly, a consistent inspection schedule keeps toilet components functioning and prevents costly repairs.
Inspect monthly for leaks, worn flappers, slow fills, mineral buildup on moving parts, and loose or corroded connections.
Test flush performance and listen for phantom running. Record issues, tighten fittings, and replace failing items promptly.
Annual deeper checks guarantee longevity and reliability.
Cleaning and mineral deposit prevention
Monthly checks reveal not only mechanical wear but also early signs of mineral buildup and grime that shorten component life.
Use white vinegar or a mild descaler to dissolve calcium from flappers, fill valves, and rims; soak removable parts briefly. Brush gently with a soft brush, rinse thoroughly, and reassemble.
Consider installing a water softener or inline filter to reduce recurring deposits and extend component lifespan.
When to consider professional help
When should a homeowner call a professional rather than attempting DIY repairs?
A plumber is advised when leaks persist after part replacement, multiple failures occur, complex tank or supply-line damage exists, or water damage and mold are present.
Professionals also handle inaccessible components, unknown diagnostics, and confidence- or time-limited homeowners.
Hiring reduces risk and guarantees compliant, durable repairs.
Comparison of Replacement Options and Costs
Selecting replacement parts for a toilet involves balancing function, durability, and budget; choices range from basic economy components to premium, water-saving assemblies. Comparison considers price, warranty, and performance; mid-range parts often offer best value. Below is a simple comparison table to clarify options.
| Option | Cost | Key Benefit |
|---|---|---|
| Economy | Low | Basic function |
| Mid-range | Moderate | Better reliability |
| Premium | High | Water savings, longevity |
HH3: Cost, difficulty, tools needed, and lifespan for flapper vs fill valve vs flush valve vs full kit
A straightforward comparison of flappers, fill valves, flush valves, and full replacement kits highlights differences in cost, installation difficulty, required tools, and expected lifespan so readers can match parts to their needs.
Flappers: low cost, easy, pliers optional, 1–5 years.
Fill valves: moderate cost, moderate skill, wrench needed, 3–8 years.
Flush valves: higher cost, harder, tools plus sealant, 5–15 years.
Full kits: highest cost, moderate difficulty, full tool set, 5–15 years.
Quick Parts Checklist and Installation Sequence
A concise checklist and a logical installation order reduce time and errors when replacing toilet parts.
Recommended items to have on hand include:
- New flapper
- Fill valve
- Flush valve seal/gasket
- Tank-to-bowl bolts and washers
- Overflow tube or refill tube
Begin with the internal tank parts (flapper and flush valve), follow with the fill valve, then secure external connections and test for leaks.
Essential replacement parts to have on hand
Several basic parts should be kept on hand to handle the most common toilet repairs quickly and prevent prolonged downtime: a flapper, fill valve, flush valve seal, tank-to-bowl gasket, wax ring, tank bolts with rubber washers, and a pair of closet bolts.
Additionally, include replacement nuts, hose, small adjustable coupling, and a silicone-safe lubricant.
Store parts with basic tools and clear labeling.
Recommended installation order to minimize rework
Begin by laying out the quick parts checklist and an ordered sequence to follow: flapper, flush valve seal, fill valve, tank-to-bowl gasket and tank bolts, wax ring and closet bolts, then final hose and nut connections.
The technician follows that sequence to prevent access conflicts, verify component fits, and test subsystems incrementally.
Final tightening and leak checks finish the job, reducing redo time.
Conclusion
A final inspection confirms that routine diagnosis and timely replacement of flappers, fill valves, and flush valves prevents common failures and conserves water. Contrary to the myth that all toilet parts must be replaced together, selective repairs often restore full function and extend service life. Homeowners who learn basic troubleshooting, invest in correct parts and tools, and follow manufacturer torque and seal guidance can avoid unnecessary expense while keeping toilets reliable for years.