How to Repair a Sump Pump: Step-by-Step DIY Guide for Quick Fixes and Preventive Care
To effectively repair a sump pump, start by following safety precautions and inspecting power connections, float operation, and the discharge line for clogs. Key troubleshooting steps include resetting the GFCI or breaker, clearing debris from the pit and impeller, adjusting or replacing a faulty float switch, and addressing any blockages in the discharge line. Regular monthly and seasonal maintenance is essential to prevent future issues. If parts are worn or electrical problems continue, consider replacing the unit or seeking professional help. For detailed procedures and tips, continue reading.
What to Know Before You Start Repairing a Sump Pump
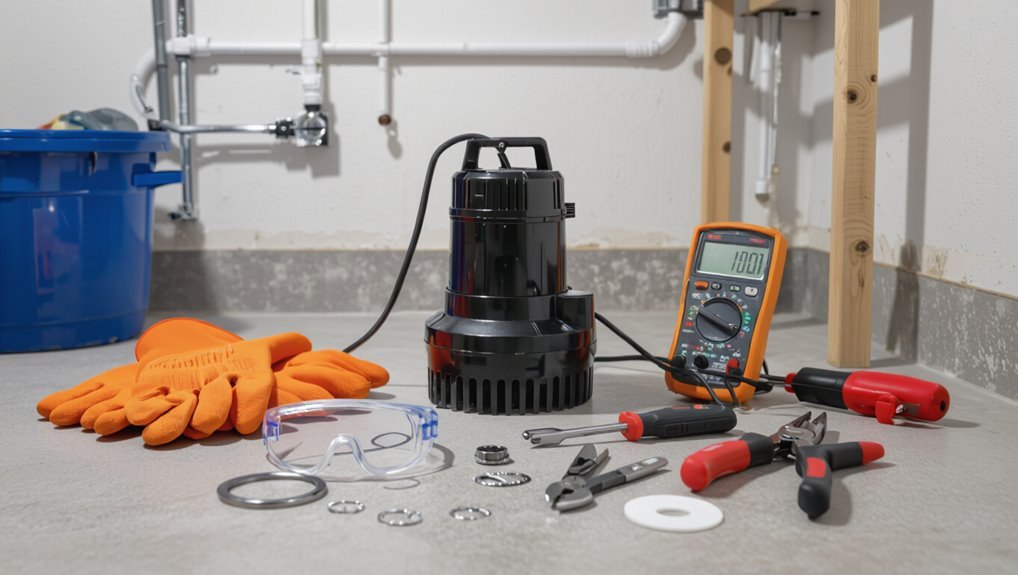
Before attempting repairs, one should understand how a sump pump operates, including its motor, float switch, check valve, discharge pipe, and typical failure modes.
Common causes of malfunction—clogged intakes, worn impellers, electrical faults, and frozen or disconnected discharge lines—should be identified so troubleshooting targets the right component.
Safety precautions, required tools, and clear criteria for when to call a professional versus pursuing DIY fixes must be established first.
How a sump pump works key components and functions
A sump pump moves groundwater away from a building by collecting water in a pit and activating an electric pump when the water reaches a set level.
The article outlines key components—pit, float switch, pump motor, impeller, check valve, discharge pipe, and power source—and explains functions and interactions relevant to how to repair a sump pump safely and effectively.
Common reasons sump pumps fail
Recognize common failure modes to prioritize diagnostics and avoid needless disassembly: sump pumps most often fail because of power loss, clogged or frozen intakes, malfunctioning float switches, worn impellers or motors, blocked or leaky discharge lines and check valves, or sediment and debris buildup in the pit.
Additional causes include improper pump sizing, corroded electrical connections, prolonged dry running, and intermittent control relay faults.
Safety precautions and tools required
Wear insulated gloves and eye protection, verify power is disconnected, and guarantee the sump pit is well ventilated before any work begins.
Inspect surroundings for water, gas smells, or slippery surfaces.
Required tools include a multimeter, screwdrivers, pliers, wrench set, replacement seals, and a wet/dry vacuum.
Use nonconductive tools when possible and follow manufacturer safety instructions.
When to call a professional vs. DIY
When should a homeowner attempt a sump pump repair and when is a professional necessary?
A homeowner may handle basic tasks: clearing debris, replacing float switches, or resetting breakers.
Call a licensed plumber or electrician for persistent failures, unusual noises, motor or seal replacement, electrical faults, or backup system installation.
Complex diagnostics, safety risks, and warranty considerations also justify professional service.
Quick Diagnostic Checklist to Identify the Problem
A concise checklist helps pinpoint whether the issue is visual, electrical, or mechanical by guiding inspection of power, the float, and the discharge.
It then recommends simple electrical tests—confirming power at the outlet, checking the reset switch and any GFCI—and mechanical checks like float movement, impeller spin, and clog detection.
Finally, it links common symptoms (no power, runs but won’t pump, rapid cycling, unusual noise) to likely causes so troubleshooting proceeds efficiently.
Visual inspection steps (power, float, discharge)
Begin by checking the pump’s basic external indicators to quickly narrow the fault to power, float, or discharge issues.
Inspect the power cord for damage and confirm the plug is seated.
Observe the float: free movement, tangles, or obstructions.
Examine the discharge pipe and hose for clogs, kinks, loose connections, or visible leaks.
Note rust or debris around the sump basin.
Electrical tests (power supply, reset switch, GFCI)
After confirming the power cord, float movement, and discharge path, attention shifts to the electrical supply and protection components to pinpoint faults.
Test the outlet with a plug or multimeter for voltage. Inspect the pump’s reset switch and press if tripped.
Check any GFCI or breaker protecting the circuit; reset or replace as needed. Record findings and proceed accordingly.
Mechanical tests (float movement, impeller spin, clog detection)
Inspect the pump’s mechanical components methodically to isolate physical causes of failure.
Check float movement for obstruction or binding; lift and lower it to confirm free travel and switch activation.
Spin the impeller manually (power off) to detect grinding, play, or seizure.
Inspect inlet screen and discharge for debris, hair, or sludge; remove clogs and verify clear flow path before retesting.
How to interpret common symptoms (no power, runs but won’t pump, cycles rapidly, noisy)
A simple symptom-to-cause checklist helps narrow failures quickly:
No power — check breaker, GFCI, cord, outlet.
Runs but won’t pump — inspect clogged intake, seized impeller, broken seal, disconnected discharge.
Cycles rapidly — verify float alignment, stuck switch, improper pit depth, check valve failure.
Noisy — identify worn bearings, debris, loose mountings, or cavitation from restricted flow.
Step-by-Step Repairs for Common Sump Pump Issues
The following section outlines concise, practical repairs for the most common sump pump faults, matching each symptom to the typical corrective steps.
It covers electrical problems, blockages, float-switch failures, motor or impeller damage, and persistent short cycling with targeted fixes and safety notes.
Readers should follow basic electrical safety and consult a professional for complex motor repairs.
- Fixing a sump pump with no power
- Clearing clogs in intake, impeller, or discharge line
- Repairing or replacing a stuck or faulty float switch
- Addressing a seized or damaged motor/impeller and stopping short cycling
Fixing a sump pump with no power
When a sump pump has no power, the first steps are practical checks of the electrical supply: verify the outlet and circuit breaker status.
Next, test and reset any GFCI devices that may have tripped.
If power still fails to reach the unit, inspect the power cord and float or power switch for damage and replace components as needed.
Check outlet and breaker
Inspect the outlet and circuit breaker to rule out basic power failures before moving on to more complex diagnostics.
Verify the pump’s plug is fully seated and test the outlet with a known-working device.
Check the home’s breaker panel for tripped switches and reset any tripped breaker.
If the breaker trips repeatedly, consult an electrician to evaluate wiring or circuit overloads.
Test and reset GFCI
If power and breakers check out but the pump still won’t run, attention should turn to any GFCI protection on the same circuit.
Locate and press the GFCI reset; if it won’t reset, press test then reset.
If it trips immediately or won’t reset, replace the GFCI or consult an electrician.
After reset, verify pump power and operation before finalizing repairs.
Inspect and replace power cord or switch
Begin by visually and manually examining the pump’s power cord and control switch for frays, exposed wires, corrosion, melted insulation, loose connections, or water intrusion.
If damage is found, disconnect power, remove the pump, and replace the cord or switch with manufacturer-approved parts.
Rewire using correct gauge, secure connections, seal entries, and test function.
Dispose of damaged components safely.
Clearing clogs in intake, impeller, or discharge line
The technician begins by safely removing the pump from the basin, shutting off power and disconnecting the discharge line before lifting the unit out to access the intake and impeller.
Debris is cleared from the intake screen and impeller housing, and the discharge line is inspected and flushed to restore unrestricted flow.
Finally, the check valve is tested and cleaned or replaced as needed to guarantee proper backflow prevention.
How to safely remove the pump and clear debris
Before attempting removal, guarantee power is fully disconnected and the area is dry enough to work safely; this prevents electrical hazards and reduces slip risk.
Wear gloves and eye protection.
Detach discharge pipe and unscrew mounting bolts.
Lift pump straight up, avoiding twisting.
Inspect intake screen and impeller, removing debris with a brush or pick.
Rinse components and reassemble for testing.
Flushing and checking check valve function
After the pump and components are cleared and reassembled, attention turns to flushing the system and verifying the check valve operates properly.
Run clean water through the discharge to remove residual debris, observing flow and listening for backflow.
Inspect the check valve for leaks, cracks, or stuck flapper. Replace if compromised.
Re-test under simulated sump conditions to confirm one-way operation and secure fittings.
Repairing or replacing a stuck or faulty float switch
The float switch is a common failure point that can prevent a sump pump from activating or shutting off properly.
The discussion will cover how to adjust float position and travel to guarantee reliable operation and how to replace tethered or vertical float assemblies when repair is not possible.
Clear, step‑by‑step instructions and safety checks will guide the process.
Adjusting float position and travel
Inspecting and adjusting the float’s position and travel guarantees reliable sump pump activation and prevents short cycling or failure to start.
The float should move freely without obstruction, with travel limits set so the pump engages at the desired water level and shuts off before dry running.
Loosen clamps or adjust stop screws, test multiple cycles, and secure settings to maintain consistent operation.
Replacing tethered or vertical float assemblies
Replacing a tethered or vertical float assembly restores proper on/off control when the existing switch is stuck, damaged, or unreliable.
The procedure: power off, remove pump, inspect float linkage and mounting.
Replace with matching assembly, secure connections, and guarantee free travel without obstructions.
Reinstall pump, test multiple cycles, and adjust travel or tether length for desired activation points to confirm reliable operation.
Addressing a seized or damaged motor/impeller
A seized or damaged motor or impeller prevents a sump pump from moving water and requires prompt attention.
First steps typically include attempting to free and lubricate the motor shaft where design permits, followed by inspection for visible impeller wear or jamming.
If lubrication and clearing do not restore operation, replacing the impeller or the entire motor assembly is the practical next step.
Lubrication and freeing a seized motor (where applicable)
Begin by disconnecting power and removing the pump from the basin to guarantee safety and access.
Inspect shaft and bearings for corrosion or debris. Apply penetrating oil to stuck bearings and shaft splines; let soak per product instructions.
Gently tap housing to loosen deposits, then rotate shaft manually.
Reclean, dry, and apply manufacturer‑recommended lubricant sparingly.
Reassemble and test before reinstalling.
Replacing the impeller or motor assembly
When an impeller or motor is seized, damaged, or beyond economical repair, the unit must be disassembled and the faulty component replaced to restore reliable operation.
Power is disconnected, pump removed, and housing opened following manufacturer instructions.
Impeller or motor assembly is inspected, matched with correct replacement parts, installed with proper seals and alignment, then reassembled, tested, and checked for leaks and vibration.
Stopping short cycling and improving pump performance
To stop short cycling and boost performance, the technician first inspects and adjusts float settings to guarantee proper on/off thresholds.
If the basin or pump is undersized, replacing them with correctly sized components prevents rapid cycling and excessive wear.
Where capacity remains marginal, adding a larger or additional sump pit or installing a backup system provides needed reserve and reliability.
Checking and adjusting float settings
A few simple checks of the float mechanism can resolve most short-cycling and performance problems with a sump pump.
Inspect for obstructions, kinked floats, or stuck clips. Verify free vertical movement and correct activation points.
Adjust float arm or reposition float to raise cut-in/cut-out levels, ensuring adequate cycle spacing.
Test operation with water, then recheck connections and seals.
Installing or replacing the correct-sized basin and pump
After verifying and adjusting float settings to stop short cycling, attention turns to whether the basin and pump themselves are properly sized and positioned.
Measure pit diameter and depth against pump specifications; confirm clearance for float travel and inlet flow.
Replace undersized basins or pumps with models matching expected inflow and head.
Re-seat unit on level gravel, secure discharge piping, and test operation.
Adding a larger or additional sump pit or backup system
Several homeowners find that installing a larger pit or adding a secondary pit or backup system is the most effective way to stop short cycling and handle peak inflow. This step increases holding capacity, provides redundancy, and reduces pump wear by spacing out cycles.
A larger basin or dual-pit arrangement, paired with a battery or water-powered backup pump, stabilizes run intervals and improves reliability during heavy runoff.
Fixing noisy or vibrating pumps
Noisy or vibrating sump pumps usually stem from identifiable causes such as a loose mount, trapped debris, or worn bearings.
A systematic inspection isolates the source by checking fasteners, removing obstructions, and testing the motor for play.
Once diagnosed, securing the pump and adding rubber cushioning or replacing worn components restores quiet, stable operation.
Diagnosing vibration causes (loose mount, debris, worn bearings)
Inspecting a vibrating sump pump begins with a methodical check of three common sources: mount looseness, trapped debris, and worn bearings.
Verify fasteners and housing for play, listen for irregular bearing noise during brief operation, and visually inspect and clear intake, impeller, and check valve areas.
Record findings, isolate the specific cause, and plan targeted repair or part replacement.
Mounting and cushioning solutions
Begin by securing the pump to a stable base and isolating vibration paths to reduce transmitted noise and movement.
Use rubber or neoprene mounts, anti-vibration pads, or spring isolators between pump and bracket.
Tighten fasteners to manufacturer torque, replace worn mounting plates, and add foam or sorbothane cushions where pipes contact enclosure.
Recheck alignment and test under load for residual vibration.
Replacing a Sump Pump: When and How
When recurring failures, excessive noise, persistent overheating, or visible corrosion occur, replacement rather than repair is usually warranted.
Selecting the correct replacement requires matching pump capacity and head to the basin and discharge layout and choosing between submersible and pedestal designs based on space, noise, and durability needs.
A clear step-by-step replacement process—power off, disconnect and remove the old unit, install the new pump with proper seals and check valve, reconnect wiring and discharge, then test—ensures reliable operation.
Signs you need a full replacement
A failing sump pump can show clear, measurable signs that replacement is necessary rather than repair.
Persistent cycling, reduced discharge flow, frequent overheating, rusted or seized components, and electrical faults indicate irreversible wear.
Repeated failures after repairs, age beyond typical lifespan (8–10 years), or compromised float and check valve assemblies justify full replacement to restore reliable basement protection.
Choosing the right replacement pump (capacity, head, submersible vs. pedestal)
Choosing the right replacement sump pump requires matching the home’s water-handling needs to the pump’s capacity, shutoff head, and form factor—submersible or pedestal—so performance and reliability are guaranteed. Select capacity (GPM), total dynamic head, and materials for corrosion resistance. Consider backup power and float-switch type. Compare options:
| Feature | Consideration |
|---|---|
| Capacity | GPM at specific head |
| Head | Vertical lift needed |
| Type | Submersible vs pedestal |
| Backup | Battery or water-powered |
Step-by-step replacement process
The replacement section outlines preparing the sump pit, safely removing the old pump, and clearing debris to guarantee a clean work area.
It then covers installing the new pump, reconnecting the discharge line and check valve, and securing electrical connections.
Finally, procedures for testing and commissioning the new unit are described to confirm proper operation and watertight seals.
Preparing the site and removing the old pump
Begin by cutting power to the sump pump circuit and shutting off any connected check valves to guarantee a safe, dry workspace.
Wear gloves and eye protection.
Remove the lid and siphon or bail out remaining water.
Disconnect electrical and discharge piping at accessible joints, noting orientation.
Extract the old pump, inspect the basin for debris or corrosion, and clean the sump before installing its replacement.
Installing the new pump and reconnecting discharge/check valve
With the basin cleaned and the old unit removed, attention shifts to positioning the replacement pump and restoring the discharge line and check valve.
The pump is centered on a stable platform, level and firm.
Reattach the discharge pipe using proper fittings and sealant, install a one-way check valve oriented correctly, tighten clamps, and secure electrical connections per code before proceeding to the next steps.
Testing and commissioning the new unit
Activate the system to verify proper operation before finalizing the installation.
The technician fills the pit, cycles the pump, checks float travel and switch engagement, and inspects the discharge for steady flow and leaks.
Measure amperage and voltage against specs, confirm the check valve prevents backflow, and allow multiple cycles to guarantee reliable activation and automatic shutoff under load.
Preventive Maintenance Schedule and Checklist
A clear preventive maintenance schedule helps guarantee a sump pump remains reliable and ready when needed. Regular monthly checks catch minor issues early, while seasonal and annual tasks address wear and performance.
Specific steps for winterizing and guarding the pump in cold climates reduce freeze-related failures.
- Monthly inspections: test operation, clear debris, and verify float switch movement.
- Seasonal tasks: clean the pit, check discharge lines, and inspect electrical connections.
- Annual maintenance: service the pump, verify backup systems, and replace worn parts.
- Winterization: insulate exposed pipes, guarantee proper drainage, and protect the power supply.
Monthly checks to keep the pump reliable
Because consistent monthly checks catch small problems before they become failures, a concise preventive routine preserves sump pump reliability and household protection.
Inspect power connection and test battery backup; run pump to confirm activation and float switch movement; clear debris from the pit and intake screen; verify discharge pipe is unobstructed and sealed; listen for unusual noise or vibration; note run duration and document findings for trend tracking.
Seasonal and annual maintenance tasks
Establishing a seasonal and annual maintenance routine guarantees long-term sump pump performance and helps prevent costly failures. This schedule outlines specific tasks, their recommended frequency, and a simple checklist for tracking completion so homeowners and service technicians can address wear, corrosion, and system changes before they escalate.
Quarterly: inspect float, clean basin, test alarm.
Biannual: check battery backup, clean discharge line.
Annual: full system inspection, replace worn parts, document service.
How to winterize and protect the pump in cold climates
After seasonal and annual checks are complete, focus shifts to measures that specifically guard the sump pump against freezing temperatures and winter-related failures.
This section outlines a preventive maintenance schedule and checklist tailored for cold climates. Inspect insulation, heat tape, and pit covers monthly.
Verify pump operation and battery backup weekly during cold spells. Drain and winterize auxiliary lines, secure discharge piping, and document dates of each task.
Upgrades and Backup Options for Flood Protection
For enhanced flood protection, the article reviews battery backup pumps and guidance on selecting suitable batteries as well as the alternatives offered by water-powered backup systems with their respective advantages and limitations.
It also covers alarms, smart monitors, and remote alert options for real-time failure notification.
Finally, practical sump pit improvements and check valve upgrades that reduce failure risk are examined.
Battery backup pumps and battery selection
Many homeowners add a battery backup sump pump as a fail-safe against power outages and primary pump failures.
Selection hinges on battery type (sealed AGM or deep-cycle lead-acid), amp-hour capacity, and expected runtime under load.
Match battery voltage to backup unit, guarantee proper charging system, and allow for periodic testing and replacement every 3–5 years to maintain reliable emergency operation.
Water-powered backups and pros/cons
Several homeowners consider water-powered backup pumps as an alternative to battery systems because they use municipal water pressure to drive discharge when the primary pump or power fails.
These systems need adequate municipal pressure and may increase water usage and utility costs. They offer reliable, indefinite runtime during outages but require proper installation, backflow prevention, and can struggle where water supply is limited or metered.
Alarms, smart monitors, and remote alerts
Beyond mechanical backup options like water-powered pumps, electronic monitoring provides early warning and remote oversight when primary systems fail.
Battery-backed alarms, float-switch sensors, and Wi-Fi-enabled monitors detect high water, pump failures, power loss, or abnormal cycling. Alerts can be sent via text, app push, or email.
Integration with home automation and professional monitoring increases response speed and minimizes flood damage.
Sump pit improvements and check valve upgrades
Improve the sump pit and upgrade the check valve to reduce clogging, backflow, and sediment buildup that compromise pump performance.
Recommend installing a larger, smooth-sided pit liner, gravel-free base, and a sealed debris screen to prevent blockages.
Advise fitting a reliable swing or dual-check valve with proper orientation and a vertical discharge loop.
Include periodic inspection and replacement intervals to guarantee ongoing protection.
Troubleshooting Scenarios and Solutions
The troubleshooting section presents common sump pump problems, diagnostic steps, and practical fixes to restore reliable operation.
It outlines causes for continuous running in heavy rain, reasons a pump runs without lowering water, factors behind intermittent or delayed starts, and electrical faults like tripped breakers or blown fuses.
Each scenario includes quick checks and corrective actions to guide repair or when to call a professional.
- Causes and fixes for continuous running during heavy rain
- Diagnostics when the pump runs but water level doesn’t drop
- Likely causes of intermittent operation or delayed start
- Troubleshooting electrical tripping and blown fuses
Pump runs continuously during heavy rain likely causes and fixes
When a sump pump runs continuously during heavy rain, it usually signals that the inflow of water exceeds the pump’s capacity or that a system fault prevents the pump from cycling properly.
Possible causes include undersized pump, clogged or frozen discharge, leaky basin, stuck float, or overwhelmed drainage.
Fixes: upgrade capacity, clear discharge, seal basin, free/adjust float, improve yard grading and drainage.
Pump runs but water level doesn’t drop diagnostic steps
If a sump pump runs but the water level in the basin does not fall, it signals a flow or mechanical issue beyond simple capacity or external drainage problems.
The diagnosis should proceed methodically to isolate leaks, check valve function, inspect the impeller and intake, and verify float and switch operation.
Confirm discharge pipe integrity, clear clogs, test check valve seating, inspect impeller for damage, and verify pump head capacity.
Intermittent operation or delayed start likely causes
Investigate intermittent operation or delayed start by treating the symptom as an electrical, control, or obstruction issue that prevents reliable activation.
Inspect float switch for sticking, misalignment, or debris; test switch continuity.
Verify check valve and discharge pipe for clogs or partial blockages.
Confirm automatic relay or float-based controller functions; reseat connections and tighten loose terminals.
Replace faulty float or controller if intermittent after testing.
Electrical tripping or blown fuses during operation
Resolve electrical tripping or blown fuses by treating the symptom as a sign of overload, short circuit, or ground fault within the pump circuit.
Inspect cord, plug, and outlet for damage; test circuit breaker and replace blown fuses.
Measure current draw and verify pump motor insulation.
Clear debris causing overload, replace faulty float switches, and consult a licensed electrician if persistent faults or exposed wiring are found.
Parts, Tools, and Replacement Cost Estimates
A concise inventory of common replacement parts, their typical lifespans, and the basic tools required helps frame realistic repair choices. Below is a quick reference for parts, approximate DIY vs. professional costs, and recommended sources or brands. Refer to the table for a snapshot before proceeding with repairs or estimates.
| Item / Topic | Notes |
|---|---|
| Common parts & lifespan | Impellers (3–7 yrs), switches (2–5 yrs), seals/gaskets (1–3 yrs) |
| DIY vs. pro cost (estimate) | DIY: $20–$200; Professional: $150–$600+ |
| Tools needed | Pliers, multimeter, screwdriver set, pipe wrench |
| Sources & brands | Local suppliers, Home Depot, Zoeller, Wayne, Little Giant |
Common replacement parts and expected lifespan
Typical wear items for sump pumps include impellers, check valves, seals, and float switches, each with a different expected lifespan and replacement complexity.
Impellers and seals typically last 3–7 years depending on debris and corrosion. Check valves often endure 5–10 years. Float switches vary widely, 2–8 years.
Motors and bearings can fail after 5–15 years. Regular inspection extends component life.
Estimated DIY vs. professional repair costs
Repair costs for a sump pump vary widely depending on whether a homeowner undertakes the work or hires a professional, and on the specific parts and tools required.
DIY repairs often cost $20–$200 for parts and basic tools; professional service typically ranges $150–$600 including labor.
Major replacements (motor, switch, check valve) push costs higher. Estimated ranges help budget decisions.
Where to source quality parts and helpful brands
When deciding between DIY and professional options, homeowners should also consider where to source reliable parts and which brands offer proven performance.
Reputable retailers include plumbing supply stores, big-box hardware chains, and manufacturer-authorized dealers. Trusted brands: Zoeller, Grundfos, Wayne, and Liberty.
Buy OEM seals, impellers, and switches; compare warranties and read verified reviews.
Keep receipts and part numbers for future maintenance.
Safety and Warranty Considerations
Before beginning any repair, the article recommends following electrical safety best practices and wearing appropriate PPE to prevent shock and injury.
It also explains how certain DIY actions can void manufacturer warranties and when OEM parts or authorized service should be used to maintain coverage.
Finally, it advises keeping clear documentation of repairs, receipts, and professional service records for warranty claims and future maintenance.
Electrical safety best practices and PPE
A clear understanding of electrical hazards and appropriate personal protective equipment (PPE) is essential for anyone working on a sump pump to prevent shock, burns, and equipment damage.
Assess power sources; always disconnect and lock out circuits before service. Use insulated tools, rubber-soled footwear, safety glasses, and electrical gloves rated for the task.
Inspect cords, avoid wet conditions, and follow local electrical codes.
Maintaining warranty coverage when repairing or replacing
Many homeowners and technicians must understand warranty terms and manufacturer instructions to avoid voiding coverage during sump pump repairs or replacements.
They should use authorized parts, follow prescribed procedures, and avoid unauthorized modifications. Prior approval is advisable for warranty-related service.
Performing work beyond user-maintenance, or neglecting recommended maintenance schedules, can invalidate claims.
Retain proof of authorized service and original purchase documentation.
Documentation and when to keep professional records
Keep detailed records of professional inspections, repairs, and part replacements to support safety, warranty claims, and future maintenance decisions.
Include dates, technician names, license numbers, service descriptions, parts used, and receipts.
Store digital copies and originals in a safe, accessible location.
Retain records for the duration of warranties and several years afterward to document service history and substantiate claims or resale value.
Final Checklist After Repair or Replacement
A concise final checklist guarantees the sump pump performs reliably after repair or replacement.
It should list specific functional tests to run, outline simple long-term monitoring practices, and note clear signs that could indicate recurring problems.
The homeowner or technician can use this checklist to confirm operation and plan follow-up inspections if warning signs appear.
Functional tests to perform
Begin a systematic sequence of functional tests to verify the sump pump operates reliably after repair or replacement.
Check power and alarm function, confirm float switch movement and unobstructed travel, verify pump activation at correct water levels, observe discharge flow and backflow prevention, measure run time and motor temperature for abnormalities, and guarantee automatic shutoff and reset behavior.
Record results and corrective actions.
Long-term monitoring tips
Several simple practices guarantee long-term reliability after sump pump repair or replacement.
Schedule quarterly inspections of discharge lines, check valves, and power connections. Log run times, float activity, and any unusual noises.
Test backup power and alarm systems semiannually. Keep the pit clean and water-free of debris.
Review records annually to spot trends and plan preventive maintenance or component replacement.
Signs to watch for that indicate recurring problems
With routine monitoring in place, technicians and homeowners should next scan for specific indicators that a repaired or replaced sump pump is failing again.
Watch for rapid on/off cycling, unusual noises, reduced discharge flow, rising basement water levels, frequent float or switch sticking, tripped breakers, corrosion or leaks, and repeated alarm activation.
Early detection prompts swift troubleshooting or replacement to prevent recurrence.
Conclusion
After a weekend of wrenching, the homeowner discovered the cleared float saved the basement—like a lighthouse restored after fog. One survey shows 60% of failures stem from debris-clogged floats, underscoring commonality of small causes. With the outlined diagnostics, repairs, and preventive checklist followed, a functioning sump pump becomes less an emergency and more routine stewardship: regular checks and timely part swaps keep water—and worry—at bay.