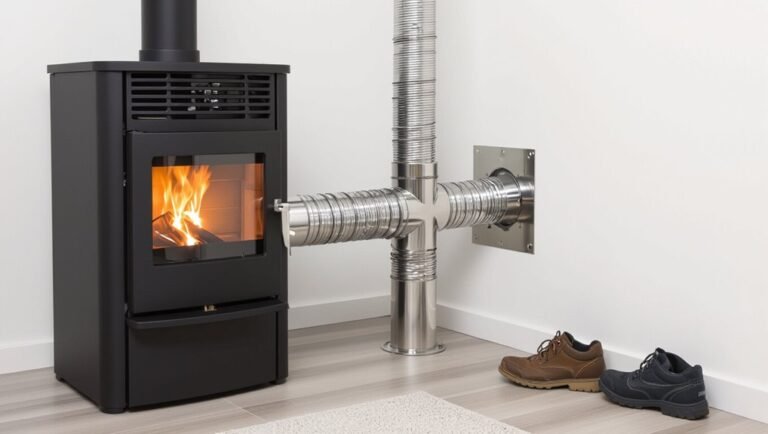
How to Hide a Boiler in the Living Room: Stylish, Safe Ideas That Don’t Sacrifice Access
To stylishly and safely hide a boiler in your living room, consider using a shallow built-in cupboard, freestanding cabinet, or decorative screen. These solutions maintain necessary access for servicing while allowing for proper ventilation and clearance. Start by measuring the boiler and its service points, ensuring direct flueing and combustion air are accounted for. Use fire-rated materials and leave marked maintenance zones accessible. Always make sure valves are reachable and schedule regular professional inspections. Explore practical design options, ventilation requirements, and budget-friendly styling that ensure full service access.
How to Conceal a Boiler in the Living Room Without Blocking Access
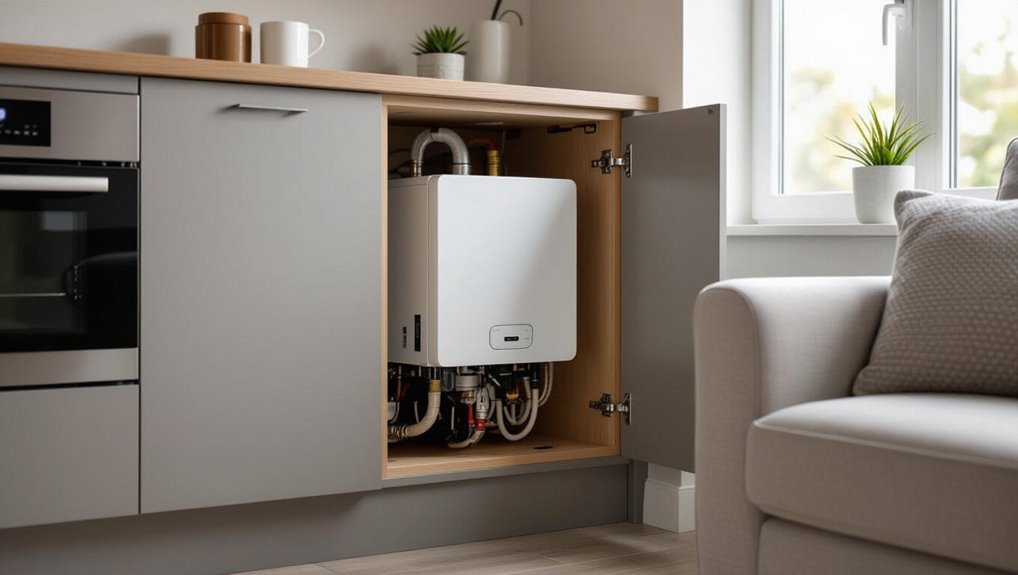
Before beginning work, the homeowner should assess immediate considerations such as location, surrounding finishes, and any obstacles that could affect installation.
They must also account for legal and safety requirements—adequate ventilation, required clearances, and unobstructed service access—to guarantee compliance and safe operation.
Finally, accurate measurements of the boiler’s dimensions and service points should be confirmed so any concealment maintains full technician access.
Immediate considerations before you start
Several practical checks should precede any concealment plan: confirm local building codes, verify boiler clearances and service access points, and identify combustion air and flue requirements.
Before exploring how to hide a boiler in living room, assess room layout, nearby furniture, and noise levels.
Sketch access panels, plan removable facades, and schedule a qualified engineer inspection to confirm feasibility and safety.
Legal and safety requirements to know (ventilation, clearance, service access)
Having completed the initial checks on codes, clearances, and access points, attention must turn to the legal and safety requirements that govern ventilation, minimum clearances, and unobstructed service access when concealing a boiler in a living room.
Compliance demands maintained airflow paths, prescribed lateral and frontal clearances, non-combustible surrounds, accessible isolating valves, removable panels for servicing, and adherence to local building and gas regulations enforced by qualified professionals.
Checking boiler dimensions and service points
When planning concealment, the installer measures the boiler’s full dimensions and maps all service points—flue, condensate outlet, gas and water connections, electrical feed, and any control interfaces—to confirm the enclosure and surrounding finishes do not obstruct routine maintenance or emergency access.
Clearances, hinge swing, removable panels, and ventilation openings are specified. Marked access zones confirm future servicing without dismantling decorative elements or compromising safety.
Quick options for hiding a boiler today
Practical quick options for hiding a living-room boiler include freestanding radiator cabinets and enclosures that match room trim and decorative screens or room dividers that mask the unit without permanent alteration.
Built-in cabinetry with removable panels offers a more integrated look while preserving service access.
Furniture solutions such as benches or media units can conceal the boiler and double as functional elements.
Freestanding radiator cabinets and enclosures
Freestanding radiator cabinets and enclosures offer a fast, non-permanent way to conceal a boiler while preserving room layout and access.
Ready-made units fit around compact boilers, improving aesthetics and providing discreet shelf space.
Ventilated panels and removable fronts maintain airflow and serviceability.
Materials range from painted MDF to metal; selection should consider heat tolerance, clearance requirements, and local safety guidance to avoid obstructing controls.
Decorative screens and room dividers
Decorative screens and room dividers provide a fast, non-permanent solution for concealing a boiler while keeping it accessible for service. They come in folding panels, fixed partitions, or sliding screens that can match a room’s decor.
Lightweight materials allow easy removal for maintenance, while louvered or slatted designs preserve ventilation. Choose fire‑resistant finishes and guarantee panels don’t obstruct service panels or valves.
Built-in cabinetry with removable panels
While screens and dividers offer quick, non-permanent concealment, built-in cabinetry with removable panels creates a more integrated, permanent look that still allows easy access for servicing.
Custom cabinets can match trim and paint, hide pipes, and include ventilation grills. Panels fasten with discreet clips or magnets for tool-free removal.
Guarantee compliant clearances, accessible controls, and removable shelves for technicians.
Furniture solutions that integrate a boiler (bench, media unit)
When designed with access panels and ventilation in mind, furniture pieces such as built-in benches and media units can conceal a living-room boiler without compromising serviceability.
These solutions combine storage or seating with discrete cutouts, removable boards, and heat-resistant finishes so the appliance remains reachable and safe.
Modular benches, slimline cabinets, and custom media consoles offer quick installation, concealed piping routes, and compliant clearances while matching room aesthetics.
Designing a built-in boiler cupboard that maintains service access
Designing a built-in boiler cupboard begins with accurate measurements and a planned layout that preserves clear service space.
Removable doors, hinged panels or access hatches should be positioned for routine maintenance while incorporating ventilation grills, fire-rated materials and proper condensate routing.
Finishing choices can then be selected to blend the unit with living-room decor without compromising functionality.
Measuring and planning the cupboard layout
Before any cutting or building begins, accurate measurements and a clear plan guarantee the cupboard both conceals the boiler and preserves service access.
Record boiler dimensions, flue location, service clearances, pipe runs and ventilation requirements.
Map panel positions, shelving and cable routes to avoid obstructions.
Allow extra tolerance for future servicing, and draft elevations and a cut list before purchasing materials.
Removable doors, hinged panels, and access hatches
Plan for access from the start: removable doors, hinged panels, and access hatches should be positioned and sized to permit safe, unobstructed access to the boiler, controls, and serviceable pipework while meeting ventilation and clearance requirements.
Removable facings, lockable hinges, and magnetic catches enable quick opening.
Number and placement of panels should allow technician reach to controls, condensate points, and pipe unions without dismantling cabinetry.
Ventilation grills, fire-rated materials, and condensate routing
Having guaranteed access panels and hinged facings allow unimpeded service. Attention turns to ventilation, fire safety, and condensate management to keep the built-in cupboard both serviceable and compliant.
Install fixed and return grills sized per boiler manufacturer and Building Regs. Use fire-rated linings and intumescent seals around openings, and route condensate to a safe drain with an accessible trap and frost protection for maintenance.
Finishing choices to match living-room decor
A cohesive finish can disguise the boiler cupboard while preserving required access and service clearances.
Matte or satin paint, wood veneer panels, or tongue-and-groove cladding integrate with room style while allowing removable panels or hinged doors for service.
Concealed magnetic catches, continuous ventilation slots matching skirting lines, and coordinated hardware guarantee safety and aesthetics without obstructing technician access or maintenance tasks.
Concealment techniques for different boiler types
Different boiler types require distinct concealment approaches based on their service and safety needs.
Gas combi boilers need clear ventilation and unobstructed flues, while system and regular boilers often demand space for tanks, pumps and visible pipe runs.
Electric boilers, with no flue or external tanks, allow the simplest enclosure options provided electrical access remains safe and accessible.
Gas combi boilers ventilation and flue considerations
Consider ventilation and flue requirements as the primary constraints when concealing a gas combi boiler: these units need direct flueing to the outside and sufficient air for combustion and cooling.
Enclosures must allow an unobstructed flue route, maintain manufacturer-specified clearances, and incorporate ventilation grilles or ducts sized and positioned to prevent overheating or CO buildup.
Install removable panels for service access and avoid blocking intake or exhaust.
System and regular boilers additional equipment and pipework
System and regular boilers require more ancillary components—expansion vessels, hot water cylinders, pumps, and extra pipe runs—that influence concealment strategies.
Concealment must accommodate larger footprints and visible pipework runs: purpose-built cupboards with access panels, boxed-in pipe trunking, and ventilated cabinetry.
Leave clear service gaps, label shutoffs, and use removable panels for maintenance.
Materials should resist heat and allow inspection without dismantling permanent finishes.
Electric boilers simpler enclosure options
Many electric boilers are compact and generate less external pipework, making simple cabinetry or wall-mounted enclosures effective concealment options.
Discrete shallow cabinets, ventilated cupboards with removable panels, or slim floating boxes preserve access while blending with decor. Materials should allow airflow and service access; magnetic or hinged panels speed inspections.
Electrical isolation, labeling and professional installation remain essential for safety and code compliance.
Materials, finishes, and styling ideas
The discussion turns to materials and finishes that allow a boiler to recede into the room, from paint, veneer, and laminate that match surrounding cabinetry to Shaker, louvred, or mesh doors that combine style with ventilation.
Functional styling tactics—integrated shelving, TV mounts, or built-in seating—can mask the unit while adding useful surface area.
Decorative camouflaging with artwork, mirrors, or plants completes the approach by breaking up the appliance visually without compromising access.
Paint, veneer, and laminate options that blend in
A few carefully chosen finishes can make a living-room boiler recede into the background by matching color, texture, and sheen to surrounding elements.
Neutral matte paint minimizes glare; tinted trims unify edges.
Wood veneer echoes cabinetry; engineered oak or walnut laminates offer durable, cost-effective warmth.
High-quality vinyl wraps mimic grain while resisting moisture.
Subtle color-matching and consistent finish levels guarantee the unit integrates without drawing attention.
Shaker doors, louvred doors, and mesh panels for airflow
Painted finishes and veneers set the stage for concealment, while door and panel choices determine both look and airflow around a living-room boiler.
Shaker doors offer a clean, traditional face with removable panels for service access. Louvred doors and metal or decorative mesh panels provide continuous ventilation.
Finishes—from muted mattes to subtle woodgrain—maintain visual cohesion while meeting safety and code ventilation needs.
Incorporating shelving, TV mounts, or seating to disguise the unit
Integrating shelving, TV mounts, or seating around a living-room boiler transforms a functional necessity into a deliberate design feature, using materials and finishes to balance concealment with access and ventilation.
Matte-painted plywood, veneered oak, or powder-coated steel frame modular units provide durability.
Floating shelves, recessed TV brackets, and bench seating with removable tops enable service access while matching room tones and tactile finishes for cohesive, unobtrusive styling.
Creative camouflaging: artwork, mirrors, and plants
Three understated strategies—artwork, mirrors, and plants—turn a living-room boiler into a deliberate visual element while preserving access and airflow.
Artwork panels on hinged frames conceal controls yet flip open; lightweight mirror tiles expand perceived space and reflect light without blocking vents; strategically placed tall, potted plants soften edges and distract sightlines.
Finishes should resist heat, allow service clearance, and coordinate with room palette.
Step-by-step installation checklist
The installation checklist begins with pre-installation checks carried out by a qualified engineer to confirm suitability and compliance.
It then covers building the enclosure—framing, insulation, and ventilation—followed by fitting removable access panels and clearly labeling service points.
The process concludes with a final safety inspection and completion of required documentation.
Pre-installation checks with a qualified engineer
Begin by arranging a site survey with a qualified Gas Safe–registered engineer to confirm the boiler type, flue requirements, gas supply pressure, and suitable mounting location.
This assessment should also check structural support, ventilation needs, condensate routing, and access for servicing to guarantee the proposed concealment plan complies with regulations and manufacturer specifications.
The engineer should document required clearances, electrical supplies, pipework routes, and any remedial work before installation.
Building the enclosure: framing, insulation, and ventilation
Once the site survey and any remedial work are complete, framing, insulation, and ventilation are installed in a coordinated sequence to create a safe, serviceable boiler enclosure.
Studs are fixed to allow clearances, non-combustible fireboard or plasterboard is applied, thermal and acoustic insulation fitted, and vents or ducting positioned for combustion air and heat dissipation.
Fasteners, seals, and clearances follow manufacturer and code requirements for safety and serviceability.
Installing removable access and labeling service points
Install removable access panels and clearly label service points to secure safe, efficient maintenance and compliance with codes.
Fit hinged or magnetic panels sized for technician reach; use fire‑rated materials where required.
Mark shutoffs, isolation valves, condensate drains, and electrical disconnects with durable labels and a simple diagram inside the panel.
Ascertain fasteners allow tool‑free removal when appropriate.
Final safety inspection and documentation
Conduct a methodical final safety inspection and compile complete documentation to verify the concealed boiler installation meets code, manufacturer, and safety requirements.
Inspect clearances, ventilation, combustion air, flue integrity, gas/electrical connections, condensate drainage, and access panels.
Test controls, safety devices, and leak detection.
Record measurements, test results, component serial numbers, commissioning notes, and owner maintenance instructions.
Archive permits and certificates.
Common problems and how to avoid them
Common problems include overheating from inadequate ventilation, blocked access that hinders routine servicing, and condensation leading to corrosion in enclosed housings.
Identifying ventilation requirements, planning clear maintenance access, and using moisture-resistant materials and drainage can prevent these issues.
The following section outlines practical signs to watch for and specific measures to mitigate each risk.
Overheating and poor ventilation signs
When a boiler lacks adequate ventilation or is running hotter than expected, the room may show clear warning signs—unusual warmth or persistent heat near the unit, a rise in condensation or damp patches on surrounding walls, and stale or chemical odors indicating trapped combustion gases.
Immediate responses include improving airflow with vents or grills, avoiding obstructive casing, monitoring temperatures, and consulting a qualified engineer if signs persist.
Restricted access for servicing and how to prevent it
Allowing clear, safe access to a boiler is essential to routine maintenance and emergency repairs. Obstructions such as built-in cabinetry, decorative screens, or tightly packed furniture can hinder engineers and lead to longer, costlier visits or missed faults.
Prevent restricted access by installing removable panels, hinged doors with full-width openings, marked clearance zones, and reversible concealments. Keep pathways unobstructed and provide documented access instructions.
Condensation and corrosion risks in enclosed spaces
Because boilers and their pipework emit heat and moisture, enclosing them without adequate ventilation can create persistent condensation that accelerates corrosion of metal components and fittings.
Regular inspection, corrosion-resistant coatings, and use of breathable enclosures reduce risk.
Install ventilation grilles, trickle vents or a small extractor, guarantee clearances for airflow, and consider a condensate drain or dehumidifier to prevent long-term damage.
Cost considerations and budgeting guide
Cost considerations can sway the decision between a budget DIY concealment and hiring professionals for a polished, compliant installation. The homeowner should weigh upfront expenses against long-term costs such as routine maintenance, potential repairs, and eventual replacement.
Clear criteria for when a specialist is required—safety, regulations, or complex modifications—help set a realistic budget.
- A basic DIY cupboard or screen with paint and trim versus a fitted cabinet and venting by a contractor
- Ongoing service visits, part replacements, and the impact of warranty coverage on lifetime cost
- Structural changes, gas or flue work, and permit requirements that typically necessitate a specialist
Typical price ranges for DIY vs professional solutions
Typical projects to conceal a living-room boiler span a wide price spectrum: simple DIY boxing or cupboard builds may run from a few dozen to a few hundred dollars in materials, while bespoke cabinetry, ventilation upgrades, or professional enclosure installation commonly range from several hundred to a few thousand dollars.
Costs vary by materials, finishes, required ventilation, local labor rates, and site complexity; obtain quotes.
Long-term costs: maintenance, repairs, and replacements
Many homeowners should factor ongoing expenses beyond the initial concealment project, since maintenance, occasional repairs, and eventual replacement of boiler components or the unit itself can materially affect long-term budgeting.
Routine service, part replacements, and emergency call-outs vary by age and model; accessible concealment reduces labour costs.
Budget for annual inspections, a sinking fund for major repairs, and eventual full replacement to avoid surprises.
When to hire a specialist installer
Any homeowner weighing concealment options should consider hiring a specialist installer when the project involves complex plumbing, gas work, electrical alterations, structural modifications, or when local codes and warranties require certified trades.
A specialist provides accurate quotes, anticipates hidden costs, guarantees code compliance, minimizes risk, and preserves warranties.
Budget for labour, inspections, permits, and contingency (typically 10–20%); compare multiple estimates before committing.
Comparison of concealment methods
Different concealment methods—cabinets, screens, and furniture integration—are weighed by appearance, access for servicing, and compatibility with specific boiler types. A concise comparison helps determine which option best balances cost, installation complexity, and ongoing maintenance. The table below summarizes key trade-offs for quick reference.
| Method | Key trade-off |
|---|---|
| Cabinet | Better aesthetics, may restrict service access |
| Screen | Low cost, limited protection |
| Furniture integration | Seamless look, potential ventilation concerns |
| Suitability | Varies by boiler type, cost, and serviceability |
Pros and cons: cabinet vs screen vs furniture integration
Several practical approaches exist for concealing a living-room boiler—cabinet enclosures, decorative screens, and furniture integration—each offering distinct trade-offs in appearance, accessibility, ventilation, and cost.
Cabinets provide neat storage and easier pipe concealment but can restrict airflow.
Screens are inexpensive and flexible yet offer limited sound reduction.
Furniture integration yields seamless aesthetics but demands custom work and careful service access planning.
Suitability by boiler type, cost, and ease of service
Because boiler models vary in size, ventilation needs, and service access points, the ideal concealment method depends on the specific unit: wall-mounted combi boilers suit shallow cabinets or recesses for easy servicing; floor-standing boilers need larger enclosures with removable panels; compact units work behind decorative screens.
Costs range from low (freestanding screens) to high (custom cabinetry).
Prioritize access panels, airflow, and technician clearance when choosing.
Safety checks and maintenance after concealing the boiler
After concealment, a clear maintenance plan should outline a regular inspection schedule and specific items to check, such as burners, seals, and pressure.
It must also confirm that alarms, flues, and vents remain unobstructed and fully operational.
Finally, access requirements should be communicated to contractors and household members so inspections and emergency work are not impeded.
Regular inspection schedule and what to check
Routine inspection is essential to guarantee a concealed boiler remains safe and efficient; homeowners should follow a clear schedule of checks and professional servicing.
Inspect monthly for visible leaks, unusual noises, and pressure stability.
Quarterly verify pipe insulation, cabinet ventilation openings and condensate drains.
Annually arrange a Gas Safe or qualified technician service to test controls, combustion efficiency and safety interlocks, documenting all findings.
How to ensure alarms, flues, and vents remain functional
Maintain clear access and regular checks on alarms, flues, and vents to confirm a concealed boiler continues to operate safely and efficiently.
Verify carbon monoxide and smoke detectors monthly, replacing batteries as needed.
Inspect flue terminals and vent grilles for obstructions, corrosion, or animal nests.
Ascertain ventilation routes meet manufacturer clearance specifications and record findings.
Promptly address any faults with a qualified engineer.
Communicating access needs to contractors and household members
Provide clear, written instructions and visible markings so contractors and household members understand when and how the boiler enclosure must be opened for inspections, servicing, or emergency access.
Include contact details for the installer, service intervals, and a simple diagram of key valves and controls.
Post instructions near the enclosure and in shared home documents; review and update them after any modifications.
Real-life examples and layout ideas
The article presents compact solutions for tight living rooms that conceal boilers without sacrificing circulation or storage.
It also examines strategies for open-plan spaces where the boiler is integrated into a focal wall alongside shelving or media units.
Before-and-after layouts illustrate practical trade-offs and visual impacts to guide selection.
Small living-room solutions for tight spaces
When space is at a premium, clever concealment of a boiler can transform a cramped living room into a functional, cohesive area without sacrificing access or safety.
Compact solutions include shallow recessed cabinets with hinged panels, built-in shelving that frames the unit, multifunctional furniture with hidden access, and vertical cupboards occupying narrow alcoves.
Each layout prioritizes service clearance, ventilation, and unobtrusive aesthetics.
Open-plan living: integrating a boiler into a focal wall
Moving from compact concealment strategies to open-plan scenarios, attention shifts to making a boiler part of a room-defining focal wall without compromising function or flow.
Design examples include recessed alcoves with ventilated cabinetry, painted surround panels matching media units, and a compact utility column beside shelving.
Layouts prioritize clear service access, balanced symmetry, and airflow, integrating controls discreetly while keeping the wall visually cohesive.
Before-and-after concept configurations
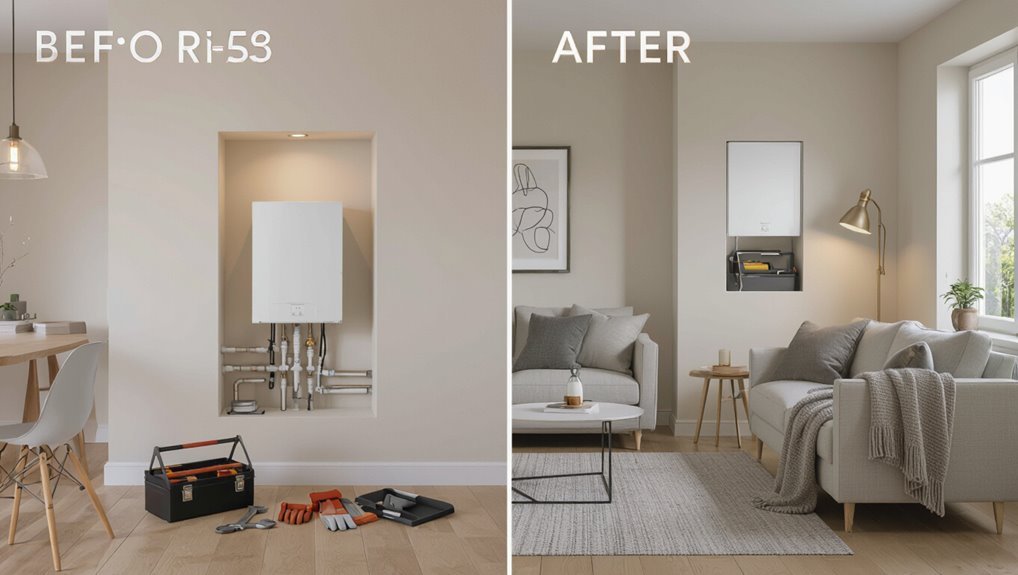
Several illustrative before-and-after configurations demonstrate how a visible living-room boiler can be transformed into an integrated, functional element without sacrificing access or airflow.
Examples show replacing exposed units with shallow cabinets featuring removable panels, recessed alcoves with ventilation grilles, built-in shelving that disguises service clearances, and corner enclosures that retain service access.
Each layout balances aesthetics, maintenance space, and code-compliant ventilation.
Conclusion
Concealing a living-room boiler can blend practicality with panache, turning an eyesore into a considered feature while preserving essential access for servicing. By choosing ventilated cabinetry, removable panels, or decorative screens tailored to the boiler type, owners balance aesthetics, safety, and budget. Who wouldn’t prefer a seamless wall of storage that whispers warmth rather than announces utility? With sensible materials, clear sightlines, and routine checks, function and style coexist without compromise.