How to Crimp PEX Without a Tool: DIY Methods That Work Safely
You can join PEX without a dedicated crimp tool using approved alternatives like push-to-connect fittings, compression fittings, or cinch clamps tightened with pliers or a screwdriver. However, ensure you use the correct parts, make clean cuts, and place rings or bands properly to minimize leak risks. While these methods are suitable for temporary repairs, permanent installations should always utilize certified tools and fittings. For detailed guidance on safe techniques, testing, and knowing when to call a professional, continue reading.
Can You Crimp PEX Without a Crimp Tool? A Clear, Practical Answer
The article distinguishes situations where skipping a crimp tool may produce an adequate connection—such as temporary repairs or non-pressurized test setups—and situations where it is not acceptable, like permanent, buried, or pressurized potable-water lines.
It notes that improvised methods increase the risk of leaks and failures.
It also highlights that many local codes and manufacturers require certified crimp tools and fittings, so non-tool crimping can violate safety standards and warranties.
When skipping a crimp tool is acceptable and when it’s not
Although some DIYers may improvise, skipping a crimp tool is only acceptable in very limited situations: temporary repairs, mock-ups, or when using alternative approved fittings (such as push-to-connect or compression fittings) that do not require crimping.
In those cases, instructions for how to crimp pex without a tool may be referenced for context, but permanent plumbing should use proper tools and certified fittings to guarantee reliable, code-compliant connections.
Safety and code implications for non-tool crimping
Because improper crimping can cause leaks, safety and building code implications make attempting to crimp PEX without the correct tool a risky proposition for permanent work.
Authorities and manufacturers require approved fittings and methods; DIY alternatives may void warranties and fail inspections.
Temporary fixes might suffice for emergencies, but certified tools and techniques guarantee reliable seals, compliance, and occupant safety.
Basics You Need to Know About PEX Fittings and Connections
PEX installs use distinct systems—crimp, clamp/cinch, and expansion—each paired with specific fittings and connection methods.
Crimp rings and clamp bands compress the pipe onto barbed fittings, while expansion systems enlarge the tubing to accept a fitting that contracts for a seal.
Reliable joints typically require compatible fittings, properly sized rings or sleeves, and the correct tools or adapters to guarantee uniform compression and leak-free connections.
Types of PEX systems and common fittings (crimp, clamp, cinch, expansion)
When choosing a plastic tubing system for plumbing, homeowners and professionals must understand the four main connection methods—crimp, clamp (cinch), cinch-specific terminology, and expansion—each of which pairs with distinct fittings and installation tools.
Each system uses compatible fittings: crimp rings with standard PEX fittings, stainless clamps for cinch systems, specialized expansion fittings for expansion PEX, and matching adapters for alterations.
How crimp rings, clamps, and expansion fittings work
Having covered the main systems and their compatible fittings, the focus shifts to how each connection actually creates a watertight joint.
Crimp rings compress PEX onto barbed fittings, deforming tube for seal. Stainless clamps cinch similarly but distribute pressure differently.
Expansion fittings enlarge PEX, insert a fitting, then allow tubing to contract around it, forming a secure, mechanically interlocked seal.
Materials and tools normally required for reliable PEX joints
A reliable PEX joint depends on a small set of purpose-designed materials and a few basic tools: tubing of the correct type and size, compatible fittings (crimp, clamp, or expansion), appropriately sized crimp rings or stainless clamps, and a ring or clamp tool or expansion tool as required by the fitting system.
Additional essentials include a tube cutter, deburring tool, marker, and pressure tester to verify integrity.
DIY Methods to Join PEX Without a Dedicated Crimp Tool
The section outlines several practical alternatives for joining PEX when a dedicated crimp tool is unavailable, presenting step-by-step approaches for each method.
Techniques covered include using a screwdriver or flatbar as a makeshift cinch clamp tool, a pliers-and-hose-clamp method, heavy-duty zip ties with clamp adapters, compression-style fittings, and push-to-connect (SharkBite) fittings.
Each method is described with installation steps and key considerations to help assess suitability and guarantee leak-free connections.
Using a screwdriver or flatbar as a makeshift cinch clamp tool step-by-step
Using a screwdriver or a flatbar as a makeshift cinch clamp tool lets a homeowner tighten stainless-steel cinch clamps on PEX fittings when a dedicated tool is unavailable.
Position the clamp over the fitting, slide the screwdriver or flatbar into the cinch slot, and lever carefully to draw the band snug.
Check alignment, avoid over-tightening, and inspect for uniform compression and leaks before completing the connection.
Pliers and hose-clamp technique step-by-step
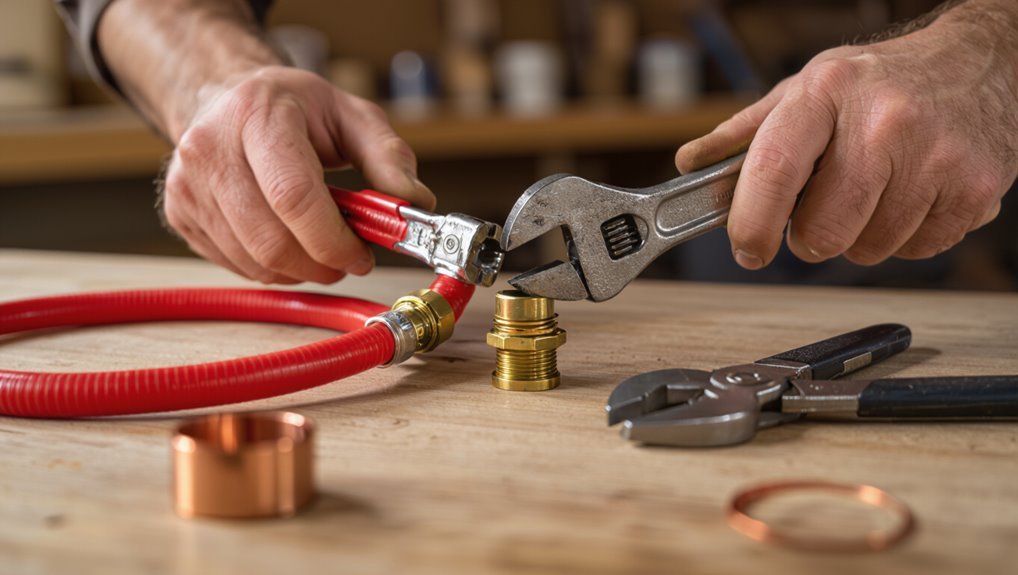
Apply pliers to compress a standard stainless-steel hose clamp evenly around the PEX fitting and tubing. Then tighten incrementally while checking for uniform compression and proper alignment.
Position the clamp just behind the fitting barb, avoiding over-compression that deforms the tubing. Work slowly, rotating the clamp for even pressure.
Inspect seals and test for leaks under low pressure. Replace the clamp if corrosion or slippage appears.
Using a heavy-duty zip tie and clamp adapter step-by-step
When a dedicated crimp tool is unavailable, a heavy-duty zip tie paired with a stainless-steel clamp adapter can form a secure temporary PEX connection by compressing the tubing evenly against the fitting barb.
Slide the adapter over the PEX and fitting, position the zip tie over the adapter groove, tighten progressively to avoid distortion, trim flush, and test for leaks under low pressure before regular use.
Compression-style fittings as a no-crimp alternative step-by-step
If a zip tie and clamp adapter are unavailable or a more permanent, tool-free connection is preferred, compression-style fittings offer a reliable alternative for joining PEX.
The installer cuts and deburrs tubing, slides the compression nut and ferrule on, inserts tubing into the fitting shoulder, then tightens the nut by hand and with a wrench until secure.
Inspect for leaks and pressure-test.
Push-to-connect (sharkbite) fittings: installation steps and considerations
Several common sizes of push-to-connect (SharkBite) fittings allow quick, tool-free joins for PEX by simply inserting the prepared pipe into the fitting until it seats against the internal stop.
The stainless steel teeth and O-ring create a secure seal rated for potable water and many plumbing applications.
Installation requires square cuts, deburring, marking depth, and full insertion.
Consider temperature, pressure ratings, and manufacturer instructions; test and support runs.
Tools and Materials Checklist for Non-Tool PEX Connections
A concise checklist clarifies which items are essential for creating reliable PEX connections without a dedicated crimp tool, and which optional supplies improve safety and finish.
Essential items typically include properly sized fittings, PEX tubing cutters, and a reliable method for securing fittings such as clamps or stainless steel cinch rings.
Optional items—gloves, deburring tools, a tape measure, and a heat source for difficult fittings—help guarantee cleaner, safer, and more professional results.
Essential items you should have on hand
Gathering the right items before attempting non-tool PEX connections guarantees smoother, safer work and reduces the chance of leaks or rework.
Essential items include PEX tubing cut to length, compatible fittings (slip or push-fit), clean rags, a deburring tool or utility knife for clean ends, pipe markers, a tape measure, and a bucket to catch water.
Safety gloves and eye protection.
Optional items that improve results and safety
Beyond the essentials, a handful of optional tools and materials can greatly improve the ease, quality, and safety of non-tool PEX connections.
Recommended extras include a small vise or clamp to steady fittings, heat-shrink tubing for insulation, a deburring tool for cleaner cuts, a magnifier or inspection mirror for joint checks, and safety glasses and gloves.
These minimize errors and hazards.
Step-by-Step Safety and Quality Procedures
The procedure begins with preparing and cutting PEX to the correct length and square, followed by deburring and ensuring fittings are fully aligned and seated.
Methods for checking joints without a crimp tool are then described, including simple leak-detection techniques.
A concise pressure-testing and inspection checklist closes the section to verify integrity before commissioning.
Preparing and cutting PEX correctly
Prepare the workspace and inspect materials to confirm clean, undamaged PEX and compatible fittings before cutting; proper preparation minimizes leaks and rework.
Measure runs precisely, mark cut points, and allow expansion space. Use a sharp PEX-rated cutter held square to guarantee straight ends.
Support the pipe to prevent twisting, cut slowly to avoid deformation, and verify length against fixture tolerances before proceeding.
Deburring, aligning, and seating fittings properly
Several precise actions confirm fittings seat correctly and create leak-free joints: deburr cut PEX ends to remove burrs and sizing scallops, verify alignment of pipe and fitting to prevent cross-threading or angular stress, and fully insert the pipe to the fitting’s depth mark until the tubing bottoms out.
After seating, rotate slightly to confirm even contact, check ferrule or clamp position, and remove debris before final securing.
How to test joints for leaks without a crimp tool
Begin by visually inspecting each joint and surrounding area for proper seating, correct ferrule or clamp placement, and absence of visible gaps or deformation.
Next, gently fill system sections with water, watching fittings for immediate drips.
Wipe joints dry and mark suspected spots with tissue.
After a short dwell, recheck marked areas; persistent moisture indicates a faulty connection requiring rework or replacement.
Pressure testing and inspection checklist
After identifying and marking suspected leaks from the visual and wet/dry checks, proceed to a systematic pressure test and inspection checklist to verify overall integrity and safety.
Isolate sections, cap open ends, and fill with water. Pressurize to recommended psi using a pump and gauge.
Hold for specified duration, monitor gauges and joints, recheck fittings, document results, and repair or retest as needed.
Comparison of Methods: Reliability, Cost, and Code Compliance
Different PEX connection approaches are compared here by longevity, leak risk, typical cost and time per connection, and likelihood of passing inspection to inform method selection. The table below summarizes key trade-offs so readers can weigh reliability, expense, and code compliance at a glance. This concise comparison frames the practical implications of choosing a nonstandard method versus conventional tooling.
| Method | Notes |
|---|---|
| Crimp with proper tool | High longevity, low leak risk; moderate cost/time; usually passes inspection |
| Clamp (cinch) with improvised tools | Moderate longevity, moderate leak risk; lower cost, slightly faster; inspection acceptance varies |
| Push-fit fittings | High longevity, very low leak risk; higher cost per connection, fastest; broadly accepted by inspectors |
| Improvised hand-formed crimps | Low longevity, higher leak risk; minimal cost, slow; unlikely to pass inspection |
| Heat-fused alternatives | High longevity, low leak risk; moderate to high cost/time; acceptance depends on local code and certified materials |
Longevity and leak risk comparison
When comparing crimp, clamp, and push-to-connect fittings for PEX, longevity and leak risk hinge on material compatibility, installation quality, and environmental stressors.
Crimp rings perform well if properly sized and crimps fully compressed; clamps resist corrosion but can creep if under- or over-tightened.
Push-to-connect offers consistent seals with correct tubing condition.
All require inspection, correct tubing preparation, and avoidance of mechanical strain to minimize leaks.
Typical cost and time per connection
One key factor in choosing crimp, clamp, or push-to-connect fittings for PEX is the incremental cost and time per connection: crimp rings and a manual crimp tool represent low material expense but require a few seconds to a minute per joint and occasional tool investment.
Stainless-steel clamps are slightly cheaper per ring but take comparable installation time with a screwdriver or pliers, while push-to-connect fittings carry higher per-piece costs yet typically install fastest and with the least skill—affecting total labor and material outlay on both small repairs and large runs.
Typical per-connection material costs range roughly from cents (rings) to several dollars (push fittings), with labor time varying by installer speed and access.
Likelihood of passing building inspection
Cost and time considerations feed directly into decisions about which PEX connection method is likely to satisfy a building inspector.
Inspectors favor proven, code-listed fittings and installation techniques; improvised crimps or unlisted sleeves risk failure.
DIY methods that mimic approved procedures, use listed components, and document installation have the best chance.
Ultimately, compliance depends on local code, visible workmanship, and adherence to manufacturer instructions.
Common Mistakes When Crimping or Replacing PEX Without a Tool and How to Avoid Them
Common errors in improvised PEX crimping often stem from technique, part selection, and attention to seating, which can lead to leaks or failures if not corrected.
The following checklist highlights the most frequent problems and points to simple preventive steps. Addressing these issues early preserves system integrity and reduces the need for rework.
- Over-tightening or uneven fastening that deforms the ring or pipe
- Improper ring placement or incomplete seating leaving gaps or misalignment
- Using incompatible fittings or materials that do not form a proper seal
- Skipping inspection and pressure testing after assembly
Over-tightening or uneven fastening
Over-tightening or fastening clamps unevenly can strip PEX fittings, deform tubing, and create leaks that may not appear until under pressure.
DIYers risk cracking plastic collars or twisting jaws when using pliers or improvised tools.
Apply steady, even pressure, tighten incrementally, and check alignment visually.
Stop when the clamp seats snugly; test with low pressure before restoring full service.
Improper ring placement or incomplete seating
Place the crimp ring precisely and guarantee it seats fully; misaligned or partially seated rings are a leading cause of leaks and failures when crimping PEX without a proper tool.
Inspect ring alignment relative to the fitting collar, push it flush against the fitting shoulder, and confirm even contact all around.
If seating is uncertain, reposition and retest before finishing the connection.
Using incompatible fittings or materials
Using the wrong fittings or materials undermines the integrity of a PEX connection and is a frequent source of leaks and system failure.
Mixing incompatible metals, using non-PEX-rated fittings, or substituting improper rings compromises seals and voids warranties.
Inspect compatibility, match crimp type (cinch vs. crimp vs. expansion), and use manufacturer-approved components to guarantee durable, code-compliant joints and avoid premature failures.
When to Stop DIY and Use the Proper Tool or Hire a Professional
Visible leaks, loose fittings, or deformed rings indicate a joint may be unreliable or unsafe and warrant immediate attention.
Projects requiring permits, adherence to local plumbing codes, or work on pressurized main lines typically demand certified installation or proper crimp tools.
In those cases, a professional plumber or the correct tooling should be used to guarantee code compliance and long-term safety.
Signs a joint is unreliable or unsafe
If a PEX connection shows movement, leaks, corrosion, uneven compression, or deformities in the ring or tubing, those are clear signs the joint may be unreliable or unsafe and should not be left in service.
Additional indicators include persistent moisture, discoloration, visible gaps, loose fittings, or recurring failure after temporary fixes.
Stop DIY and use proper crimping tools or hire a professional.
Situations that require certified installation or code compliance
Noticing the warning signs of a failing PEX joint should prompt consideration of legal and safety limits on DIY repairs.
Projects affecting potable water, multi‑unit buildings, permits, insurance, resale disclosure, or municipal code require certified installers or approved tools.
Structural or concealed piping, gas adjacency, or frequent failures merit professional assessment.
Compliance avoids liability, guarantees inspections pass, and protects occupants.
Quick Troubleshooting Guide for Leaks and Failures
The guide begins by identifying common signs and methods for locating the exact source of a PEX leak, including visual inspection and pressure testing.
It then outlines quick temporary fixes—such as compression sleeves, pipe clamps, or rubber and hose-clamp wraps—to stop active leaks until a proper repair can be made.
Finally, it summarizes permanent repair options and replacement steps, covering fitting replacement, section-cut-and-splice techniques, and when full pipe replacement is warranted.
Locating the leak source and temporary fixes
A homeowner should first isolate the affected circuit by shutting off the nearest shutoff valve or the main water supply to limit damage and confirm that pressure is relieved.
Then inspect fittings, crimps, and visible PEX runs for drips or corrosion, using dry paper to locate seepage.
For temporary fixes, apply silicone tape, hose clamps over rubber patching, or compression sleeves until professional or permanent repair is possible.
Permanent repair options and replacement steps
Begin by evaluating whether the damaged section, fitting, or crimp can be isolated and replaced without disturbing the rest of the run; simple fixes include replacing a faulty fitting, swapping a short damaged length of PEX with new tubing and proper fittings, or re-crimping with a verified tool and ring.
More extensive failures may require replacing entire sections or rerouting. Use proper cutters, fittings, clamps, and pressure-test after completion.
Cost and Time Comparison: DIY No-Tool Methods vs. Proper Crimp Tool Installation
Typical material costs for DIY no-tool PEX joints (crimp rings from hardware stores, clamps, or makeshift fittings) often run lower per joint but can increase if rework is needed.
A proper crimp tool represents a higher upfront expense but reduces per-joint consumable waste.
Time estimates show a single hand-made or improvised joint can take 5–15 minutes versus 1–3 minutes with a correct crimp tool; small projects amplify those differences, with improvised methods adding hours overall.
The tradeoff between lower initial outlay and greater time and failure risk should guide the choice depending on project size and skill level.
Typical material costs
Comparing material costs for DIY no-tool PEX methods versus proper crimp tool installation highlights clear differences in upfront expense and long-term value.
DIY approaches may save on crimp tools but require more specialized fittings, clamps, or temporary seals, raising per-joint cost and potential replacement.
Proper crimp systems have higher initial tool expense but lower per-connection fitting costs and greater durability, reducing long-term repair expenses.
Time estimates for a single joint and for small projects
A single no-tool PEX joint—using push-fit or clamp-style fittings—typically takes about 3–7 minutes for an experienced DIYer and 8–15 minutes for a novice.
In contrast, a properly executed crimp connection with the correct tool averages 4–6 minutes once the user is comfortable with the process.
For small projects (5–15 joints), expect 1–3 hours with no-tool methods versus 30–90 minutes using proper crimp tools.
Final Checklist Before Completing a No-Tool PEX Project
Before finishing a no-tool PEX project, a concise final checklist helps guarantee safety and code compliance.
It should cover critical verification points like pressure testing and secure fittings, plus clear documentation to satisfy inspectors. A brief, organized record reduces the risk of missed steps and simplifies any follow-up inspections.
- Verify system pressure and check for leaks at every joint
- Confirm all fittings are fully seated and supported per code
- Record test results, materials used, and locations of each connection
- Photograph critical areas and store documentation for inspectors
Safety verification points
Once all fittings are seated and clips or cinch rings are in place, perform a systematic safety verification to confirm every connection, line, and fixture meets basic integrity and code requirements.
Check for visible gaps, proper ring alignment, secure pipe support, correct flow direction, and absence of kinks or sharp bends.
Pressure-test segments, inspect for leaks, and verify valve operation before restoring service.
Inspection and documentation tips for inspections
Document and verify each connection and test result methodically to create a reliable final record.
The inspector notes fitting type, joint location, material condition, and test pressures.
Photographs capture alignment and seals.
Record dates, tester name, and corrective actions taken.
Flag any leaks or suspect crimps for rework.
Store digital and physical copies with project plans for future reference.
Conclusion
Attempting to crimp PEX without a proper crimp tool can work in a pinch, but it’s not magic—results vary wildly. The article shows reliable alternative methods, materials, and safety steps to minimize leaks, yet warns when to use the right tool or call a pro. Readers are urged to follow procedures exactly; one bad joint can flood a house. With care, patience, and inspections, short-term fixes hold, but long-term reliability demands proper tools.