How to Install a Kohler Toilet Seat: Step-by-Step Guide for Easy, Secure Fit
To install a Kohler toilet seat easily and securely, start by confirming the bowl shape and mounting-hole spacing. Gather essential tools like a wrench, screwdriver, and tape measure.
Begin by removing the old seat and cleaning the area. Align the new seat’s hinge posts with the existing holes, insert the bolts, and alternately tighten the nuts to 10–15 ft·lb for a secure fit. For quick-release or concealed-hinge models, follow the manufacturer’s latch instructions. Additional tips on torque specifics, special models, and troubleshooting are also provided to ensure a successful installation.
Quick overview of installing a Kohler toilet seat
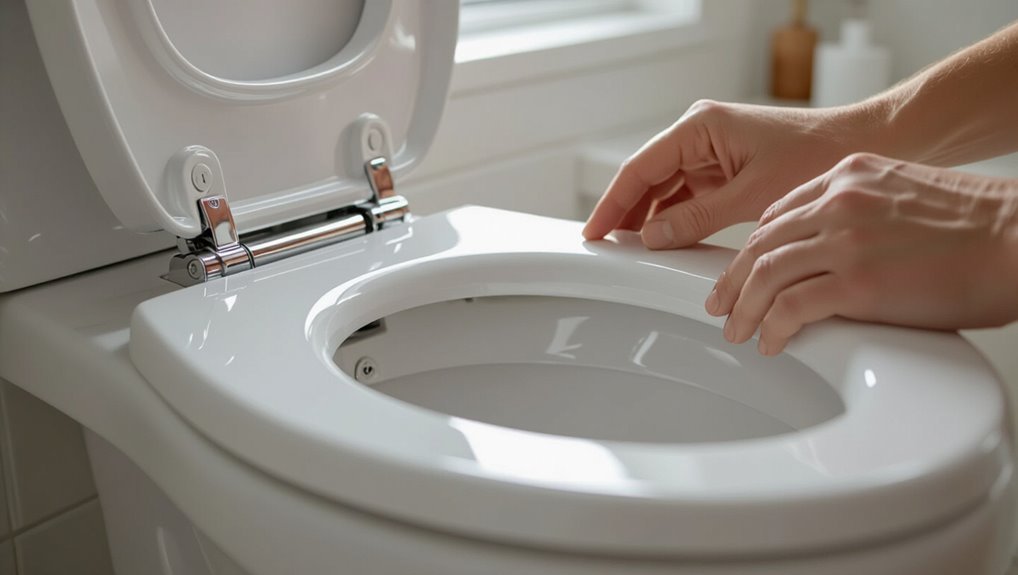
This guide outlines the steps and expected outcomes for installing a Kohler toilet seat.
It notes typical time requirements, basic tools needed, and the usual difficulty level for most homeowners.
Readers will gain a clear, step-by-step plan to complete the job efficiently.
What to expect in this guide
When following the guide, readers will find a concise, step-by-step overview covering required tools, removal of the old seat, proper alignment and mounting of the new Kohler seat, and final adjustments for a secure fit.
The guide explains how to install a Kohler toilet seat with clear steps, illustrated tips for common fits, torque and alignment reminders, and brief troubleshooting for wobble or misalignment.
Time, tools, and difficulty level for a typical installation
Efficiency and clarity guide the typical Kohler toilet seat installation: most homeowners complete the task in 15–30 minutes with basic hand tools—adjustable wrench or pliers, screwdriver, and a tape measure—plus the seat’s included bolts and washers.
Skill level is beginner to moderate; minimal plumbing knowledge suffices.
Prepare to clear the area, follow manufacturer steps, and tighten fasteners securely for a stable, long-lasting fit.
Verify compatibility and choose the right Kohler seat
Before purchasing, the installer measures the bowl length and width to determine round versus elongated fit, noting the distance from the mounting holes to the rim.
They inspect the toilet’s mounting hole spacing and bolt style to match Kohler’s hinge systems.
Finally, they compare Kohler seat models and features—materials, soft-close, and quick-release options—to select the best match.
Measuring your toilet bowl (round vs. elongated) with step measurements
To determine whether a Kohler seat will fit, measure the bowl’s shape and mounting dimensions precisely: identify if the bowl is round (roughly 16.5 inches front-to-seat-bolt center) or elongated (about 18.5 inches).
Then confirm the distance between the two seat-bolt holes (usually 5.5 inches on modern toilets) and note any irregular contours or proprietary fittings that could affect compatibility.
Measure front-to-center, bolt spacing, and width.
Identifying mounting hole types and bolt styles on Kohler toilets
When verifying seat compatibility, the installer should identify the toilet’s mounting hole type and bolt style, since these determine whether a standard Kohler seat will fit or if specialized hardware is required.
Inspect for top-mount or hidden-hinge holes, measure hole spacing (typically 5.5″ or 7″), and note bolt material—plastic, brass, or stainless steel.
Match seat fasteners to hole type and spacing.
Comparing popular Kohler seat models and features
Choosing the right Kohler seat requires matching measured mounting details with model features such as shape (round or elongated), hinge style (standard, quick-release, or soft-close), material (plastic, molded wood, or cushioned), and any added functions like bidet compatibility or antimicrobial finishes. Compare specs, installation ease, and warranty to guarantee fit and function.
| Model | Key Feature | Compatibility |
|---|---|---|
| Classic | Durable plastic | Most bowls |
| Premium | Soft-close hinge | Bidet-ready |
| Wood | Contoured comfort | Elongated only |
Tools and materials checklist
Before beginning installation, the article lists the essential tools—screwdriver, pliers, measuring tape—and hardware needed for a secure fit.
It also notes optional supplies, such as lubricant, replacement bolts, or a small level, that can simplify the process or aid repairs.
Readers are advised to gather these items beforehand to guarantee a smooth installation.
Essential tools (screwdriver, pliers, measuring tape, etc.)
A concise set of tools guarantees the toilet seat installation proceeds smoothly: a flathead and Phillips screwdriver, adjustable pliers, a tape measure, and a utility knife are the core items, with optional items like a socket wrench, level, and cleaning supplies for convenience and accuracy.
Essential tools enable proper fit, measurement, and secure fastening without improvisation.
- Screwdrivers
- Adjustable pliers
- Tape measure
- Utility knife
Optional supplies for easier installation or repair
After listing the core tools, attention can turn to optional supplies that simplify installation or address unexpected issues.
These items speed work, prevent damage, and help with stubborn fittings or minor repairs. Consider having:
- Rubber gloves and knee pads
- Thread sealant or plumber’s tape
- Silicone caulk and a caulking gun
- Spare bolts, washers, and nylon anchors
Preparing the toilet and work area
Before beginning, the installer should put on gloves, eye protection, and guarantee the area is well-ventilated to address safety and hygiene.
The old seat is then removed by loosening fasteners in sequence and lifting the hinge assembly away from the bowl.
Finally, the mounting holes and bowl surface are cleaned and inspected for damage or residue to ensure a proper fit for the new Kohler seat.
Safety and hygiene precautions
Several clear steps guarantee the area is safe and sanitary for replacing a Kohler toilet seat: ventilate the bathroom, gather necessary tools and protective gear, and clear the countertop and floor of obstructions.
Disinfect the toilet exterior and surrounding surfaces, wear gloves and eye protection, use non-slip footwear, place absorbent towels to catch drips, and keep a trash bag nearby for removed debris and used wipes.
Removing the old seat: step checklist
Begin by ensuring the toilet and surrounding area are prepared for safe, unobstructed access: turn off nearby water valves if needed, close the lid, and clear items from the tank and floor so tools can be set down without risk of contamination.
Gather tools (screwdriver, wrench, pliers, cleaning cloth, gloves).
Inspect fasteners, loosen bolts, remove seat and hinges, and place hardware in a labeled container.
Cleaning and inspecting mounting holes and bowl surface
With the old seat and hardware removed and stored, attention shifts to the exposed mounting holes and the toilet bowl rim.
The technician scrubs holes and surrounding porcelain with a mild disinfectant, using a soft brush and cloth to remove debris and mineral buildup.
After rinsing and drying, the holes are inspected for cracks, corrosion, or uneven edges that could impair new-seat alignment or fastener integrity.
Step-by-step installation for a standard Kohler toilet seat
The installer begins by positioning the new Kohler seat on the bowl and aligning the bolt holes for a centered fit.
Bolts are inserted and nuts tightened in an alternating sequence to specified torque, with attention to model-specific quick-release or concealed-hinge procedures.
Final adjustments guarantee an even gap and a flush, secure fit before use.
Positioning the new seat and aligning bolt holes
Place the new Kohler seat over the bowl so the hinge assemblies rest near the rear rim, then lower it slightly to check that both hinge posts align with the factory bolt holes in the porcelain.
Adjust fore-aft and side-to-side until symmetric with the bowl contour. Confirm gaps are even and the seat sits flush without rocking before proceeding to fasten hardware.
Inserting bolts and securing nuts: sequence and torque guidance
Begin by inserting the stainless-steel bolts through the hinge posts and down into the factory holes, ensuring each bolt passes straight and fully seated before adding washers or nuts.
Hand-thread nylon or metal nuts, snugging alternately to keep even pressure.
Use a wrench to tighten to manufacturer torque (typically 10–15 ft·lb) or until firm without overtightening; recheck alignment and secure.
Using Kohler quick-release or concealed-hinge systems (model-specific steps)
After bolting the seat hinges and snugging the nuts as instructed, attention shifts to Kohler’s quick-release and concealed-hinge options, which require a different sequence of steps and small alignment checks.
For quick-release, engage latch, align tabs, then snap seat onto hinges until audible click.
For concealed-hinge models, slide cover plates, insert hinge pins, confirm smooth pivot, then replace covers to finish.
Final adjustments to ensure even gap and flush fit
Several small adjustments confirm the seat sits evenly and tight against the bowl: tighten hinge bolts incrementally, alternately left and right, checking alignment.
Center the seat over the bowl, close slowly to confirm flush contact. If gaps persist, loosen, reposition shims or washers, then retighten.
Verify no rocking and that lids close without binding. Final check verifies uniform gap and secure fit.
Installation for specialty Kohler seats and systems
For specialty Kohler seats and integrated systems, the installer must account for model-specific steps such as soft-close mechanism adjustments and common binding or alignment issues.
Electrified bidet and heated seats require attention to electrical supply, grounding, and any nearby plumbing or water-connection needs.
When retrofitting older or non-standard bowls, measurement, adapter compatibility, and possible seat-shimming determine whether the upgrade is feasible.
Soft-close seats: extra steps and common issues
Installers should note that soft-close Kohler seats require a few additional steps and attention to specific components compared with standard seats.
Alignment of damping hinges, correct torque on hinge bolts, and proper engagement of the slow-close mechanism are essential.
Test multiple open/close cycles to confirm smooth operation and retracting.
Common issues include misaligned hinges, overtightening, and debris in hinge cavities.
Bidet-seat and heated-seat integration: electrical and plumbing considerations
Prepare for additional electrical and plumbing steps when integrating Kohler bidet or heated seats, as these models require dedicated power and a water supply or adaptor beyond standard seat mounting.
Installation requires a grounded GFCI outlet within code distance, concealed wiring or conduit, and a braided water line with shutoff valve or adapter to the fill valve.
Follow manufacturer wiring diagrams and local codes.
Retro-fit on older or non-standard bowls
When adding power and water lines for bidet or heated seats to older fixtures, attention must shift to bowl compatibility and mounting geometry. Many vintage or proprietary Kohler bowls use nonstandard bolt spacing, raised rims, or molded mounting pads that interfere with modern specialty seats.
Assess measurements, use adapter brackets or universal mounting kits, trim or shim per manufacturer guidelines, and verify watertight connections before finalizing installation.
Troubleshooting common problems
Common installation issues are addressed here, including a seat that loosens after tightening and simple fixes such as replacing worn washers or using thread-locking solutions.
Guidance is provided for correcting misalignment or uneven gaps through hinge adjustment and shimming, as well as for repairing stripped bolts or swapping corroded hardware.
Tips for accessing hidden or hard-to-reach mounting nuts, like using angled pliers or extension tools, conclude the troubleshooting overview.
Loose seat after tightening: causes and fixes
A toilet seat that still wobbles after tightening usually points to one of four issues: stripped threads on the bolts or nuts, worn or missing mounting hardware, an uneven or damaged toilet bowl surface, or overtightened fasteners that have deformed plastic anchors.
Inspect hardware, replace stripped bolts/nuts or anchors, add stainless steel replacements or new mounting kits, and clean mating surfaces.
Test for stability.
Misaligned seat or uneven gaps: adjustment methods
Realign the seat by loosening the mounting bolts just enough to allow slight movement, then center the seat over the bowl so gaps on both sides match and the front edge aligns with the rim.
If the seat won’t shift, check for obstructions or uneven bowl edges, loosen or remove old anchors, and use shims or replacement mounting hardware to correct persistent misalignment before retightening evenly.
Verify symmetry and secure.
Stripped bolts or corroded hardware: repair and replacement options
If loosening bolts to center the seat reveals hardware that won’t move or shows visible rust, stripped threads and corroded fasteners are likely to be the cause and require repair or replacement.
Remove remaining corrosion, apply penetrating oil, and use proper-size drivers or nut extractors.
Replace damaged bolts and washers with stainless or brass kits sized for Kohler seats to guarantee secure, long-lasting mounting.
Dealing with hidden or hard-to-reach mounting nuts
Accessing hidden or hard-to-reach mounting nuts frequently requires patience and the right tools; cramped spaces beneath the toilet, plastic shrouds, or recessed bolt pockets can hide fasteners that need extra maneuvering.
Use a compact wrench, socket with universal joint, or long-reach pliers. Remove shrouds carefully, illuminate the area, and apply penetrating oil for seized nuts.
Replace damaged hardware with modern quick-release bolts.
Maintenance and care for longevity
Maintenance guidance covers gentle cleaning agents and methods compatible with Kohler seat materials to prevent damage.
A simple schedule for periodic inspection and tightening of fasteners helps maintain fit and function.
Guidance should also note signs that warrant replacement of hardware or the entire seat for safety and hygiene.
Cleaning tips safe for Kohler seat materials
Use gentle, nonabrasive cleaners and a soft cloth to preserve Kohler seat finishes and prevent scratches or discoloration.
The user should avoid bleach and abrasive pads, rinse thoroughly, and dry to prevent water spots.
For stubborn grime, a mild soap solution applied with a microfiber cloth works well.
- Soft cloth wiping
- Mild soap suds
- Rinse and towel-dry
- Avoid bleach
Periodic tightening and inspection schedule
Although a toilet seat may appear secure, periodic tightening and inspection prevent loosening, wear, and potential damage. Perform a quick check every three months and after any heavy use or cleaning that involved hinge manipulation.
Inspect hinges, fasteners, and mounting points for corrosion, cracks, or movement. Tighten screws to manufacturer torque, wipe contacts dry, and note any recurring looseness for closer monitoring.
When to replace seat hardware or the entire seat
When corrosion, persistent wobbling, visible cracks, or stripped threads appear despite routine tightening, replacement of the seat hardware—or the entire seat—becomes necessary to maintain safety and hygiene.
The user should inspect fasteners, hinges, and mounting holes; replace corroded bolts and plastic anchors immediately.
If damage is extensive, choose a full-seat replacement matching bowl shape and mounting pattern to guarantee secure fit and prolonged service life.
Quick reference: common Kohler seat models and installation notes
Common Kohler seat lines—such as the Pure, San Souci, and Cachet—differ primarily by hinge type, mounting footprint, and bowl compatibility, so installers should match the seat model to the toilet’s bowl shape (round or elongated) and verify whether soft-close hinges, quick-release mechanisms, or top-fix bolts are present before proceeding.
| Model | Hinge type | Note |
|---|---|---|
| Pure | Top-fix | Simple fit |
| San Souci | Concealed | Compact footprint |
| Cachet | Soft-close | Quick-release option |
Tips to ensure a secure, professional-looking installation
A few simple practices guarantee the seat is both secure and visually aligned: use a torque-limited driver or hand-tighten to manufacturer specs, center the hinges over the bowl, and check for even gaps front to back.
Inspect mounting hardware for wear and replace stripped bolts to maintain stability and appearance.
If fittings are corroded, alignment cannot be achieved, or leaks appear, a professional installer should be contacted.
Best practices for torque, alignment, and aesthetics
Begin by checking torque specifications and visual alignment before final tightening: correct torque prevents cracked plastic or stripped bolts and guarantees the seat sits centered over the bowl.
Follow measured tightening, check gaps, and confirm bolt security. Visual finishing matters.
- Even torque: alternate tightening sequence.
- Centering: align front lip with rim.
- Gap check: equal spacing both sides.
- Finish: wipe away fingerprints.
When to call a professional installer
If installation challenges exceed routine adjustments—such as stripped mounting hardware, cracked bowl edges, irregular flange height, or persistent wobble despite proper torque—then a professional installer should be contacted to prevent further damage and secure a professional-looking fit.
A pro evaluates flange and bowl integrity, replaces damaged components, ascertains correct flange height and shims, and verifies stable alignment and torque for lasting, code-compliant installation.
Useful resources and warranty information
Kohler’s support site and downloadable model-specific manuals are cited for reference and troubleshooting.
Warranty coverage basics, including what is and is not covered, are summarized alongside instructions for registering the product.
Readers are directed to consult those resources to confirm eligibility and obtain replacement parts or service.
Kohler support links and model manuals
When tracking down installation instructions, replacement parts, or warranty details, Kohler’s official support pages and model-specific manuals provide the most reliable information.
They list model numbers, exploded diagrams, torque specs, and part codes. Downloadable PDFs and searchable support articles simplify troubleshooting.
Contact options appear for region-specific assistance.
- Model diagram
- Parts list
- Installation steps
- Support contacts
Warranty coverage basics and registering your product
Review warranty coverage and register the product promptly to secure protection and simplify future claims.
The warranty typically covers defects in materials and workmanship for a specified period; exclusions and proof requirements vary by model.
Registration links and serial number locations are provided in manuals and on Kohler’s website.
Keep purchase receipts and photos; contact Kohler support for claim initiation and authorized repair options.
Conclusion
A properly installed Kohler toilet seat becomes a quiet partner in daily routines, fitting with precision and reliability. After confirming compatibility, following the steps, and tightening fasteners correctly, the seat will sit secure and true like a well-cut lid on a favorite book. Regular cleaning and periodic checks preserve function and finish. With modest tools and attention to detail, the installation rewards with lasting comfort and a professionally restrained appearance.