How to Change Galvanized Pipe to Copper: Step-by-Step Guide for DIY & Pros
To change galvanized pipe to copper, you’ll need to shut off the water supply, drain the system, and remove the corroded sections of pipe. Then, install copper piping using sweat joints, push-fit fittings, or threaded adapters with dielectric connectors to avoid galvanic corrosion. Essential tools include pipe cutters, a soldering torch, flux, and safety gear. Make sure to check for necessary permits, test the system for pressure, and inspect for leaks after installation. Weigh the time and costs of DIY against hiring a professional for peace of mind. Follow our detailed step-by-step procedures, safety tips, and troubleshooting advice to ensure a successful transition to copper piping.
How to Replace Galvanized Pipe with Copper: Overview and When to Replace
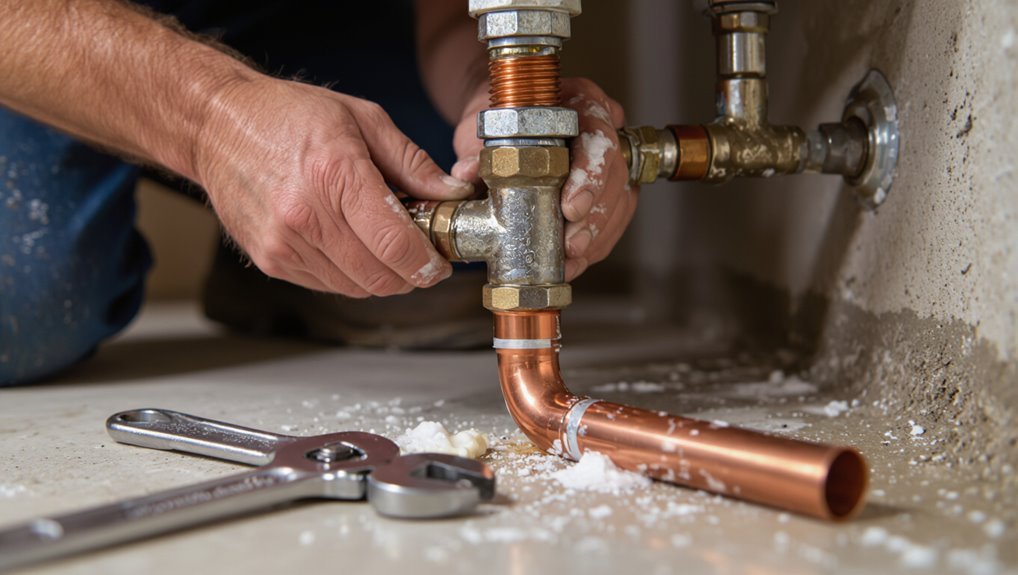
Homeowners often replace galvanized pipe with copper to address corrosion, improve water quality, and prevent leaks.
Common indicators that replacement is needed include rust-colored water, low pressure, frequent leaks, or visible pipe deterioration.
The decision weighs benefits like durability and corrosion resistance against cost and installation complexity, with minor, accessible sections sometimes suitable for DIY while extensive corrosion or whole-house replacements typically require a professional.
Why homeowners replace galvanized pipe with copper
Many choose to replace galvanized pipe with copper because copper offers improved water quality, greater reliability, and longer service life.
Homeowners prioritize reduced corrosion, fewer leaks, and consistent pressure; copper also resists bacterial buildup and withstands higher temperatures.
Cost, longevity, and resale value drive decisions.
Practical guidance on how to change galvanized pipe to copper helps owners weigh DIY versus professional installation.
Signs your galvanized plumbing needs replacement
Recognize the common indicators that galvanized plumbing is failing before small issues become major repairs: discolored or metallic-tasting water, persistent low pressure, visible rust or flaking on exposed pipes, and recurring leaks or clogs in older sections.
Additional signs include frequent joint failures, water stains on walls or ceilings, and accelerated corrosion around fixtures.
If multiple signs appear, prioritize inspection and plan replacement.
Benefits and drawbacks of switching to copper
When evaluating whether to replace galvanized pipe with copper, weigh the trade-offs between improved water quality, longevity, and resale value against higher material and installation costs and potential compatibility issues with existing systems.
Copper resists corrosion, reduces contamination and requires less maintenance, but costs more upfront, can be theft-targeted, and may need adapters or rework where mixed metals or outdated fittings exist—factors affecting feasibility.
When to call a professional vs. DIY suitability
Although some homeowners can handle short runs or isolated fittings, evaluating whether to tackle a galvanized-to-copper replacement requires a clear look at scope, skill, and risk:
Assess pipe length, wall access, corrosion extent, and system complexity.
DIY suits visible, small sections with basic soldering or compression skills.
Call a licensed plumber for extensive corrosion, hidden mains, structural work, code compliance, or gas connections.
Tools, Materials, and Safety Gear You Need
This section outlines the essential tools, materials, and safety gear required to replace galvanized pipe with copper.
It covers cutting tools, joining and measuring equipment, the common copper pipe types (K, L, M), and appropriate fittings and adapters.
Additionally, it includes consumables like flux, solder, and primers.
Safety equipment and precautions for soldering and cutting are also summarized to guarantee a safe, code-compliant job.
List of tools for cutting, joining, and measuring
Several essential tools and safety items are required to cut, join, and measure pipes when converting galvanized to copper.
Tools should be durable, accurate, and appropriate for metal work. Personal protective equipment is mandatory.
Typical toolkit includes:
- Pipe cutter or reciprocating saw with metal blade
- Soldering torch, flux, and lead-free solder
- Adjustable wrench and tubing cutter
- Tape measure, deburring tool, and marker
Copper piping and fitting types to buy (Type M, L, K)
After assembling the cutting, joining, and measuring tools, the homeowner must choose the appropriate type of copper pipe and matching fittings: Type K, L, or M.
Selection depends on application and wall thickness: K (thickest) for underground or high-stress, L for interior water lines, M for low-pressure domestic cold water.
Consider fittings rated to the same type and pressure.
- Type K: highest durability
- Type L: common residential
- Type M: economy option
- Match fittings to pipe type
Required consumables: flux, solder, primers, fittings, adapters
Gather the right consumables to secure reliable joints and code-compliant changes when replacing galvanized pipe with copper.
Select proper flux, lead-free solder, and primer where required; choose fittings and adapters rated for plumbing systems and compatible with pipe types.
Confirm sizes match and use compression or sweat fittings as appropriate.
- Rosin or water-soluble flux
- Lead-free 95/5 or 50/50 solder
- PVC/metal primers where applicable
- Copper-to-galvanized adapters
Safety equipment and precautions for soldering and cutting
Wear appropriate personal protective equipment and follow safety protocols when cutting or soldering plumbing to prevent burns, eye injury, inhalation of fumes, and accidental fire.
The technician guarantees ventilation, clears combustibles, and uses proper tools.
Recommended safety items include:
- Heat-resistant gloves and leather apron
- Safety goggles or face shield
- Fire extinguisher and heat blanket
- Respirator for lead/flux fumes
Preparing for the Job
Before beginning work, the homeowner must shut off the main water supply and drain the system in a clear step-by-step sequence to prevent flooding and pressure-related hazards.
They should evaluate pipe accessibility, map the replacement route, and verify whether permits, local codes, or inspections are required.
Finally, a realistic estimate of time, costs, and material quantities should be prepared to guarantee the project proceeds without unexpected delays.
How to shut off water and drain the system step-by-step
Once the decision is made to replace galvanized pipe with copper, the water must be fully shut off and the system drained to prevent flooding and facilitate safe cutting; locate and close the main shutoff valve, then open a high and a low faucet to relieve pressure.
Next, shut off any branch valves, drain water heater per manufacturer, open outdoor spigots, and collect remaining water with buckets.
Assessing pipe accessibility and planning the replacement route
A brief survey of the home identifies where galvanized runs are exposed, concealed, or bundled inside walls, ceilings, crawlspaces, and basements, and notes obstructions such as ductwork, framing, insulation, and electrical wiring that will affect access.
The assessor maps entry points, measures clearances, chooses routing to minimize demolition, plans shutoff and bypass locations, and lists required fittings, supports, and tools.
Permits, local codes, and inspection considerations
With access points and routing determined, attention turns to permits, local codes, and inspection requirements that govern replacing galvanized with copper.
Confirm jurisdictional permit needs, applicable plumbing codes, allowable materials and joint types, and required licensed trades.
Schedule inspections and obtain documentation before concealing work.
Comply with backflow, seismic, and fire-safety provisions where relevant; maintain copies of approvals for final sign-off.
Estimating time, cost, and quantity of materials
Estimating time, cost, and material quantities begins by mapping the scope of work: measure affected runs, count fixtures and fittings to be replaced, and note access challenges that may extend labor.
Calculate copper pipe lengths, fittings, solder or flux, valves, hangers, and sealants.
Factor labor hours, permit fees, disposal, and contingency (typically 10–20%).
Produce a parts list and a time-cost spreadsheet.
Step-by-Step Guide to Removing Galvanized Pipe
The procedure begins with locating the exact segment to be replaced and shutting off or isolating water to that section.
Next, appropriate techniques are chosen for disconnection—unscrewing threaded fittings, cutting or torching welded or soldered joints, or using cutters where sections are seized by corrosion.
Where fittings are corroded or seized, the guide outlines safe methods and alternatives such as penetrating oil, cutting out the section, or using flange adapters.
Locating and isolating the section to be replaced
Before cutting or disconnecting any fittings, identify the specific galvanized section to be replaced by tracing the pipe run from the fixture or meter back to the corroded area, noting junctions, shutoff valves, and nearby branches that may feed other fixtures.
Verify accessible isolation points, plan temporary closures to maintain service elsewhere, and mark both ends of the replacement segment for accurate measurement and support placement.
Methods for disconnecting threaded galvanized fittings
Disconnecting threaded galvanized fittings requires methodical steps to prevent damage to adjoining plumbing and guarantee a clean shift to copper.
The technician applies penetrating oil, allows soak time, then uses two wrenches—one to stabilize, one to turn—applying steady, controlled force.
If corrosion resists, gentle heat may be used cautiously.
Clean threads and inspect for damage before proceeding with new fittings and proper thread sealant.
Cutting through welded or soldered joints safely
After stabilizing and loosening threaded connections, attention shifts to welded or soldered joints that require cutting. These joints often need different tools and safety measures because they cannot be unscrewed.
The worker selects an appropriate cutting method—reciprocating saw with metal blade, tubing cutter for thin sections, or angle grinder—wears eye, hand, and respiratory protection, and secures the pipe to prevent movement and sparks.
Handling corroded or seized sections and alternatives
When sections of galvanized pipe are corroded or seized, the technician evaluates the extent of deterioration and selects techniques that minimize damage to surrounding fittings and the piping system.
Options include penetrating lubricants, gradual heat with torch while protecting nearby materials, careful mechanical extraction using pipe wrenches or extractor tools, cutting and replacing small segments, or abandoning runs and installing new copper bypasses where removal risks structural or service damage.
Connecting Copper to Existing Plumbing
The section outlines practical ways to join new copper to existing galvanized plumbing, including threaded adapters and couplings for threaded connections.
It notes when dielectric fittings are advisable to prevent galvanic corrosion between dissimilar metals.
It also compares conversion methods—sweat (solder), compression, and push-fit connectors—so the reader can choose the best option for the situation.
Using threaded adapters and couplings between galvanized and copper
Changing from galvanized to copper often involves threaded adapters and couplings that provide a mechanical, solder-free connection between dissimilar metals.
Installers select appropriate thread types, sizes, and sealants, ensuring leak-free joints and alignment.
Consider these points:
- Match NPT or BSP threads precisely
- Use pipe dope compatible with both metals
- Tighten to torque specs
- Inspect for leaks after pressurizing
When to use dielectric fittings to prevent corrosion
Although copper and galvanized steel are commonly joined during plumbing upgrades, a direct metal-to-metal connection can accelerate galvanic corrosion; dielectric fittings isolate the metals electrically to prevent this reaction.
Use dielectric unions or nipples whenever dissimilar metals meet, especially in wet or buried locations, systems with continuous water flow, or where long-term durability is required.
Inspect and replace damaged dielectric components periodically.
Transition methods: sweat (solder), compression, and push-fit connectors
Joining dissimilar metals with dielectric fittings reduces corrosion risk, but making the physical connection between copper and existing plumbing requires choosing an appropriate joining method. Sweat (solder) offers permanent, leak‑resistant joints but needs heat. Compression fittings are mechanical, reversible, and suit tight spaces. Push‑fit connectors are fastest, tool‑free, and ideal for repairs.
| Method | Notes |
|---|---|
| Sweat | Permanent, requires torch |
| Compression | Reversible, needs wrench |
| Push‑fit | Quick, tool‑free |
| Dielectric | Prevents galvanic corrosion |
Step-by-Step Installing Copper Pipe (Sweat/Solder Method)
The section outlines the sweat/solder method for installing copper pipe, beginning with cutting and deburring to guarantee clean ends.
It then covers fitting layout, precise measuring and marking, followed by the step-by-step sequence of cleaning, applying flux, and soldering each joint.
Finally, it describes testing soldered joints, allowing proper cooling, and the necessary clean-up procedures.
Cutting and deburring copper pipe
Prepare to cut and deburr copper pipe precisely, as clean edges and correct lengths are essential for leak-free soldered joints.
Use a tubing cutter to score and rotate until separation, avoiding crushing.
Remove burrs and internal roughness with a reamer or deburring tool, then file or sand the outer edge lightly for a smooth, square face.
Clean with emery cloth before fluxing.
Fitting layout, measuring, and marking
Lay out fittings and pipe pieces on the work surface to establish exact lengths and alignment before cutting.
Mark reference points on pipe and fittings for insertion depth. Measure twice from fixed anchors, allowing for flange, elbow offsets, and solder gap.
Transfer measurements to pipe, mark cut lines squarely. Re-confirm alignment with installed supports and adjust marks as needed for final fit.
Cleaning, fluxing, and soldering joints’ detailed sequence
Begin by thoroughly cleaning each joint area to guarantee a reliable solder bond: remove corrosion and old pipe scale with a wire brush or emery cloth until bright copper is exposed.
Then deburr and square the pipe ends and inside fittings with a reamer.
Apply a thin, even layer of flux to both pipe and fitting, assemble fully, heat the joint evenly, and feed solder into the joint until capillary flow fills the seam.
Testing soldered joints and cooling/clean-up procedures
After the solder cools to touch, inspect each joint visually for an even, smooth bead and wipe away any remaining flux with a damp cloth to prevent corrosion.
Then pressure-test the system by closing drains, filling the line slowly, and observing for leaks at every fitting while monitoring pressure for the recommended duration.
Document any failures, repair by reheating and resoldering, retest, then dry, cap open ends, and clean workspace.
Alternative Copper Installation Methods
The section surveys alternative copper installation methods beyond sweating, starting with when compression fittings are appropriate and how to install them.
It then outlines push-fit (SharkBite) connector installation steps and weighs their advantages and limitations.
Finally, it explains the difference between brazing and soldering and identifies situations that require brazing.
Compression fittings: when and how to use them
Compression fittings offer a straightforward, solder-free option for connecting copper to existing galvanized pipe or to other copper runs, relying on a nut and ferrule to create a leak-tight seal.
They suit repairs, retrofit connections, and situations where heat is undesirable.
Proper pipe preparation, correct ferrule seating, and torque to manufacturer specs are essential to prevent leaks and avoid overtightening damage.
Push-fit (SharkBite) connectors: installation steps and pros/cons
Install push-fit (SharkBite) connectors by simply cutting the pipe square, deburring and cleaning the end, marking the insertion depth, and pushing the fitting onto the pipe until it seats against the depth mark; the internal O-ring and stainless steel teeth create an immediate, reusable seal that works on clean copper, PEX, and CPVC without solder, flux, or special tools.
Advantages include speed, no heat, and reversibility.
Drawbacks: higher cost, limited temperature/pressure range, and potential unsuitability in concealed or long-term high-temperature applications.
Brazing vs. soldering: when brazing is required
Distinguish brazing from soldering by heat, filler material, and application:
Brazing uses higher temperatures (typically above 840°F/450°C) and a stronger silver-based filler to create joints suited for larger-diameter piping, high-pressure systems, or where mechanical strength and corrosion resistance are critical.
In contrast, soldering uses lower-temperature tin-based solders for routine domestic plumbing on smaller copper lines.
Brazing requires flux, stronger joint prep, and ventilation.
Pressure Testing and Leak Detection
After installation, a pressure test is performed to verify system integrity and identify immediate failures.
Common leak sources—poorly seated fittings, solder joints, and damaged pipe—are inspected and repaired using tightening, re-soldering, or section replacement as appropriate.
A long-term testing and re-inspection checklist is maintained to schedule follow-up pressure checks, visual inspections, and any required corrective actions.
Performing a pressure test after installation
Pressure testing verifies the integrity of the newly installed copper lines by pressurizing the system and monitoring for pressure drops or visible leaks.
The installer isolates the section, attaches a calibrated gauge and pump, fills and vents air, then raises pressure to specified test value.
Hold for the required duration while observing gauge and exposed joints.
Record results and depressurize safely before reopening service.
Common leak sources and how to fix them
Identify common leak sources quickly to streamline repairs: typical failures include loose or improperly soldered joints, damaged fittings or ferrules at compression connections, cracked or pinholed sections of copper caused by corrosion or mechanical stress, and faulty valves or threaded joints with worn tape or sealant.
Inspect joints under pressure, use leak detection spray or soapy water, tighten or re-solder joints, replace damaged fittings, and reseal threads.
Long-term testing and re-inspection checklist
Having addressed immediate leak sources and made necessary repairs, the next step is a structured long-term testing and re-inspection checklist focused on sustained system integrity.
Inspect joints, fittings, and soldered connections quarterly. Perform pressure tests after seasonal temperature shifts and post-repair. Use electronic leak detectors and moisture meters. Document results, repair actions, and schedule follow-ups.
Verify valve operation and corrosion signs annually.
Corrosion, Water Quality, and Maintenance After Conversion
Attention to galvanic corrosion at dissimilar metal joints, proper flushing to remove debris and improve water quality, and a routine maintenance schedule are essential after converting galvanized to copper.
Install dielectric fittings or isolation techniques where copper meets remaining steel to prevent accelerated corrosion.
Establish a flushing procedure immediately after switchover and a periodic inspection and cleaning schedule to preserve system longevity and water quality.
Preventing galvanic corrosion at metal joins
Prevent galvanic corrosion at joints by isolating dissimilar metals, controlling stray currents, and managing water chemistry to reduce electrochemical activity.
Use dielectric unions, plastic couplings, or nonconductive gaskets between copper and remaining steel.
Bond electrical systems correctly to avoid unintended current paths.
Apply compatible sealants and coatings, inspect sacrificial anodes where present, and schedule periodic checks to detect early corrosion signs.
Flushing the system and improving water quality after changeover
After converting sections of galvanized pipe to copper, flush the system thoroughly to remove debris, loose scale, and disturbed deposits that can accelerate corrosion or foul fixtures.
Open all faucets and downstream valves, run until clear, then flush water heaters and aerators.
Test for discoloration, odor, and pH; install or adjust filtration, corrosion inhibitors, or sacrificial anodes as needed to stabilize water quality.
Routine maintenance schedule for copper plumbing
Once flushing confirms that debris and altered water chemistry have been addressed, establishing a routine maintenance schedule helps preserve copper plumbing and minimize corrosion risks.
Inspect joints, soldered connections, and valves annually for leaks or greenish patina.
Test water pH and hardness biannually; treat if acidic or aggressive.
Clean aerators and strainers quarterly.
Replace worn components promptly and document inspections for trend tracking.
Cost Comparison, Time Estimates, and ROI
A concise comparison of costs and timeframes helps homeowners choose between DIY and professional copper repiping.
Typical expenses for materials and labor, plus time estimates for a single branch versus a whole-house project, frame upfront investment and disruption.
These figures are weighed against long-term savings on repairs and potential resale-value gains to assess return on investment.
Typical DIY vs. professional cost breakdown
Many homeowners weigh the trade-offs between a DIY swap and hiring a pro by comparing upfront costs, time investment, and long-term value; DIY labor cuts direct expense but increases time and risk, while professionals charge more but typically finish faster with warranty-backed results.
| Item | DIY | Professional |
|---|---|---|
| Materials | Lower | Same/higher |
| Labor | Owner time | Paid hours |
| Warranty | None | Often included |
| Risk | Higher | Lower |
| ROI | Variable | More predictable |
Time estimates by project scope (single branch, entire house)
Estimating time for converting galvanized pipe to copper depends primarily on scope: replacing a single branch typically takes a few hours to a day, while re-piping an entire house commonly requires one to several days for a small home and up to a week for larger or more complex layouts.
Variables include access, wall removal, fixture count, fittings, soldering versus compression, inspection scheduling and crew experience.
Long-term savings and resale value considerations
Because replacement choices affect both immediate expenses and long-term value, homeowners should weigh material costs, labor, expected lifespan, and potential resale impacts when swapping galvanized pipe for copper.
Copper’s higher upfront cost can yield lower maintenance, fewer future repairs, and improved water quality.
Over time, reduced service calls and increased market appeal often offset initial investment, producing measurable ROI for many properties.
Common Problems and How to Avoid Them
Common problems during a galvanized-to-copper conversion often stem from DIY errors such as improper cutting, inadequate cleaning of pipe ends, or using the wrong fittings.
Troubleshooting typically focuses on stubborn fittings and persistent leaks that indicate poor joints or mismatched materials.
Inspectors and homeowners should watch for signs of improper installation—visible corrosion at joints, uneven solder, and water stains—that signal the need for corrective work.
Mistakes DIYers make when replacing galvanized with copper
DIYers often underestimate the differences between galvanized steel and copper, leading to installation errors that cause leaks, corrosion, and code violations.
Common mistakes include improper joint selection, failing to remove remaining galvanized remnants, neglecting dielectric unions where dissimilar metals meet, and incorrect support spacing.
Avoidance requires correct fittings, thorough cleaning, proper isolation, and adherence to local plumbing codes.
- Improper joint types
- Leftover galvanized
- Missing dielectric unions
- Inadequate support spacing
Troubleshooting stubborn fittings and leaks
Mistakes like improper joints, leftover galvanized fragments, and missing dielectric unions often show up as stubborn fittings and persistent leaks during the copper conversion; identifying the root cause quickly reduces water damage and rework.
Inspect thread integrity, clean pipe bores, and verify correct fitting types. Use proper flux, solder or compression methods, and dielectric connectors.
Tighten gradually, pressure-test, and replace damaged components immediately.
Signs of improper installation to watch for during inspection
Several telltale signs reveal improper installation when inspecting a galvanized-to-copper conversion: uneven solder joints, visible corrosion at fittings, misaligned or stressed pipes, and water stains or mineral buildup near connections.
Additional indicators include loose or inadequate supports, improper dielectric fittings causing galvanic corrosion, inconsistent pipe slope, and evidence of thread sealant in press-fit joints.
Document defects and correct before pressurizing.
Sample Project Scenarios and Step Sequences
The article presents three common project scenarios with clear step sequences: replacing a single galvanized branch to a fixture, converting a whole-house main to copper, and planning partial or phased replacements.
Each scenario outlines required tools, isolation and shutoff procedures, typical fittings and joinery, and testing steps.
Readers are guided to choose the scenario matching their scope and to follow the corresponding sequence for safety and code compliance.
Replacing a single galvanized branch to a fixture (bathroom/kitchen)
Begin by isolating the water supply and draining the branch to prevent leaks.
Then remove the short galvanized run serving the fixture and prepare the remaining system for a copper replacement; this scenario typically involves cutting back to a sound galvanized tee or fitting, deburring and cleaning the pipe ends, and choosing an appropriate conversion method (compression, dielectric union, or soldered/pressed copper) that matches local codes and the condition of the existing piping.
Cut back, verify internal condition, fit adapter, test.
Converting a whole-house main from galvanized to copper
Converting a whole-house main from galvanized to copper requires a coordinated plan that addresses service shutoff, pressure disconnection, and staged replacement to minimize downtime and maintain water service to essential fixtures.
The project sequence typically documents inspection, permit acquisition, temporary bypass setup, main cutover, anchoring and support, pressure testing, disinfection, and final inspection, with contingency provisions for corrosion surprises and joint changes.
Partial conversions and phased replacement strategies
When a full re-pipe is impractical, partial conversions and phased replacement strategies allow homeowners to target the most problematic sections while maintaining service to occupied areas.
Prioritize trunk lines, rusted branches, or fixtures with poor pressure.
Sequence work by zone, isolate and cap temporarily, and schedule plumbing shutdowns during low-use periods.
Document connections and test each phase for leaks and water quality.
Final Checklist Before Restoring Full Water Service
Before restoring full water service, the team verifies that all required permits are closed, inspections passed, and safety measures remain in place.
A final pressure test is performed and the system is thoroughly flushed to remove debris and verify no leaks.
Completed work is documented with test results and warranty information provided for future homeowners.
Safety, permit, and inspection confirmations
Confirm all safety measures, permits, and inspections have been completed prior to restoring full water service.
A final verification documents compliance, worker safety, and municipal approval before re-pressurizing the system.
Ascertain records are available and any corrective items addressed.
- Confirm permit closure with local authority
- Obtain inspector sign-off for altered sections
- Verify bonding/grounding and venting
- Retain all inspection reports
Final pressure test and system flush steps
Perform a controlled final pressure test and system flush to verify integrity and remove debris before restoring full water service.
The installer isolates sections, pressurizes to test value, records results, then slowly vents and flushes to clear particulates.
Confirm no leaks and acceptable pressure drop before reconnecting fixtures.
- Pressure gauge monitoring
- Sectional isolation valves
- Timed leak observation
- High-flow flush through fixtures
Documentation and warranty notes for future homeowners
When the system has passed final pressure testing and flushing, the installer compiles clear documentation for the homeowner that includes as‑tested pressure readings, locations and statuses of isolation valves, a timeline of work performed, and photographs of key connections.
The packet also details warranty terms, recommended maintenance, and contact information.
- Warranty duration and exclusions
- Parts and labor coverage
- Required homeowner maintenance
- Claim procedure and contacts
Conclusion
A homeowner once found a soda-can-sized hole in an old galvanized riser, reminding readers that corrosion can appear as suddenly as a popped balloon. Replacing galvanized with copper restores flow and reliability: studies show copper lasts decades longer in many systems. By following the outlined steps and safety measures, a DIYer or pro can swap pipes efficiently, turning a tenuous, leaky maze into a stable, long-lasting plumbing artery ready for years of trouble-free service.