How to Use CPVC Pipe: Complete Step-by-Step Guide for Cutting, Joining, and Installing
To effectively use CPVC pipe for hot and cold water lines, start by measuring and marking your pipe runs accurately. Secure the pipe, then cut it squarely. Next, deburr and chamfer the ends before cleaning and priming the joint surfaces. Apply solvent cement, ensuring proper insertion depth and alignment when joining the parts. Allow the joint to cure before conducting a pressure test. Remember to accommodate support spacing and thermal expansion with appropriate hangers and loops. This guide also includes instructions for repairs, code requirements, and troubleshooting tips to ensure a successful installation.
What CPVC Pipe Is and When to Use It
CPVC, short for chlorinated polyvinyl chloride, is a thermoplastic with enhanced heat and chemical resistance suited for hot and cold water applications.
It is used across residential, commercial, and some industrial systems for potable water, fire sprinkler lines, and corrosive fluid handling.
Compared with copper, PVC, and PEX, CPVC offers cost and corrosion advantages but has temperature, UV, and mechanical limitations that affect suitability.
What CPVC Stands For and Material Properties
Chlorinated polyvinyl chloride (CPVC) is a thermoplastic created by chlorinating PVC, producing a material with higher heat resistance, improved chemical durability, and greater impact strength than standard PVC.
CPVC denotes altered PVC with increased chlorine content, yielding enhanced thermal stability, corrosion resistance, and dimensional integrity.
Understanding these properties helps determine how to use CPVC pipe for elevated-temperature potable and process piping where material performance matters.
Common Applications for CPVC (Residential, Commercial, Industrial)
Many buildings and industrial systems rely on CPVC pipe for hot and cold water distribution, corrosion-resistant process lines, and fire-sprinkler networks where elevated temperature tolerance and chemical resilience are required.
Typical residential uses include potable water and hydronic heating.
Commercial applications cover plumbing, laboratory and domestic hot water.
Industrial roles encompass chemical handling, cooling water and low-pressure process piping in corrosive environments.
Advantages and Limitations Compared to Other Piping Materials
Although derived from PVC, CPVC offers higher temperature and chemical resistance that makes it a distinct option for systems requiring durable hot-water service and corrosive-fluid handling.
It balances cost, ease of installation, and corrosion resistance versus copper and stainless steel, but has lower impact strength and UV tolerance.
Suitable where temperature, chemical compatibility, and budget favor plastic over metal alternatives.
Tools, Materials, and Safety Precautions Needed
A concise list of required tools, from pipe cutters and deburring tools to solvent cement applicators and clamps, sets the foundation for successful CPVC work.
Equally important is stocking consumables and fittings—cleaning solvent, primer, various couplings, elbows, and replacement joints—to avoid delays during installation.
Proper personal protective equipment (gloves, eye protection, respirator when needed) and established safe work practices reduce injury and solvent exposure risks.
Required Tools for Cutting, Joining, and Installing
Gathering the correct tools and safety gear assures CPVC cutting, joining, and installation proceed efficiently and safely. Recommended equipment includes hand and power cutters, deburring tools, primer and solvent application brushes, measuring tools, clamps, and PPE (gloves, eye protection, respirator).
Proper selection reduces waste and hazards; maintenance and inspection before use guarantee reliable performance.
- Ratchet pipe cutter and fine-tooth saw
- Deburring tool and chamfering file
- Safety glasses, nitrile gloves, and respirator
Consumables and Fittings to Stock Before Starting
Several essential consumables and fittings should be stocked before beginning CPVC work to prevent delays and confirm reliable joints.
Necessary items include solvent cement, primer, and appropriate cleaners; assorted CPVC fittings and adapters sized to the project; and spare pipe lengths plus repair couplings for adjustments or mistakes.
Ready availability speeds installation and confirms proper, code-compliant connections.
- Solvent cement and primer
- Assorted fittings and adapters
- Spare pipe and repair couplings
Personal Protective Equipment and Safe Work Practices
Wear appropriate personal protective equipment and follow safe work practices to minimize exposure to chemical solvents, airborne dust, and cutting hazards when working with CPVC.
Workers should use chemical-resistant gloves, safety goggles, NIOSH-approved respirators for solvent fumes or dust, and hearing protection for power tools.
Maintain ventilation, secure workpieces, keep a fire extinguisher nearby, and follow manufacturer safety data sheets and local regulations.
Preparing for a CPVC Installation Project
Before cutting or solvent-welding, the installer assesses system requirements and lays out a clear route that meets flow, pressure, and code constraints.
Exact measurements and calculated pipe lengths are recorded with allowances for thermal expansion and necessary fittings.
All pipes and fittings are inspected for cracks, warping, or manufacturing defects before installation begins.
Assessing System Requirements and Layout Planning
A clear assessment of system requirements and a detailed layout plan establish the foundation for any CPVC installation project.
The planner identifies supply/demand points, water pressure, temperature limits, and applicable codes. Routing avoids obstructions and simplifies access for maintenance.
Valves, fittings, supports, and isolation points are specified. Safety, ventilation, and compatibility with existing systems are confirmed before procurement.
Measuring, Calculating Pipe Lengths, and Allowance for Expansion
When calculating required lengths and allowances, the planner measures each run from fixture to source, accounts for fittings and offsets, and notes wall, ceiling, and structural penetrations that affect routing.
They add linear footage for elbows, tees, and valves, include extra for cutting errors, and compute thermal expansion allowances per manufacturer tables.
A layout sketch records total lengths and expansion compensation points.
Inspecting Pipes and Fittings for Damage or Manufacturing Defects
Inspectors examine each CPVC pipe and fitting for cracks, gouges, discoloration, molded flash, and warping that could compromise joint integrity or flow.
They verify dimensions, socket and spigot surfaces, and chamfers; reject items with shrinkage, brittle spots, or foreign contamination.
Documentation records lot numbers and defects.
Damaged components are quarantined and replaced before solvent welding to guarantee reliable, code-compliant installations.
Cutting CPVC Pipe: Step-by-Step
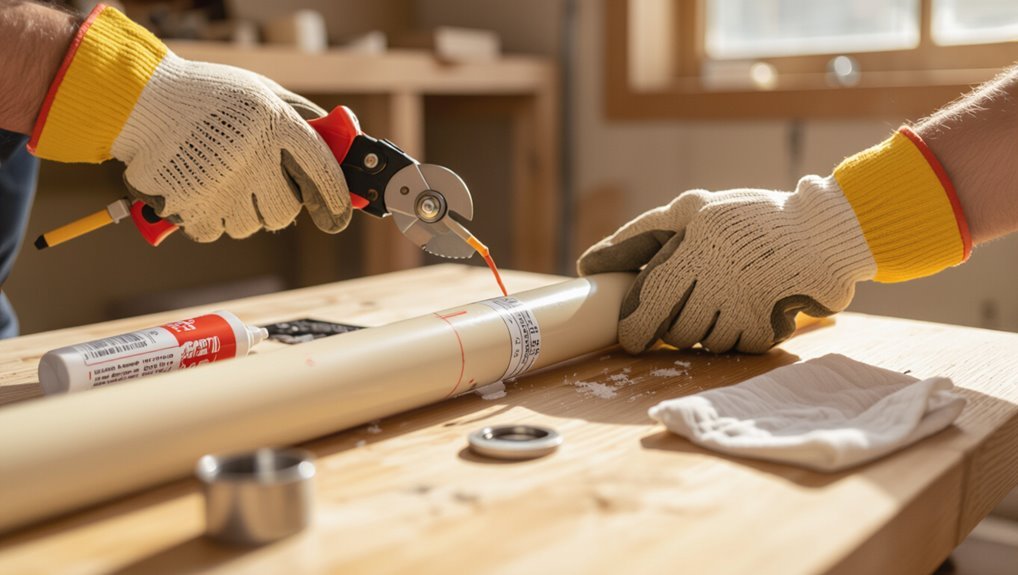
The section outlines methods for cutting CPVC—hand pipe cutter, hacksaw, or powered miter saw—so the installer selects the tool best suited to pipe size and workspace.
It covers measuring and marking techniques to guarantee accurate, square cuts and then describes how to make the cut while maintaining a clean end.
Finally, it explains deburring, chamfering, and cleaning the cut ends to prepare fittings for secure solvent-weld joints.
Choosing the Right Cutting Method (Pipe Cutter, Hacksaw, Miter Saw)
Although each cutting tool has specific strengths and limitations, selecting the right method depends on pipe diameter, worksite conditions, and the desired finish.
For small diameters and clean edges, a ratcheting CPVC pipe cutter is fast and precise.
A hacksaw suits awkward spaces and budget constraints but requires deburring.
A miter saw offers speed and uniformity for high-volume or long runs.
Marking and Measuring for Accurate Cuts
Measure twice, mark once: accurate cuts start with a clear, consistent layout.
The installer measures from fixed reference points, compensating for socket depth and fittings. A pencil or fine-tip marker draws precise cut lines; a square or marking gauge guarantees perpendicularity.
Measurements are rechecked, allowance for bevels noted, and pipe is supported to prevent movement before cutting.
Making the Cut and Ensuring a Clean, Square End
Begin by securing the marked pipe and aligning the cutting tool precisely with the layout line to guarantee a straight, square cut.
Apply steady, even pressure while rotating the pipe or blade, maintaining alignment until the cut completes. Use slow, controlled motions to prevent cracking or chipping.
Inspect the end for uniformity and confirm it sits square against a straightedge before proceeding.
Deburring, Chamfering, and Cleaning the Cut Ends
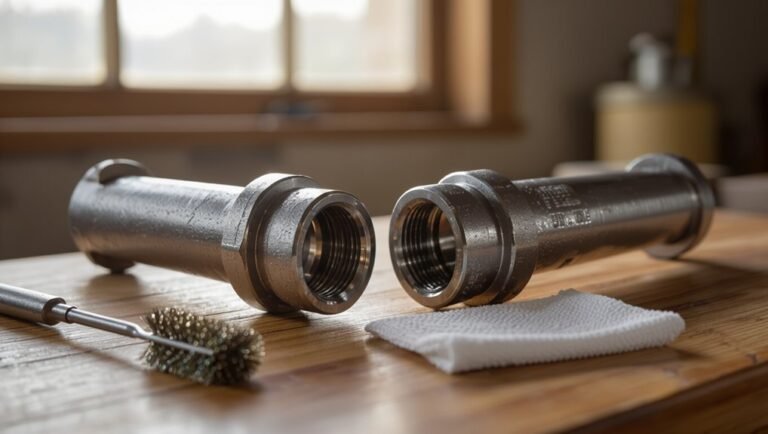
After cutting, remove any burrs, rough edges, and plastic slivers from the pipe ends to guarantee a proper fit and reliable solvent weld.
Use a deburring tool or file to smooth the inner and outer edges, then chamfer the outside slightly to ease insertion.
Wipe both surfaces with a clean, lint-free cloth and suitable cleaner to remove dust, grease, and particles before priming and solvent application.
Joining CPVC Pipe: Solvent Welding Process
The solvent welding process is presented as the primary method for joining CPVC, contrasted with mechanical fittings for situations requiring disassembly or different pressure ratings.
Surfaces must be cleaned and primed, solvent cement applied correctly, and parts assembled with proper alignment, insertion depth, and tack time to guarantee a secure bond.
Recommended cure times and pressure testing procedures are described before the system is put into service.
Overview of Solvent Cement vs Mechanical Connections
When joining CPVC pipe, two primary methods—solvent cement (solvent welding) and mechanical fittings—offer distinct trade-offs in strength, installation speed, and long-term reliability.
Solvent cement chemically fuses joints for permanent, leak-resistant connections favored in pressurized systems.
Mechanical fittings provide quicker, reversible assembly and easier maintenance but may be bulkier and rely on seals that can deteriorate over time, requiring periodic inspection or replacement.
Preparing Surfaces: Cleaning and Primer Use
Having compared solvent cement and mechanical fittings, attention turns to surface preparation for solvent welding, where clean contact surfaces and proper primer application determine bond quality.
Surfaces must be free of dirt, grease, and burrs; cuts should be squared and debarred.
Apply primer specified for CPVC to soften and dissolve the surface layer uniformly.
Allow recommended dwell time before proceeding.
Applying Solvent Cement and Proper Assembly Technique
Begin by applying an even coat of CPVC solvent cement to both the pipe end and the fitting socket, ensuring complete coverage of primed areas without puddling.
Use a circular motion with the applicator, coat both mating surfaces, and immediately assemble while cement remains wet.
Rotate slightly to distribute cement evenly, hold briefly for initial set, and wipe excess with a clean cloth.
Alignment, Insertion Depth, and Tack Time
After assembly and initial wiping of excess cement, attention turns to alignment, insertion depth, and tack time to secure a strong solvent-welded joint.
The fitter guarantees full, even insertion to the manufacturer’s depth marks, rotating slightly for uniform cement distribution. Immediate alignment correction within tack time prevents stress.
Once tack holds, external support and minimal disturbance maintain joint integrity until further curing.
Cure Times and Pressure Testing Before Use
Allow sufficient cure time before applying pressure to guarantee the solvent-welded joint reaches the strength specified by the manufacturer.
Manufacturers provide specific ambient temperature and humidity cure charts; follow them.
After full cure, perform a hydrostatic pressure test at recommended pressure and duration to detect leaks.
Document results and inspect joints visually.
Do not place system into service until tests confirm integrity and no leaks occur.
Alternative Joining Methods and When to Use Them
Besides solvent welding, several practical joining alternatives suit different situations and materials. The following table summarizes common options and their typical uses:
| Method | Best Use | Notes |
|---|---|---|
| Threaded Adapters / Connector Fittings | Connecting to metal or differing pipe types | Good for retrofit and mixed-material systems |
| Mechanical Clamps / Compression Fittings | Temporary repairs or where disassembly is needed | Allow repositioning without heat or solvent |
| Quick-Connects | Fast installations in tight spaces | Ideal for service lines and limited-access areas |
Each option carries trade-offs in leak resistance, ease of installation, and long-term durability, which will be compared.
Threaded Adapters and Transition Fittings
Threaded adapters and conversion fittings provide reliable alternatives to solvent welding when connecting CPVC to metal pipes, valves, or different plastic materials. They are used where disassembly, future modification, or joining dissimilar materials is required.
These fittings use compatible threads, PTFE tape or joint compound, and sometimes bonded inserts to seal. Properly matched sizes and thread types prevent leaks and galvanic issues between materials.
Mechanical Clamps, Compression Fittings, and Quick-Connects
After using threaded adapters or conversion fittings to join CPVC to metal or other materials, installers may choose mechanical clamps, compression fittings, or quick-connects when frequent disassembly, tool-free installation, or joining without solvent is preferred.
Mechanical clamps secure repairs or temporary lines; compression fittings offer reliable, non-permanent seals for potable water; quick-connects provide fastest installation but require compatible CPVC tubing and pressure ratings verification.
Installing CPVC Pipe in Typical Scenarios
This section covers practical installation of CPVC in common settings, including hot and cold water supply systems and runs through walls, floors, and ceilings.
It outlines proper mounting and hanger spacing to support lines and prevent sagging.
It also explains routing strategies for managing obstacles and forming bends without stressing the pipe.
CPVC for Hot and Cold Water Supply Systems
Several common configurations for residential and light-commercial plumbing benefit from CPVC’s heat-resistant, corrosion-proof properties when routing both hot and cold water supplies.
Installers pair CPVC with manifolds, trunk-and-branch layouts, or point-of-use runs. CPVC suits water heaters, boiler connections, and domestic distribution where temperature and corrosion resistance matter.
Proper solvent-weld joints, support spacing, and compatible fittings guarantee reliable, long-term service.
Running Pipe Through Walls, Floors, and Ceilings
Run CPVC through walls, floors, and ceilings with attention to clearances, structural penetrations, and protection from abrasion or heat sources.
Route lines to minimize bends and maintain access for future repairs.
Use proper firestopping at rated assemblies and maintain required distance from electrical wiring and flues.
Protect pipe where it passes through framing with sleeves or grommets, and avoid compressing insulation.
Mounting Supports, Hangers, and Spacing Guidelines
Properly spaced supports and hangers keep CPVC piping aligned, control sagging and thermal movement, and extend system life by reducing stress at joints.
Mount supports near fittings, changes of direction, and at regular intervals per pipe size. Use cushioned hangers to prevent abrasion, allow axial movement for expansion, and secure to stable structures.
Follow manufacturer spacing charts and local codes for reliable performance.
Routing Around Obstacles and Making Bends
When steering around obstacles and directing CPVC piping through typical residential and commercial layouts, installers plan routes that minimize fittings, maintain slope where required, and preserve access for maintenance.
They favor long sweeps and use 45° bends or fabricated offsets instead of multiple 90° elbows, measure clearances, avoid heat sources, secure connections to structural elements, and verify flow and serviceability before final fastening.
Thermal Expansion, Insulation, and Pressure Considerations
Thermal movement, support, insulation, and pressure ratings are critical for reliable CPVC installations and must be addressed during planning.
Installers should calculate expected thermal expansion and provide proper hanger spacing and supports, insulate lines for energy efficiency and freeze protection, and observe maximum working pressure and temperature limits.
Clear specifications and adherence to manufacturer guidelines reduce stress, prevent sagging, and maintain system integrity.
Calculating and Allowing for Thermal Expansion
Account for CPVC’s significant linear expansion as temperature changes to prevent stress, distortion, or joint failure in a piping system.
Calculate expansion using ΔL = α·L·ΔT (α ≈ 3.8×10⁻⁵/°C).
Provide expansion loops, offsets, or sliding supports sized from calculations.
Insulate to reduce temperature swings and verify system pressure limits at elevated temperatures to avoid overstressing joints and fittings.
Recommended Hanger Spacing and Support Techniques
Specify hanger spacing and support methods based on pipe size, operating temperature, and system layout to control deflection, accommodate thermal movement, and maintain joint integrity.
Use cushioned supports and saddle-type hangers to prevent point loading.
Increase hanger frequency for long runs, vertical risers, and higher internal pressures.
Allow sliding guides at expansion zones and secure anchors at changes in direction to manage stresses without restricting movement.
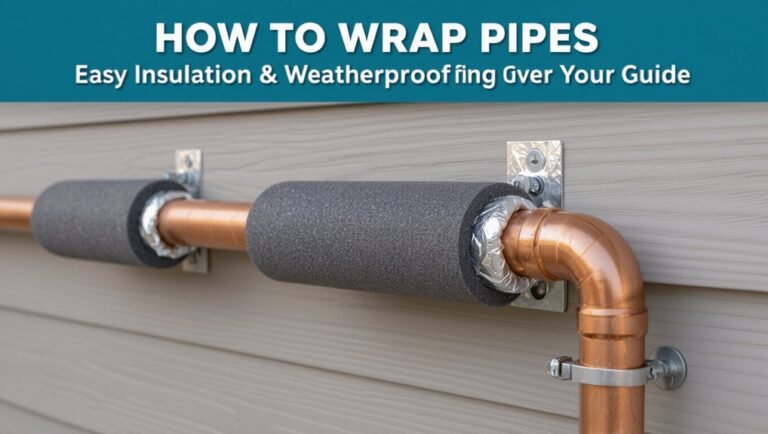
Insulating CPVC for Energy Efficiency and Freeze Protection
When properly selected and applied, insulation on CPVC piping reduces heat loss, minimizes condensation, and helps prevent freeze-related failures while also influencing thermal expansion behavior and internal pressure limits.
Install continuous, closed-cell insulation with proper thickness and vapor barrier where needed.
Allow for expansion gaps, secure with noncompressive supports, and avoid insulating fittings that trap moisture.
Periodic inspection guarantees integrity and performance.
Maximum Working Pressure and Temperature Limits
Pressure and temperature limits define the safe operating envelope for CPVC piping and must be evaluated together because higher temperatures reduce allowable working pressure through material strength and thermal expansion effects.
Manufacturer charts specify maximum allowable working pressure at given temperatures; installers must derate pressure as temperature rises, allow for thermal expansion, provide insulation to limit temperature exposure, and avoid pressure spikes that exceed rated limits.
Repairing and Modifying Existing CPVC Systems
When evaluating an existing CPVC system, technicians begin by locating and diagnosing leaks or joint failures using visual inspection, pressure testing, and moisture detection tools.
Common repair techniques include cutting out damaged sections for replacement or installing repair sleeves where appropriate.
When fittings are compromised or a material shift is required, approved adapters and proper solvent-weld or mechanical transition methods are used to guarantee a reliable connection.
Locating and Diagnosing Leaks or Failures
Start by visually inspecting accessible runs of CPVC for signs of wetness, staining, corrosion on nearby metal fittings, or white crystalline deposits that indicate slow leaks.
Listen for dripping, pressure-related noises, and check the water meter for unexplained usage.
Isolate sections with shutoffs, apply food-safe dye or noncorrosive leak detection fluid, and use a moisture meter or infrared camera to pinpoint concealed failures.
Common Repair Techniques (Cut-Out and Replace, Sleeves)
After locating a leak or failure, repair choices depend on damage extent, accessibility, and system layout.
Cut-out and replace: remove damaged section, deburr, dry-fit new CPVC with primer and cement, maintain alignment and support.
Sleeves: use repair coupling or compression sleeve for small localized damage without removing long runs.
Pressure-test and insulate repaired area; document location and materials used.
Replacing Fittings and Transitioning to Other Materials
Replace damaged or outdated CPVC fittings by cutting back to sound material, deburring the pipe ends, and selecting compatible replacement fittings or connecting fittings.
Make certain solvent-welded joints are primed and cemented per manufacturer instructions, while mechanical couplings (threaded adapters, compression fittings, or push-fit connectors) require proper seating and torque to avoid deformation.
When shifting to copper, PEX, or PVC, use approved transition adapters, support spacing, and dielectric isolation where metals join plastics.
Common Mistakes to Avoid and Troubleshooting Tips
Common mistakes with CPVC installations often stem from improper solvent cementing, mechanical stresses, and environmental exposure, each causing leaks or premature failure.
Troubleshooting focuses on identifying cold joints, signs of over-tightening or inadequate supports, and damage from chemicals or UV, then applying targeted repairs or replacements. Clear inspection and simple corrective steps can prevent most problems and extend system life.
- Check solvent-welded joints for proper mating depth and uniform cement application to prevent cold joints.
- Inspect fittings and hangers for over-tightening or spacing issues that cause stress and use appropriate supports to control thermal movement.
- Look for discoloration, cracking, or surface crazing from chemical or UV exposure and replace affected sections or apply approved protective coatings.
Solvent Cement Errors and How to Prevent Cold Joints
Preventing solvent cement errors is essential to forming durable CPVC joints; mistakes such as inadequate cleaning, insufficient primer, overapplication, or misalignment can lead to weak, leaky, or “cold” joints that fail under pressure.
To prevent this, guarantee surfaces are clean and dry, apply correct primer and cement sparingly, assemble with proper alignment within the open time, and allow full cure before pressurizing.
Over-tightening, Improper Supports, and Thermal Stress Issues
Over-tightening fittings, inadequate or improperly spaced supports, and unmanaged thermal expansion are frequent causes of CPVC system failure because they introduce stress points, misalignment, and movement that the material cannot accommodate.
To prevent cracks and joint failure, torque fittings to manufacturer specs, install supports at recommended intervals, allow for expansion with loops or sliding hangers, and inspect assemblies after temperature cycles for signs of stress.
Signs of Chemical or UV Damage and Remediation Steps
Many visible indicators point to chemical or UV damage on CPVC pipe, including discoloration (yellowing or dark streaks), surface embrittlement or chalking, crazing or fine cracks, and brittle fracture at fittings or along exposed runs.
Inspection should identify affected sections, remove degraded pipe, replace with UV-resistant or chemically compatible CPVC, protect exposed runs with shielding or paint, and verify solvent weld integrity.
Code Compliance, Standards, and Best Practice References
The section summarizes applicable plumbing codes and manufacturer guidelines that govern CPVC selection, installation, and temperature/pressure limits.
It outlines required testing, documentation, and inspection records to demonstrate compliance.
It also identifies situations—complex layouts, high-pressure systems, or code-required permits—when engaging a licensed plumber is recommended.
Relevant Plumbing Codes and Manufacturer Guidelines
Although not always visible on a job site, adherence to applicable plumbing codes and manufacturer guidelines is crucial for safe, durable CPVC installations.
Installers must follow local plumbing codes, UPC/IPC requirements, and ASTM/CSA material standards, plus manufacturer instructions for solvent types, joint preparation, pressure ratings, temperature limits, and support spacing.
Compliance guarantees warranty validity, system performance, and regulatory approval during inspections.
Testing Requirements and Documentation for Inspections
When preparing CPVC systems for inspection, installers must perform prescribed pressure and leak tests, document results, and retain manufacturer-specified records to demonstrate compliance with applicable codes and standards.
Test procedures, durations, and acceptance criteria should follow local code and ASTM/NSF standards.
Inspection packets must include test logs, material certifications, installation photos, and corrective-action records to substantiate system integrity and compliance.
When to Hire a Licensed Plumber
Recognize that hiring a licensed plumber becomes necessary whenever CPVC installations intersect with code-mandated work, complex system modifications, or situations where liability and long-term performance hinge on professional certification.
This includes new mains tied to municipal systems, alterations that affect pressure-rated assemblies, backflow-prevention device installations, and any work requiring permits, inspections, or manufacturer-credentialed endorsements.
Licensed professionals guarantee code compliance, proper testing, certified materials, and documented inspections.
Project Checklist and Step-by-Step Quick Reference
A concise checklist and quick-reference sequence helps guarantee CPVC installations are safe, efficient, and code-compliant.
It should cover pre-installation verification, straightforward cutting and joining steps, and clear post-installation testing plus maintenance reminders. The following points summarize the essential actions to follow on-site.
- Pre-installation Checklist: materials, fittings, tools, permits, and site safety checks
- Cutting and Joining Quick Steps: measure, square cut, deburr, primer/solvent application, fit and cure times
- Post-Installation Testing and Maintenance Reminders: pressure test, inspect joints, document, and scheduled inspections
Pre-Installation Checklist
Before cutting or fitting any CPVC components, the installer should verify project plans, confirm material quantities and compatibility, and guarantee all required tools and safety gear are on hand.
Inspect pipes and fittings for defects, confirm pressure and temperature ratings match system requirements, plan routing and support spacing, locate shutoffs and access points, gather primers/solvents, and review manufacturer instructions and local codes before beginning work.
Cutting and Joining Quick Steps
Begin by laying out the specific pipes, fittings, tools, and consumables required for each joint. Then follow a concise, repeatable sequence for cutting, deburring, dry-fitting, priming, solvent-welding, and curing.
Verify measurements, mark cut lines, squarely cut, remove burrs, test-fit, apply primer evenly, apply solvent cement to both surfaces, assemble with twist, hold per manufacturer cure time.
Post-Installation Testing and Maintenance Reminders
With joints cured and visible checks completed from the cutting and joining steps, attention shifts to systematic post-installation testing and routine maintenance reminders to confirm long-term performance.
Perform pressure testing per code, inspect for leaks, and verify fixture operation. Document results, mark test dates, and schedule periodic checks.
Replace deteriorated insulation, clear debris from vents, and train occupants on basic leak response.
Conclusion
Like a gardener tending a delicate vine, the installer prunes, binds, and guides CPVC into a steady flow. Each cut, solvent weld, and careful test is a patient hand, shaping a reliable path for water where cracks once threatened. When tools, codes, and caution are respected, the system grows resilient—quietly serving its purpose—reminding that skillful attention transforms raw materials into enduring infrastructure, safe and ready for daily use.