How to Fix a Leaky Tub Drain: Step-by-Step DIY Repair Guide
If you’re dealing with a leaky tub drain, the issue is often due to worn gaskets, loose fittings, corroded drain bodies, or degraded sealant. To fix it yourself, follow these steps: remove the stopper and faceplate, inspect the flange and gasket, and then either reseal with plumber’s putty or replace the flange and drain body. Be sure to clean the threads and apply PTFE tape or silicone on threaded joints before reinstalling everything. Finally, test the repair by filling the tub. Continue reading for detailed step-by-step instructions, necessary tools, and troubleshooting tips.
What Causes a Leaky Tub Drain and How to Know If It’s the Drain
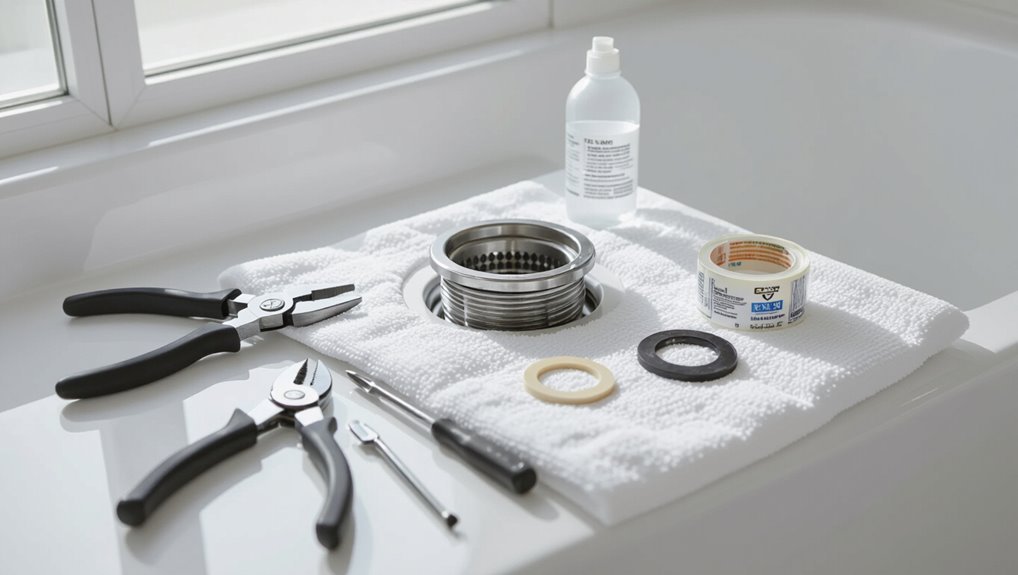
Leaks around a tub drain most often stem from worn gaskets, loose fittings, corroded drain assemblies, or damaged sealant.
Symptoms that point to the drain include persistent wetness around the flange, water pooling beneath the tub, and water that appears when the stopper is operated or when nearby fixtures are unused.
A quick diagnosis can be done with a visual inspection for gaps or corrosion, a paper-towel test to localize moisture, and running water while observing for new leakage.
Common sources of leaks around the tub drain
A leaky tub drain often stems from a few predictable failures: a worn rubber gasket or O-ring, a corroded or misaligned drain flange, loose or deteriorated drain-body seals, or cracks in the surrounding tile or grout that let water bypass the drain assembly.
Other common sources include hair-clogged overflow passages, degraded plumber’s putty, and faulty pop-up mechanisms — key targets when learning how to fix leaky tub drain.
Symptoms that indicate a drain leak versus other plumbing problems
Many of the failure points listed above produce similar signs, but distinguishing a true drain leak from other plumbing issues depends on specific symptoms.
Indicators of a drain leak include persistent pooling around the drain rim, water stains directly beneath the drain, slow but continual water loss when the tub is unused, and localized mold or softening of flooring adjacent to the drain area rather than elsewhere.
How to perform a quick leak diagnosis (visual checks and simple tests)
How can a homeowner quickly determine whether the tub drain is the culprit?
Inspect around the drain for water stains, corroded or loose flange, and damp ceiling or wall below.
Run dye or food coloring in the tub, avoid overflow, observe for colored leakage.
Tighten visible fittings, test again.
If dye appears externally, the drain assembly likely leaks and needs repair or replacement.
Tools, Materials, and Safety Precautions You’ll Need
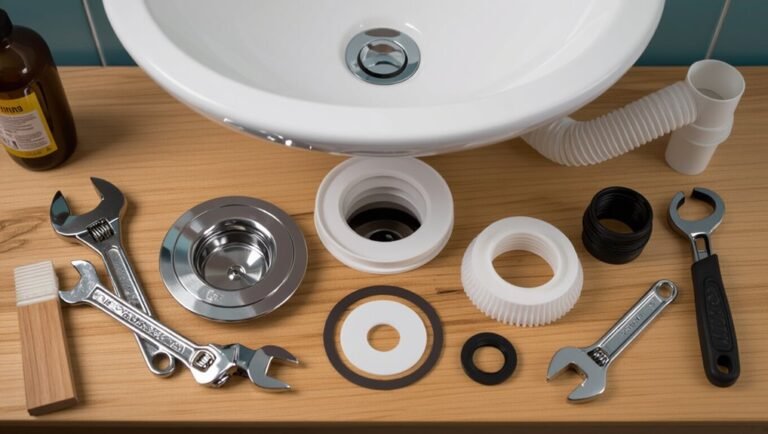
A concise list of essential tools—such as a wrench, pliers, drain key, and plumber’s putty—helps prepare for most tub drain repairs.
Common replacement parts and sealants to evaluate include new gaskets, rubber O-rings, replacement drain assemblies, and silicone caulk.
Basic safety tips are outlined and guidance is given for situations that warrant calling a professional.
Essential tools for a DIY tub drain repair
Before starting a DIY tub drain repair, gather a concise set of tools, materials, and safety gear to guarantee the job proceeds smoothly and without unnecessary delays.
Essential items include protective gloves and eye protection, basic hand tools, and a drain key or pliers.
Recommended checklist:
- Adjustable wrench, pliers, screwdriver set
- Drain key, basin wrench, utility knife
- Work gloves, safety glasses, rags
Replacement parts and sealants to consider
Several common replacement parts and a few reliable sealants typically cover most tub drain leaks. Replacement options include drain assemblies, gaskets, and overflow plates.
Recommended sealants and materials:
- Plumber’s putty for drain flanges.
- Silicone bathroom caulk for joints.
- Thread tape (PTFE) for threaded fittings.
Selection depends on material compatibility and leak location; carry matching finishes and spare fasteners.
Safety tips and when to call a professional
Why proceed cautiously when tackling a leaky tub drain? The guide emphasizes protective gloves, eye protection, and ventilation when using solvents or epoxy.
Shut off water supply and isolate electricity near fixtures.
If corrosion, complex piping, persistent leaks, mold, or unfamiliar tools appear, stop and contact a licensed plumber.
Professional assessment prevents water damage, code violations, and unsafe DIY repairs.
Prepare the Work Area and Remove the Old Drain Assembly
Before beginning work, the water supply should be shut off and the tub cleared of water and personal items to provide a safe, dry workspace.
The existing stopper and faceplate—whether pop-up, lift-and-turn, or push-pull—must be removed following the manufacturer’s method to expose the drain.
With appropriate tools and protection, the old drain flange and body are then unscrewed or pried out and lifted away, taking care to avoid damaging the tub finish or plumbing.
How to turn off water and clear the tub
Shut off the water supply to the tub and clear the area to create a safe, accessible workspace.
Verify valves are closed by running nearby faucets and checking for no flow.
Remove bathmats, toiletries, and rugs.
Lay down towels or a drop cloth to protect surfaces and catch debris.
Have a bucket, flashlight, and pliers ready before proceeding to remove the drain components.
Removing the drain stopper and faceplate (pop-up, lift-and-turn, push-pull)
With tools at hand and the area protected, the technician removes the tub stopper assembly to expose the drain components beneath.
For pop-up stoppers, the pivot rod is detached; lift-and-turn stoppers are unscrewed and lifted out; push-pull types are pulled up and threaded free or released via a retaining clip.
The faceplate screws are then loosened and removed for access.
Steps to remove an old drain flange and drain body safely
Begin by clearing and protecting the work area: remove rugs and personal items, lay down waterproof drop cloths, and place a small bucket or towel beneath the drain to catch residual water.
Wear gloves and eye protection.
Loosen and remove the flange using a drain wrench or pliers; cut through old caulk with a utility knife.
Unscrew or pry out the drain body, inspecting for corrosion and debris.
Inspecting the Drain Components and Surrounding Plumbing
The technician inspects the flange, gasket, and drain body for cracks, corrosion, and worn threads.
They check the tub finish and overflow assembly for pitting, missing sealant, or other damage that could allow leaks.
Based on overall condition and repairability, they decide whether to reseal individual parts or replace the entire drain assembly.
Checking the condition of the flange, gasket, and drain body
Inspecting the tub flange, gasket, and drain body reveals where leaks most commonly originate and guides the next repair steps.
The inspector checks for corroded or cracked flange metal, flattened or brittle gaskets, and hairline fractures or stripped threads on the drain body.
Any deformation, pitting, or looseness indicates replacement.
Document findings and match replacement parts before disassembly to guarantee proper fit.
Inspecting the tub finish and overflow assembly for damage
After evaluating the flange, gasket, and drain body, attention shifts outward to the tub finish and overflow assembly to identify sources of water intrusion beyond the immediate drain hardware.
The inspector checks for cracks, chips, soft spots, loose or corroded overflow plates, and degraded seals or gaskets.
Any visible deterioration, staining, or mold indicates potential leaks requiring targeted cleaning, tightening, or seal replacement.
When to replace the entire drain versus resealing parts
When is it more effective to replace the entire drain rather than reseal or repair components?
Complete replacement is advised if corrosion, cracked fittings, warped flange, recurring leaks after resealing, or inaccessible damaged trap/pipe exist.
Also replace when multiple parts show wear, nonstandard or obsolete components complicate repairs, or previous fixes failed.
Replacement guarantees a reliable, long-term seal and proper alignment with existing plumbing.
Step-by-Step Guide to Replacing or Resealing the Tub Drain
The following steps outline three common approaches for addressing a leaking tub drain.
Method A explains resealing the existing flange with plumber’s putty to restore a watertight seal.
Method B covers removing and replacing the flange and drain body, while Method C describes repairing threaded or body leaks with thread tape and appropriate sealant.
Method A Resealing an existing drain with plumber’s putty
The procedure begins with thoroughly cleaning the flange area to remove old putty, grime, and mineral deposits.
Next, plumber’s putty should be rolled and applied evenly to form a continuous seal around the flange before seating it.
Finally, the flange is reinstalled and tightened just enough to compress the putty without overtightening, which can deform the seal or crack the tub.
Cleaning the flange area
Begin by removing visible debris and old sealant from the drain flange so the new plumber’s putty can bond to clean metal or porcelain.
Scrape gently with a plastic scraper, then use a cloth and a mild solvent (isopropyl alcohol or mineral spirits) to remove residue.
Dry thoroughly.
Inspect for corrosion or damage and file minor rough spots smooth before proceeding to the next step.
Applying plumber’s putty correctly
Prepare a smooth, even rope of plumber’s putty and press it firmly around the underside of the drain flange so it forms a continuous, gap-free seal against the cleaned surface; then lower the flange into place, tighten the drain assembly evenly to squeeze out excess putty, and remove any surplus before it skins to secure a watertight bond.
Ensure putty seating is uniform, trim stray bits, and wipe residue promptly.
Reinstalling and tightening the flange without overtightening
Hand-tighten the drain flange in stages, aligning it squarely over the putty so compression is even and excess material is expelled uniformly.
After initial hand turns, use a wrench or drain tool for incremental quarter-turns, checking alignment and seal integrity.
Stop when resistance increases noticeably; avoid brute force.
Wipe away squeezed putty, test for leaks, and retighten only if minor seepage appears.
Method B Replacing the drain flange and body
Method B covers replacing the drain flange and body when resealing is insufficient.
The section explains how to select a compatible replacement drain, assemble and install the new body, and choose between plumber’s putty or silicone for a watertight seal.
Clear steps and tool lists guide the user through each stage to guarantee a proper fit and leak-free finish.
Choosing the correct replacement drain
Several key factors determine which replacement drain will fit and perform correctly: drain type (pop-up, trip lever, or lift-and-turn), flange diameter and finish, body threading or slip-fit style, and the tub material.
The correct choice matches the existing mechanism, provides compatible seals, and resists corrosion. Measure flange OD, thread pitch or slip depth, and select matching finish and material for longevity.
Assembling and installing a new drain body
With the correct drain selected to match flange diameter, threading, and finish, the next step is assembling and installing the new drain body.
Insert any included rubber gasket or compression ring per manufacturer instructions, thread the body into the tailpiece, hand-tighten, then use a drain wrench to secure without over-tightening.
Verify alignment with overflow and test for snug mechanical fit before final sealing.
Sealing the new drain with plumber’s putty or silicone
Before sealing, confirm the drain flange sits flush and the surrounding surface is clean, dry, and free of old putty or silicone.
Apply a rope of plumber’s putty beneath the flange or a thin bead of silicone around its underside.
Press flange down evenly, wipe excess, tighten the drain assembly, and allow silicone to cure per manufacturer instructions before testing for leaks.
Method C Fixing threaded/drain body leaks with thread tape and sealant
Method C addresses leaks that originate at threaded joints or the drain body, using thread tape where threads are intact and sealant for added protection.
The technician evaluates the condition of the threads to determine if PTFE tape will form a reliable seal, then wraps tape clockwise in tight, overlapping turns and applies a compatible plumber’s sealant at the joint if needed.
Proper technique—cleaning threads, orienting tape correctly, and avoiding excess sealant—ensures a watertight connection without interfering with assembly.
When thread tape is appropriate
When is thread tape the right choice for a leaking tub drain?
Thread tape suits leaks at metal-to-metal threaded joints where threads are intact but sealing has degraded.
It is appropriate for fittings without significant corrosion, stripped threads, or plastic bodies.
Use tape to supplement, not replace, proper joint seating and compatible sealant when threads provide mechanical engagement and a need for a compressible seal.
Proper wrapping and sealing technique
Having established that thread tape is appropriate for intact metal threads, the next focus is the exact wrapping and sealing steps to guarantee a watertight joint.
Clean threads thoroughly, apply 3–4 wraps of PTFE tape clockwise, press tape into grooves, then apply a thin bead of plumber’s silicone or pipe dope to the tape.
Tighten evenly, wipe excess, and allow cure before testing.
Reconnecting and Testing the Repair
After the drain work is completed, the stopper is reinstalled and checked to guarantee it opens, closes, and seals correctly.
A controlled water or pressure test is then run—fill the tub, plug the stopper, and observe for leaks over several minutes or use a pressure gauge where applicable.
Finally, nearby areas such as basement ceilings, cabinet interiors, and any signs of mold or discoloration are inspected to confirm no hidden leaks remain.
Reinstalling stopper and verifying mechanical function
Reinstall the drain stopper and operate the lift or pivot mechanism to confirm smooth, watertight movement; this step restores the assembly and reveals any remaining alignment or seal issues that require attention.
Ascertain linkage engages correctly, tighten retaining screws or clip, and adjust travel limits so the stopper seats fully.
Observe for binding, gaps, or loose parts and correct before finishing.
How to run a pressure/water test to confirm the leak is fixed
With the stopper reinstalled and linkage adjusted, proceed to a controlled pressure/water test to verify the repair holds under normal use.
Plug the overflow or drain, fill the tub to typical depth, and mark the water level.
Leave for 15–30 minutes, then inspect visible fittings and surrounding floor for leaks.
Release water, observe drain flow, and confirm no new seepage.
What to inspect after testing (basement ceilings, cabinet interiors, mold signs)
Once the tub has been filled, held, and emptied to confirm the drain repair, attention should shift to areas that may have received hidden water: ceiling surfaces in basements beneath the bathroom, interiors of nearby cabinets, and any spots where mold could form.
Inspect for stains, soft or sagging drywall, warped cabinet bottoms, musty odors, visible mold, and corrosion on nearby plumbing or fasteners.
Preventative Maintenance to Avoid Future Drain Leaks
Preventative maintenance reduces the chance of future tub drain leaks by keeping hair and debris from building up and stressing seals.
Regular inspections—recommended every six months—should check for slow drainage, corrosion, loose fittings, or deteriorating gaskets.
When recurring issues appear, consider upgrades such as higher-quality drains, improved overflow seals, or a tub liner to extend service life.
Regular cleaning and hair/debris prevention
Regularly clearing hair and debris from the tub drain reduces buildup that can corrode seals, strain fittings, and eventually cause leaks.
Routine prevention preserves drain integrity and minimizes odor.
Recommended actions include:
- Use a hair catcher and remove trapped material after each use.
- Run hot water weekly to flush residue.
- Extract clogs promptly with a drain snake or biodegradable enzyme cleaner.
Recommended inspection schedule and what to watch for
After routine cleaning and hair removal, a simple inspection schedule helps catch early signs of wear before they become leaks.
Inspect monthly for slow drainage, visible corrosion, loose or wobbly strainers, and water stains around the tub base.
Check seals and grout quarterly for cracks or gaps.
Perform a deeper inspection annually, testing overflow and removing the drain flange to verify gasket integrity.
Upgrades to consider (better drains, overflow seals, tub liners)
Upgrades such as higher-quality drains, improved overflow seals, and tub liners reduce the likelihood of future leaks by addressing common failure points directly.
Replacing stamped drains with brass or stainless units, installing reliable rubber or neoprene overflow gaskets, and adding a tub liner or reglazing layer extend service life.
These choices lower maintenance frequency, simplify inspections, and minimize water intrusion risks when properly installed.
Troubleshooting Persistent or Hidden Leaks
If water stains or moisture persist beneath the tub despite a repaired drain, the source may be the trap, waste arm, or connecting piping.
Simple diagnostics—such as a food coloring dye test in the tub and inspection through available access panels—can help pinpoint hidden leaks.
If those checks are inconclusive or the leak appears behind the wall or under the tub, exploring behind panels or removing the tub may be required.
Signs a leak is coming from the trap, waste arm, or piping
When water continues to appear beneath the tub despite a dry drain flange, the leak may originate deeper in the trap, waste arm, or connecting pipes; subtle signs include persistent wetness on the floor, a musty odor, or drips timed with faucet use rather than visibly from the drain.
- Uneven floor wetting under trap area.
- Intermittent dripping synchronized with water flow.
- Faint mildew or mold smell near plumbing access.
Diagnostic steps for hidden leaks (dye test, access panel checks)
How can a hidden leak be located with minimal disruption?
Begin by isolating the tub, filling it, then adding food coloring near the drain and overflow; watch adjacent ceilings, floors, and walls for color migration.
Inspect any access panels and crawlspaces visually and with a flashlight.
Use a moisture meter or paper towels to confirm damp spots.
Document findings before repairs.
When a leak requires removing the tub or opening walls
Proceeding to invasive measures signals that noninvasive diagnostics have failed to locate the source and that water damage persists or worsens.
Removal of the tub or opening walls reveals hidden pipe joints, deteriorated seals, or substrate rot.
Prioritize structural assessment, photograph conditions, shut off water, and contain moisture.
Engage a plumber or contractor for complex repairs; document work for insurance claims and future prevention.
Cost, Time Estimates, and When to Hire a Pro
Typical DIY repairs for a leaky tub drain often take one to three hours and cost between $10 and $100 for parts and basic tools.
More extensive fixes can raise materials and rental costs. Homeowners should call a licensed plumber if leaks persist after seal replacement, water is entering walls or ceilings, or recent repairs reveal corroded or misaligned drain components.
When contacting a plumber, provide the fixture location, a concise history of attempted fixes, visible symptoms (drips, stains, soft drywall), and any unusual sounds to help expedite diagnosis and service.
Typical DIY time and cost breakdown
Most DIY tub-drain repairs take between 30 minutes and a full afternoon depending on the issue and the homeowner’s experience. Typical costs range from $5–$60 for parts; tools may add one-time expense. Simple fixes suit DIYers; complex corrosion or routed pipes justify a pro.
| Task | Time | Typical Cost |
|---|---|---|
| Replace stopper | 30–60 min | $5–$30 |
| Reseal drain | 1–3 hrs | $10–$40 |
| Replace flange | 2–4 hrs | $20–$60 |
Red flags that mean call a licensed plumber
After attempting basic repairs like replacing a stopper or resealing a flange, certain signs indicate the job has exceeded DIY scope and a licensed plumber should be contacted.
Significant persistent leaks, water spreading into walls or ceilings, mold growth, corroded or cracked pipes, recurring backups, complex drain assembly damage, or inability to locate the leak all justify professional assessment.
Expect higher costs and longer repair time.
How to describe the problem to a plumber for faster service
When contacting a plumber, provide a clear, concise summary of the problem:
- where the leak is located,
- when it started,
- what repairs have already been attempted,
- and whether water has reached walls, floors, or ceilings.
Include photos, describe sound or odor, note water flow behavior, and list tub model or age.
Ask for estimated diagnosis time, repair window, and a written cost estimate including parts and labor.
Quick Reference: Common Mistakes to Avoid and Best Tips
Common mistakes and helpful tips are summarized to prevent common rework and damage.
Emphasis is placed on not overtightening fittings to protect the tub finish, selecting a sealant compatible with the tub material, and following a concise checklist to confirm a complete fix before finishing.
This quick reference helps guarantee the repair is durable and cosmetically sound.
Avoiding overtightening and damaging tub finish
Overtightening a drain assembly can strip threads, crack enamel, or mar a tub’s finish, turning a minor repair into a costly refinish job.
Use a hand-tight approach, snugging parts until seated then applying a quarter-turn. Protect surfaces with soft jaws or a cloth-covered wrench.
Check alignment before final tightening and test for leaks; retighten incrementally only if needed.
Choosing the right sealant for your tub material
Selecting the correct sealant for a tub depends on the tub material—acrylic, fiberglass, cast iron, or enamel-coated steel—and the joint type, exposure to water, and expected movement.
Use silicone for flexible, waterproof seals on acrylic/fiberglass; polyurethane for durable adhesion on metal; epoxy for permanent metal repairs; nonstaining, bathroom-grade formulations prevent discoloration.
Avoid solvent-based products that can damage softer finishes.
Quick checklist to verify a complete fix before finishing
After choosing the proper sealant for the tub material, a short checklist helps verify the repair before finishing work proceeds.
Inspect for visible gaps, confirm flange and tailpiece tightness, run a timed water test for leaks, check drain alignment and stopper function, guarantee sealant cures per instructions, and verify no tools or debris remain.
Note torque limits to avoid over-tightening fittings.
Conclusion
In closing, the modest nuisance of a leaky tub drain need not become a household drama. With prudent inspection, measured tools, and a touch of patience, most leaks yield to a careful reseal or replacement. Routine attention keeps minor seepage from escalating into costly upheaval, and when complexities whisper beyond DIY reach, a qualified professional can discreetly restore calm. Ultimately, small, timely interventions preserve comfort and avert greater disturbance.