What Size Is a Toilet Drain Pipe? Standard Toilet Pipe Sizes Explained
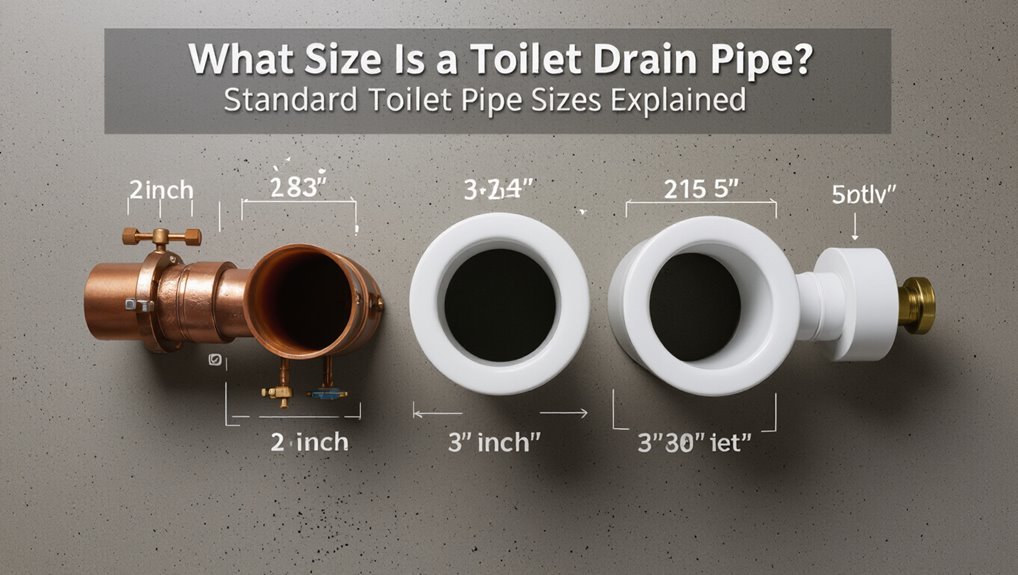
The standard size for residential toilet drain pipes is typically 3 inches or 4 inches in diameter. Three-inch drains are often found in older homes and tight retrofit situations, while four-inch drains are preferred for new constructions, as they allow for higher flow rates and are commonly used in commercial settings. Smaller sizes, such as 2¼ inches or 2 inches, can be seen in specialty or older fixtures but may increase the risk of clogs and often require adapters. Additionally, factors like material and venting can impact performance alongside diameter. For further details on measurement, adapters, and installation, continue reading.
What This Guide Covers (And Why)
In this guide, the scope and purpose are defined so readers understand which toilet drain pipe sizes are addressed and why those distinctions matter.
The section clarifies that the focus is on residential and light-commercial toilet drains, common nominal diameters, and applicable fitting types. It excludes deep plumbing theory, sewer main specifications, and venting practices reserved for later sections.
Readers learn intended purpose: replacement, remodeling, and code comparison.
The guide summarizes measurement methods, typical materials (cast-iron, PVC, ABS), and when to consult local code or a licensed plumber.
Assumptions and limits are stated to prevent misapplication.
Quick Answer: Standard Toilet Drain Pipe Sizes
For most residential and light‑commercial toilets, the standard drain pipe sizes are 3 inches and 4 inches (nominal). These sizes reflect common trapway and soil‑stack connections: 3‑inch lines suit older or compact installations, while 4‑inch lines accommodate higher flow and multi‑fixture stacks.
Local codes typically accept either, though some jurisdictions or commercial applications mandate 4 inches. Pipe material varies (PVC, cast iron, ABS), but nominal diameter remains the sizing reference. Adapters bridge mismatched fittings when necessary. Manufacturers list required outlet size for each model; installers confirm compatibility before replacing or relocating a toilet.
Why Drain Pipe Size Matters for Toilet Performance
Proper drain pipe sizing directly influences clog prevention by providing sufficient internal diameter to carry waste without frequent blockage.
It also affects flow rate, where undersized pipes restrict velocity and volume, impairing flush efficiency.
Additionally, pipe size interacts with trap and vent design to maintain siphon balance and prevent seal loss or slow drainage.
Clog Prevention Basics
Although often overlooked, drain pipe diameter plays a direct role in preventing toilet clogs by determining flow velocity and the pipe’s capacity to carry waste and water together. Proper sizing reduces stagnant zones where solids accumulate, while inadequate diameter increases backup risk. Installation alignment and slope complement diameter to maintain self-clearing momentum. Material smoothness and joints affect friction and snag points. Routine maintenance addresses external causes but cannot fully compensate for undersized piping.
- Verify minimum recommended diameter for fixture type.
- Maintain correct slope to aid gravity flow.
- Use smooth, continuous runs with few bends.
- Inspect and replace damaged sections promptly.
Flow Rate Importance
Balancing flow rate is central to toilet performance because the pipe’s internal diameter directly controls the volume and velocity of water and waste that can pass in a given flush; higher flow velocity helps carry solids through the trap and into the soil stack, while insufficient flow promotes pooling and clogs. Proper pipe size matches fixture discharge to expected load, reducing backups and water waste. Performance depends on peak flow during flush, not just static capacity. Designers consider typical flush volumes, slope, and pipe roughness to guarantee reliable conveyance without excessive noise or erosion.
| Factor | Effect |
|---|---|
| Diameter | Controls flow capacity |
| Velocity | Determines solids transport |
Trap And Venting
Ensuring effective trap and venting functionality hinges on the drain pipe’s diameter because it sets the pressure dynamics and flow characteristics that prevent siphoning and allow smooth discharge.
Proper sizing maintains water seal integrity, limits negative pressure, and guarantees venting can equalize air quickly.
Smaller pipes risk siphonage and slow drains; oversized runs can reduce flow velocity and allow solids to settle.
Installers must balance slope, fixture units, and vent location with pipe size to preserve trap seals and avoid gurgling.
- Prevents siphoning by sustaining adequate airflow.
- Maintains trap seal under flush demand.
- Ensures sufficient flow velocity.
- Matches vent capacity to fixture load.
How to Measure Your Toilet Drain Pipe Size
To determine the correct toilet drain pipe size, the homeowner should measure the pipe diameter using calipers or a measuring tape and note whether the measurement is of the inside (ID) or outside (OD) dimension.
They should also check the pipe location—floor flange, wall outlet, or basement stack—as positioning affects required fittings and clearances.
Recording both diameter and location guarantees accurate replacement or retrofit choices.
Measure Pipe Diameter
Measure the toilet drain pipe diameter by taking precise measurements of the pipe’s internal width, since the inside dimension determines flow capacity and fitting compatibility. A caliper or ruler placed inside the open end yields the inside diameter (ID); measure across the widest internal point. If only outside diameter (OD) is accessible, measure it and subtract wall thickness or consult material tables. Record measurements in inches and millimeters for clarity. Note condition: obstructions, buildup or deformation alter readings and may require cleaning or replacement before measuring.
- Use calipers for accuracy.
- Verify multiple points.
- Convert units.
- Document results.
Check Pipe Location
When locating the toilet drain pipe, note whether it exits through the floor, wall, or a basement slab, since position affects access, measurement approach, and available fitting types.
Inspect visible pipe ends, clean debris, and record distance from finished floor or wall surface to pipe center.
Measure clearance around the pipe for flange mounting or wall-hung carriers, and identify nearby joists, studs, or other obstructions that may restrict access.
Determine whether the pipe is cast iron, PVC, ABS, or clay to anticipate joining methods.
Photograph the location and measurements for reference.
Use these observations to select appropriate fittings and measure diameter accurately.
How to Identify the Toilet Trapway Size
In identifying a toilet’s trapway size, a clear, methodical approach begins with locating the visible curve or flush passage at the bowl’s base and noting whether it appears smooth, glazed, and unbroken.
Measurement follows: calipers or a flexible tape capture the internal passage diameter where visible; external molds or paper templates aid where glazing obscures access.
Documentation of measurements and any obstructions secures accurate reporting.
If unsure, compare with manufacturer diagrams or remove the bowl for direct inspection.
Record findings for replacement or repair decisions.
- Visual inspection
- Measure internal diameter
- Note obstructions or glazing
- Consult documentation
Common Residential Sizes: 2¼”, 3″, and 4″ Explained
The article outlines the common residential toilet trapway diameters—2¼”, 3″, and 4″—and explains how each size affects flow and clog resistance.
It compares typical applications for each diameter in homes and which fixtures or installations they suit best.
Guidance for selecting the correct size based on drain performance, plumbing codes, and retrofit constraints is provided.
Standard Diameters Explained
A toilet drain’s diameter determines flow capacity and compatibility with fixtures and waste stacks. Common residential diameters—2¼”, 3″, and 4″—reflect performance, installation practice, and blockage resistance. Each size suits different fixture types and stack requirements without addressing selection guidance.
- 2¼” — older or compact fixtures, limited flow, higher clog risk.
- 3″ — mid-range capacity, often used where space or existing lines constrain.
- 4″ — standard for new installations and commercial-grade flow, better solids handling.
- Adapter fittings — permit connection between diameters while maintaining trap seal and vent function.
Choosing The Right Size
Selecting the correct toilet drain diameter depends on fixture type, existing plumbing, and expected usage. Common residential options—2¼”, 3″, and 4″—address different performance needs.
Small, low-flow or wall-mounted fixtures may use 2¼” where code permits; these require careful venting and limit waste capacity. Three-inch drains offer a compromise for standard toilets with moderate flow, easing installation in retrofits.
Four-inch drains provide maximum flow for high-capacity or commercial-like residential fixtures, reducing clog risk and simplifying waste discharge. Final selection should follow local code, manufacturer recommendations, and a plumber’s assessment of slope, venting, and line capacity.
When Toilets Use 3″ Drains Instead of 4″?
Occasionally, older homes and compact bathroom designs call for toilets connected to 3-inch drain lines rather than the more common 4-inch piping; this choice typically reflects space constraints, existing plumbing layouts, or local code allowances that permit smaller vents and drains for low-flow fixtures.
Use of 3″ drains occurs when:
- Floor space or joist bays restrict larger piping runs.
- Existing drain stacks are 3″ and replacement seeks minimal disturbance.
- Low-flow or dual-flush toilets reduce required flow capacity.
- Local codes or historic preservation rules allow smaller diameters.
Plumbing professionals assess trapway size, venting, and blockage risk before approving 3″.
How Soil‑Stack and Waste‑Line Size Affect Toilet Choice
When tied into an existing soil stack or main waste line, toilet selection must account for the pipe diameter and its downstream capacity to guarantee proper drainage and venting. Fixture flow rate, trapway size, and flush performance must match stack capacity to avoid backups or slow drainage. Building codes often limit combined discharge onto a single stack; installers should confirm cumulative fixture units. Adapting a high‑flow toilet to a narrow main can require upgrading the waste line or choosing lower‑volume models. The table below summarizes common considerations.
| Factor | Impact | Action |
|---|---|---|
| Stack diameter | Capacity | Verify code limits |
| Trapway | Flow | Match performance |
| Venting | Air supply | Assure continuity |
| Flush volume | Load | Select accordingly |
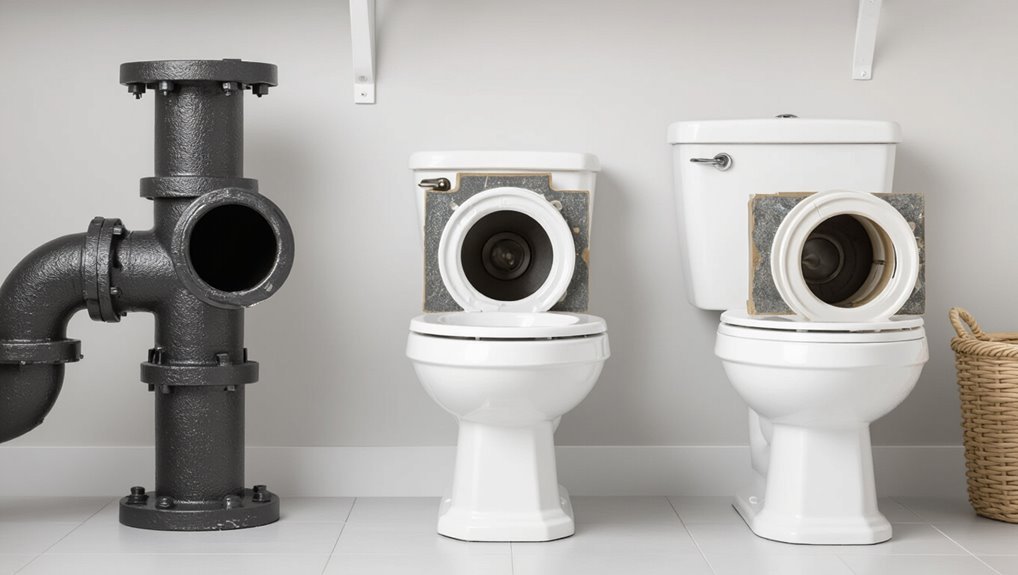
Pipe Materials: PVC, ABS, and Cast Iron Differences
After matching toilet performance to stack diameter and venting, attention shifts to the materials used for waste piping—PVC, ABS, and cast iron—which differ in strength, noise, corrosion resistance, and joint methods.
Each material suits specific installation contexts and regulatory preferences. PVC is lightweight, chemically resistant, and joined with solvent cement.
ABS offers impact resistance and colder-weather durability, using solvent or mechanical joints.
Cast iron provides superior sound dampening and longevity but is heavier and resists root and heat damage; it uses hub-and-spigot or no-hub couplings.
Consider cost, building codes, and expected lifespan when selecting pipe material.
- PVC: inexpensive, corrosion-resistant
- ABS: impact-tolerant, rigid
- Cast iron: quiet, durable
- Selection factors: code, cost, longevity
Fittings and Adapters to Transition Between Sizes
Adaptation components enable smooth connections between differing toilet drain dimensions and materials.
Common solutions include stepped adapters for pipe adaptations, flange size converters to match toilets to existing drains, and flexible couplings that accommodate misalignment and vibration.
Selecting the correct type and material guarantees a watertight, code-compliant joint.
Adapters For Pipe Transition
In plumbing systems where toilet drain lines change diameter, adapters provide a secure, code-compliant connection between mismatched pipe sizes. These fittings bridge cast-iron, PVC, ABS, and copper using mechanical couplings, rubber adapters, or solvent-weld conversions. Proper selection prevents leaks, maintains slope, and meets local codes. Consider material compatibility, pressure rating, and access for maintenance.
- Use flexible rubber adapters with stainless clamps for slight misalignments.
- Choose solvent-weld or gasketed PVC for permanent joins.
- Employ conversion couplings for dissimilar materials.
- Verify adapter size and local code approval before installation.
Flange Size Converters
When connecting toilets to drain lines of differing diameters, flange size converters provide a secure, code-compliant interface between the fixture and the waste pipe. These fittings adapt toilet flanges to various pipe materials and sizes, maintaining proper seal, bolt alignment, and pitch. Installers select rigid or stepped reducers, cast iron to PVC adapters, or neoprene-lined pieces to meet local code and prevent leaks. Proper choice preserves trap seal and simplifies future replacement. Below is a concise comparison.
| Converter Type | Typical Use | Key Benefit |
|---|---|---|
| Stepped flange | 3″→4″ adaptations | Simple, low-cost |
| Neoprene adapter | Mixed materials | Leak-resistant seal |
| Cast-to-PVC | Cast iron to PVC | Durable, code-ready |
| Rigid reducer | Permanent retrofit | Stable alignment |
Flexible Coupling Options
After describing rigid flange converters, attention shifts to flexible coupling options that accommodate misalignment, vibration, and mixed pipe materials.
Flexible couplings bridge differing diameters and materials (cast iron, PVC, ABS) with rubber sleeves and stainless clamps, allowing secure seals and slight movement.
Selection depends on pipe sizes, pressure, and code requirements.
Benefits include ease of installation and reduced stress transmission; limitations involve temperature and chemical resistance.
Common types and considerations:
- Fernco-type rubber couplings for PVC-to-PVC or PVC-to-ABS.
- Shielded couplings for cast iron changes.
- Changeover couplings with stainless clamps.
- Reducer couplings for size stepping.
Local Code Rules for Toilet Drain Sizing
Across jurisdictions, local plumbing codes determine permitted toilet drain sizes and installation requirements to guarantee proper trap arm and slope, venting, and load capacity.
Municipal codes typically reference national model codes (IPC, UPC) but add amendments affecting minimum pipe diameter, maximum trap arm length, required vent size and distance, and allowable fittings.
Inspectors enforce compliance during rough‑in and final inspections; permits and plan approval may be required.
Compliance assures waste flow, prevents siphonage, and avoids backups.
Before selecting pipe size, installers must consult the applicable code edition, local amendments, and utility or health department rules to confirm acceptable materials and configurations.
New Build vs. Retrofit: Common Installation Scenarios
New construction allows planners to size and route toilet drain pipes to code with minimal obstruction, often favoring larger diameters and straight runs.
Retrofit projects commonly face space constraints, existing framing, and floor finishes that restrict pipe diameter and routing options. Each scenario requires different trade-offs between ideal hydraulics and practical installation limits.
New Construction Considerations
When planning toilet drain installation for new construction versus retrofit projects, the decision-making focuses on access, routing, and code compliance constraints that differ markedly between the two scenarios.
New construction allows optimal placement of 3″ or 4″ soil stacks, direct routes to main drains, and integrated venting schemes.
Designers can coordinate floor framing, slab penetrations, and future maintenance access.
Material selection and slope is set during rough-in to meet local codes.
Considerations include:
- Choosing 3″ vs 4″ based on fixture count and code.
- Positioning for easy trapway alignment.
- Routing to minimize bends.
- Provisioning vent stacks and cleanouts.
Retrofit Installation Challenges
In retrofit projects, installers frequently confront restricted access, unpredictable routings, and existing structural constraints that make matching toilet drain sizes to both code and practical plumbing paths more difficult than during new construction. They must assess original soil stacks, joist bays, and finished floors to decide whether 3-inch or 4-inch drainage, offsets, or drop elbows are feasible.
Challenges include limited slope opportunities, hidden damage, and compatibility with older cast-iron or clay lines. Solutions often require strategic relocations, use of lavatory venting strategies, pipe adapters, or core drilling.
Permits and inspections frequently dictate scope, adding cost and scheduling considerations.
Signs Your Toilet Drain Is Too Small (Clogs, Slow Flush)
Frequently, a toilet that repeatedly clogs or flushes slowly indicates the drain pipe diameter is undersized for the fixture and household usage. Observations focus on performance patterns: frequent backups after normal use, slow bowl drainage between flushes, gurgling in nearby drains, and reliance on multiple flushes. These signs suggest flow capacity limits rather than isolated debris issues. A clear inventory of symptoms helps distinguish pipe-size constraints from other causes without troubleshooting steps. Consider documented frequency and conditions when evaluating whether the drain’s nominal diameter matches toilet design and household demand.
- Frequent backups
- Slow bowl drainage
- Gurgling sounds
- Multiple flushes needed
Troubleshooting Size‑Related Toilet Problems
Assess the problem systematically by separating symptoms caused by pipe diameter from those due to blockages, venting, or fixture faults. Inspect flow rate, listen for gurgling, and test other fixtures. Measure pipe size at accessible cleanouts; smaller than standard 3–4 inches can limit performance. Rule out removable obstructions, improper slope, or blocked vents before attributing issues to diameter. Document findings, then decide whether cleaning, vent repair, or fixture adjustment resolves symptoms. Use professional diagnostics if uncertainty remains.
| Symptom | Likely cause | Quick check |
|---|---|---|
| Slow flush | Partial obstruction | Snaking test |
| Gurgling | Venting issue | Roof vent check |
| Frequent clogs | Undersized or buildup | Measure pipe size |
When to Upgrade a Drain Pipe: Options and Costs
After ruling out blockages, vent problems, and fixture faults, the next consideration is whether replacing or upsizing a drain pipe is warranted and which approach fits the situation.
A decision depends on pipe diameter, material age, slope, and persistent backups. Options include partial section replacement, full run replacement, installing larger-diameter piping where code permits, or reconfiguring waste lines to reduce bends.
Cost drivers are access difficulty, material (PVC vs. cast iron), labor, and permit needs. Typical ranges run from modest repairs to several thousand dollars for full replacement.
Consider long-term performance and local code requirements.
- Partial section replacement
- Full run replacement
- Upsizing to larger diameter
- Reconfiguring waste routing
DIY vs. Hire a Plumber: When to Call a Pro
When should a homeowner tackle a drain-pipe issue themselves and when is a professional necessary? A homeowner may handle minor clogs, simple flange reseats, or visible small leaks if confident. Call a plumber for repeated backups, sewer smells, unknown pipe damage, or when work affects main lines or structural elements. Complex replacements, code compliance, or inaccessible piping require licensed skills.
| DIY Situations | Pro Recommended |
|---|---|
| Minor clogs, easy access | Recurrent backups, odor |
| Visible small leaks | Main sewer or hidden damage |
| Simple flange reseat | Code/permit needs, structural risk |
Tools and Parts Checklist for Measuring or Replacing Drains
Before measuring or replacing a toilet drain pipe, a concise kit of tools and parts should be assembled to minimize trips and errors. The checklist focuses on accuracy, safety, and proper sealing.
Essential hand tools, fittings, and safety gear reduce delays and rework. Typical items cover measurement, cutting, joining, and leak prevention.
- Tape measure, calipers, PVC/ABS cutter or reciprocating saw
- Adjustable wrench, pliers, screwdriver set
- Couplings, flange bolts, wax ring or rubber gasket, solvent cement or primer
- Gloves, safety glasses, rag, bucket
Items vary by pipe material and access; prioritize correct coupling types.
How to Document Pipe Size for Maintenance or Sale
Documenting toilet drain pipe size for maintenance or sale requires clear, verifiable records that communicate measurements, material, and condition to technicians or buyers.
Include pipe diameter (inside and nominal), measurement method (caliper, tape), location (basement, wall, soil stack), and pipe material (PVC, cast iron, ABS).
Note fittings, slope, and any adapters or repairs, with dates and responsible party.
Photograph measurements with scale and overall runs, and attach inspection reports or dye-test results if available.
Store documentation digitally and as a printed packet, and label access points to streamline future inspection, quoting relevant codes when applicable.
Quick Reference Table: Sizes, Uses, and Compatibility
A compact reference table summarizes common toilet drain pipe diameters, their typical applications, and compatibility notes to help technicians, inspectors, and buyers make quick decisions.
It presents size, use, material, and installation tip in a concise grid for field reference.
The table reduces errors in retrofit or replacement projects and clarifies local code tendencies.
For rapid consultation, it pairs nominal diameters with fixture types and coupling guidance.
- 3-inch — residential toilets, PVC/ABS, standard gravity drains.
- 4-inch — commercial/high-flow, PVC/ABS, preferred for cased stacks.
- 2-inch — rare, specific fixtures only, adapter needed.
- 6-inch — large sewers, not for fixtures.
Conclusion
In the plumbing world’s quiet current, the right drain size steers performance like a riverbed shapes water. Knowing standard toilet drain and trapway dimensions prevents backups, simplifies repairs, and preserves fixture value. Measuring accurately, documenting findings, and choosing pros for complex work guarantee flow remains steady. With the correct parts and clear records, a home’s plumbing hums reliably—small pipes, when matched properly, keep the whole system moving smoothly.