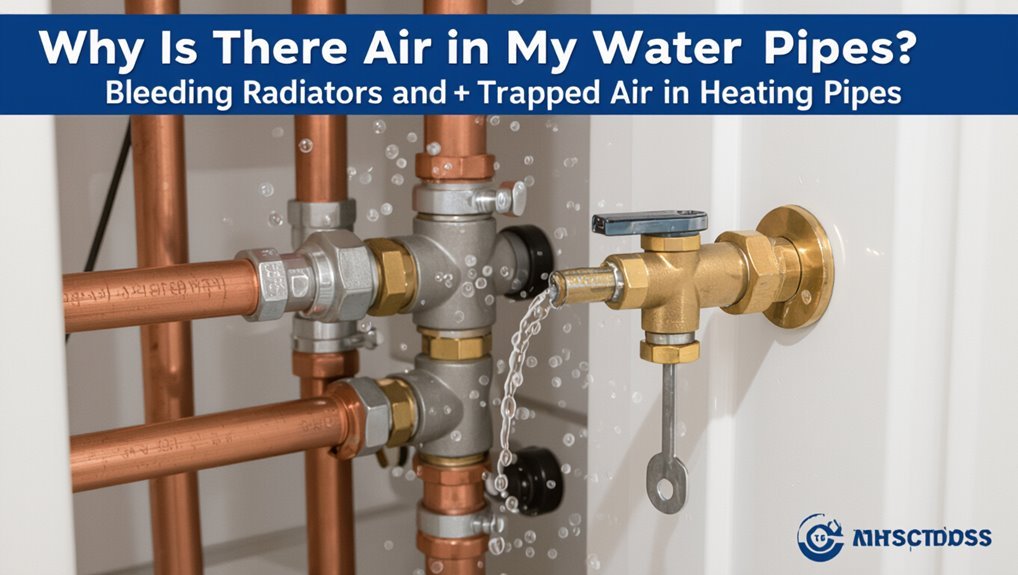
Why Is There Air in My Water Pipes? Causes & Fast Fixes
Air in your water pipes is typically caused by pressure changes, leaks, or issues with your pump or tank, which allow air to enter the system and create trapped pockets. This can lead to symptoms like sputtering faucets, gurgling drains, and noisy hammering. To resolve the issue, you can try simple methods like purging the system, bleeding high fixtures, and checking valves or tank precharge. Continue reading for practical diagnostics and repair steps.
Quick Answer: Why Air Gets Into Water Pipes

Air enters water pipes primarily when changes in pressure or temperature create voids that draw in air, such as during main breaks, pump shutdowns, or when a line is drained for maintenance.
Leaks or loose fittings can siphon air as water escapes.
Thermal contraction in cold conditions causes trapped pockets to form.
Rapid valve closures or sudden flow changes introduce turbulence that traps bubbles.
Municipal repairs, hydrant flushing, or system startup after downtime frequently introduce and redistribute air.
Aging infrastructure with corrosion or irregular pipe gradients promotes accumulation.
Small trapped pockets cause sputtering; larger volumes can disrupt flow and pressure.
How to Tell If Air Is in Your Water Lines
Following the common causes of air entry into water systems, homeowners and technicians can recognize its presence by several clear signs at fixtures and equipment.
Sudden pressure changes when taps open, intermittent flow at multiple outlets, or water that sprays irregularly indicate trapped air.
Hot-water appliances may cycle oddly or fail to maintain steady temperatures.
Drainage noises and brief pauses in flow while running taps suggest pockets moving through lines.
Observing reduced flow after utility work or after repairs points to introduced air.
Simple verification includes slowly opening a high faucet until smooth, continuous flow replaces sputtering or fluttering.
Common Symptoms: Sputtering, Banging, Gurgling
Air in water pipes often reveals itself through clear, observable sputtering at faucets as trapped air forces water to spurt irregularly.
It can also produce loud banging or water hammering when pockets of air shift suddenly in the line.
Persistent gurgling from drains or fixtures commonly accompanies these signs and indicates air moving through the system.
Visible Air-Driven Sputtering
Visible bursts of water and intermittent noise occur when trapped pockets of gas move through domestic plumbing, producing sputtering at faucets, sudden banging (water hammer), and gurgling in drains. Air-driven sputtering signals pressure fluctuations and irregular flow; bubbles disrupt steady streams and can loosen debris.
Observing where sputtering appears helps isolate affected branches or fixtures. Short-duration events often follow system repairs or main work, while persistent sputtering suggests leaks, pump issues, or improperly vented tanks.
Remedies include bleeding fixtures, slowly opening valves to flush air, and checking expansion tanks. If unresolved, a licensed plumber should inspect system pressure and check for hidden air sources.
- Locate
- Isolate
- Flush
- Inspect
Loud Water Hammering
When trapped gas or sudden valve closures disrupt flow, the result can escalate from sputtering to loud water hammering: sharp, reverberating bangs in pipes often accompanied by gurgling and intermittent sputtering at fixtures.
This phenomenon occurs when moving water abruptly stops, creating pressure waves that collide with pipe walls.
Air pockets amplify noise and stress joints, increasing leak risk and fixture wear.
Common causes include fast-closing valves, high pump startup/shutdown speeds, and loose pipe supports.
Immediate remedies include installing water hammer arrestors, securing piping with straps, slowing valve closure, and bleeding air from the system to restore steady, quiet flow.
Gurgling Drain Noises
Why does water emit a wet, bubbling sound before draining fully? Gurgling drain noises signal trapped air or partial blockages that disrupt smooth flow. When air pockets form in trap or vent lines, water forces them out audibly. This symptom often accompanies sputtering faucets or intermittent banging as pressure equalizes.
- Clogged drain: debris restricts flow, creating pockets of air.
- Blocked vent stack: roof vents obstructed prevent proper air exchange.
- Partial pipe collapse: offsets or buildup narrow passages, causing turbulence.
- Sewer line issues: solids or roots cause irregular flow and audible gurgles.
Why Faucets Spit or Blast Instead of Flowing
Air trapped in household plumbing can forcefully eject water from a faucet because pockets of compressed air act like mini pressure vessels: as trapped air moves or decompresses, it displaces water abruptly, producing spits, sputters, or sudden blasts rather than a steady stream. The phenomenon occurs when air enters during repairs, main line work, or rapid pressure changes; it collects at high points or in aerators. Simple fixes include running faucets to purge air, checking for loose valves, and cleaning aerators. Persistent issues suggest a plumber should inspect for larger system leaks or improper venting.
| Cause | Symptom | Quick action |
|---|---|---|
| Air pocket | Spitting | Purge faucet |
| Valve issue | Surging | Tighten/replace |
| Aerator clog | Irregular flow | Clean/soak |
Why Shower Pressure Drops Suddenly (And What to Try First)
A sudden drop in shower pressure often stems from trapped air in the supply lines or from a malfunctioning valve limiting flow.
Technicians first check for air blockages by briefly opening other nearby taps to purge pockets of air, then inspect valves and the main supply for partial closures or damage.
Simple initial steps can identify whether the issue is an air pocket or a component problem requiring repair.
Air Blockages In Lines
Experiencing a sudden drop in shower pressure often signals trapped pockets of gas interrupting steady flow through the plumbing.
Air blockages form in high points, bends, or near fixtures after repairs, heater cycling, or pressure changes.
They cause sputtering, inconsistent flow, or temporary loss of pressure until expelled.
Diagnosing focuses on isolating affected runs and forcing a purge from the highest outlets downward.
Simple remedies clear pockets without invasive work; persistent or recurring blocks indicate trapped low spots requiring rerouting or adding vents.
Safety and gradual purging prevent water hammer and protect appliances.
- Locate high points
- Open top outlets first
- Flush until steady flow
- Repeat if needed
Valve Or Supply Issues
Once trapped pockets have been ruled out, attention turns to valves and the incoming supply as common causes of sudden pressure loss. The shutoff or mixing valve may be partially closed, clogged with debris, or failing; supply mains can experience drops from maintenance, breaks, or demand. Technicians check valve positions, operate them fully, inspect cartridges, and monitor municipal notices. If pressure variations persist, test with a pressure gauge at the hose bib and contact the supplier. Temporary fixes include flushing lines and replacing faulty cartridges; permanent resolution may require valve repair or notifying the water utility.
| Check | Action | Outcome |
|---|---|---|
| Valve position | Open fully | Restores flow |
| Cartridge | Inspect/replace | Stops restriction |
| Supply | Gauge/test | Identifies utility issue |
Quick Home Fixes to Remove Air From Faucets
Turn the faucet on fully and let it run for a minute to clear trapped air and restore steady flow. The homeowner then tests additional fixtures, noting where sputtering persists. Simple, safe actions often eliminate pockets of air without tools. If noise or pulsing continues, inspect supply valves and the main shutoff for partial closure. Record observations before calling a plumber to speed diagnosis.
- Open cold then hot taps one at a time to purge lines.
- Run outdoor spigots to flush longer runs.
- Tighten loose aerators and screens to prevent splatter.
- Cycle the main valve slowly to release trapped air.
Bleed Radiators and Baseboards (Hydronic Systems)
After clearing faucets, attention turns to hydronic heating where trapped air can cause cold spots and noisy pipes in radiators and baseboard heaters. The homeowner locates bleed valves, warms the system slightly, then opens each valve until steady water appears, closing promptly. Work from lowest to highest units and toward the boiler. Small radiators may need a radiator key; baseboard vents often use a flat screwdriver. Safety: catch drips, avoid burns, and shut the pump if instructed. If bleeding fails repeatedly, a professional should inspect for leaks or system imbalance.
| Tool | Target | Result |
|---|---|---|
| Radiator key | Radiators | Steady water |
| Screwdriver | Baseboards | Removed air |
| Rag/bin | Safety | Contain drips |
Purge Your Whole House to Remove Air From Water Pipes
To purge the entire plumbing system, the homeowner first shuts off the main water valve to isolate the house supply.
Next, they open the highest faucet in the home and then a lowest fixture, allowing trapped air to move toward the lowest point and escape.
Once water flows steadily without sputtering, the valves are closed and the main supply is restored.
Shut Off Main Valve
Shut off the home’s main water valve to isolate the supply before purging air from the system. The homeowner or technician confirms valve closure, relieves downstream pressure at a faucet, and prepares tools and towels. This step prevents new water flow while trapped air is expelled, reducing risk of pressure surges or water damage.
- Verify valve location and orientation.
- Close valve fully and lock or mark it.
- Open a nearby faucet to confirm isolation.
- Prepare to drain lines methodically for complete air removal.
Open Highest And Lowest
With the main valve secured, the technician opens the highest and lowest fixtures in the house to create a clear path for trapped air to escape; starting at the topmost outlet and working down guarantees gravity and flow carry bubbles toward the drains and external discharge points.
This systematic purge isolates pockets of air, prevents reintroduction, and reveals stubborn entrapped zones as water resumes steady flow. Faucets, hose bibs, and attic vents are typical openings.
The crew monitors pressure and listens for sputtering, closing fixtures once a smooth stream appears. Completing the sequence restores consistent supply and confirms the effectiveness of the purge.
How to Safely Restart a Well Pump After Air
How should a homeowner proceed when air has entered a well system and the pump must be restarted? A technician-like checklist guarantees safety and restores pressure: turn off power at the main breaker, close any open faucets, and confirm the pump is isolated.
Bleed trapped air by opening a nearby service valve or hose bib until steady flow appears. Restore power briefly to allow the pump to prime, watching for unusual noises or rapid cycling.
If cycling continues or pressure won’t build, stop attempts and contact a qualified pump service to inspect tanks, valves, or the pump for leaks or failures.
- Cut power first
- Isolate plumbing
- Bleed air slowly
- Seek professional help
Flush the Water Heater to Expel Air and Sediment
Before flushing the water heater, power and water to the unit should be turned off to guarantee safety.
The tank is then drained completely to remove trapped air and accumulated sediment.
After refilling, the system is bled at fixtures to expel remaining air from the lines.
Turn Off Power And Water
Prior to flushing the water heater, shut off its power source and the incoming water supply to prevent electrical hazards and uncontrolled flow; this guarantees the tank can be depressurized and drained safely for expelling trapped air and sediment.
The technician or homeowner isolates electricity (or gas pilot), closes the cold-water shutoff, and allows the unit to cool.
Verifying zero power and stopped supply prevents burns, damage, and false diagnostics.
Once isolated, pressure can be relieved at a nearby faucet before attachment of hoses for flushing.
- Confirm power off.
- Close cold-water inlet.
- Allow cooling time.
- Open nearby faucet to relieve pressure.
Drain Tank Completely
Begin draining the tank by attaching a hose to the drain valve and directing the other end to a safe drain or exterior area; opening the valve allows air trapped in the system and accumulated sediment to exit with the water.
The heater should be cooled or powered off per instructions. Open a hot faucet upstairs to promote flow and relieve vacuum.
Allow draining until water runs clear and flow is steady; intermittent flushing may dislodge remaining grit.
Close the valve, remove the hose, and tighten fittings. Inspect drained water for excessive sediment indicating tank corrosion or failure requiring professional assessment.
Refill And Bleed Lines
With the drain valve closed and the drain hose removed, the tank is ready to be refilled and any trapped air purged from the lines.
A slow refill prevents stirring sediment; open the cold-water inlet fully while leaving a nearby hot faucet open to vent. Watch for steady water flow from the faucet, indicating air is expelled.
Once air-free, close the faucet and check the drain valve for leaks. Restore power or gas following manufacturer guidelines.
- Refill slowly to settle sediment.
- Vent through a distant hot faucet.
- Confirm continuous water flow.
- Inspect for leaks before restarting.
Use Air‑Release Valves the Easy Way
For straightforward air management in water mains and service lines, installing automatic air‑release valves at high points and along long runs prevents pockets of trapped air from accumulating and disrupting flow.
These valves vent small air volumes continuously and expel larger pockets automatically during filling or pressure changes, reducing hammer, noise, and flow loss.
Selection prioritizes valve size, pressure rating, and corrosion resistance for the system.
Placement should follow manufacturer guidance and local codes, typically at summits, dead ends, and downstream of isolation points.
Routine inspection and occasional replacement keep valves reliable; small failures are easier and cheaper to correct than systemwide problems.
When to Adjust or Replace Pressure Tanks
When pressure tanks start cycling more frequently, failing to hold pressure between pump cycles, or showing visible corrosion or waterlogging, it signals that adjustment or replacement is needed.
The homeowner should verify tank precharge, gauge accuracy, and bladder integrity before replacing. Minor pressure discrepancies may require recharging to manufacturer specs; persistent short cycling or persistent air in lines indicates a failing bladder or rusted tank.
Professional inspection detects hidden leaks, pressure switch faults, or undersized tanks. Timely action prevents pump wear and intermittent air delivery.
- Check precharge pressure
- Inspect for waterlogging
- Test pressure switch and gauge
- Replace corroded/bladder tanks
Why Municipal Water Work Adds Air to Lines
During routine maintenance, municipal crews intentionally introduce air into distribution mains to purge sediments, isolate work zones, and manage pressure transients. This controlled entrainment reduces risk during valve work, allows crews to detect leaks, and prevents damaging vacuum conditions. Residents may notice sputtering taps or noisy pipes; these effects are temporary and often localized to zones near work. Utilities typically notify affected areas in advance. Simple household steps—running cold taps briefly and opening highest and lowest faucets—help purge residual air.
| Purpose | Effect on Customers |
|---|---|
| Sediment purge | Cloudy water, sputtering |
| Pressure control | Noise, transient flow changes |
| Isolation testing | Localized interruptions |
How Public‑Works Shutdowns and Mains Flushing Introduce Air
In scheduled public-works shutdowns and mains flushing operations, crews intentionally create flow interruptions and directional changes that draw air into pipes through open hydrants, service lines, and temporary isolation points. Technicians open and close valves, purge sections, and depressurize mains to remove sediments; these steps displace water and invite entrained or pocketed air.
When pressure restores, trapped air migrates into service lines and household systems, causing sputtering, banging, or reduced flow. Awareness of recent municipal activity helps diagnose such incidents; simple flushing at the tap often clears air once mains stabilize.
- Planned valve operation
- Directed purging
- Pressure changes
- Trapped pockets
Why Well Systems Let Air Into Plumbing
Well systems can introduce air into plumbing through a few common mechanical faults. Irregular pump run‑time, a failing pressure or well tank, and leaks in the suction line each allow air to enter the water stream.
The following section examines how each of these issues creates aeration and intermittent air pockets.
Pump Run-Time Issues
Pump run-time that is too short or too long can allow air to enter household plumbing by upsetting pressure and flow conditions at the pump and intake.
Rapid cycling prevents the pump from stabilizing pressure, drawing air through loose fittings or a partial seal.
Excessive continuous run wears seals and can cavitate, vaporizing water and introducing air pockets.
Both extremes change suction dynamics at the well or intake, encouraging intermittent air ingestion that shows as sputtering taps or noisy pipes.
- Short cycles: frequent starts draw air through marginal seals.
- Long runs: seal wear and cavitation risk.
- Pressure swings: destabilize flow.
- Intake dynamics: altered suction encourages air.
Well Tank Problems
After run-time problems upset pressure and flow, attention turns to the well tank, where faults in bladder condition, precharge pressure, and tank sizing commonly allow air into the plumbing. Inspection of the bladder for splits or scarring, checking precharge with a gauge, and confirming tank volume versus pump cycle frequency reveal common failures. Corrective steps include replacing damaged bladders, adjusting precharge to 2 psi below pump cut-in, and upsizing tanks to reduce frequent cycling. Persistent aeration after these fixes suggests upstream issues, but addressing tank defects often eliminates intermittent air pockets and noisy faucets.
| Issue | Diagnostic sign | Fix |
|---|---|---|
| Bladder rupture | Rapid pressure loss | Replace bladder |
| Low precharge | Short pump cycles | Repressurize |
| Undersized tank | Frequent cycling | Increase capacity |
| Loose fittings | Hissing, air surge | Tighten or replace fittings |
Suction Line Leaks
Inspecting the suction line is essential because leaks between the source and the pump introduce air that causes sputtering, loss of prime, and noisy, aerated water at fixtures.
A cracked hose, loose fittings, damaged foot valve, or improperly seated packing can admit air when pressure drops.
Technicians should examine joints, clamps, and the buried run for soil movement or rodent damage.
Repairing or replacing the compromised section, reseating the foot valve, and ensuring proper slope and support restores continuous suction.
Regular inspections and prompt fixes prevent recurring aeration and protect pump longevity.
- Locate visible damage and test for bubbles.
- Tighten or replace faulty fittings.
- Restore correct pipe slope and clamps.
- Service or replace the foot valve.
Well Tank Problems That Cause Aeration
When a well tank develops internal faults or improper settings, air can be drawn into the water system and cause aeration symptoms such as sputtering taps, noisy pipes, and cloudy water.
Compromised diaphragms or bladders allow water to contact the air chamber, forcing air into plumbing during pump cycles.
Incorrect air charge or lost precharge leads to rapid cycling and pockets of air expelled into lines.
Loose or corroded tank fittings, faulty check valves at the tank nipple, and improper tank sizing aggravate the issue.
Diagnosis requires pressure tank inspection, pressure switch behavior assessment, and testing or replacement of defective components.
How a Low or Empty Supply Tank Admits Air
When the supply tank water level falls unusually low, air can collect at the top and be drawn into the system. A near-empty tank allows pockets of air to reach the inlet where suction during pump cycles pulls them into the piping.
The following discussion explains how these air entrainment paths form and how they affect flow.
Low Tank Water Level
A partially filled or drained supply tank can allow air to enter the plumbing system as the water surface falls below inlet openings, pump suction lines, or internal fittings; this creates pockets of air that are drawn into downstream pipes during normal flow or pump operation.
Low tank levels increase cycling, vapor formation, and suction cavitation, all promoting intermittent air ingestion and noisy, sputtering fixtures.
Regular monitoring and maintenance prevent recurrence.
- Reduced submergence exposes intakes and fittings to air.
- Pump drawdown pulls trapped air into circulation.
- Intermittent flow causes air pocket migration.
- Neglected refilling or leaks sustain low-level conditions.
Air Entering Through Inlet
By dropping below inlet openings, a low or empty supply tank exposes pump suctions and intake fittings to air, allowing pockets to be drawn into the system during startup or normal flow. The result is intermittent sputtering, pressure loss, and visible air at taps. Inspection should focus on tank level, inlet placement, and float valve function. Corrective actions include refilling, lowering inlet fittings, or installing an anti-siphon and proper float control. Prevention relies on routine level checks and alarms to avoid recurrence. Quick fixes reduce disruptions; long-term fixes protect pumps and maintain steady flow.
| Symptom | Cause | Fix |
|---|---|---|
| Sputter | Exposed inlet | Refill/adjust |
| Pressure drop | Air pockets | Install float |
Why Recent Plumbing Repairs or Drained Pipes Trap Air
Recent plumbing repairs or deliberate draining introduce pockets of air into the piping network because work often opens lines to atmosphere and removes the continuous water column that normally keeps air expelled; once water service resumes, trapped air becomes compressed in high points and behind fixtures, interrupting smooth flow and causing sputtering or reduced pressure until the system is vented or flushed.
Technicians and homeowners encounter audible knocking, intermittent flow, and pressure loss as air migrates and accumulates.
Proper bleeding, strategic flushing, and using isolation valves restore steady flow.
Preventive measures minimize recurrence after service.
- Locate high points
- Open fixtures sequentially
- Flush until steady
- Use venting valves
How Winterizing or Draining Plumbing Creates Air Pockets
Winterizing and draining procedures can leave air trapped in traps and supply lines when water is removed and not fully expelled.
During blowout operations compressed air may push pockets into high points where they become trapped.
Partially open valves and closed isolation points also create isolated sections that hold air until intentionally bled.
Draining Traps And Lines
When drains and supply lines are emptied for cold-weather protection, pockets of air become trapped in low sections and within fixture traps, altering pressure and flow characteristics.
Draining removes hydraulic continuity, leaving isolated cavities that shift when valves reopen.
Technicians note that trapped air can cause sputtering, noisy flow, and false pressure readings until bled.
Restoring normal operation requires systematic venting and controlled refilling to prevent re‑entrainment.
Inspect traps and low runs for retained pockets and reopen fixture drains briefly during refill.
Monitor flow sequentially to locate stubborn air locks and repeat venting at problem fixtures until steady, continuous flow returns.
- Identify low points
- Open trap drains
- Refill slowly
- Vent sequentially
Trapped Air During Blowout
Blowing out a plumbing system forces compressed air through pipes to expel water, but this process commonly leaves isolated air pockets in low runs, fixture traps, and behind closed valves. These pockets cause sputtering, reduced flow, and noise when the system is refilled. Technicians check high and low points, open fixture drains, and slowly repressurize to purge trapped air. Persistent pockets may require targeted bleeding or temporarily disconnecting sections to allow full drainage. Proper blowout technique minimizes residual air but cannot eliminate pockets in complex layouts; methodical recharging and venting restore steady flow and quiet operation.
| Location | Symptom | Fix |
|---|---|---|
| Low runs | Gurgling | Bleed at high point |
| Traps | Sluggish drain | Open trap cleanout |
| Behind fittings | Sputter | Isolate and vent |
Valves Left Partially Open
Any partially open valve can trap pockets of air by creating isolated chambers that prevent full drainage or complete purge during winterizing.
Technicians observe that half‑open stop or gate valves leave segments of pipe unreachable by airflow, so residual water and air remain. When systems are repressurized, these pockets shift, causing sputtering taps and noise.
Proper winterizing requires systematically opening or fully closing valves in a sequence to avoid isolation.
Inspectors recommend cycling each valve and using blowout equipment or compressed air until continuous flow appears. Failure to follow steps creates repeat air entrapment and intermittent service issues.
- Identify all valves
- Fully open or close
- Cycle to purge
- Verify continuous flow
How Closed or Partially Closed Valves Trap Air
Partially or fully closed valves create pockets where rising air can no longer escape, allowing bubbles to collect and become trapped.
When flow is restricted, water slows and loses the momentum needed to carry entrained air through the system. Air accumulates at high points, near valve seats, or inside short dead-end branches downstream of the closure.
Repeated partial closures can form persistent air pockets that cause sputtering, reduced flow, and pressure fluctuations.
Clearing trapped air requires opening valves fully, flushing lines, or using air vents at high points. Routine valve checks prevent reoccurrence by maintaining consistent flow paths and pressures.
How Broken or Loose Fittings Let Air In
While trapped air often results from closed valves, leaks at fittings introduce air by a different mechanism: pressure differentials draw air into the system through cracks, loose joints, or damaged seals.
Small openings admit pockets of air during low-pressure periods; when pressure rises, those pockets move downstream, causing sputtering taps and noisy pipes.
Corroded threads, failed O-rings, or improperly seated compression fittings are common culprits.
Fixes include tightening, replacing seals, or swapping compromised fittings.
Regular inspection prevents recurrence.
- Identify visible corrosion or gaps.
- Hand-tighten then torque fittings per spec.
- Replace worn O-rings/gaskets.
- Retest system pressure and purge air.
How Leaks in Pressurized Systems Promote Aeration
Leaks in pressurized systems draw air into the water line by creating localized zones of reduced pressure where surrounding air is forced inward through cracks, loose fittings, or pinhole breaches.
When system pressure fluctuates—during pump cycles, rapid valve closures, or transient drops—these openings act as intakes, introducing microscopic bubbles that travel downstream.
Continuous leakage sustains bubble formation; intermittent leaks produce sporadic air pockets causing noisy flow and intermittent sputtering at fixtures.
Corrosion, vibration, or mechanical damage enlarges breaches over time, increasing aeration.
Detecting and repairing leaks, restoring proper sealing and maintaining stable pressure minimizes air ingress and preserves flow quality.
Why Water Heaters Gurgle After Maintenance
Experiencing gurgling in a water heater after maintenance often indicates trapped air or disturbed sediment within the tank and its connected pipes.
Technicians draining, refilling, or flushing can introduce air pockets; loosened scale and sediment may shift, creating noise as water flows around deposits.
Typical causes include incomplete bleed procedures, rapid refill, or residual debris. Recommended checks focus on venting and flushing to restore steady flow and remove loosened sediment.
If noises persist, inspect valves and dip tube seating for leaks that harbor air.
- Confirm proper bleed and refill sequence
- Repeat tank flush to clear sediment
- Verify valve tightness and seating
- Monitor for recurring gurgles over 48 hours
How Expansion Tanks and Circulation Pumps Affect Air Pockets
After confirming bleed and refill procedures and addressing sediment-related gurgling, attention should turn to how expansion tanks and circulation pumps influence trapped air in a hot water system.
Expansion tanks absorb volume changes as water heats; a failed or waterlogged tank cannot accommodate expansion, raising system pressure and encouraging air to collect at high points.
Circulation pumps move water continuously; improper orientation, excessive speed, or worn impellers create turbulence that entrains air and prevents it from rising to vents.
Together, a compromised tank and aggressive pump promote persistent pockets.
Correct sizing, maintenance, and proper pump settings reduce entrained air and recurring gurgling.
Why Backflow Preventers Trap Air and How to Clear Them
When installed on a domestic hot-water line, backflow preventers can create pockets where air becomes trapped because their spring-loaded check assemblies and tight-seal housings form small voids and flow disturbances that inhibit upward migration of entrained air.
They intermittently hold air against downstream pressure, causing gurgling, reduced flow, and noise.
Clearing requires isolating, relieving pressure, and cycling the valve to let trapped air escape; sometimes brief downstream flushing or loosening cover bolts releases pockets.
If persistent, inspect for internal damage or install an upstream automatic air vent.
- Isolate and depressurize
- Cycle the check slowly
- Flush downstream
- Inspect or replace
Why Incomplete Purging Leaves Persistent Air Pockets
Incomplete purging leaves residual air pockets because flow paths, pipe geometry, and low-velocity zones prevent trapped gas from migrating to vents or outlets. When flushing is partial, dead legs, high points, and uneven slopes create pockets where water cannot displace air.
Small diameter branches and complex fittings trap bubbles that coalesce and resist downstream movement. Pressure changes and transient flows reorganize pockets rather than eliminate them.
Without systematic directional flushing and sufficient velocity, air remains lodged, causing noise, flow reduction, and meter errors. Persistent pockets require targeted purging strategies that address layout, flow direction, and trapped volumes to restore full system deaeration.
Tools You Need to Remove Air Fast
A concise set of tools streamlines removal of air from plumbing systems.
Basic hand tools handle fittings and quick adjustments, while pressure and valve tools control flow and bleed trapped pockets.
Appropriate safety and drain gear protect personnel and prevent water damage during purging.
Basic Hand Tools
For quick and effective removal of air from household water pipes, a small set of reliable hand tools is essential.
The homeowner benefits from compact, easy-to-use implements that enable swift access to fittings, minor disassembly, and controlled bleeding without specialized gear.
Safety gloves protect grip and skin; adjustable pliers allow nut and coupling manipulation; a basin wrench reaches confined connectors; and a small screwdriver assists in opening screw-type bleeds.
Proper selection reduces damage risk and speeds troubleshooting.
Knowledge of basic usage prevents leaks and unnecessary calls to professionals.
- Adjustable pliers
- Basin wrench
- Screwdriver (flat and Phillips)
- Protective gloves
Pressure And Valve Tools
Begin with shutting off the main supply and preparing the pressure and valve tools that let a homeowner purge trapped air quickly and safely.
Essential items include a pressure gauge to verify system pressure, a hand pump or pressure bleeder to introduce controlled pressure, and adjustable wrenches for valve access.
A ball valve or isolation valve enables targeted venting; a stopcock key or faucet key reaches outdoor or utility valves.
Inline air release valves and hose adapters allow efficient flushing.
Proper sequencing—confirm pressure, isolate sections, open vents, apply gentle pressure—ensures trapped air is expelled without stressing pipes or fittings.
Safety And Drain Gear
With safety gear on hand and a clear drain plan, homeowners can remove trapped air quickly while minimizing risk.
Essential protective equipment includes gloves, goggles, and closed-toe shoes to prevent injury from sudden sprays or hot water.
A reliable bucket and hose aid controlled draining.
Clear labeling of shutoff valves and a flashlight improve visibility during recessed work.
Knowledge of mains shutoff location prevents accidental flooding.
Proper tools reduce time spent bleeding lines and lower likelihood of damage.
- Gloves and goggles
- Bucket and hose
- Flashlight and labels
- Valve access wrench
Step‑By‑Step: Bleeding a Single Fixture
When a single fixture contains trapped air, the homeowner should isolate that tap, shut off its supply valve, and prepare a bucket or towel to catch any discharged water; this focused approach prevents disturbance to the rest of the system and keeps the procedure simple.
Next, open the faucet fully — hot and cold if separate — to relieve pressure. Loosen an aerator or disconnect a flexible hose to allow trapped air to escape; water will sputter, then run steady.
Close the faucet, retighten fittings, and slowly reopen the supply valve while checking for leaks. Test flow; repeat if pockets remain.
Step‑By‑Step: Whole‑House Purge Procedure
To purge the entire plumbing system of trapped air, the homeowner should shut off the main water supply, open every faucet and fixture — including outdoor spigots, shower valves, and appliance shutoffs — and then slowly reopen the main valve to let water push air out through the open points.
The process continues until steady, sputter-free flow appears at each outlet.
Close outlets from lowest to highest to avoid reseating pockets.
Check pressure and listen for knocking afterward.
If irregularities persist, consult a professional.
- Prepare: towels and buckets.
- Open: all outlets.
- Reopen: main slowly.
- Close: low to high.
Temporary Fixes While You Wait for a Pro
Temporarily isolating problem areas can reduce noise and damage until a professional arrives: shut off affected fixtures, bleed nearby faucets to relieve trapped air, and secure loose pipes with straps or padding to prevent banging.
Use flexible connectors or hose clamps as temporary seals for minor leaks, and collect drips in a bucket to avoid water damage.
Open highest and lowest valves to encourage slow, controlled air release rather than forcing pressurized surges.
Avoid operating appliances connected to the affected lines.
Document noise patterns and water behavior to inform the plumber. These measures mitigate symptoms without attempting permanent repairs.
When Air Means a Serious Plumbing Failure
If simple isolation and bleeding fail to stop persistent sputtering, loud hammering, or sudden pressure loss, the presence of air may indicate a more serious system failure.
A detached assessment notes that trapped air can signal pipeline breaches, failing pumps, or collapsed supply mains.
Immediate professional evaluation is warranted when symptoms are sudden, widespread, or accompanied by water discoloration.
- Mainline rupture: rapid air ingress with flow loss and gurgling.
- Pump cavitation: repeated hammering and reduced delivery.
- Valve or check failure: backflow allowing air pockets.
- Collapsed or crushed pipe: chronic intermittent entrainment and pressure fluctuation.
How to Diagnose Persistent or Recurring Air Problems
When recurring air problems persist despite routine bleeding and isolation, a systematic diagnostic approach is required to distinguish between localized fixture issues and deeper system failures. The homeowner should log when and where bubbles appear, note timing with pump or municipal pressure events, and test multiple fixtures to map affected branches. Inspect visible valves, expansion tanks, and irrigation connections. Pressure-gauge checks at supply and branch points reveal drops or surges. If intermittent, perform timed shutoff and observe recovery. Use the table below to prioritize checks and narrow likely causes before considering component replacement or professional evaluation.
| Check | Purpose |
|---|---|
| Fixture mapping | Localize issue |
| Pressure test | Detect drops/surges |
| Valve inspection | Find leaks or failures |
| Tank/connection review | Identify air sources |
Signs You Should Call a Plumber Now
Frequently, homeowners can handle occasional air in pipes, but certain signs indicate a plumb er’s intervention is warranted immediately. A professional should be called when symptoms suggest unsafe or systemic issues rather than isolated air pockets.
- Continuous sputtering or loud banging that persists after bleeding fixtures.
- Sudden pressure loss across multiple taps or appliances.
- Discolored water, foul odor, or visible debris following aeration events.
- Recurrent air symptoms after shutoff, repair, or municipal work.
These signs point to leaks, mainline problems, or failing valves requiring trained diagnosis and prompt repair to prevent damage.
How Plumbers Locate Air Pockets and the Root Cause
Using pressure diagnostics and systematic isolation, a plumber first narrows the affected zone before pinpointing air pockets and their source. They monitor pressure gauges, listen for flow noise, and cycle valves to force trapped air toward accessible points. Visual inspection of vents, risers, and recent work finds entry points. Pressure decay tests reveal leaks that admit air. Thermal cameras or tracer dyes sometimes highlight flow disruptions. Documentation of system layout guides targeted actions and prevents recurrence.
| Diagnostic Step | Purpose |
|---|---|
| Pressure test | Detects drops indicating leaks/air entry |
| Valve isolation | Localizes affected segments |
| Visual/tracer inspection | Identifies exact entry/source |
Common Professional Repair Options for Aeration
Professional repair options for aeration focus on removing trapped air, sealing entry points, and restoring proper flow through targeted mechanical and material interventions. Technicians assess systems, then apply one or more corrective measures tailored to diagnosis. Common options emphasize reliability and minimal disruption.
- Replace or service automatic air vents and vacuum breakers to expel persistent pockets.
- Purge and pressure-test lines, using controlled flushing to eliminate residual air.
- Repair leaks and loose fittings; reseal joints and replace deteriorated valves allowing air ingress.
- Install or upgrade expansion tanks and arrestors to stabilize pressure and prevent repeat aeration.
Typical Cost Ranges for Air‑Related Repairs
After outlining common repair methods—vent replacements, line purging, leak repairs, and tank upgrades—the next consideration is cost.
Small fixes like sediment flushing or simple valve replacements often run $75–$250.
Mid‑range services, such as thorough line purges, pressure adjustments, or replacing air-related fittings, typically cost $250–$700.
Major interventions—tank replacement, complex leak location and repair, or extensive repiping—commonly range $700–$3,000 or more, depending on materials and access.
Emergency call‑outs and permits can add fees.
Estimates vary by region and plumber; obtaining multiple quotes and written estimates helps homeowners gauge reasonable pricing before authorizing work.
Preventing Air After Repairs or Maintenance
After repairs or maintenance, technicians should bleed the highest fixtures to allow trapped air to escape.
Running all faucets simultaneously helps purge air from the system more quickly.
Finally, a thorough check and securement of valves prevents reintroduction of air and guarantees steady flow.
Bleed The Highest Fixtures
When water service or plumbing repairs introduce air into the system, it collects at the highest points and can cause sputtering or intermittent flow; consequently, bleeding the highest fixtures first clears trapped air quickly and restores steady pressure to the rest of the system.
A technician or homeowner opens the topmost faucets or valves, lets air escape until a steady stream appears, then closes them in sequence down the system.
This targeted approach minimizes water waste and shortens recovery time.
Follow safety precautions and shut off appliances if required before starting.
- Identify highest fixtures
- Open slowly
- Wait for steady flow
- Close sequentially
Run All Faucets Simultaneously
Run all faucets simultaneously to push trapped air through the system faster and equalize pressure across branches, reducing sputtering and uneven flow.
After repairs or maintenance, open every fixture — hot and cold — including outdoor spigots and showers, then run at moderate flow.
Begin at the highest level and work downward if multi-story.
Keep fixtures open until steady, air-free streams appear and any noise stops.
Close faucets gradually to avoid pressure spikes.
If air persists after several minutes, recheck the main shutoff briefly or repeat the process.
This coordinated flush clears pockets and restores consistent water delivery.
Check And Secure Valves
Inspect valves and fittings immediately following repairs to guarantee they are properly seated and fully closed or open as required. A technician should verify valve positions, tighten loose packing nuts, and confirm no partial closures trap air pockets.
Properly orienting isolation valves and bleed screws prevents suction and backflow that introduce air. Record settings before work and restore them precisely afterward to avoid inadvertent misalignment.
If a valve is faulty, replace it rather than risk intermittent leaks that admit air. Routine post‑maintenance checks reduce noise, sputtering, and pressure swings by eliminating common valve‑related air entry points.
- Verify positions
- Tighten fittings
- Restore records
- Replace faulty valves
Seasonal Maintenance to Avoid Air in Pipes
At the change of seasons, homeowners should schedule routine checks and simple maintenance tasks to reduce the likelihood of air entering water pipes.
Inspect visible piping for loose fittings, corrosion, and signs of wear; tighten connections and replace damaged sections promptly.
Flush seldom-used fixtures to clear trapped air and sediment after temperature shifts.
Drain and refill water-backed appliances where appropriate to expel pockets of air.
Verify outdoor hose bibs and irrigation lines are drained before freezing weather.
Keep access panels unobstructed for quick service.
Document inspections and repairs to identify recurring issues and guide future seasonal work.
Maintain Your Well and Pressure System to Prevent Air
After seasonal checks of visible plumbing, attention should turn to the well and pressure system, since issues there are a common source of air in service lines.
The homeowner or technician inspects the pressure tank for waterlogging, confirms correct cut-in/out settings, and checks for loose or failing check valves that allow air ingress.
Well pump seals, drop pipe joints, and the foot valve receive routine evaluation to prevent suction of air.
Regularly scheduled pumping tests and tank maintenance reduce intermittent aeration and pressure cycling that introduce bubbles into household plumbing.
- Verify pressure tank condition.
- Test cut-in/out pressures.
- Inspect check valves and seals.
- Schedule pump and tank service.
Upgrades That Reduce Future Air Problems
When addressing persistent air in plumbing, targeted upgrades to the well and pressure system can cut recurrence and reduce maintenance.
Install a larger or better-quality pressure tank to reduce pump cycling and air entrainment. Replace worn check valves and pressure switches to stop backflow and rapid cycling that introduce air. Add an automatic air eliminator or air/vacuum valve at high points to expel trapped pockets. Upgrade piping to smooth, correctly pitched runs to prevent air pockets. Consider a variable-speed (VFD) pump to maintain steady pressure and minimize turbulence. These measures improve system stability and reduce future air problems.
How to Choose a Plumber for Persistent Air Issues
Choosing a plumber for persistent air problems requires focusing on specific experience, diagnostic skill, and documented results rather than general plumbing credentials. The selection should emphasize technicians who demonstrate knowledge of air entrainment, pressure testing, and system-specific solutions.
Verify certifications, ask for case histories, and confirm warranty terms; prioritize those who use pressure gauges, flow analysis, and air elimination techniques. Communication clarity and a written diagnostic plan matter.
- Request documented cases of air issue resolution.
- Confirm diagnostic tools and methods.
- Check clear warranty and follow-up policies.
- Prefer specialists with system-specific experience.
Quick Checklist to Follow After You Find Air in Pipes
Upon detecting air in the plumbing, the homeowner should first shut off the main valve to limit flow and isolate the system.
Next, each fixture should be bled methodically to expel trapped air and restore steady water flow.
Finally, the pressure gauge should be checked to confirm system pressure is within safe operating range.
Turn Off Main Valve
Locate and shut off the home’s main water valve immediately to stop further flow and prevent pressure-related damage when air is detected in the pipes. The action isolates the plumbing, limits surges, and prepares the system for safe inspection or repairs. Note the valve type and orientation so it can be reopened correctly. If the valve is stiff, apply steady pressure; avoid forcing it.
- Confirm valve location (basement, crawlspace, exterior).
- Turn clockwise until fully closed; mark position.
- Record any visible leaks or noises after shutting.
- Contact a plumber if the valve won’t move or leaks.
Bleed Each Fixture
Before restoring full supply, each fixture should be bled individually to remove trapped air and normalize pressure. The procedure proceeds fixture by fixture: open the lowest cold tap, work upward, then repeat with hot where applicable. Listen for sputtering, wait until flow is steady, then close. Record any persistent noises or weak flow for further inspection. Safety: protect floors from spills and avoid scalding when bleeding hot lines. If multiple fixtures fail to clear, suspect a larger inlet issue. Use the table below for a quick checklist.
| Fixture | Action | Expected Result |
|---|---|---|
| Sink | Open cold then hot | Steady flow |
| Shower | Turn on full pressure | No sputter |
| Toilet | Flush twice | Stable refill |
| Washer | Run rinse cycle | Consistent inlet flow |
Check Pressure Gauge
Frequently, checking the pressure gauge is the quickest way to confirm whether trapped air has altered system pressure; the technician should note the reading immediately after bleeding fixtures and again after a short run to detect any rebound or fluctuation.
The gauge verifies supply stability, highlights pressure spikes or drops caused by air pockets, and guides corrective steps like repressurizing or inspecting the expansion tank.
Record baseline and post-bleed values to compare against normal operating range.
If readings oscillate or remain abnormal, further diagnostics are warranted to locate leaks, faulty valves, or trapped air sources.
- Record initial gauge reading.
- Recheck after running taps.
- Compare to normal range.
- Flag inconsistent oscillations.
Conclusion
Air trapped in pipes becomes a loose pebble in a creek—small but disruptive. Homeowners are encouraged to treat sputters, bangs and spurts as clues rather than nuisances. Regular well and pressure-system care, timely upgrades, and the right plumber smooth the flow like clearing stones from a stream. Acting promptly preserves pressure, protects fixtures, and lets water run as meant—calm, steady, and unobstructed—restoring household rhythm and peace of mind.