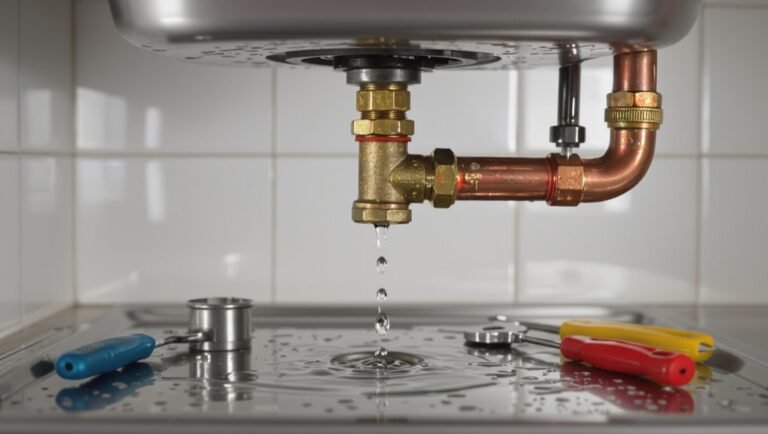
What Breaks Down Calcium Deposits in Pipes? Quick DIY Fixes & Tips
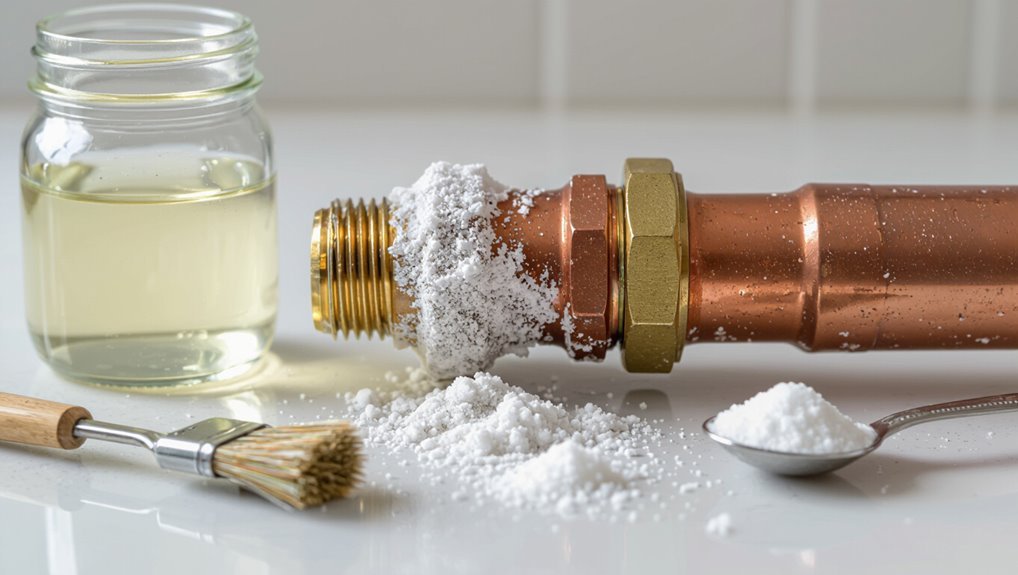
To break down calcium deposits in pipes, use acidic descalers like household vinegar or citric-acid cleaners, which effectively soften and dissolve scale. For small jobs, focus on isolated sections with a hand pump or fill-and-soak method, followed by thorough flushing. For heavier buildup, consider commercial phosphate or citric formulations, and always wear gloves while testing compatibility first. If deposits are persistent, extensive, or in hard-to-reach areas, it’s best to call a plumber. This guide will provide practical steps, tools, and prevention tips to help you manage calcium buildup effectively.
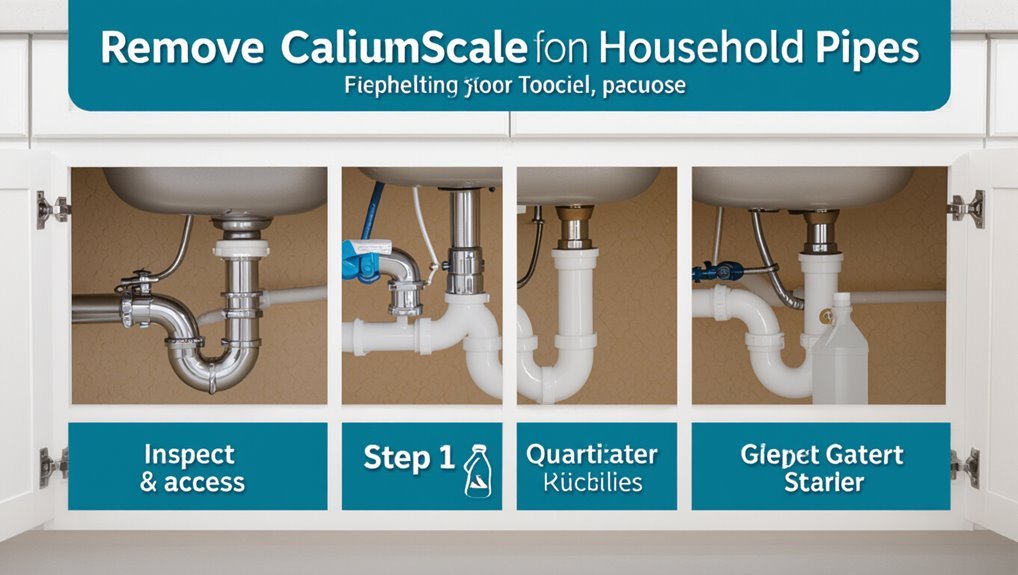
Quick 3‑Step DIY to Remove Calcium Scale From Household Pipes
With a few common household tools and safe cleaners, homeowners can tackle mild calcium buildup in water lines themselves.
First, isolate the affected pipe and shut off water; drain remaining water.
Second, apply a descaling solution—diluted white vinegar or a commercial descaler—circulate gently with a hand pump or fill-and-soak method, allowing dwell time to dissolve scale.
Third, flush thoroughly with clean water, inspect for residual deposits, and reinstall fixtures.
Use protective gear, test on a small section for material compatibility, and repeat treatment if necessary.
Seek professional help for persistent, heavy, or inaccessible deposits.
How This Guide Is Organized (Quick Fix First)
After outlining a quick 3‑step DIY for mild calcium buildup, the guide shifts to its overall structure: practical fixes come first, followed by deeper troubleshooting and preventive measures.
It prioritizes immediate, low‑risk interventions readers can try with common tools and household cleaners.
Next sections escalate to targeted chemical treatments, mechanical descaling, and when to call a professional.
Each part notes required tools, safety precautions, estimated time, and likely effectiveness.
Preventive strategies conclude the guide, focusing on water softening, routine maintenance, and monitoring.
Cross-references help readers jump to relevant steps based on results and urgency.
How To Tell If Calcium Scale Is The Problem In Your Pipes
How can one distinguish calcium scale from other pipe problems? Inspectors note narrowed flow, reduced water pressure, and white to off-white crusty deposits at fixtures or cut pipe sections.
Scale feels hard, granular, and resists gentle scraping, unlike soft biofilm or rust flakes. Faucets and showerheads clog progressively, producing uneven spray patterns and mineral streaks on porcelain.
Testing with vinegar dissolves scale over minutes to hours; persistent residue suggests other corrosion. Sudden leaks, metallic taste, or reddish-brown stains point toward corrosion or sediment, not scale.
Combining visual cues, simple acid testing, and symptom patterns confirms calcium scale as the likely culprit.
Why Calcium Deposits Form Inside Plumbing
Caustic minerals accumulate inside plumbing when calcium and magnesium ions in hard water precipitate out as the water’s chemistry or temperature changes.
Scale formation is driven by factors like high mineral concentration, elevated temperature, and reduced solubility from pH shifts.
Flow patterns and pressure variations create areas where minerals settle, especially in slow-moving or stagnant zones.
Repeated evaporation in fixtures concentrates dissolved ions, promoting deposition.
Water softeners and chemical inhibitors alter ion balance to prevent precipitation.
Municipal treatment, source geology, and seasonal variations influence hardness levels, making certain systems inherently more prone to buildup over time.
How Calcium Scale Damages Pipes And Fixtures
Calcium scale accumulates as hard mineral layers that narrow pipe interiors and restrict water flow.
Over time this buildup increases pressure on plumbing systems and reduces fixture efficiency. The same deposits also etch and corrode fixture surfaces, leading to staining, pitting, and premature replacement.
Reduced Water Flow
Why does water slow and sputter from taps and showers in homes with hard water? Calcium scale builds inside pipes and aerators, narrowing passages and disrupting flow patterns. Flow reduction raises pressure, stresses fittings, and lowers fixture performance; appliances may take longer and use more energy. Regular inspection and descaling restore capacity and prevent blockages.
| Location | Effect | Observable Sign |
|---|---|---|
| Faucet aerator | Restricts jet | Sputtering, weak stream |
| Showerhead | Partial blockage | Uneven spray, reduced pressure |
| Supply lines | Flow constriction | Slower filling, longer cycles |
Corroded Fixture Surfaces
Wearing away protective finishes and creating rough, pitted surfaces, calcium scale accelerates corrosion on metal fixtures and pipe interiors. It acts as an abrasive layer, trapping moisture and electrolytes that promote rust and deterioration.
The following points summarize typical consequences and observations:
- Reduced lifespan of faucets, valves, and fittings due to progressive material loss.
- Increased likelihood of leaks where seals and joints fail under pitting stress.
- Compromised water quality from released metal particles and discoloration.
- Greater maintenance needs as corrosion complicates repairs and increases part replacement.
- Higher long-term costs driven by accelerated degradation and emergency interventions.
DIY vs Plumber: When To Call A Pro?
When should a homeowner attempt to remove pipe scale without professional help? A homeowner may tackle light, localized calcium buildup on accessible fixtures using household descalers, vinegar, or a hand brush when water flow is only mildly reduced and plumbing is standard.
Call a professional if deposits recur quickly, scale affects multiple fixtures, water pressure is severely diminished, visible corrosion or leaks exist, or pipes are old, galvanized, or hidden. A plumber is also advised when chemical treatments fail, when sediment may enter appliances, or when work requires pipe disassembly or replacement. Prioritize long-term reliability over short-term fixes.
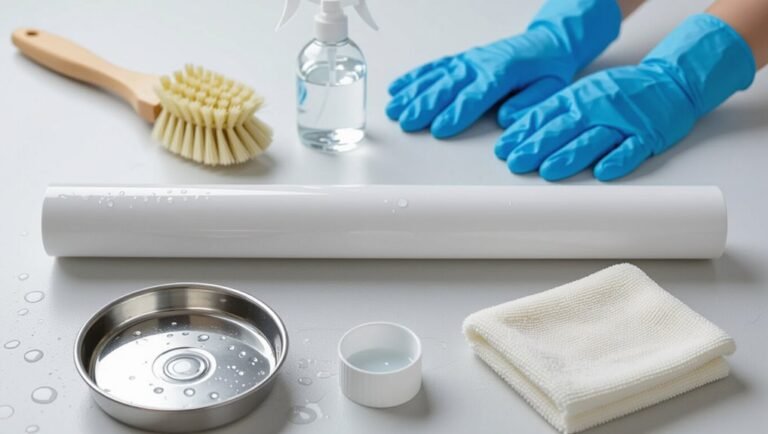
Essential Safety Gear For Tackling Pipe Scale
After deciding whether a homeowner can safely tackle minor scale or should call a pro, attention turns to the protective gear needed for any descaling task.
Proper equipment minimizes chemical, splash, and cut risks while working around pipes and fittings. Essential items focus on respiratory, ocular, skin, and hand protection, plus sturdy footwear to prevent slips and impacts.
- NIOSH-rated respirator or mask for fumes and dust
- Chemical splash goggles with a sealed fit
- Chemical-resistant gloves (nitrile or neoprene)
- Long-sleeve, chemical-resistant apron or coveralls
- Closed-toe, non-slip work shoes or boots
Tools You Need For DIY Calcium Removal
For DIY calcium removal, a compact set of purpose-specific tools lets a homeowner safely and effectively tackle scale without overbuying.
Essential items include a basin wrench and adjustable pliers for accessing fittings, a pipe brush and nylon scrapers for mechanical scale removal, and a hand auger for localized blockages.
A small drill with wire brush attachments speeds stubborn buildup removal.
Flexible tubing and a wet/dry vacuum aid flushing debris.
Thread seal tape, replacement washers, and a bucket complete basic repairs.
Quality gloves and eye protection were covered earlier; these tools focus on access, agitation, and cleanup for home descaling tasks.
How Descaling Chemicals Actually Dissolve Calcium
By reacting chemically with the mineral compounds that form scale, descaling agents convert insoluble calcium carbonate and similar deposits into soluble salts that can be flushed away. The process relies on acid-base reactions, chelation, and sequestration to break down hard, adherent layers without mechanical scrubbing. Effective products target bond disruption and increase solubility, allowing pipe flow to restore. Safety and correct concentration matter for material compatibility and disposal.
Typical action includes:
- Protonation of carbonate to form carbon dioxide and soluble ions
- Chelation of calcium by organic molecules
- Acid neutralization and dissolution
- Reduction of adhesion to pipe walls
- Rinsing and transport of residues
White Vinegar: When And How To Use It On Pipes
White vinegar is recommended for light to moderate calcium buildup and for routine maintenance where commercial descalers are unnecessary.
Application typically involves soaking affected fittings or flushing pipes with a vinegar solution, allowing time for the acetic acid to soften deposits before rinsing thoroughly.
Safety precautions include using appropriate concentrations, avoiding prolonged exposure on sensitive materials, and testing a small area first.
When To Use Vinegar
Frequently, vinegar is the simplest household solution for mild calcium buildup in pipes because its acetic acid dissolves mineral deposits without harsh chemicals.
It suits small, recent deposits and routine maintenance rather than severe, years-old scale or corroded metal.
Consider water source, pipe material, and access before choosing vinegar.
Use it when clogs are partial and safe to treat; avoid when pipes show leaks, flaking corrosion, or are galvanized.
- Mild, recent white crusts
- Accessible sections or removable parts
- Non-galvanized, acid-safe materials
- Preventive maintenance intervals
- When professional treatment is unnecessary
How To Apply Vinegar
After determining that vinegar is appropriate for the situation, proceed with a targeted application plan that maximizes contact time and protects fittings and fixtures.
Use white vinegar (5% acetic acid) undiluted for stubborn buildup; dilute 1:1 with water for light scale or sensitive materials.
Shut off water, isolate the affected section, and apply vinegar via soaking cloth, syringe, or small pump so the solution contacts deposits directly.
Allow 30 minutes to several hours depending on severity, then scrub gently with a brush and flush thoroughly.
Rinse fittings and test for leaks; repeat if residue remains.
Dispose of rinse water responsibly.
Citric Acid: A Gentler Option For Scale Removal
In many household and light-commercial settings, citric acid offers an effective, low-corrosivity method for dissolving calcium carbonate scale in pipes and fixtures.
It dissolves deposits by chelation and mild acid reaction, safe for many metals and plastics when properly diluted.
Users prefer it for reduced odor and environmental impact compared with stronger acids.
Typical use involves dissolving powder in warm water, applying, soaking, then rinsing; repeat as needed.
Precautions include avoiding prolonged contact on sensitive alloys and wearing gloves.
- Mix 1–2% solution for routine cleaning
- Use higher concentration for stubborn scale
- Apply with soak or circulation
- Rinse thoroughly after treatment
- Test on a small area first
CLR And Commercial Descalers: Pros And Cons
Commercial descalers like CLR are compared for their ability to remove varying types of mineral build-up, with some formulations working better on hard calcium versus mixed calcium-magnesium deposits.
Consideration must also be given to safety and compatibility, since strong acidic or alkaline formulations can corrode metal, damage seals, or pose handling risks.
A clear assessment weighs fast, broad-spectrum effectiveness against potential material harm and required safety precautions.
Effectiveness On Different Deposits
Many households and professionals weigh the choice between CLR and specialized descalers by comparing their active ingredients, reaction times, safety profiles, and suitability for various mineral buildups.
CLR and similar general-purpose formulas excel on light to moderate calcium and lime, offering fast visible results. Stronger commercial descalers target heavy, aged scale and mixed mineral layers, often requiring longer dwell times. Performance varies with concentration, temperature, and deposit composition.
Practical considerations include cost, required contact time, and whether mechanical agitation is needed.
- Light calcium and lime: CLR effective
- Heavy scale: industrial descalers preferred
- Mixed deposits: tailored blends perform better
- Dwell time impacts results
- Mechanical help often necessary
Safety And Material Compatibility
Having compared performance across deposit types and conditions, attention turns to how CLR and stronger descalers interact with piping materials and safety concerns. CLR is milder, broadly safe on many metals and plastics when used per instructions; it reduces risk but may require longer contact. Stronger acid-based descalers act faster but can etch brass, copper, galvanized steel, or degrade some plastics and rubber seals. Protective measures, ventilation, eye and skin protection, and neutralization steps are essential. Consult manufacturer compatibility charts before use.
| Product type | Speed | Material risk |
|---|---|---|
| CLR | Moderate | Low |
| Acid descaler | Fast | High |
Muriatic Acid And Harsh Acids: Risks And Limits
Acknowledging their strong effectiveness against calcium buildup, muriatic and other harsh acids pose significant risks that limit their safe use in household plumbing. They can corrode metal pipes, damage seals, and release toxic fumes; professional assessment and strict precautions are essential.
Limited application to resistant, non-reactive materials; dilution and neutralization protocols matter.
- Corrodes copper, brass, galvanized steel over time
- Destroys rubber gaskets and plastic fittings if concentrated
- Emits harmful chlorine and hydrogen chloride vapors
- Requires corrosion-resistant equipment and ventilation
- Neutralization and proper disposal are legally and environmentally required
Baking Soda : What It Can And Can’t Do For Scale
Positioned as a mild, noncorrosive cleaner, baking soda (sodium bicarbonate) can loosen light mineral film and neutralize acidic residues in and around plumbing fixtures, but it has limited effect on hard, thick calcium scale.
It gently abrasively removes soft deposits when applied as a paste or combined with hot water, making it useful for routine cleaning of aerators, faucets, and showerheads.
It does not chemically dissolve established limescale; persistent buildup requires stronger descalers or mechanical removal.
Baking soda is safe for many surfaces, environmentally benign, and inexpensive, but expectations should match its mild alkalinity and physical action rather than rapid chemical descaling.
DIY Descaling Mix Recipes To Try At Home
When tackling light to moderate limescale around the home, a few simple DIY descaling mixes can be effective, safe, and inexpensive.
The following recipes balance acidity and gentle abrasives for surfaces and fixtures; test on a hidden area first and ventilate the space.
- White vinegar: undiluted for small deposits, soak cloth or bag, 30–60 minutes.
- Vinegar + baking soda: fizz action for drains; use sparingly to avoid overflow.
- Lemon juice: direct application for delicate finishes, short dwell time.
- Citric acid solution: 1–2% for stronger scale on metal parts.
- Cream of tartar paste: gentle rubbing for spot removal.
Descale A Faucet Aerator (Remove Calcium Deposits) : Step By Step
The aerator is unscrewed and its screen removed for inspection and cleaning.
Parts are soaked in white vinegar until mineral buildup softens and lifts away.
Once rinsed and reassembled, the faucet is tested to confirm improved flow.
Remove Aerator And Screen
Begin by shutting off the water supply to the faucet or closing the aerator’s supply valve to prevent drips while working.
The aerator is then unscrewed carefully by hand or with a cloth-wrapped pliers to avoid scratching the finish.
Once removed, components should be laid out in order for reassembly.
The screen and flow restrictor are inspected for scale, debris, and damage.
If parts are fragile, handle gently and consider replacement rather than forceful cleaning.
- Unscrew aerator counterclockwise
- Note component order
- Remove rubber washer
- Inspect mesh screen closely
- Photograph layout for reference
Soak In Vinegar
After removing the aerator components, place the screen, flow restrictor, and housing into a small container and pour enough white vinegar to fully submerge them; this mild acid dissolves calcium without harming metal or plastic parts. Let parts soak for 30–60 minutes, checking periodically; heavy buildup may require a longer soak or fresh vinegar. After soaking, scrub gently with an old toothbrush to remove loosened deposits, rinse thoroughly with water, and inspect for remaining residue. If deposits persist, repeat soaking. Avoid harsh scrubbing that can deform fine mesh.
| Soak time | Effect |
|---|---|
| 30 mins | Light buildup |
| 60 mins | Moderate |
| Overnight | Severe |
| Repeat if needed | Persistent deposits |
Reassemble And Test
With the aerator components clean and rinsed, reassembly can proceed. The parts are placed in order, ensuring screens and seals align correctly. Threading must be gentle to avoid cross‑threading. After reassembly, faucet flow and spray pattern are evaluated for improvements. If leaks appear, disassemble and inspect seals.
- Seat the inner screen and flow restrictor squarely
- Replace rubber washer before tightening the housing
- Hand‑thread then finish with a tool, not force
- Run water, check for even stream and no sputtering
- Reinspect for leaks and retighten minimally if needed
Successful testing confirms restored performance.
How To Remove Scale From Showerheads Quickly
Soaking the showerhead in a mild acid solution loosens mineral scale quickly and safely: a vinegar or citric-acid mix dissolves calcium deposits without damaging most finishes, allowing clogged nozzles to clear and water flow to restore with minimal effort.
Remove the head if possible, submerge in solution for 30–60 minutes, then brush with a soft toothbrush to dislodge softened deposits.
For fixed heads, fill a plastic bag with solution, secure it over the head with a rubber band, and soak.
Rinse thoroughly, run hot water to flush residues, and wipe dry.
Repeat if necessary; avoid harsh abrasives or strong acids.
Descaling Sink And Bathtub Drains Without Removal
Homeowners can tackle drain scale without disassembly by using household mixtures like vinegar and baking soda to loosen deposits and flush them away.
For tougher buildup, commercial descaling solutions formulated for drains offer stronger chemical action when used according to label instructions.
Regular preventive maintenance—periodic flushes with boiling water, enzyme-based cleaners, and limiting mineral-heavy residues—helps minimize recurring calcium accumulation.
Vinegar And Baking Soda
For many sinks and bathtubs, a simple reaction between vinegar and baking soda loosens light calcium buildup without removing fixtures. The method relies on mild acid and fizzing to break deposits; it suits routine maintenance rather than heavy scaling. Steps and cautions follow:
- Pour one cup baking soda down the drain to coat affected areas.
- Add one cup white vinegar slowly; expect bubbling and foaming.
- Wait 15–30 minutes for reaction and partial dissolution of deposits.
- Flush with boiling or very hot water to clear loosened residue.
- Repeat weekly as needed; avoid on older metal pipes with corrosion.
Commercial Descaling Solutions
Several commercial descaling products are formulated to dissolve mineral buildup in sink and bathtub drains without removing fixtures. These typically contain acids (sulfamic, citric, or diluted hydrochloric) or chelating agents that break calcium and lime scale.
Application follows label instructions: pour measured amount, allow dwell time, then flush with hot water. Many are available as gels for vertical surfaces and foams for clinging to pipes.
Users should wear gloves and eye protection, guarantee ventilation, and avoid mixing with bleach or ammonia. For stubborn deposits, repeat treatments may be necessary; persistent blockage warrants professional inspection to prevent pipe damage.
Preventive Maintenance Steps
Regular preventive maintenance helps minimize calcium buildup and prolongs the effective flow of sink and bathtub drains.
Routine, simple actions reduce scale without removal and delay intensive descaling.
Effective steps focus on gentle chemical use, mechanical clearing, and water quality management to protect pipes.
- Flush drains weekly with hot water after use to soften deposits.
- Apply dilute vinegar or citric solution monthly; let sit 30–60 minutes, then flush.
- Use a drain snake or brush quarterly to remove loose scale.
- Install a faucet aerator filter or water softener to limit mineral load.
- Inspect and clear strainers to prevent debris trapping.
How To Flush And Descale Water Heater Pipes
Flushing and descaling water heater pipes restores flow and heat transfer by removing mineral scale that accumulates over time.
The process begins with shutting power or gas and closing the cold inlet. A hose attaches to the drain valve to direct water to a safe discharge. Draining removes loose sediment; reversing flow with a garden hose can help dislodge deposits.
For stubborn scale, circulating a diluted vinegar or commercial descaler through the tank with a pump for one to two hours dissolves buildup.
Rinse thoroughly until clear, refill, restore power, and check for leaks and restored performance.
Cleaning Scale From Copper And PEX Pipes Safely
After restoring a water heater, attention should turn to the building’s distribution lines, where mineral scale can similarly restrict flow and damage fittings. Copper and PEX require different cleaning approaches to avoid corrosion or deformation. Professionals recommend gentle mechanical and chemical methods that respect material limits and joints.
- Inspect visually and with flow tests before treatment.
- Use soft brushes or nylon scrapers for light scale on copper.
- Apply diluted acetic acid (vinegar) or descaler briefly, flushing thoroughly.
- Avoid heat or harsh acids on PEX; use low-concentration enzymatic cleaners if needed.
- Rinse, pressure-test, and monitor for leaks after cleaning.
Removing Scale From Galvanized And Iron Pipes
Addressing scale in galvanized and iron pipes requires stronger mechanical and chemical tactics than those used for copper or PEX because the heavy, adherent mineral layers and corroded interiors resist gentle treatments.
Technicians often begin with mechanical descaling: wire brushes, rotary pipe cleaners, or hydro-jetting remove thick buildup and loose rust. Chemical descalers formulated for ferrous metals can dissolve remaining deposits but must be chosen to avoid accelerating corrosion; follow manufacturer instructions and neutralize after use.
After cleaning, inspect for pitting and replace severely corroded sections. Install water softening or corrosion inhibitors to minimize recurrence and extend pipe service life.
Vinegar Soak Vs Vinegar Paste: Which To Use
When choosing between a vinegar soak and a vinegar paste for removing calcium deposits, the decision hinges on the deposit’s location, thickness, and the surface material: a soak works best for parts that can be immersed and need uniform penetration, while a paste is preferable for vertical surfaces, targeted spots, or where runoff must be minimized.
A soak offers full immersion and consistent contact; a paste offers control and reduced mess. Consider material compatibility and safety.
Practical choices balance access, waste, and contact time.
- Soak: ideal for removable fittings
- Paste: suited to vertical pipes
- Soak: better for thick scale
- Paste: minimizes runoff
- Test both on inconspicuous areas
How Long To Let Descalers Sit For Best Results
Recommended soak times for descalers typically range from a few minutes for light buildup to several hours for heavy deposits, and manufacturers’ guidelines provide a starting point.
The ideal duration depends on factors such as deposit thickness, pipe material, descaler concentration, and water temperature.
Users should balance sufficient contact time to dissolve calcium with precautions to avoid damage to fittings or seals.
Recommended Soak Times
For effective descaling, soak times should balance chemical strength, deposit thickness, and pipe material to allow the cleaner to dissolve calcium without harming the plumbing.
Recommended durations vary by product and situation but generally follow simple brackets to guide safe, effective use.
- Light buildup: 15–30 minutes for mild residues with mild descalers.
- Moderate buildup: 1–2 hours for thicker deposits using standard formulations.
- Heavy buildup: 4–8 hours or overnight with industrial-strength products, monitored closely.
- Sensitive materials: shorter exposures, often under 30 minutes, or use gentle alternatives.
- Final rinse: flush thoroughly immediately after the soak.
Factors Affecting Duration
Why does soak time vary so much between jobs? Factors affecting duration include deposit thickness, mineral composition, and solution strength; thicker, older calcium requires longer exposure, while softer formulations act faster.
Water temperature and flow influence reaction rates: warmer, stagnant conditions speed dissolution.
Pipe material and fittings matter too—delicate metals need gentler, lengthier treatments to avoid corrosion.
Application method (soak, brush, circulation) changes contact efficiency.
Presence of organic films or rust can shield deposits, extending soak time.
Safety constraints and manufacturer guidelines also limit concentration and maximum exposure, balancing effectiveness against damage and user risk.
Mechanical Removal: Brushes, Picks, And Pipe Snakes
Mechanical methods—using brushes, picks, and pipe snakes—offer direct, immediate removal of calcium build-up by physically scraping or breaking deposits from pipe walls.
Technicians and DIYers choose tools based on pipe size, access, and deposit hardness.
Appropriate technique minimizes damage and restores flow quickly.
Safety and gentle testing are advised before aggressive action.
- Brass or nylon brushes clear light scaling without scratching.
- Picks and dental-style tools remove targeted flakes in accessible joints.
- Manual augers reach moderate blockages by scraping interiors.
- Flexible cable snakes dislodge deeper accumulations with rotating heads.
- Inspect after each pass to avoid overzealous erosion and make certain success.
When To Combine Chemical And Mechanical Methods
In complex or stubborn calcium buildups, combining chemical and mechanical approaches offers the best balance of effectiveness and speed: chemicals soften and dissolve mineral matrixes that are out of reach, while mechanical tools remove loosened material and restore flow. A combined strategy suits long runs, partial blockages, and deposits hardened by heat. Safety gear and correct chemical choice reduce risk. Timing matters: allow chemical dwell, then agitate. Inspect progress and repeat as needed. Use minimal effective concentrations to protect pipes.
| Scenario | Chemical Role | Mechanical Role |
|---|---|---|
| Long runs | Soften deposits | Scrape loose material |
| Partial blockages | Penetrate crevices | Clear passage |
| Hardened scale | Dissolve matrix | Chisel remnants |
| Sensitive fittings | Mild agents | Gentle tools |
| Fast restoration | Accelerate breakdown | Restore flow |
Preventing Leaks While Descaling Threaded Joints
When descaling threaded joints, attention to seal protection is essential to avoid leaks and preserve gasket integrity.
Proper support of pipe alignment reduces stress on threads and prevents gaps during cleaning.
Selecting and applying the correct sealant guarantees a reliable, chemical‑resistant joint after descaling.
Protect Threaded Seals
To prevent leaks while descaling threaded joints, technicians should isolate and protect sealants and packing before applying chemical or mechanical cleaners.
Protective steps extend seal life and prevent contaminant ingress.
Careful masking, gentle cleaning, and avoiding solvent saturation preserve thread compounds and compression packing.
After descaling, inspect and reapply compatible sealant or replace packing as needed to guarantee leak-free operation.
- Mask threads with tape or plastic caps
- Use brush cleaning away from sealant areas
- Apply neutralizing rinse to avoid residue
- Replace damaged PTFE or hemp packing promptly
- Re-torque fittings to specified values, not overtightened
Support Pipe Alignment
After protecting threaded seals, attention shifts to supporting pipe alignment to minimize stress on joints during descaling. The technician secures pipes with temporary braces or adjustable hangers to prevent torque transfer when scrubbing or applying solutions. Proper alignment reduces bending forces that can loosen threads or create microgaps.
Supports are placed near joints but not directly on seals, distributing load along solid sections. Movement-prone segments receive clamping and padding to avoid abrasion. Once scale is softened, controlled rotation and gradual re-torquing preserve alignment. Final inspection verifies no new leaks and confirms that descaling did not compromise joint integrity.
Use Proper Sealants
In selecting and applying sealants, the technician prioritizes compatibility with pipe materials and descaling chemicals to maintain joint integrity. Proper sealant choice prevents leaks when removing calcium from threaded joints and resists chemical attack and temperature changes.
Preparation and technique matter to guarantee a lasting seal.
- Verify sealant type: PTFE tape, anaerobic, or silicone compatible with pipe and cleaner
- Clean threads thoroughly, removing debris and residual scale before sealing
- Apply sealant evenly, avoid excess that can contaminate system
- Tighten to manufacturer torque specifications to prevent crushing sealant
- Inspect after descaling for leaks and reapply if needed
How To Protect Fixtures And Seals During Treatment
When treating pipes for calcium buildup, protecting nearby fixtures and rubber seals prevents damage from acidic cleaners and mechanical abrasion.
The technician isolates faucets, valves, and exposed hoses with plastic sheeting or waterproof tape, guaranteeing seals remain dry.
Rubber gaskets and O-rings receive light coating of silicone lubricant to shield against solvent contact and swelling.
Metal surfaces are wrapped in cloth or nonreactive foil to avoid pitting.
Small parts are removed and soaked separately when possible.
After treatment, all protective materials are discarded or cleaned, seals inspected for distortion, and fittings reassembled with appropriate torque to guarantee leak-free operation.
Dealing With Stubborn Or Thick Scale Deposits
When scale becomes thick or resistant, professionals often combine mechanical removal methods with chemical attacks to restore flow.
In severe cases, controlled strong acid treatments are used, taking precautions to protect pipe material and seals.
Long-term prevention through water conditioning and regular maintenance reduces recurrence and the need for aggressive interventions.
Mechanical Removal Methods
Mechanical removal methods tackle stubborn or thick calcium scale that chemical treatments cannot fully dissolve.
Practical approaches rely on abrasion, scraping, or pressure to restore flow. Suitable tools vary by pipe material and access, and safety precautions are essential.
- Wire brushes for metal pipes, applied gently to avoid scoring.
- Plastic scrapers or nylon brushes for PVC to prevent damage.
- Mechanical augers or drain snakes to break internal rings of scale.
- High-pressure water jets for accessible sections, used with proper pressure control.
- Rotary cleaning heads or sanding attachments for professional remediation where visible buildup persists.
Strong Acid Treatments
For deposits that resist mechanical abrasion or where access limits physical removal, strong acid treatments offer a chemical option to dissolve heavy calcium scale.
Concentrated acids—typically hydrochloric or muriatic acid—react with calcium carbonate, producing soluble salts and carbon dioxide.
Application requires dilution guidance, controlled contact time, agitation, and thorough flushing.
Protective gear, corrosion-resistant tools, and ventilation are essential; metals and seals can be damaged, so compatibility checks precede use.
Neutralization and proper disposal of spent solution prevent environmental harm.
When risks or complexity exceed DIY comfort, consulting a licensed plumber or water treatment professional is recommended.
Preventive Water Conditioning
In treating stubborn or thick scale deposits, preventive water conditioning reduces future buildup by altering the water chemistry and controlling minerals before they precipitate. It focuses on long-term strategies rather than reactive cleaning, applying methods that limit calcium and magnesium crystallization.
Options vary by system size, budget, and water profile, and may require periodic maintenance or professional calibration. Consider testing water hardness and monitoring results to adjust treatment.
Typical measures include:
- Water softeners (ion exchange) to remove hardness ions
- Template-assisted crystallization systems for scale control
- Magnetic or electronic conditioners as adjuncts
- pH adjustment through chemical dosing
- Routine water testing and maintenance
How To Test Water Hardness Before And After Cleaning
How can water hardness be measured accurately before and after cleaning to verify calcium removal? A simple quantitative approach uses test strips or titration kits measuring calcium and magnesium concentrations in ppm or grains per gallon; record baseline readings prior to descaling.
After cleaning, collect comparable samples from the same outlets, following identical sampling and timing procedures. For greater precision, send samples to a certified laboratory for ICP or atomic absorption analysis.
Document results, calculate percentage reduction, and compare against expected descaling efficacy. Repeat testing if results are inconclusive or if flow rates and appliance performance suggest remaining buildup.
Temporary Fixes To Improve Flow Before Full Descaling
Before a full descaling, several temporary measures can restore acceptable flow and pressure so systems remain usable until a permanent fix is scheduled. Short-term tactics reduce immediate symptoms and buy time for proper treatment.
- Increase inlet pressure briefly to dislodge loose scale with caution.
- Flush sections with hot water to soften recent mineral buildup.
- Use a sink or shower aerator cleaning to remove visible deposits.
- Apply mechanical agitation (pipe tapping or gentle vibration) to free weakly adhered scale.
- Install a temporary inline sediment filter to catch particles and protect fixtures.
These steps are stopgaps; schedule full descaling for lasting results.
How To Descale Small Appliance Lines (Coffee Makers, Kettles)
For small appliances like coffee makers and kettles, descaling restores flow, heating efficiency, and flavor by removing mineral buildup inside narrow lines and heating chambers.
A citric acid solution (one tablespoon per cup of water) or commercial descaler is circulated or boiled through the appliance per manufacturer instructions. After treatment, run multiple clear-water cycles to flush residue.
For removable parts, soak briefly, scrub with a soft brush, then rinse thoroughly. Inspect filters, tubes, and seals for damage; replace if compromised.
Regular descaling frequency depends on water hardness and usage—typically every one to three months.
Using A Vinegar Flush Safely In Toilet Supply Lines
Before beginning a vinegar flush in a toilet supply line, the person should shut off the water, drain the line, and disconnect the supply hose to expose the section to be treated.
A measured amount of white vinegar is then introduced into the line and allowed to sit for a defined contact time to soften calcium deposits.
After soaking, the line is thoroughly flushed with clean water and reassembled, with the system checked for leaks and proper flow.
Preparing The Line
With the water supply shut off and the toilet tank emptied, the line must be isolated and accessed so a vinegar flush can be applied without backflow or spills.
Prepare by confirming shutoff valve closure and relieving residual pressure; attach a wrench-safe coupling or hose to the supply line; place a bucket beneath connections; lay down absorbent towels; and wear gloves and eye protection.
Check for corrosion or brittle fittings and replace any suspect parts before proceeding.
Make certain a clear path for used vinegar to a safe drain.
Label the valve position and keep tools and replacement washers nearby for quick adjustments.
Vinegar Flush Procedure
Having isolated the line and confirmed fittings are sound, the vinegar flush procedure begins by preparing a measured vinegar solution and arranging containment for returned fluid.
A mixture of white vinegar and water (typically 1:1 to 2:1 vinegar) is poured slowly into the supply line or applied via a funnel to the shutoff side of the toilet valve.
The solution is held in place by closing valves, allowing 1–3 hours of contact time.
After soaking, the line is flushed with clean water, fittings inspected for leaks, and the process repeated if deposits persist.
Dispose of wastewater responsibly.
How To Neutralize Acids After Descaling
After descaling, neutralizing residual acid is essential to halt corrosion and protect piping and fixtures. A mild alkaline rinse converts remaining acid to harmless salts and prevents metal damage. Common neutralizers include baking soda or diluted washing soda; measure to avoid over-alkalinity. Flush thoroughly with plenty of water after neutralization. Test pH with strips to confirm near-neutral levels before restoring use.
- Dissolve 1–2 tablespoons baking soda per liter of water.
- Circulate solution through treated sections for several minutes.
- Allow contact time, then flush with clean water.
- Retest pH; repeat if acidic.
- Wear gloves and eye protection.
Safe Disposal Of Descaling Chemicals And Rinse Water
Proper disposal of descaling chemicals and rinse water requires attention to household safety and environmental rules.
Before discarding, used acid or alkaline solutions should be neutralized to a near-neutral pH to prevent pipe or septic damage.
Disposal must also follow local hazardous-waste regulations, which may prohibit pouring treated solutions to drains or require collection at designated facilities.
Safe Household Disposal
When neutralizing descaling solutions and rinse water before disposal, homeowners should follow product instructions and local regulations to prevent harm to plumbing, septic systems, and the environment.
Household disposal practices must minimize chemical exposure, avoid drains when instructed, and protect wastewater treatment processes.
- Check product labels for disposal guidance and warnings.
- Use appropriate PPE and ventilate work areas during handling.
- Contain and transport unused concentrate to hazardous waste facilities.
- Flush small, properly neutralized rinse volumes only if local rules allow.
- Record actions and receipts for hazardous waste drop-offs to stay compliant.
Neutralize Before Disposal
Building on safe household disposal practices, neutralizing descaling chemicals and rinse water before release prevents corrosive or reactive residues from damaging plumbing, septic systems, or local waterways.
First, identify the chemical type: acidic cleaners (vinegar, citric acid, commercial descalers) require careful dilution and gradual neutralization with baking soda; alkaline residues need dilute vinegar or citric acid neutralization.
Perform neutralization in a well-ventilated area using nonmetal containers and small, incremental additions while monitoring pH with strips to reach near-neutral (pH 6–8).
Collect and dispose of neutralized solution down the drain only if local guidance permits; otherwise, store for approved hazardous waste disposal.
Local Hazard Rules
For local disposal of descaling chemicals and rinse water, municipal regulations and utility guidelines determine what is permissible and what requires special handling.
The homeowner should verify local hazardous-waste rules before pouring or draining.
If sewer systems accept diluted solutions, follow specified concentration limits and neutralization steps.
Where prohibited, collect and transport to an approved facility.
Recordkeeping and labeling may be mandated for larger jobs.
Emergency contacts and spill protocols should be known.
- Check municipal hazardous-waste webpages or hotline
- Confirm sewer authority acceptance and limits
- Neutralize acids to recommended pH before discharge
- Use labeled containers for transport
- Take prohibited waste to a licensed facility
When Descaling Can Be Harmful To Older Plumbing
Frequently, aggressive descaling can damage older plumbing by exposing weakened pipe walls and degrading joints that have relied on mineral deposits for partial sealing.
Chemical or mechanical removal may reveal corroded metal beneath scale, causing pinhole leaks or accelerated deterioration.
Fragile soldered connections, lead-based fittings, or cast-iron sections can fail when supporting deposits are stripped away.
High-pressure flushing risks dislodging fragments that clog downstream fixtures.
Older water systems often lack modern lining or flexible joints, increasing vulnerability.
Hence, descaling methods should be selected conservatively, prioritizing inspection, gentler agents, and staged treatments to minimize sudden structural compromise.
Signs The Scale Problem Needs Pipe Replacement
Persistent low water flow despite repeated descaling suggests internal narrowing from scale buildup that may be irreversible.
Recurrent pipe leaks, especially at joints and seams, indicate structural weakening linked to long-term mineral intrusion.
Rusty or discolored water accompanying these symptoms further points to corrosion and the practical need to contemplate pipe replacement.
Persistent Low Water Flow
Often, homeowners notice a steady drop in water flow that simple fixes—like aerator cleaning or water pressure adjustments—do not correct.
Persistent low flow can signal internal scale buildup restricting pipelines beyond fixtures. Assessment focuses on measurable declines and failure of localized remedies. Indicators suggesting replacement over descaling include consistent sluggishness, reduced throughput at multiple outlets, and aged piping prone to internal corrosion.
- Multiple fixtures display weak flow simultaneously
- Descaling efforts yield only temporary improvement
- Flow rates remain below expected municipal supply
- Pipes are old, brittle, or previously patched
- Professional inspection confirms extensive internal narrowing
Replacement becomes prudent when restoration is unlikely.
Recurrent Pipe Leaks
When low flow stems from internal scale, another common and more urgent consequence is repeated leaking along affected runs; recurrent pipe leaks signal that calcification has compromised wall integrity and fittings beyond simple cleaning. Inspection reveals hairline fractures, persistent joint seepage, or bulging where scale has weakened metal or plastic. Replacement becomes prudent when leaks recur after descaling, repairs fail, or corrosion partners with mineral buildup. Planning considers accessible sections, material matching, and long-term water treatment. Quick reference:
| Sign | Likely Cause | Action |
|---|---|---|
| Hairline cracks | Brittleness from scale | Replace section |
| Joint seepage | Weakened seals | Replace fittings |
| Bulging | Internal pressure | Replace pipe |
Rusty Or Discolored Water
Rust-colored or discolored water is a clear indicator that mineral scale has progressed to a point where pipe interiors are corroding or shedding deposits, and it often accompanies reduced flow and sediment in fixtures.
The condition signals structural compromise and potential contamination; inspection and timely replacement prevent failures. Homeowners should note persistent discoloration despite flushing, metallic taste, or staining. Professional assessment determines whether cleaning suffices or pipe replacement is necessary.
Consider these signs and actions:
- Persistent rusty water after flushing and aeration
- Brown or orange staining on fixtures or laundry
- Increased sediment in screens and aerators
- Metallic taste or odor in tap water
- Sections of visibly corroded piping
How Water Softeners Stop Calcium Buildup Long‑Term
Typically, a water softener prevents calcium buildup by exchanging the calcium and magnesium ions in hard water for sodium or potassium ions, keeping dissolved minerals from forming scale on pipe walls and fixtures. Over time this ion-exchange process reduces precipitation of carbonate and sulfate salts that adhere to surfaces, preserving flow and heat-transfer efficiency.
Regular regeneration flushes trapped hardness to drain, maintaining resin capacity. Softened water also reduces soap scum and eases appliance maintenance. Monitoring salt levels and servicing valves guarantees consistent performance.
While not removing existing heavy scale, long-term use prevents new accumulations and slows pipe deterioration.
Choosing The Right Water Softener For Your Home
In selecting a water softener for a home, the most important factors are household water hardness, daily water usage, and available regeneration type; these determine system size, capacity, and operating cost. The buyer evaluates resin capacity, salt consumption, and installation constraints, balancing upfront cost against long‑term savings. Maintenance needs and warranty coverage influence choices, while flow rate compatibility guarantees performance.
- Measure grains per gallon to size the unit.
- Estimate daily gallons used per household member.
- Choose between timer or demand‑initiated regeneration.
- Confirm fittings, space, and electrical needs.
- Compare resin life and salt efficiency ratings.
Do Magnetic And Template‑Based Scale Treatments Work?
Do magnetic and template‑based devices actually prevent scale buildup or merely shift the problem? Evidence remains mixed.
Laboratory studies sometimes show altered crystal formation—softer, less adherent deposits—while field trials often report negligible long‑term reduction in scaling. Performance depends on water chemistry, flow rate, and installation; results are inconsistent.
These systems require no chemicals and minimal maintenance, appealing for some homeowners, but they do not remove existing calcium deposits. For persistent or heavy scaling, proven approaches like ion‑exchange softeners or targeted descaling are more reliable. Consumers should treat magnetic/template devices as supplementary, not guaranteed primary solutions.
Routine Maintenance Schedule To Prevent Re‑Attachment
Regularly scheduled maintenance is essential to prevent detached or residual calcium from re-attaching inside pipes. A concise plan reduces buildup recurrence and preserves flow. Inspections, cleaning, and water chemistry checks should be predictable and documented.
- Monthly visual checks of accessible fittings and drains for early deposits.
- Quarterly flushing with appropriate descaling solutions at manufacturer concentrations.
- Semiannual water hardness testing and adjustment as needed.
- Annual inspection of softeners, filters, and sacrificial anodes; replace parts showing wear.
- Recordkeeping of dates, procedures, products, and outcomes to inform future maintenance decisions and adjust intervals.
DIY Vs Pro: Cost Comparison
Having a documented maintenance routine helps owners decide whether to handle calcium removal themselves or hire a professional, because frequency, complexity, and documented outcomes directly affect cost-benefit calculations.
DIY typically involves low up-front expense: cleaners, brushes, basic tools and time. Effective for light, accessible buildup and routine prevention.
Professional service incurs higher immediate fees but brings specialized equipment, warranty, and faster remediation for heavy or hidden scale.
Long-term costs hinge on recurrence, risk of damage, and labor value. Owners should compare itemized estimates, expected lifespan improvements, and personal ability to perform safe, effective maintenance before choosing.
Common Mistakes That Make Scale Worse
Frequently, well-intentioned actions accelerate scale formation or embed deposits more deeply into plumbing systems. Misapplied methods can compact calcium, damage protective coatings, or leave residues that encourage faster buildup.
Common mistakes include:
- Using abrasive tools that grind deposits into pipe walls.
- Applying high-concentration acids without neutralization.
- Rinsing with hard water immediately after cleaning.
- Ignoring flow restrictions and leaving partial blockages.
- Relying solely on short-term fixes instead of addressing water chemistry.
Recognizing these errors helps prioritize safe, effective cleaning and prevention measures that preserve pipe integrity and reduce recurrence.
Quick Troubleshooting: Why Scale Returns After Cleaning
Often the same visible cleanliness returns because underlying causes were left unaddressed: persistent hard water chemistry, incomplete removal of deposits, residual scale fragments that act as nucleation sites, or ongoing operation conditions (low flow, high temperature) that favor precipitation.
A quick troubleshooting sequence isolates causes: test water hardness and pH, inspect for missed pockets of scale, and check flow rates and temperature settings.
Consider whether chemical cleaners were neutralized or rinsed improperly, leaving residues that promote reprecipitation.
If corrosion or biofilm exists, address those separately.
Document findings, repeat targeted cleaning, and adjust operating conditions or water treatment to prevent recurrence.
Checklist For A Safe, Effective DIY Descaling Job
After isolating the causes of recurring scale, prepare a concise checklist to guide a safe, effective DIY descaling job. The list focuses on safety, correct materials, and methodical steps to minimize damage and guarantee results. Follow each point deliberately.
- Verify water supply is shut off and depressurize the section to be treated.
- Select an appropriate descaler (acidic or chelating) compatible with pipe material.
- Wear gloves, eye protection, and ensure ventilation; keep neutralizing agent nearby.
- Test the product on a small pipe section and set a strict contact time.
- Rinse thoroughly, restore flow, and inspect for leaks or remaining deposits.
Top Tips To Keep Pipes Scale‑Free Year‑Round
To keep pipes scale-free year-round, establish a routine of preventive measures that target water quality, temperature control, and maintenance frequency.
Regularly test water hardness and install softening or conditioning systems when necessary.
Maintain hot water temperature above 60°C for short cycles to reduce buildup while balancing scald risk with thermostatic mixing valves.
Flush seldom-used lines monthly and remove aerators to clean sediment.
Use magnetic or electronic descalers where appropriate as adjuncts, not replacements, for chemical treatment.
Schedule professional inspections annually, promptly repair leaks, and document maintenance to detect trends and optimize interventions for long-term scale control.
Conclusion
Calcium scale in household plumbing yields to persistent, informed attention rather than panic. The guide’s quick three‑step fixes, diagnostic cues and safety checklist enable homeowners to remove deposits with vinegar, descalers or mechanical scraping, while avoiding common mistakes that hasten recurrence. Understanding hardness, flow reduction and fixture wear guides proper prevention. Like a clockmaker repairing gears with a pocket watch and modern tools, regular maintenance preserves pipes’ function and prolongs plumbing life.