How to Use Pipe Thread Sealant: Step-by-Step Guide for Leak-Free Joints
To effectively use pipe thread sealant and ensure leak-free joints, start by selecting the right product based on your service needs: use PTFE tape for water and stainless steel, thicker pipe dope for metal or high-pressure lines, and gas-rated compounds or yellow tape for fuel. Begin by cleaning and drying the threads, then apply the sealant—wrap PTFE tape clockwise or apply a consistent bead of paste on male threads. Hand-start the connection, torque it to the specified level, and allow it to cure before conducting pressure tests. This guide provides comprehensive instructions for selection, preparation, and testing to achieve optimal results.
Why Use Pipe Thread Sealant: Common Leaks It Stops
When joining threaded pipe fittings, small gaps and imperfect threads can allow liquids or gases to seep through; pipe thread sealant fills those voids and creates a reliable barrier. It prevents leaks from common sources: hairline thread imperfections, uneven thread engagement, vibration-induced loosening, and thermal cycling that alters clearances.
Sealant also compensates for minor surface corrosion and debris that would otherwise compromise the metal-to-metal seal. Suitable formulations resist specified fluids—water, fuel, hydraulic oil, gas—and maintain elasticity to preserve the seal under pressure fluctuations.
Properly applied, thread sealant reduces maintenance, enhances safety, and prolongs joint service life.
Pipe Thread Sealant vs Teflon Tape: When to Use Each
Between plumbers and DIYers, the choice between pipe thread sealant (pipe dope) and PTFE tape hinges on the application’s pressure, fluid type, joint material, and assembly method.
Pipe dope provides thicker, gap-filling coverage and is preferred for metal fittings, gas lines, and higher-pressure systems; it resists vibration and can lubricate threads for proper torque.
PTFE tape is cleaner, ideal for water lines, low to moderate pressure, and plastic fittings if compatible; it prevents galling on stainless components.
Sometimes both are used: tape for initial seal, dope for added protection, but compatibility and manufacturer guidance should govern final selection.
Quick Answer: Best Sealant for Common Jobs
For typical water lines, a plumber-grade PTFE tape or a non-hardening, water-rated pipe thread compound is recommended for reliable seals.
For gas applications, a specialized gas-rated thread sealant or anaerobic gas-rated compound should be used to meet safety and code requirements.
The following section compares these options and notes when each is appropriate.
Best Options For Water
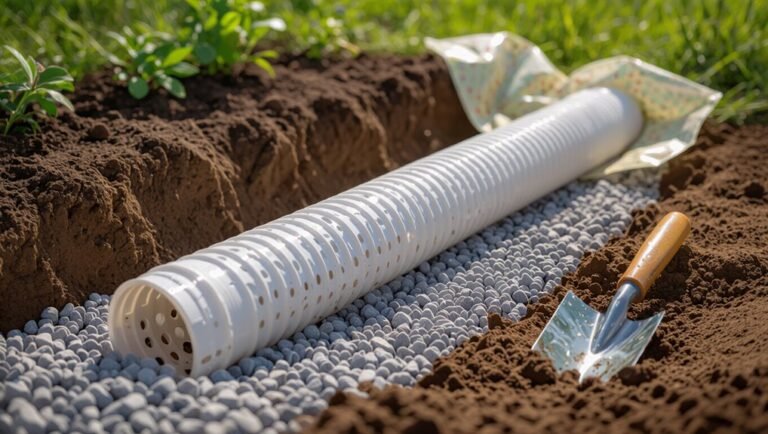
Which sealant suits household water lines depends on the joint type and service conditions. For typical potable water and cold water supply, plumbers commonly choose PTFE tape or water-rated pipe dope; both resist corrosion and allow disassembly. For threaded brass, bronze, or galvanized fittings, thicker non-hardening paste provides reliable seals. For outdoor or buried joints, consider elastomeric, water-resistant sealants that tolerate temperature swings.
- PTFE tape — clean, dry threads; multiple wraps for tapered threads.
- Water-rated pipe dope — paste that fills imperfect threads; non-hardening.
- Elastomeric sealant — flexible, weather-resistant for exposed or buried lines.
Best Options For Gas
Gas-line sealing prioritizes compatibility with fuel type, thread form, and long-term leak resistance.
For natural gas and propane, approved yellow PTFE tape (multiple wraps) or gas-rated anaerobic pipe dope are standard.
Use compounds listed for gas service and certified by relevant authorities.
Avoid non-gas-rated tapes or sealants that can degrade with hydrocarbons.
For black iron or steel fittings, apply sealant to male threads only, then assemble per torque recommendations.
Inspect joints with a soap solution or electronic detector.
For meters and regulators, follow utility/provider specifications and local code; when unsure, consult a licensed technician.
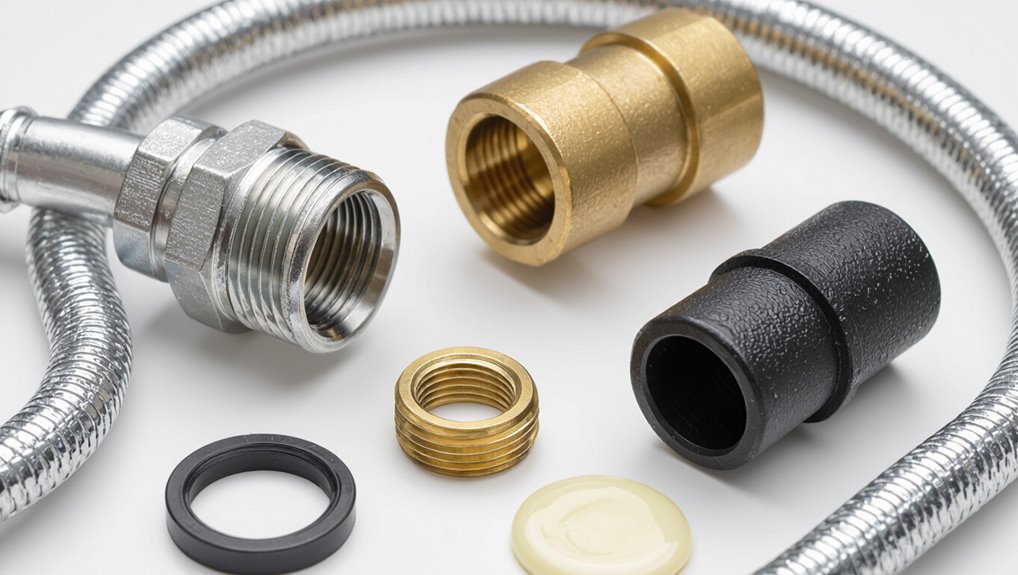
Choose Sealant for Metal, Plastic, and Gas Lines
When selecting a pipe thread sealant, material compatibility and application conditions determine the appropriate product. Different substrates demand specific chemistries: metals tolerate anaerobic or PTFE-based sealants, plastics require non-reactive, low-solvent formulas, and gas lines need sealants rated for fuel service. Choices affect cure, flexibility, and chemical resistance.
- Metal: use metallic-safe thread compounds or PTFE tape designed for high pressure and temperature.
- Plastic: choose solvent-free, low-stress sealants to prevent swelling or cracking; test on scrap if unsure.
- Gas: select sealants labeled for gas service and compatible with the pipe material.
Code Rules for Gas Lines and When to Call a Pro
Local building codes and utility company rules dictate approved materials and sealing methods for gas lines.
Permits and inspections are often required to verify safe installation and compliance.
Complex runs, conversions, or any uncertainty about leaks should prompt hiring a licensed gas professional.
Local Code Requirements
Before any work begins, homeowners and installers must consult applicable municipal and national codes because gas piping carries significant safety and legal implications. Local codes dictate approved materials, thread sealant types, joint methods, clearances, and appliance connections. Compliance reduces leak risk and liability. When uncertain, contact the authority having jurisdiction for interpretations.
- Verify permitted sealants and fittings specific to natural gas or propane.
- Confirm required competency level for the person performing gas work (licensed plumber or gas fitter).
- Check mandated testing procedures and acceptable leak-detection methods.
Noncompliance can void insurance and create criminal exposure; hire a pro if doubts exist.
Permit And Inspection
After confirming applicable codes and acceptable sealants, attention must turn to permits and inspections that govern gas-line work. The article outlines mandatory permit acquisition, required inspection stages, and documentation retention. Authorities enforce code-compliant materials, approved sealants, and qualified installer verification. Inspection timing—rough, pressure, and final—affects scheduling and project completion. Failure to permit risks fines, insurance denial, and safety hazards. Homeowners should verify municipal requirements and retain inspection reports. Professionals coordinate permits and assure compliance; however, the decision to hire is discussed elsewhere.
| Requirement | Typical Action |
|---|---|
| Permit | Submit plans |
| Inspection | Schedule stages |
When To Hire
Professionals typically recommend calling a licensed gas technician for any work that alters pipe size, changes meter location, adds new appliance branches, or involves underground or concealed piping, because code rules and safety risks escalate with system complexity.
Codes often mandate permits, pressure testing, and certified installers; noncompliance risks leaks, fines, or voided insurance.
Homeowners should hire a pro when work exceeds routine connector replacement or requires brazing, new regulators, or rerouting near foundations.
Consider professional help for unfamiliar diagnostics, odor investigations, or multi-appliance balancing.
- Structural or concealed piping changes
- Meter or regulator relocation
- New appliance branches or multi-appliance systems
Safety and Ventilation Rules Before You Start
Always make certain adequate ventilation and prioritized safety when preparing to apply pipe thread sealant. The work area should allow fresh air flow to disperse fumes; use fans or open windows when indoors.
Confirm gas and water supply lines are shut off and depressurized; lockout-tagout procedures are recommended for complex systems.
Wear appropriate personal protective equipment: chemical-resistant gloves, eye protection, and respiratory protection if ventilation is limited. Keep ignition sources away from solvent-based sealants.
Store sealants per manufacturer instructions and dispose of rags or containers safely. Review emergency procedures for spills, inhalation, or skin contact before starting.
Tools & Materials Checklist Before Applying Pipe Thread Sealant
Before beginning application, assemble a compact set of tools and materials to guarantee an efficient, safe process: pipe thread sealant (paste or tape) chosen for the specific service (gas, water, chemical), clean dry rags, a suitable thread cleaner or wire brush, tape measure or calipers for thread verification, thread sealant applicator or brush if using paste, PTFE tape of the correct grade and width if used, compatible pipe dope for the material, solvent-resistant gloves, eye protection, and a container for waste.
Then confirm quantity and compatibility, label products, and lay items on a clean work surface for easy access.
- Personal protective equipment
- Sealants and tapes
- Cleaning and measuring tools
Inspect Threaded Fittings: What to Look For
When inspecting threaded fittings, the technician should first verify thread type, size, and condition to guarantee compatibility and a proper seal.
Next, examine threads for wear: flattened crests, stretched roots, or rounded profiles that impede mating.
Check for cross-threading indicators, such as uneven starts or gouges near the lead-in.
Look for corrosion, pitting, or deposits that can prevent full engagement; surface discoloration may signal chemical attack.
Inspect flange faces and seat surfaces for nicks or deformities that affect sealing.
Confirm that any taper or straight thread conforms to specifications and that thread pitch matches the counterpart.
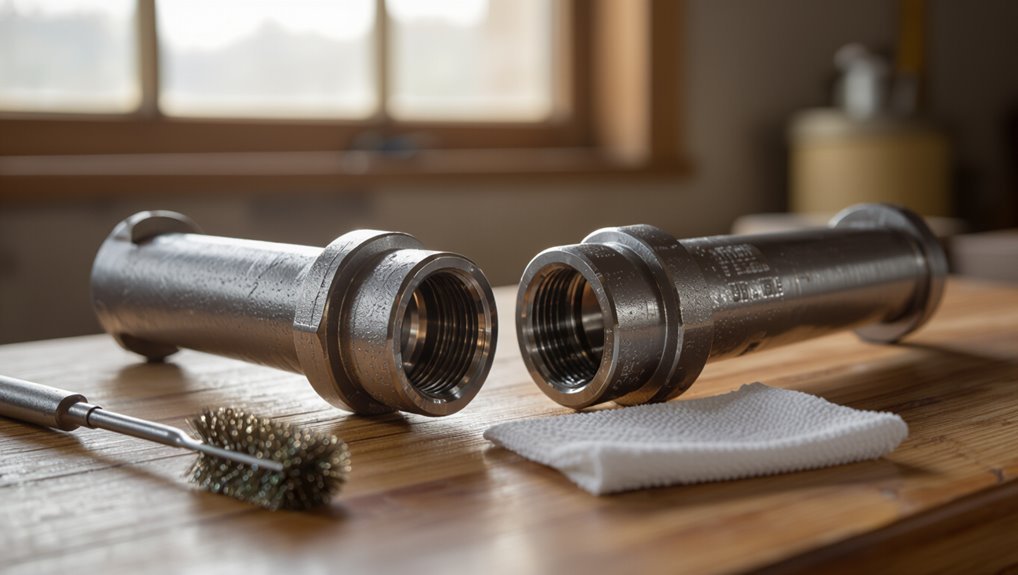
Clean and Dry Threads Correctly (Step-by-Step)
With threads verified and damage-free, attention turns to preparing the mating surfaces for sealant application. The technician removes loose debris with a nylon brush, avoiding metal scraping that can alter thread form. Residual oil or cutting fluid is wiped with a clean, lint-free rag. Compressed air or a clean towel guarantees threads are fully dry before sealant.
- Brush gently along thread crests and roots to dislodge dust.
- Wipe with solvent-dampened rag, then repeat with a dry rag until no residue transfers.
- Blow out or towel-dry every thread depth; moisture prevents proper sealant cure.
Remove Old Sealant, Corrosion, and Stuck Fittings
Before applying new sealant, the joint should be inspected for remaining sealant, corrosion, and signs of damage.
Old sealant must be carefully removed with an appropriate scraper or solvent to avoid contaminating new threads.
If fittings are stuck, they should be loosened using proper tools and techniques to prevent thread or component damage.
Inspect The Joint
Prior to reassembly, the joint must be carefully inspected to remove old sealant, address corrosion, and free any stuck fittings.
The inspector examines threads, seating surfaces, and mating faces for damage, pitting, or residual material that could prevent a tight seal.
Any distorted threads or deep corrosion are noted for repair or replacement.
Clearance and alignment are checked to confirm proper engagement.
Small debris is brushed away; trapped grit is blown out.
Tightness of previously seized fittings is assessed; appropriate tools and penetrating lubricant are planned if needed.
- Visual thread integrity check
- Surface cleanliness confirmation
- Alignment and engagement assessment
Remove Old Sealant
Remove old sealant, corrosion, and seized fittings systematically to guarantee a clean, undamaged joint ready for reassembly.
Begin by scraping hardened sealant with a plastic or brass scraper to avoid marring threads.
Apply a suitable solvent or penetrating oil to soften residues and loosen light corrosion; allow dwell time per product instructions.
Use a wire brush or toothbrush to remove remaining debris, working along thread grooves.
For stubborn deposits, employ a gasket scraper or fine emery cloth cautiously, preserving thread profile.
Clean with solvent and dry thoroughly.
Inspect threads for pitting or damage; replace components if integrity is compromised before resealing.
Loosen Stuck Fittings
Once threads are clean and inspected, attention turns to freeing fittings that remain seized by corrosion, old sealant, or mechanical binding.
The technician evaluates accessibility, selects penetrating oil, and prepares tools. Gentle, incremental force prevents damage; heat may expand metal and break corrosion bonds. If threads are fragile, sacrificial pipe wrenches or strap wrenches distribute force. After loosening, surfaces are re-cleaned before resealing.
- Apply penetrating oil, wait 10–15 minutes, tap fitting gently.
- Use appropriate wrenches; increase leverage gradually; avoid sudden shocks.
- Apply heat cautiously or replace badly corroded parts for reliable joints.
How Much Sealant to Use for Each Thread Size
For each nominal pipe size, an appropriate bead length and thread coverage are recommended to guarantee a reliable seal without excess mess or weakening of the joint.
Guidance typically scales with diameter: 1/8–1/4″ requires a short 1–2 mm bead with full thread wrap; 3/8–1/2″ uses 2–3 mm bead covering threads fully but not overfilled; 3/4–1″ needs 3–4 mm bead with two to three wraps for male threads; 1¼–2″ benefits from a 4–6 mm bead and broader coverage, keeping excess off the first thread.
Larger sizes use proportionally wider beads and controlled coverage to avoid squeeze-out.
Apply Paste/Liquid Pipe Thread Sealant, Step-by-Step
After sizing the bead and coverage for the joint, attention turns to the practical steps for applying paste or liquid sealant.
The practitioner verifies threads are clean and dry, selects the correct applicator, and prepares enough sealant for continuous coverage without excess.
Application proceeds smoothly, avoiding build-up at the lead-in or root.
- Apply an even, spiral bead from the first engaged thread toward the end, keeping thickness consistent.
- Wipe excess from the male thread tip and start of thread to prevent lumps.
- Assemble parts promptly, hand-tightening then following torque or wrench guidance to final seating.
Apply Anaerobic (Pipe Dope) Sealant Correctly
Before applying anaerobic pipe dope, surfaces should be cleaned and dried to remove oil, debris, and old sealant for reliable bonding.
The compound must be applied in an even, continuous film on male threads while avoiding excess that can squeeze into the bore.
After assembly, allow the specified cure time and perform pressure testing to confirm a leak-free joint.
Surface Preparation Steps
Prepare the metal threads by removing oil, dirt, and old sealant so the anaerobic compound bonds directly to clean metal. Surfaces must be dry and free of corrosion for reliable polymerization.
Clean and inspect both male and female threads before any sealant is introduced.
- Use a solvent wipe (acetone or isopropyl alcohol) to dissolve oils and residues; allow to evaporate fully.
- Scrape or brush with a nylon or brass brush to remove old sealant and light corrosion; avoid damaging threads.
- Blow out debris with compressed air and visually confirm all grooves are clean and intact.
Applying Even Thread Coating
With clean, dry threads confirmed, attention shifts to applying the anaerobic sealant evenly to guarantee a consistent cure and leak-free joint. The applicator dispenses a continuous bead on male threads, avoiding excess at the first threads; female threads receive a light, uniform spread. Directional wrapping follows thread helix so compound seats within valleys. Avoid pooling and contaminant contact. Assemble components promptly to distribute sealant. Clean tools between applications.
| Step | Action | Tip |
|---|---|---|
| 1 | Dispense bead | Moderate pressure |
| 2 | Spread evenly | Follow thread direction |
| 3 | Remove excess | Wipe immediately |
Curing And Testing Time
After assembly, the anaerobic sealant requires an undisturbed period to polymerize fully and develop its rated strength. The joint must remain static and at recommended temperature; cure time varies by product, gap, and metal. Follow manufacturer charts for minimum and full cure; partial handling risks leaks. After curing, conduct pressure testing per code, gradually increasing to working pressure and holding while inspecting for seepage.
For concrete guidance:
- Allow initial fixture time (minutes to hours) before light handling.
- Observe full cure (typically 24–72 hours) before pressurization.
- Perform a controlled leak test and record results.
Use PTFE Paste and Tape Together the Right Way
Combine PTFE paste and tape strategically to leverage each material’s strengths: tape provides a clean, conforming seal on straight threads while paste fills gaps and seals irregularities or low-thread engagement. The practitioner wraps tape clockwise 2–3 turns, then applies a thin paste layer over tape and exposed threads, avoiding excess that can squeeze into the system. This pairing resists vibration and imperfect threads better than either alone. Clean surfaces and correct wrap direction remain essential. Visualize layering and coverage like this:
| Layer | Purpose | Result |
|---|---|---|
| Tape | Conformity | Smooth contact |
| Paste | Gap fill | Enhanced seal |
| Both | Vibration resistance | Durable joint |
Assemble Threaded Fittings After Applying Sealant
Align the threaded fittings carefully and start engagement by hand to guarantee smooth, straight threading without cross-threading.
Once sealant coats the male threads evenly, the installer advances the fitting by hand until resistance indicates metal-to-metal contact.
A wrench is then used for final seating, maintaining alignment and steady force.
- Make sure initial hand-tight threading to verify correct alignment and detect binding.
- Apply steady, controlled wrench turns after hand engagement to compress sealant into threads.
- Recheck alignment and visually inspect joint for squeezed-out sealant or gaps, wiping excess and noting any irregularities.
How Tight Should You Torque Pipe Joints?
When determining how tight to torque pipe joints, the goal is to achieve a leak-proof metal-to-metal seal without overstressing threads or deforming fittings.
Torque until hand-tight engagement is followed by the manufacturer’s recommended turns or specified torque value for the pipe size and material.
Use calibrated tools and apply steady, controlled force; stop when resistance increases noticeably and fittings seat fully.
Avoid excessive wrenching, which can strip threads, crack fittings, or compress sealant excessively.
For critical systems, follow published torque charts and retorque only if specified after assembly and during maintenance checks per supplier guidance.
Cure Times: How Long Before Pressure Testing?
After proper torque has seated the fittings and any thread sealant has been applied, the next consideration is how long the sealant requires to cure before subjecting the joint to pressure testing.
Cure time depends on product chemistry, ambient conditions, and layer thickness.
Manufacturer instructions are authoritative; typical ranges follow:
- Light-curing or quick-set compounds: 15–60 minutes at room temperature for initial handling.
- Anaerobic or paste sealants: 1–24 hours for substantial strength; full cure may take longer.
- Thick coatings or cold environments: 24–72 hours or more; temperature accelerates cure.
Adhere to specified cure windows for reliable test results.
How to Pressure Test Threaded Joints Safely
Before applying pressure, the assembler must verify that cure time has elapsed, fittings are torqued to specification, and the test environment is safe and contained.
The assembler should use calibrated gauges, install appropriate isolation valves, and make certain compatible test medium (air, water, or inert fluid).
Apply pressure gradually to the planned test value, pausing at increments to inspect for audible leaks, seepage, or abnormal movement.
Maintain pressure for the required dwell period while monitoring gauges.
Depressurize slowly using controlled vents.
Record test parameters and results.
If pressure loss occurs, isolate the section and follow established repair or retest procedures.
Spot and Diagnose Common Sealant Failures
The technician inspects joints for visible thread damage, noting burrs, cross‑threads, or stripped sections that prevent proper sealant contact.
Persistent weeping leaks under pressure testing are recorded and traced to application errors, insufficient cure time, or compromised sealing surfaces.
Chemical compatibility issues with pipe materials or conveyed fluids are checked as a potential root cause when sealant breakdown or swelling is observed.
Visible Thread Damage
Visible thread damage is often the most immediate indicator of sealant failure, and it can take several recognizable forms: gouging from improper tool use, crushed or flattened crests from over-tightening, and shredded or missing sections where sealant or thread material has been torn away.
Inspection should note depth, location, and extent before repair.
Common manifestations include visible metal deformation, inconsistent engagement between male and female threads, and residue caught in damaged valleys.
- Deep gouges: cause poor seal seating and require rethreading or replacement.
- Flattened crests: lead to leak paths despite fresh sealant.
- Shredded sections: indicate compromised strength and need component swap.
Persistent Weeping Leaks
Diagnose persistent weeping leaks by isolating the slow, steady seepage that often escapes notice during pressurized testing but becomes apparent over time as dampness, mineral deposits, or oil sheen around joints.
Inspect joints after stable service conditions, wiping residues to reveal fresh weep points.
Check for imperfect engagement, cross-threading, uneven thread contact, or insufficient sealant coverage.
Verify proper curing time and that excess antifreeze, lubricants, or condensate aren’t masking the source.
Use dye or UV tracer for elusive leaks.
If threads appear intact but seepage persists, disassemble, clean, reapply correct quantity of sealant, and retest under normal operating pressure.
Chemical Compatibility Issues
Persistent weeping that survives reassembly and proper curing often signals not just mechanical misfit but chemical mismatch between sealant and system fluids.
The technician inspects residue, discoloration, swollen polymer, or brittle sealant to infer attack by solvents, fuels, acids, or bases.
Compatibility charts and SDS comparisons guide selection; testing on sacrificial threads verifies performance.
If incompatibility is confirmed, choose a sealant rated for the specific fluid and temperature, or use a PTFE tape designed for chemical resistance.
Document failures and replacements to build institutional knowledge and prevent recurrence.
- Observe visual and tactile degradation.
- Cross-check fluid–sealant compatibility.
- Test prior to installation.
Fix a Small Leak Without Full Disassembly
When a small leak appears at a threaded joint, the quickest fix often involves stopping flow, removing just the affected fitting or component, and resealing the threads rather than taking the entire assembly apart. The technician isolates the line, depressurizes, and unscrews the leaking piece.
Threads are cleaned of old sealant, debris, and corrosion using a wire brush and solvent compatible with the pipe material. Appropriate pipe thread sealant or PTFE tape is applied following manufacturer directions: direction of wrap, number of passes, or bead size.
The fitting is reassembled hand-tight then torqued to specification. The repair is pressure-tested for leak confirmation.
Remove and Re‑Seal a Stuck Threaded Fitting
When encountering a stuck threaded fitting, the technician first assesses corrosion, alignment, and access to determine the best removal approach.
If needed, penetrating lubricant is applied and given time to work before attempting careful mechanical persuasion.
Once removed, threads are cleaned and re‑sealed correctly with the chosen sealant to guarantee a reliable connection.
Assess The Stuck Fitting
Before attempting removal, the technician should evaluate the joint to determine why the fitting is stuck and whether removal is safe without damaging surrounding components.
The assessment focuses on corrosion, mechanical stress, thread condition, adjacent seals, and system contents that could pose hazards.
Record observations and plan precautions: isolate pressure, drain lines, and protect nearby fixtures.
If removal risks structural damage or system contamination, consult documentation or a specialist.
Use the following quick checklist to guide decisions:
- Visual signs: corrosion, sealant buildup, deformation.
- Mechanical constraints: tight space, adjacent piping, torque history.
- Safety factors: pressure, fluid type, required permits.
Apply Penetrating Lubricant
Applying a penetrating lubricant loosens corrosion and old sealant by seeping into threads to reduce friction and break bonds, enabling safer disassembly.
The technician selects a solvent-based penetrant compatible with pipe material and system contents, then isolates and depressurizes the line.
Spray or apply the lubricant directly onto the exposed threads and crevices; avoid excess that could contaminate surrounding surfaces.
Allow dwell time recommended by the product, periodically tapping the fitting to aid penetration.
If needed, reapply and extend wait time.
Once the lubricant has worked, attempt careful, incremental rotation with proper tools, backing off only when resistance meaningfully decreases.
Re‑Seal Threads Properly
Having freed the connection with penetrating lubricant and careful rotation, the technician prepares to remove the stuck fitting and re-seal the threads to guarantee a reliable, leak‑free joint.
After loosening, the fitting is backed off steadily to avoid galling. Threads are inspected; damaged threads are chased with the appropriate die or thread file. Residual sealant and debris are cleaned with a wire brush and solvent.
Fresh pipe thread sealant or PTFE tape is applied correctly, wrapping clockwise and covering full male threads without overlap at the shoulder.
- Steady removal to prevent damage.
- Clean and inspect threads.
- Apply sealant evenly and test.
Temperature and Chemical Limits for Common Sealants
When selecting a pipe thread sealant, temperature and chemical compatibility are primary constraints that determine suitability and longevity.
Common PTFE-based tapes tolerate −200°C to about 260°C and resist most hydrocarbons, acids, and bases but can swell with strong oxidizers.
Pipe dope formulations vary: general-purpose compounds often handle −30°C to 120°C; high-temp variants reach 300°C.
Anaerobic sealants typically operate from −55°C to 150°C and resist oils and fuels but may degrade with strong acids or chlorinated solvents.
Silicone sealants handle wide temperatures but can be attacked by petroleum solvents.
Always consult manufacturer data for exact limits and service conditions.
Using Sealant on Potable Water Lines (Safety & Approvals)
When working on potable water systems, attention to certifications and applicable standards is essential to make certain safety and regulatory compliance.
The selected sealant should be explicitly approved for drinking water use and verified for compatibility with plumbing materials and local codes.
Installers must follow label instructions and observe application safety precautions to prevent contamination and protect both workers and the water supply.
Certifications And Standards
Which approvals matter most for pipe thread sealants on potable water lines depends on local codes and health regulations. The text summarizes essential certifications and standards to verify safety and suitability for drinking-water systems. Consider agency marks, material limits, and testing history before selection.
- NSF/ANSI 61 — health effects and leachate testing for components in contact with drinking water.
- ANSI/NSF 372 — lead-free compliance where required; guarantees acceptable lead content levels.
- ASTM or ISO references — performance, chemical resistance, and application testing relevant to sealant type.
Documentation, traceability, and label claims should be retained for inspections.
Certified Product Compatibility
Having confirmed applicable certifications and recordkeeping, the next step is to verify that a specific pipe thread sealant product is explicitly approved for potable water service in the designated jurisdiction.
The product label, technical data sheet, and manufacturer certification should state NSF/ANSI 61 or equivalent potable-water approval where required.
Cross-check local plumbing codes and utility or project specifications for additional endorsements or banned substances.
Confirm compatibility with pipe materials (copper, CPVC, PEX, stainless) and with system temperatures and pressures.
Retain documentation of approvals and lot numbers for inspections and future traceability; do not assume general-purpose sealants are acceptable.
Application Safety Precautions
Practitioners should always prioritize safety and regulatory compliance before applying any thread sealant to potable water lines. They must confirm product NSF/ANSI 61 or equivalent approval and review manufacturer instructions to guarantee suitability for drinking water. Proper ventilation, gloves, and eye protection minimize exposure during application; avoid open flames and food-contact surfaces. After curing, perform pressure and bacteriological testing per local codes.
Documentation of approvals and lot numbers aids traceability and inspections.
- Verify certification and material safety data.
- Use personal protective equipment and work controls.
- Test and document results before service restoration.
Using Sealant on Gas Lines: Approved Products & Cautions
When sealing gas line threads, one must use only products specifically approved for fuel-gas service to guarantee leak-free joints and safety compliance. Approved thread sealants and tapes resist gas permeation, list NATURAL GAS/LP approval, and specify temperature and pressure limits. Cautions include avoiding non‑rated compounds, not overapplying sealant, and ensuring compatibility with pipe material and fittings; follow manufacturer instructions and local code. After application, test joints with soapy water or electronic detectors; never use open flame. Maintenance records and labeling of sealed gas connections support safety and inspections.
| Product type | Approval | Typical use |
|---|---|---|
| PTFE tape (gas-rated) | Yes | Threads on iron/steel |
| Pipe dope (gas) | Yes | High-temp/pressure |
| General-purpose dope | No | Not for gas lines |
Sealant Choices for Stainless Steel and Brass Threads
After emphasizing approved products for gas service, attention turns to selecting sealants for stainless steel and brass threads, where material compatibility and joint behavior differ from iron or steel.
Careful choice prevents galvanic corrosion, preserves plating, and guarantees proper torque. Common options include PTFE tape rated for metal, non-acidic pipe dope formulated for soft metals, and anaerobic thread sealants with metal-safe formulations.
Consider machining tolerances, service temperature, and chemical exposure when choosing. Avoid abrasive compounds or those containing sulfur or strong acids.
Apply sparingly, follow manufacturer cure times, and verify leak-tightness with appropriate testing methods.
- PTFE tape (metal-rated)
- Non-acidic pipe dope
- Metal-safe anaerobic sealant
Avoid Cross‑Threading and Thread Damage When Assembling
Begin assembly with visual inspection and hand-starting of the male thread into the female, ensuring alignment and engagement of the first two threads before applying force.
Use clean, debris-free threads and adequate light to confirm pitch and direction match.
Hand-turn fittings until resistance is felt; avoid cross-threading by stopping at any misalignment. If binding occurs, back off and re-seat rather than forcing.
Apply sealant only after correct engagement, then tighten with appropriate tools using steady, controlled torque.
Inspect completed joints for nicked, flattened, or distorted threads; replace damaged components to prevent leaks and make certain long-term integrity.
Storing and Disposing Leftover Pipe Thread Sealant Safely
Proper storage and disposal of leftover pipe thread sealant preserves product performance and reduces safety and environmental risks. Containers should be resealed tightly and stored upright in a cool, dry area away from heat or ignition sources. Label containers with date opened and product type to avoid misuse. Follow manufacturer directions and local regulations for disposal; some sealants qualify as hazardous waste.
- Keep lids sealed, store upright, avoid temperature extremes.
- Use small measured batches to minimize leftovers and expiry.
- Dispose of unusable sealant through hazardous waste programs or approved collection sites, never down drains.
Cost vs Performance: Picking the Best Sealant for Your Budget
When balancing cost against performance, the choice of pipe thread sealant should be guided by the application’s pressure, temperature, chemical exposure, and required longevity.
Lower-cost general-purpose sealants suit low-pressure, short-term, non-corrosive uses. Mid-range anaerobic or PTFE-based options balance affordability with broader compatibility and moderate temperatures.
Premium specialty formulations — high-temp, chemical-resistant, or long-life lubricating compounds — justify higher cost for demanding systems or where failures are costly. Buyers should compare unit coverage, cure time, and compatibility rather than price per tube alone.
Factoring maintenance intervals and failure consequences guarantees the selected sealant delivers optimum lifecycle value.
Choosing Sealants That Meet Plumbing Codes & Approvals
How can one guarantee a pipe thread sealant is legally acceptable for a given installation? The installer must verify approvals, material compatibility, and jurisdictional requirements before use. Check labels and datasheets for certification marks, listed standards, and temperature/pressure ratings.
- Confirm third-party certifications (e.g., NSF, UPC, or local authority listings) match application.
- Make certain chemical and temperature compatibility with piping, fluids, and operating conditions per technical data.
- Retain documentation and manufacturer installation instructions to demonstrate compliance during inspections or permits.
Selecting approved sealants reduces code violations, liability, and rework while ensuring reliable, compliant joints.
How Often to Inspect Previously Sealed Joints
Regularly scheduled inspections of previously sealed pipe threads help detect sealant degradation, leaks, or installation faults before they escalate into failures.
Frequency depends on system type, fluid, pressure, and environment: residential water lines often merit annual checks, pressurized commercial or HVAC systems benefit from biannual or quarterly reviews, and corrosive or high‑temperature services require more frequent monitoring.
Inspections should include visual checks for residue, moisture, corrosion, and physical movement, plus pressure testing where appropriate.
Record findings, note sealant age, and compare against expected service life.
Promptly address anomalies; deferred repairs increase risk of joint failure and collateral damage.
Pro Plumber Tips for Long‑Lasting, Leak‑Free Joints
Professional plumbers emphasize two fundamentals for durable, leak-free joints: thorough thread cleaning and precise sealant application.
Removing old tape, debris, and corrosion guarantees proper metal-to-metal contact and a consistent sealant bond.
Applying the right amount of sealant evenly, with attention to thread direction and cure time, prevents excess squeeze-out and joint failure.
Proper Thread Cleaning
Before applying sealant, the threads must be completely clean and dry to guarantee a secure, leak‑free joint. The professional inspects threads for old tape, sealant residue, corrosion, and damage. Debris removal prevents gaps and improper seating.
- Use a stiff nylon brush and solvent to remove old sealant and grime, then rinse and dry.
- For metal threads, light wire brushing removes corrosion; avoid altering thread profile.
- Inspect with light and magnification, replacing fittings with nicks or flattened crests.
Only proceed when threads are bare, smooth, and dry to reassure sealant adheres and seals effectively.
Correct Sealant Application
Apply sealant evenly and sparingly, working from the base of the male thread outward to guarantee full coverage without excess that can squeeze into the system.
A professional makes certain a thin, continuous film, avoiding blobs and gaps.
For tape-like sealants, wrap clockwise with moderate tension for three to five turns, covering threads but leaving the first thread bare.
For paste, use the supplied brush or nozzle to coat crests only, not root spaces.
Allow recommended cure time before pressurizing.
Reapply only when reassembling; never mix different sealant types.
Inspect joints after initial pressurization and correct any seepage immediately.
Conclusion
In sum, careful selection and proper application of pipe thread sealant prevent common leaks and extend joint life; after all, “measure twice, cut once” applies to preparation as much as to execution. Matching sealant to material — metal, plastic or gas — and following code approvals secures safety and durability. Regular inspection and timely re‑sealing catch failures early, and when in doubt, a licensed professional should be consulted to guarantee compliant, long‑lasting, leak‑free connections.