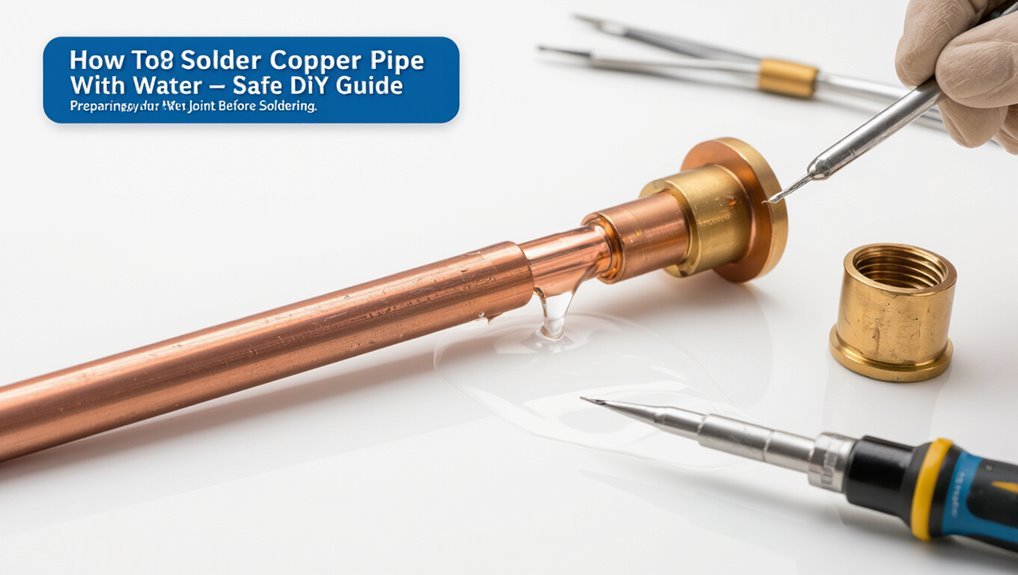
How to Solder Copper Pipe With Water in It’ Safe DIY Guide
Soldering copper pipe with water inside is not recommended due to the challenges it presents. The presence of water cools the joint, creates steam and spatter, and hinders proper solder adhesion. While experienced professionals may use specialized techniques to manage minor moisture, such methods carry significant risks of cold joints and leaks. For most DIYers, it’s safer to drain the pipe or use push-fit or compression fittings instead. This guide offers insights into safer techniques, tools, and necessary precautions for your plumbing projects.
Quick Answer: Can You Solder Copper Pipe With Water in It?
Generally, no — soldering copper pipe with water in it is impractical because the water rapidly absorbs heat, preventing the joint from reaching the solder’s melting temperature and making a reliable seal unlikely. Professionals typically drain or isolate the line first.
Small residual moisture can sometimes be managed by localized heating and flux, but success requires skill, higher heat, and careful technique; risks include cold joints, leaks, and damaged fittings.
Alternatives include using compression fittings, push-fit connectors, or temporarily stopping flow with a commercial stop-and-drain tool. For most DIYers, draining the section remains the most reliable and repeatable approach.
When You Should Avoid Soldering Wet Pipes
When is soldering a wet copper pipe a bad idea? Avoid attempting joints when water flow cannot be stopped; moving water prevents proper heating and solder adhesion.
Refrain if corrosion, heavy mineral deposits, or damaged pipe ends exist, since contaminants hinder a reliable joint.
Do not solder in confined spaces lacking ventilation or access for tools and heat control.
Avoid heat-sensitive nearby materials or concealed wiring where flame could cause broader damage.
If the pipe supplies critical systems that cannot tolerate downtime or leaks, choose alternative repair methods or schedule a full shutdown and dry the section before soldering for certainty.
Safety First: Risks of Soldering With Water Present
In the presence of water, soldering copper pipe carries specific and significant hazards: flowing water cools the joint, preventing the solder from melting and flowing properly, while trapped water can boil and spatter, causing burns or blowing flux and hot metal from the connection. Risks include scalding, weak joints, fire from nearby combustibles, toxic fumes from overheated flux, and sudden pressurization. Proper assessment and mitigation are critical before proceeding.
| Risk | Cause | Consequence |
|---|---|---|
| Scalding | Boiling trapped water | Burns |
| Weak joint | Cooling effect | Leaks |
| Fire | Nearby combustibles | Property damage |
| Fumes | Overheated flux | Respiratory harm |
Tools and Materials for Soldering Wet Copper Pipe
Typically, a concise set of hand tools, safety gear, and consumables is required to solder copper pipe that contains water: a propane torch or soldering torch with adjustable flame, lead-free solder and suitable flux, a pipe cutter and deburring tool, wire brush or emery cloth for cleaning, heat-resistant gloves and eye protection, and materials for isolating or draining the work area (such as pipe clamps, rubber caps, or a wet/dry vacuum).
Additional useful items include a heat shield or fire blanket, pliers and adjustable wrench, soldering paste brushes, flux remover or cleaning solvent, a temperature indicator or infrared thermometer, and replacement fittings and spare solder.
Choosing Flux and Solder for Damp Joints
For damp joints, selection of flux should prioritize water-displacing or moisture-tolerant formulations that promote wetting and resist washout.
The choice of solder alloy must balance flow characteristics with corrosion resistance, often favoring lead-free tin-silver or tin-copper blends for potable water systems.
Together, the correct flux and solder improve joint reliability when some moisture remains in the pipe.
Flux Types For Wet Joints
Frequently, choosing the right flux for a wet joint determines whether the solder will flow properly or cause corrosion later; fluxes designed for damp conditions contain active rosin or water-soluble acid formulations that tolerate residual moisture and help displace thin films of water.
Such fluxes are labeled “wet” or “moisture-tolerant” and have faster wetting action. Rosin-based active fluxes resist mild corrosion and are easier to clean than strong acid types.
Water-soluble acid fluxes provide aggressive cleaning for oxidized surfaces but require thorough removal after cooling.
Non-corrosive, no-clean variants are available but may not perform on heavily damped fittings.
Solder Alloys For Moisture
Solder-alloy selection is critical when joining copper pipe that contains moisture, because alloy composition determines melting behavior, flow characteristics, and corrosion resistance in damp conditions.
For wet or partially filled joints, lead-free solders based on tin-silver-copper (Sn-Ag-Cu) offer reliable wetting and higher melting points, reducing reheating risk. Tin-copper (Sn-Cu) alloys are economical and suitable for potable systems if certified. Avoid low-temperature soft solders that remelt easily.
Compatibility with chosen flux is essential: use flux rated for wet environments and potable water systems.
Proper alloy and flux pairing guarantees durable, corrosion-resistant joints despite residual moisture.
How Pipe Size and Wall Thickness Change Technique
Pipe diameter affects how much heat is needed and how quickly the joint reaches soldering temperature, with larger diameters requiring more time and a broader heat pattern.
Wall thickness alters heat transfer and may necessitate higher flame settings or preheating for thicker-walled tubing.
Effective heat distribution methods—such as moving the torch, using heat sinks, or applying targeted preheat—help compensate for size and thickness differences.
Pipe Diameter Effects
Many factors change when moving between small-diameter tubing and large, thick-walled copper: heat retention, time to reach soldering temperature, capillary action, and the required solder quantity all vary with size and wall thickness. Smaller diameters heat quickly, require less solder, and rely on strong capillary draw; larger diameters absorb heat, need longer torch application, and demand more solder and controlled heating. Flowing water cools larger sections more markedly, so segmental draining or heat zoning becomes important. Technique adjustments include torch size, flame focus, and joint preheat strategy to achieve reliable wet solder joints across diameters.
| Diameter | Effect |
|---|---|
| 1/4–1/2″ | Fast heat, strong capillary |
| 3/4–1″ | Moderate heat, more solder |
| 1¼–2″ | Slow heat, preheating useful |
| >2″ | Significant heat sink, multiple passes |
Wall Thickness Impact
In thicker-walled copper, thermal mass increases and changes how heat is absorbed and retained during soldering, requiring longer, more controlled heating to bring the joint area to soldering temperature. Thicker walls demand more heat input and patience; the plumber must apply heat until flux liquefies and solder flows without overheating.
Conversely, thin-walled tubing reaches temperature quickly and risks burning flux or melting solder if heat is excessive. Selection of solder type and joint preparation remain constant, but attention to heating duration, flame distance, and cooling pace prevents cold joints or seal failure.
Experience guides subtle adjustments for reliable results.
Heat Distribution Methods
Thicker walls that require more heat and thinner tubing that heats rapidly both change how heat must be applied across a joint. Technique adjusts for pipe diameter and wall gauge: larger pipes need broader, slower heat; small tubing needs focused, quick bursts. Heat sinks like water inside alter distribution, so flame movement and distance matter.
- Use a larger flame sweep for big diameters to avoid cold spots.
- Concentrate heat on thin walls to prevent burn-through.
- Rotate joint for even heating.
- Preheat slowly on thick walls to reach capillary temperature.
- Account for water cooling; dry or use heat-retaining paste.
Isolate the Section: Shutoffs and Valves
Before soldering, the specific section of copper pipe must be isolated by closing the nearest shutoff valves and, if possible, the main water supply to prevent flow into the work area.
Next, confirm isolation by opening a downstream faucet to verify pressure relief; no steady stream should appear.
Use ball valves or stopcocks closest to the repair; if none exist, consider installing temporary isolation fittings.
Ensure adjacent fixtures won’t be affected and notify household members before shutting water.
Label closed valves for clarity.
Finally, inspect valve seals and test for leaks after closure to guarantee a dry soldering zone.
How to Reduce Pressure and Drain Partial Water
With the shutoff valves closed and pressure checked at a downstream faucet, the next step is to reduce any remaining pressure and remove as much water as possible from the isolated section. The procedure minimizes water left at the joint and prevents steam or splatter during soldering.
Recommended actions include:
- Open the downstream faucet fully to relieve trapped pressure.
- Use a nearby bleed valve or petcock to drain the segment.
- Tilt or slightly rotate the pipe section to encourage pooling toward the drain point.
- Place a bucket and absorbent cloth beneath the joint to catch residual water.
- Recheck pressure and make sure flow has stopped before proceeding.
Dry the Joint Area With Wet-Sanding
Several short passes with wet sandpaper or an emery cloth will remove thin films of water and oxidation from the joint area, allowing solder to wet the copper properly.
The technician sands only the mating surfaces—inside the fitting and the pipe end—keeping abrasive movement aligned with the pipe to avoid scoring.
Periodic wiping with a clean, lint-free cloth removes slurry and reveals bright copper.
Avoid over-sanding; maintain roundness and fit.
After sanding, recheck for residual moisture and wipe dry.
Properly prepared surfaces guarantee flux adheres and solder flows uniformly, reducing cold joints and improving long-term leak resistance.
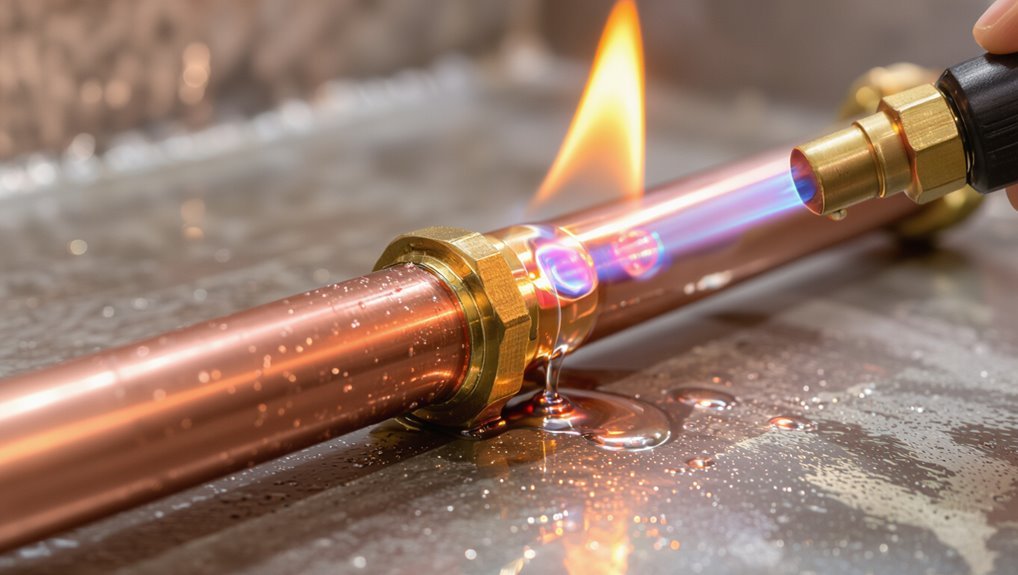
Heating Wet Pipe: Using a Handheld Propane Torch Safely
When using a handheld propane torch on a wet copper joint, the operator should maintain a steady, angled flame that heats the pipe evenly without directing the tip into the flux or solder.
Attention to torch positioning reduces scorching and helps concentrate heat where solder will flow.
Simultaneously, the worker must manage cooling water—either by controlling flow or using intermittent heating—to prevent rapid temperature drops that can ruin the joint.
Torch Positioning Tips
A handheld propane torch should be angled and moved deliberately so heat concentrates on the joint while minimizing direct flame contact with standing water; positioning the flame just below and slightly to the side of the fitting allows the pipe and solder to reach soldering temperature without boiling the trapped water excessively.
Practitioners should maintain steady, short strokes, observe solder flow, and avoid torch dwell that overheats nearby materials.
- Aim flame at the fitting, not the gap.
- Keep flame cone narrow and controlled.
- Move torch in small circles to distribute heat.
- Pause briefly between passes to assess progress.
- Maintain safe distance from insulation and fittings.
Cooling Water Management
Effective cooling water management is essential when heating a wet copper pipe with a handheld propane torch to prevent steam formation and thermal shock that can compromise the joint. The operator should drain accessible water, then insert a short length of heat‑resistant tubing or a wet rag downstream to catch residual flow.
Apply intermittent heat bursts, allowing brief cooling intervals so internal water absorbs heat gradually. Monitor solder temperature and avoid rapid quenching with cold water.
If steam appears, pause until temperatures stabilize. Controlled cooling preserves flux and solder flow, reduces cracking risk, and secures a reliable, leak‑free joint.
Protect Nearby Fittings With Heat Sinks and Wet Cloths
Before applying heat to the joint, isolate nearby fittings by clamping on heat sinks and wrapping adjacent components with wet cloths to draw away and dissipate thermal energy.
The technique protects soldered joints, valves, and fittings from overheating while water in the pipe absorbs excess heat.
Use suitable clamps and fresh, tightly wrung cloths; monitor moisture and reposition as needed.
Maintain clearance from flame, renew cloths when hot, and avoid covering insulation that could trap heat.
After cooling, inspect fittings for damage or residual moisture.
- Use metal heat sinks or plumber’s clamps
- Apply wet cotton or microfiber cloths
- Replace cloths periodically
- Keep flame directed at joint only
- Check fittings after cooling
Applying Flux to Slightly Wet Copper Correctly
Before applying flux, the technician makes certain the pipe end is scrubbed and dried as thoroughly as possible to remove oxidation and residual moisture.
When some dampness remains, a water-tolerant flux is selected to maintain adhesion and proper heat transfer.
The practitioner applies a thin, even layer of the approved flux to the joint area before assembling and heating.
Clean, Dry Surface First
When working with slightly wet copper, a technician must remove all visible moisture and contaminants so flux adheres and solder flows properly; use a clean cloth to wipe the joint, then dry with a heat source or compressed air until no beading remains.
The surface should be bright and cool enough to handle flux without steam formation. Inspect for residue, corrosion, or flux incompatibility before proceeding. Proper preparation reduces voids and weak joints.
Follow these concise steps:
- Wipe joint with lint-free cloth
- Use torch or blower to evaporate remaining damp
- Brush lightly with abrasive pad
- Reinspect for beads or film
- Allow full cooling before flux application
Use Water-Tolerant Flux
Usually, a plumber selects a specifically water-tolerant flux to guarantee reliable solder flow on slightly wet copper: these fluxes contain additives that displace moisture and resist washout, allowing capillary action to draw solder into the joint despite residual dampness.
Apply a thin, even coat to both inner and outer surfaces, avoiding excess that can trap contaminants.
Work quickly after application; heat activates the flux and expels remaining moisture.
Inspect the joint for uniform coverage, reapplying sparingly if needed.
Use flux labeled for wet conditions and approved for potable water systems.
Clean off all flux residues after soldering to prevent corrosion.
Tinning and Preheating Joints When Water Remains
With water trapped in a joint, tinning and targeted preheating become essential steps to achieve a reliable solder bond.
The practitioner brushes a thin layer of flux, applies solder to the mating surfaces (tinning) to improve heat transfer, then directs flame to dry and warm the area without boiling residual water.
Controlled preheat reduces heat loss to water and encourages solder flow once the joint reaches proper temperature.
Attention to small, focused heat zones prevents overheating nearby fittings and flux breakdown.
- Tin both pipe and fitting
- Use low flame, steady motion
- Aim heat away from water pocket
- Watch for flux activation
- Avoid prolonged heating
Feeding Solder Into a Wet Joint Reliably
Feed solder deliberately and sparingly to guarantee it flows into a wet joint rather than beading up or washing away.
The practitioner applies small amounts of fluxed solder to the heated outer joint, advancing steadily around the circumference while maintaining heat so the solder is drawn inward by the existing liquid.
Short, controlled touches prevent excess solder from cooling or being displaced by internal water.
A thin solder wire and steady hand reduce bulk and encourage penetration.
If solder resists, brief additional heating and repeated small additions succeed more often than large, continuous feeds.
Final smoothing removes surface beads.
Checking Capillary Action in Damp Conditions
The technician watches for the water line climbing into the joint as an indicator of capillary action under damp conditions.
Attention is paid to any wicking of flux along the seam, since excess moisture can alter wetting and solder flow.
Measures to prevent solder bead pullback—such as controlling heat and limiting solder volume—are noted before proceeding.
Observing Rising Water Line
Often a thin dark line appears along the joint when capillary action draws moisture upward; this rising water line indicates where solder will be repelled or contaminated unless the area is dried and cleaned. The observer notes its height and uniformity to judge how far moisture travels. Immediate steps prevent joint failure and guide drying strategy. Visual cues help decide whether to postpone soldering or apply temporary sealing.
- Inspect the entire circumference for continuity of the line
- Measure how far above the joint the stain reaches
- Check for intermittent vs. steady damp bands
- Photograph for comparison after drying
- Mark the maximum wet point for recheck
Wicking Effect On Flux
With the wet mark mapped, attention shifts to how flux behaves when moisture is present: capillary action can draw flux away from the joint or mix it with water, undermining solder flow and adhesion.
Observers check whether flux wicks into damp crevices or beads up, noting diminished wetting where contamination occurs.
Capillary-driven dilution reduces active chemistry, creating cold joints or requiring excessive heat.
Testing involves small flux application and inspection for migration under expected moisture; any visible separation indicates compromised action.
Documented behavior guides choice of stronger flux formulations or drying steps before soldering to restore reliable capillarity and bonding.
Preventing Solder Bead Pullback
In damp conditions, preventing solder bead pullback starts by verifying that capillary action will draw molten solder into the joint rather than retreat along the pipe surface. The inspector makes certain fits are clean, flux is applied sparingly, and minimal water remains at the seam so solder flows inward. Test joints on scrap or observe a small trial bead to confirm wicking before committing to critical connections.
- Clean mating surfaces thoroughly
- Use appropriate flux and avoid excess
- Minimize water in the joint with drying or absorbent material
- Heat evenly to promote inward flow
- Apply solder continuously until capillary fill is achieved
Cooling and Wiping the Joint Without Contamination
After the solder has flowed and the heat source is removed, the joint must be cooled and wiped promptly to prevent flux and solder residues from contaminating the waterway.
Cooling is achieved with a damp, clean cotton cloth or sponge applied gently to the fitting until metal reaches near ambient temperature.
Wipe away flux and excess solder immediately, using downward strokes away from the bore to avoid pushing debris inward.
Use a separate dry cloth to remove moisture and prevent corrosion.
Dispose of contaminated wipes properly.
Inspect the joint visually for smooth fillet and no residue; allow natural cooling before any handling or later testing.
Pressure-Testing Soldered Joints Right Away
Promptly pressure-testing soldered joints verifies integrity before the system is returned to service, catching leaks or weak joints that visual inspection can miss.
The operator isolates the section, fills it with water, and slowly applies shop air or a pump-rated pressure to the appropriate test level.
Observations focus on drops in pressure and visible seepage at fittings.
Allow a short hold period, recheck connections, and document results.
If pressure holds, the system may be returned to service following local codes.
- Isolate and cap test section
- Fill slowly to purge air
- Apply recommended test pressure
- Hold and monitor for leaks
- Record pressure and duration
Reheating and Repairing a Leaking Wet-Solder Joint
When a soldered joint begins to weep under pressure testing, the first task is to pinpoint the exact leak location by observing wet areas and wiping away residue to reveal the source.
Once located, the joint must be dried thoroughly using cloth, a heat gun on low, or nitrogen/air purging to remove moisture that prevents proper adhesion.
Finally, the solder is reheated and reflowed evenly around the joint, adding flux and extra solder as needed to restore a continuous, leak-free fillet.
Locating The Leak
How can a leaky solder joint be pinpointed without dismantling the system? A technician inspects visible joints, feeling for moisture and cooling spots, then traces symptoms outward. Methods emphasize safety and minimal disruption.
- Visually scan for greenish discoloration, white residue, or fresh corrosion.
- Run fingers along joints to detect wetness or temperature differences.
- Use a dry paper towel to blot suspected areas and reveal damp spots.
- Apply a small amount of soapy water; bubbles indicate active leaks.
- Listen closely for faint drips or air hissing when system pressure is applied.
Mark the leak and prepare for reheating and repair.
Drying The Joint
Before reheating, the technician must fully dry the leaking joint to allow solder to flow and bond properly; residual moisture will repel solder and cause repeated failures. The area is isolated, flushed, and wiped. A propane torch with focused heat evaporates embedded water; a heat-resistant cloth and flux-cleaning brush remove contaminants. Drying continues until metal shows consistent dryness and flux wets the surface evenly. If pinhole leaks persist, an inspection with magnification identifies corrosion or gaps needing mechanical repair before soldering. Safety gloves and eye protection are used throughout.
| Step | Tool | Indicator |
|---|---|---|
| 1 | Wrench | No movement |
| 2 | Torch | Steady steam |
| 3 | Cloth | Dry touch |
Reflowing The Solder
Reheat the cleaned, dry joint evenly with a propane torch until the flux liquefies and the existing solder softens.
The technician applies heat in a steady motion, avoids concentrated spots, and watches for solder flow.
If necessary, add a small amount of fresh solder to refill gaps; keep motion consistent to prevent overheating.
After cooling, inspect for gaps and test under low pressure.
- Use a flame large enough for even heating
- Apply flux sparingly to reflowed areas
- Add solder only where capillary action draws it
- Allow full cooling before testing
- Grind and redo if leaks persist
Protecting Nearby Plastic or Temperature-Sensitive Materials
When soldering copper pipe with water inside, nearby plastics and heat-sensitive materials should be isolated or shielded to prevent melting, warping, or fumes.
Apply heat-resistant barriers such as metal shields, fire blankets, or ceramic tiles between the joint and vulnerable items.
Remove removable plastics and electronics or cover them with aluminum foil and high-temperature tape.
Maintain a clear working radius and use pliers or clamps to position components away from heat.
Monitor surrounding materials throughout heating, and allow complete cool-down before repositioning.
Prioritize ventilation to disperse any fumes and inspect for heat damage after the job is finished.
Vertical and Overhead Wet Soldering Techniques
Vertical and overhead wet soldering requires secure positioning and support to keep joints steady and prevent movement during work.
The operator must control heat transfer carefully to avoid overheating adjacent fittings or causing steam that disrupts the solder flow.
Strategies to prevent water interruption, such as temporary clamps or localized cooling, help maintain a steady solder bead in these challenging orientations.
Positioning And Support
For wet soldering in confined orientations, secure and steady pipe positioning is critical to guarantee consistent solder flow and prevent water from quenching the joint.
The workpiece is stabilized with supports and alignment to keep fittings level during heating.
Bracing reduces movement from torch heat and operator handling.
Accessibility for fluxing and solder application is planned before heating.
Proper support also protects nearby surfaces and helps maintain joint clearance.
- Use pipe stands or padded clamps for vertical runs
- Employ straps or chain vises for overhead sections
- Add temporary blocks to maintain alignment
- Isolate pipe from building structure vibration
- Verify final orientation before soldering
Controlling Heat Transfer
Managing heat transfer is essential to prevent water from quenching the molten solder and to guarantee complete capillary flow in vertical and overhead joints.
The technician concentrates heat at the fitting, not the pipe body, using a focused torch tip and controlled flame distance. Short, pulsed heating cycles reduce bulk temperature rise while allowing flux activation and solder flow. Heat sinks—metal blocks clamped nearby—draw excess heat away from vulnerable sections.
For overhead work, gravity and solder flow are aided by angling the joint slightly so molten solder bridges the gap efficiently. Continuous observation secures even wetting without overheating adjacent fittings.
Preventing Water Interruption
Having established how focused heating and heat sinking preserve solder flow, attention shifts to techniques that keep water from interrupting the joint during vertical and overhead work.
Practitioners prepare by minimizing internal water and isolating the area, then rely on quick, controlled heat application and gravity-aware soldering posture to maintain a dry joint face.
Small barriers and temporary anchors help.
Key tactics include:
- Drain and blot the joint cavity before heating
- Use heat sinks or cold clamps below the joint
- Apply flux sparingly to avoid runoff
- Work from bottom to top on vertical sections
- Perform short, steady heating bursts to limit boil-back
Soldering in Cold or Humid Conditions Where Water Returns
Often overlooked, cold or humid environments complicate soldering when water returns to copper pipe because condensation or trapped moisture reduces joint temperature and prevents flux and solder from flowing properly. The technician assesses pipe temperature, isolates the area, and uses localized heating and drying methods. Heat must overcome cooling from returning water; flux selection matters for wet surfaces. Work proceeds in short, controlled heating bursts and verification of a clean, bright joint.
| Challenge | Mitigation |
|---|---|
| Condensation | Preheat and dry with torch or heat gun |
| Rapid cooling | Short, intense heating bursts |
| Flux washout | Use water-tolerant flux |
| Poor wetting | Clean and abrade joint surfaces |
Top Mistakes When Soldering Copper With Water Present
Following the precautions for cold or humid conditions, common errors still undermine successful soldering when water is present. The guide outlines frequent mistakes that compromise joints, increase rework, or create leaks. Awareness minimizes risks and improves outcomes.
- Failing to drain or isolate enough water before heating, causing cooling and poor flow.
- Using dirty or poorly fitted fittings that prevent capillary action.
- Applying excessive heat without flux control, burning flux and preventing wetting.
- Rushing joint cooling or moving assembly, creating voids or cold solder.
- Skipping proper cleaning after soldering, leaving residues that hid defects.
Signs a Solder Joint Will Fail Long-Term
Frequently, early visual or tactile cues predict a solder joint’s long-term failure: incomplete fillets, uneven or beaded solder, visible flux burn, gaps at the pipe-to-fitting interface, or solder that fails to wet both surfaces indicate poor capillary action; additionally, discoloration from overheating, cracked or porous solder, and joints that move when stressed signal compromised integrity and a high likelihood of future leaks.
Other signs include persistent wetness after drying, mineral-stained metal near the joint, dull or grainy solder texture, and joints that leak under pressure testing. Such indicators warrant rework before insulation or concealment to prevent hidden failures.
When to Choose Brazing or Compression Over Soldering Copper Pipe
When higher strength, faster installation, or greater tolerance for heat and pressure are required, brazing or compression fittings become preferable alternatives to traditional soldering.
Brazing offers stronger joints for high-temperature or pressurized systems; compression fittings permit quick, wet repairs without flame-intensive work.
Choice depends on service conditions, skill level, and code requirements. Consider these factors:
- System pressure and operating temperature demands
- Accessibility and time available for installation
- Presence of combustible materials nearby
- Required longevity and resistance to vibration
- Local plumbing codes and inspector preferences
Selecting the appropriate method balances safety, durability, and practicality for the specific job.
Using Mechanical Fittings for Safer Wet Repairs
Mechanical push-fit connectors provide a quick, solder-free way to seal a wet copper line and come in several brands and styles for different pipe sizes.
Compression fittings offer a durable, pressure-rated alternative that can be tightened for a long-lasting leak-free joint without heating.
Both options allow repairs to proceed with minimal draining and reduced risk compared with torch work.
Push-Fit Connector Options
Push-fit connectors offer a fast, reliable alternative to soldering for wet copper repairs, sealing pipes with an internal O-ring and metal teeth that grip the tubing.
They allow repairs without draining systems, require no heat, and suit confined spaces.
Selection depends on pressure rating, temperature tolerance, and pipe diameter.
Installation is quick: cut square, deburr, mark insertion depth, and push until seated.
Removal options vary by brand; some reusable models include disengagement collars.
- Multi-size adapters for copper, PEX, and CPVC
- Lead-free brass and composite bodies
- High-temperature, high-pressure ratings
- Clear insertion-depth indicators
- Compatible with potable water systems
Compression Fitting Benefits
Several types of compression fittings provide a dependable, heat-free method for joining copper pipe during wet repairs. They allow quick, secure seals without draining systems, reducing fire risk and interruption. Installers appreciate predictable torque, reusable nuts, and straightforward alignment. Compression fittings suit temporary fixes or long-term service where soldering is impractical or unsafe. Their limitations include size, potential for loosening under vibration, and occasional need for retightening; proper installation mitigates leaks. Overall, they offer a pragmatic, safer alternative when water remains in the line, preserving system integrity while minimizing hazards and downtime.
| Safety | Confidence |
|---|---|
| No flame | Fast fix |
| No drain | Reusable parts |
| Reduced risk | Predictable seal |
Soft vs. Hard Copper: Differences for Wet Soldering
When comparing soft (annealed) and hard (drawn) copper for wet soldering, the key differences are wall thickness, flexibility, and heat conduction: hard copper is stiffer with thinner walls and resists deformation, while soft copper is more pliable and often has slightly different heat distribution characteristics that can affect how quickly solder flows and bonds around a joint containing water.
Choosing between them affects preparation, heating strategy, and joint reliability.
- Hard copper: holds shape, may need more focused heat for even solder flow.
- Soft copper: molds easily, may require gentler heating.
- Flux adherence differs slightly.
- Mechanical stress tolerance varies.
- Inspect joints for voids.
Safeguarding Nearby Surfaces From Heat Damage
Any nearby surfaces within a few feet of the soldering area should be protected from heat, sparks, and accidental flux or solder drips.
Noncombustible shields—sheet metal, ceramic tiles, or heat-resistant mats—are placed under and around joints. Flammable items, papers, insulation, and solvents are removed or covered. Masking tape and aluminum foil protect wood trim and painted surfaces from solder splatter. Heat shields or a cardboard barrier wrapped in foil direct radiant heat away from sensitive finishes.
Surfaces are monitored during work and cooling, and a damp cloth or small fire extinguisher remains accessible until all metal has cooled.
Meeting Local Plumbing Codes When Soldering Wet Lines
Local plumbing codes dictate whether and how soldering on pipes containing water may be performed, and compliance is essential to guarantee safety and avoid costly rework or penalties. Practitioners must verify permit requirements, allowed methods, and required materials before starting. Inspectors may mandate cooling techniques, use of lead-free solder, or temporary shutdowns and isolation.
Documentation of approvals and adherence to tested procedures reduces inspection delays. When in doubt, consult the authority having jurisdiction or a licensed plumber to confirm acceptable practices.
- Confirm permit and inspection needs
- Use code-approved solder and flux
- Follow approved cooling or isolation methods
- Keep work accessible for inspection
- Consult the local authority
Labeling and Documenting a Wet Repair for Future Work
A clear label should record the date and concise repair details so future workers know what was done and when.
Include precise location and access notes, such as nearest fixtures, shutoff valves, and any obstacles encountered.
Add brief recommendations for future work or inspections, including suggested monitoring intervals or parts that may need replacement.
Date And Repair Details
When documenting a wet solder repair, include the date, specific location (pipe segment and nearby fixtures), and nature of the fix (joint type, solder used, leak cause) so future workers can quickly assess history; concise labels on or near the pipe and a matching entry in maintenance records guarantee the repair is traceable and verifiable.
- Date of repair and technician initials
- Exact pipe identifier and nearby fixture or room
- Repair type (sweat, cap, coupling) and solder alloy/flux
- Brief cause (corrosion, mechanical stress) and immediate remediation
- Recommended follow-up inspection date and any pressure testing results
This standardized entry supports efficient future diagnostics.
Location And Access Notes
Following the repair log, clear location and access notes guarantee future technicians can quickly find and safely rework the wet-soldered joint.
Record precise location (room, wall, floor level, nearby fixtures), orientation (distance from studs, joists, or service panels) and pipe identifiers (hot/cold, branch lines).
Note access method used: removed panels, ceiling tiles, or floor coverings; indicate fastener types and required tools.
Describe any temporary supports, insulation removed, and clamps left in place.
Include photographs or sketches showing access routes and clearance required.
Mark the site with durable labels tied to the repair record for straightforward retrieval.
Future Work Recommendations
In preparation for future interventions, technicians should label and document wet repairs with clear, durable identifiers and a concise record that states the work performed, the exact location, components affected, and any temporary measures left in place.
A dated note and schematic aid continuity; photos record condition and orientation.
Records should be stored both on-site and digitally, linked to maintenance logs. Labels must resist moisture and heat. Communication to owners or facility managers must note required follow-up and risk level.
- Durable tag with repair ID and date
- Short work description and materials used
- Exact pipe location and photo reference
- Temporary measures and removal timeline
- Digital log entry and backup
Estimating Time and Cost for a Wet Soldering Repair
For a wet soldering repair, estimating time and cost hinges on three variables: the size and accessibility of the leak, the amount of pipe to be cut and rejoined, and whether specialized tools or parts are required.
A small, exposed pinhole typically requires 30–60 minutes and minimal materials: solder, flux, sandpaper, and possibly a torch, totaling low cost.
Larger damaged sections or hard-to-reach locations increase labor to 1–3 hours and may need coupling, replacement tubing, or shutoff valves, raising parts costs.
Permit, disposal, or professional labor increase estimates; always include a contingency for unexpected corrosion or fittings.
Practice Drill: Wet-Soldering on Scrap Pipe
Practitioners should begin the wet-soldering practice drill on a short length of scrap copper pipe to build confidence and refine technique without risk to live plumbing.
The exercise focuses on flame control, flux application, heating duration, solder flow, and joint cleanup.
Work in a ventilated area with fire safety measures ready.
Observe how water in the tube alters heating times and solder behavior.
Repeat until consistent, leak-free joints are achieved.
- Use a capped scrap stub to retain water
- Apply appropriate flux sparingly
- Heat evenly, avoiding prolonged direct flame
- Feed solder at the heated joint, not the flame
- Quench and inspect for gaps
Training Helpers and Keeping Bystanders Safe
When assigning roles, designate one person to manage the torch and another to monitor the water source and nearby combustibles so tasks are clear and distractions are minimized.
Helpers receive concise instruction on safe torch handling, extinguishing methods, and emergency shutdown.
Require eye protection, gloves, and nonflammable clothing for all present.
Establish a clear perimeter and communicate signals for pausing or evacuating work.
Limit bystanders to necessary personnel; brief them on hazards and safe observation points.
Maintain a charged fire extinguisher and ready water source.
Regularly review roles and rehearse responses so everyone acts promptly and predictably during unexpected events.
Disposing of Flux, Solder Scraps, and Contaminated Rags
Proper disposal of flux, solder scraps, and contaminated rags is essential to prevent chemical exposure, environmental contamination, and fire hazards. The guide recommends collecting wastes separately, storing rags in a sealed metal container, and keeping solder remnants out of drains.
Small amounts of solder and lead-containing flux require hazardous waste handling per local rules. Do not burn contaminated rags. Label containers and transport to an approved disposal or recycling facility. Follow manufacturer safety data sheets for flux specifics.
- Keep wastes separate (flux, solder, rags)
- Use sealed, fireproof containers
- Do not wash residues down drains
- Check local hazardous-waste rules
- Take materials to approved facility
When to Call a Licensed Plumber Instead of DIY
How can a homeowner tell whether a job remains suitable for DIY or requires a licensed plumber? A licensed plumber should be called when leaks are extensive, pipes are inaccessible, the work affects gas lines or main water service, or local code or permit requirements apply.
Call a professional for unfamiliar plumbing systems, cast-iron or galvanized conversions, recurring failures, or when water damage, mold, or structural concerns are present.
If soldering risks causing injury or further damage due to inadequate experience or tools, a plumber provides safety, guaranteed work, and proper testing.
Costlier than DIY, professional intervention prevents larger repair bills and liability.
Inspecting and Maintaining Soldered Joints With Water in the System
During routine checks, a homeowner should visually and physically inspect soldered joints while the system remains pressurized to detect leaks, corrosion, or deterioration without dismantling the line.
The inspector notes discoloration, wetness, or mineral buildup, listens for hissing, and feels for temperature anomalies.
Minor weeps may tighten fittings or be dried and rechecked; persistent leaks require professional repair.
Record locations and dates, and prioritize joints near fittings and flexible connections.
Regular maintenance extends service life and prevents water damage.
- Look for green or white corrosion
- Feel for moisture or cool spots
- Listen for escaping air or water
- Check surrounding insulation
- Log observations and actions
Conclusion
Like a gardener pruning a thirsty vine, the careful DIY plumber learns when to wait and when to act. Soldering wet copper demands patience, the right tools and respect for heat—else the branch snaps or the bloom wilts. With proper flux, trained helpers, and safe disposal of scraps, a joint can be healed without harm. Yet sometimes the storm is too fierce; call a pro to tend the fragile roots and protect the garden.