How to Snake a Drain Pipe: Easy DIY Guide to Clear Clogs Fast
To effectively snake a drain pipe and clear clogs in sinks, tubs, and toilets, use either a hand or power snake, ensuring the cable size matches the pipe diameter. Begin by wearing gloves and eye protection, and remove any standing water. Slowly feed the cable into the drain while rotating it to catch hair or break up grease. Periodically withdraw the cable to clear out debris, but avoid forcing it against any firm resistance or delicate traps. If you encounter tree roots or experience repeated backups, it’s best to consult a professional. For detailed techniques, tool recommendations, and safety precautions, follow this guide.
Which Clogs Need a Drain Snake (Hair, Grease, Roots)?
Identify the clog type before reaching for a drain snake: hair, grease, and tree roots each behave differently and call for different approaches.
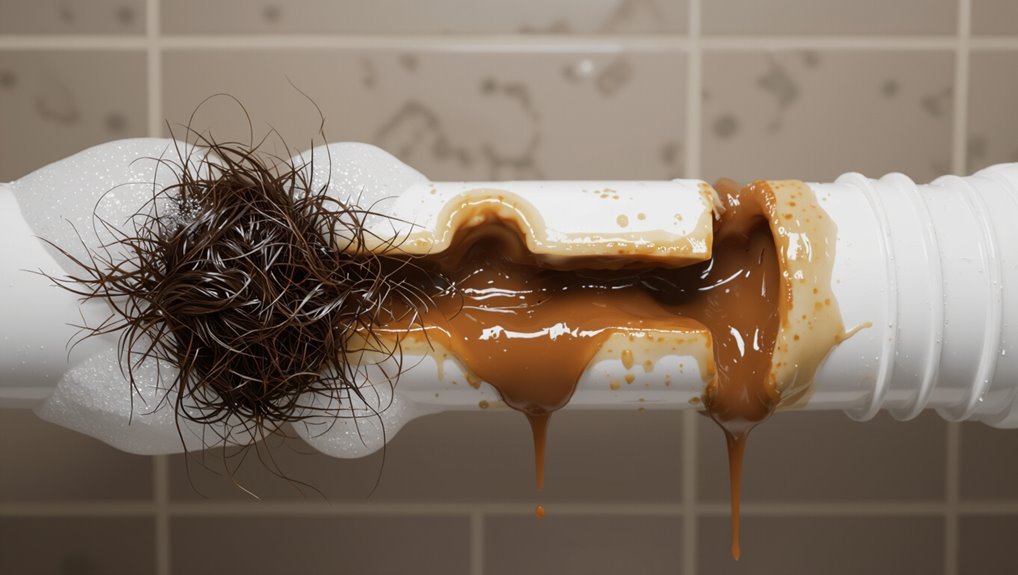
Hair mats and soap scum usually reside near fixtures and unwind or pull out with a hand auger; persistent hair may require multiple passes.
Grease forms sticky congealed masses that resist simple snaking and can smear, so a snake may need repeated scraping combined with enzymatic cleaners.
Tree roots infiltrate joints and demand heavy-duty mechanical cutting heads and often professional assessment.
Accurate diagnosis limits damage, selects appropriate auger size and head, and sets expectations for success or further intervention.
When Should You Snake the Drain DIY vs. Hire a Plumber?
When clogs are minor—hair, small grease buildup, or slow drains—a homeowner can often clear them with a hand auger or basic snake.
If the blockage is recurrent, deep in the line, or the pipes show damage or tree-root intrusion, a professional plumber with inspections and powered equipment is recommended.
Choosing between DIY and hiring should be based on clog severity, pipe condition, and the risk of causing further damage.
Minor Clogs Only
Typically, homeowners can handle minor clogs themselves using a hand auger or a power snake if the blockage is shallow, localized, and caused by hair, grease, or soap buildup. They should attempt DIY when water drains slowly, microscoped odors are present, or tools access the trap easily. Safety goggles and gloves are advised. If multiple fixtures back up, recurring clogs persist after snaking, or sewage odors and gurgling continue, professional assessment is warranted.
| Indicator | DIY Suitable | Hire Pro |
|---|---|---|
| Slow drain | Yes | No |
| Multiple fixtures | No | Yes |
| Visible debris | Yes | No |
| Recurrent clogs | No | Yes |
Complex Or Damaged Pipes
Complex or damaged pipe situations require a more cautious approach than minor clogs because hidden breaks, deep obstructions, or aging materials can worsen with improper snaking.
Assessment should precede action: visible corrosion, persistent backups, foul odors, sewage presence, or repeated clogs suggest structural issues.
DIY snaking suits clear, localized blockages; avoid forcing a snake against resistance, probing unknown bends, or working on cast iron or brittle PVC.
When cameras, hydro-jetting, section replacement, or permits might be necessary, hire a licensed plumber.
Prioritize safety and long-term cost: professional diagnosis prevents escalation, preserves warranties, and guarantees code-compliant repairs.
Tools and Safety Gear for Drain Snaking
Before beginning any snaking task, the right set of tools and safety gear should be assembled and inspected to guarantee efficiency and protection.
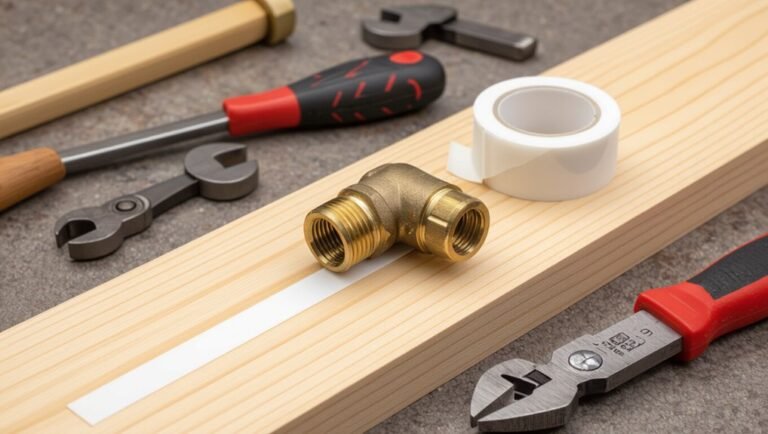
Essential tools include a hand or power auger appropriate to pipe diameter, various coil heads (corkscrew, cutting, brush), locking pliers, a basin wrench, and a bucket.
Recommended safety gear comprises chemical-resistant gloves, eye protection, a face mask if chemicals or biohazards are present, and knee pads for comfort.
A flashlight or headlamp improves visibility.
All equipment should be checked for damage, cables spooled correctly, and batteries charged.
Proper selection minimizes risk and speeds effective clog removal.
Prepare the Work Area and Protect Surfaces
With tools inspected and safety gear on, the work area should be readied to keep fixtures and floors safe and to provide clear access to the drain.
Clear surrounding countertops and remove breakables.
Lay down absorbent towels or plastic sheeting to catch drips and protect cabinetry.
Place a shallow bucket beneath trap joints to collect wastewater if disassembly is needed.
Make certain adequate lighting and create unobstructed floor space for maneuvering the snake.
Keep a small tray for removed screws and parts.
Position tools within easy reach but away from the immediate work zone to prevent tripping or contamination of clean surfaces.
Shut Off Water and Remove Standing Water Safely
Before beginning any repair, the water supply to the affected fixture should be turned off at the shutoff valve to prevent further flow.
Any standing water in the sink or tub must be removed with a cup, bucket, or wet/dry vac to expose the drain and limit spills.
These steps reduce mess and make the snaking process safer and more effective.
Turn Off Water Supply
Shut off the water supply to the affected fixture to guarantee further flow while snaking the drain.
Locate the fixture’s shutoff valve—typically under sinks or behind toilets—and turn it clockwise until fully closed.
If a local valve is absent or inaccessible, shut off the home’s main water valve.
Confirm closure by briefly opening the faucet to guarantee no new water enters the basin.
Use a wrench only if valves are stiff; avoid forcing fragile fittings.
Wearing gloves, keep a towel ready for minor drips.
Document valve positions for restoration when the clog is cleared to avoid accidental leaks.
Remove Standing Water
A small amount of standing water should be removed before snaking to improve visibility and reduce mess.
The homeowner or technician uses a cup, small container, or wet/dry vacuum to extract water from the fixture, disposing of it into a bucket or suitable drain.
Towels or absorbent cloths line surrounding surfaces to catch splashes.
Gloves and eye protection are worn to avoid contact with contaminated water.
Any remaining water level is noted; if deep, a proper pump or professional assistance is considered.
Once water is minimized, the area is prepared for inserting the drain snake safely and effectively.
How to Access Common Drains: Sink, Shower, Tub, Toilet
When dealing with common household clogs, accessing the drain correctly is the first practical step: sinks, showers, tubs, and toilets each require different points of entry and simple tools.
For a sink, clear the cabinet, place a bucket, and remove the P-trap with a wrench or by hand to reach the trap or tailpiece.
For a shower or tub, remove the drain cover or grate; some use a screwdriver or Allen key and a trim ring removal tool.
For a toilet, shut off water, flush to empty the bowl, and remove the tank lid only if accessing the flange or bolt area beneath.
Which Snake Fits Your Pipe: Coil, Drum, Toilet Auger, Cable?
Choosing the right snake depends first on matching the tool diameter to the pipe size to avoid getting stuck or causing damage.
Equally important is the cable’s flexibility: rigid coils suit straight, larger drains while more flexible cables or toilet augers navigate tight bends and traps.
A brief comparison of coil, drum, toilet auger, and cable types helps determine the best fit for each drain.
Pipe Size Match
For matching a snake to a pipe, pipe diameter and trap type determine the appropriate tool. The guide compares common pipe sizes (1¼”–2″ sink, 1½” tub/shower, 3″ main) and recommends coil or cable for larger lines, drum for moderate runs, and toilet auger for 3″ fixtures. Consider trap access and bends when choosing diameter and head size to avoid damage.
| Pipe Size | Common Fixture | Recommended Snake |
|---|---|---|
| 1¼”–1½” | Sink | Small coil/cable |
| 1½”–2″ | Tub/Shower | Drum or mid cable |
| 3″ | Toilet/main | Toilet auger/drum |
Tool Flexibility
Across varied drain sizes and trap configurations, tool flexibility determines both effectiveness and risk of damage.
A rigid drum cable pushes through long runs but may harm delicate traps; a coiled hand snake bends for S-traps yet lacks torque for deep blockages.
Toilet augers protect porcelain and reach bowl U-bends; they are short.
Long steel cables offer reach and power for main lines but require care to avoid scouring pipe walls.
Selection balances diameter, length, and bendability against clog type.
- Coil snake — flexible, short-run clogs.
- Drum cable — long reach, higher stiffness.
- Toilet auger — bowl-safe, limited length.
How to Feed a Handheld Coil Snake Into a Sink
Position the homeowner beside the sink and have them loosen the pop-up or remove the sink strainer so the coil entry is unobstructed. The technician steadies the handheld coil snake, feeding the tip slowly into the drain while maintaining firm, even pressure. Rotate the drum or handle clockwise to advance the cable, pausing when resistance is felt. Withdraw slightly, then resume rotation to work past bends. Keep hands clear of sharp edges and wear gloves. Use a flashlight to monitor progress and avoid forcing the coil. Once the cable passes the obstruction, operate the snake to break or hook debris, then retract carefully.
Using a Drum or Power Auger for Deeper Clogs
When a handheld coil snake cannot reach or clear a blockage, the technician switches to a drum or power auger to tackle deeper clogs in main lines or long runs.
The drum houses a longer, thicker cable that feeds mechanically, offering torque and reach. A power auger handles dense obstructions like tree roots or consolidated grease, with variable speeds and safety features.
Proper cable selection and gradual feeding prevent jams. The technician monitors cable behavior and clears debris from the drum after use.
Maintenance includes cleaning, lubricating, and inspecting the head and cable for wear.
- Choose correct cable size
- Use steady feed
- Inspect after use
How to Operate a Drain Snake Without Damaging Pipes
With careful technique and the right tools, a technician can operate a drain snake while minimizing risk to pipes and fittings. The operator should select the correct cable size, feed slowly, and avoid forcing turns. Use gloves, eye protection, and a rag to protect finishes. Retract gently while rotating to prevent scratches. Inspect fittings for corrosion before starting and stop if resistance feels sharp. For plastic pipes, reduce torque and prefer manual snakes. Clean and lubricate the cable after use to prevent rust.
| Action | Purpose |
|---|---|
| Slow feed | Prevents snagging |
| Gentle retract | Avoids scoring |
| Match cable | Protects material |
How to Tell When the Snake Has Reached the Clog
Recognition of a clog can be straightforward for an experienced operator. A marked increase in resistance on the cable, the cable coming to an abrupt stop, and a change in the sound of water moving in the drain each indicate contact with an obstruction.
Observing these signs together helps confirm that the snake has reached the clog.
Feeling Increased Resistance
A noticeable change in how the snake moves and feels underhand signals contact with the clog: the coil slows, the handle resists turning more than in open pipe, and the cable may bind or kink slightly as it pushes against debris.
The operator notes steady increased resistance rather than rhythmic bumps; the feed tension rises and retracting yields diminished slack.
Small rotations advance the tip incrementally.
Gentle back-and-forth can confirm engagement without forcing.
If resistance eases, the obstruction may be breaking; if it holds, the head is likely embedded.
- Pause, assess tension.
- Rotate slowly, advance cautiously.
- Avoid excessive force.
Sudden Cable Stop
Stop immediately when the cable halts without the usual give of pipe curvature or debris compression; this sudden, complete cessation of movement usually means the snake’s tip has met a solid blockage or an abrupt bend.
The operator should avoid forcing the cable, which risks kinking, breaking, or damaging pipe joints. Withdraw slightly, then rotate the drum slowly to test whether the obstruction yields or grips.
If the cable feeds with a grinding feel, the head may be embedded; work gently to dislodge. If no change occurs, retract and inspect the tip for debris or deformation before attempting another pass or changing tools.
Change In Drain Sounds
After easing back from a solid halt, attention should shift from feel to sound: the drain emits distinct audio cues when the snake reaches or engages a clog. A technician listens for changes—muted gurgles, sudden silence, or a tighter, higher-pitched scrape—as indicators the head meets resistance.
Small shifts in pitch or rhythm suggest contact; bubbling followed by steady flow can signal partial breakthrough. Pause, reverse slightly, then advance with controlled turns to confirm position. Excessive force risks damage; sound paired with gentle feel confirms engagement and guides next moves.
- Muted gurgle or stalling
- Higher-pitched scrape
- Bubbling then steady flow
Break Up and Extract Organic Clogs (Hair, Food)
Begin by inserting the snake gently into the drain until resistance indicates the head has reached the clog; for organic blockages like hair and food, the goal is to break the mass into retrievable pieces rather than force it further down the line. The operator twists slowly, using short in-and-out movements to snag fibers and loosen compacted debris. Extracted material is drawn out on the coil and wiped into a waste container. Rinse the snake as needed. If fragments remain, repeat until flow resumes. Dispose of waste hygienically and sanitize tools after use.
| Step | Motion | Result |
|---|---|---|
| 1 | Insert | Contact |
| 2 | Twist | Loosen |
| 3 | Pull | Retrieve |
| 4 | Repeat | Clear |
| 5 | Sanitize | Finish |
Step‑By‑Step: Clear Hair Clogs From Bathroom Drains
With the snake handling loosened organic masses, attention shifts to a focused, step-by-step procedure for removing hair clogs from bathroom drains.
First, wear gloves and remove the stopper to access the drain. Feed the snake slowly, twisting to thread through the hair ball; feel for resistance, then rotate to entangle.
Withdraw steadily, bringing trapped hair up; repeat until passage clears. Flush with hot water to confirm flow.
Sanitize the area and the snake before storage.
- Inspect and prepare
- Snake with controlled feed and rotation
- Extract, flush, sanitize
Remove Grease and Soap‑Scum Blockages in Kitchen Drains
In tackling grease and soap‑scum blockages in kitchen drains, the technician should first remove standing water and clear the sink trap to access the clog directly.
After trap removal, inspect and scrape accumulated gunk, wearing gloves and using a putty knife or brush.
For stubborn deposits, apply a biologically safe enzyme cleaner and allow time to digest fats; avoid harsh caustics that can damage pipes.
Reassemble the trap, run hot water to flush softened residue, and operate the disposal briefly if present.
If flow remains restricted, proceed with a drain snake designed for kitchen lines or call a professional plumber.
How to Snake a Toilet Safely Without Causing Backups
A technician approaching a clogged toilet should first minimize the risk of wastewater backup by shutting off the water supply at the tank valve and removing excess water from the bowl with a small container or cup; this precaution reduces overflow if the snake meets resistance.
The technician wears gloves and goggles, feeds a toilet auger gently to avoid scratching the porcelain, and advances until resistance is felt.
Rotate slowly, retracting occasionally to clear debris.
If severe blockage persists, stop to avoid pushing waste further into the trap.
- Use a toilet auger, not a drain snake.
- Protect fixtures from scratches.
- Stop if resistance is extreme.
Test Flow: Confirm the Clog Is Fully Cleared
Usually the technician verifies flow by running several test flushes and observing water and waste movement through the bowl and down the drain. They watch for steady, rapid drainage without gurgling, backup, or slow-sinking water.
If bubbles or delayed drainage appear, the snake may need repositioning or additional passes. Next, water is run from nearby fixtures and a sink or shower may be tested to confirm shared-line clearance.
A final observation checks for consistent trap seal and absence of sewer odors indicating partial blockages. Documentation of results and any further recommended actions completes the verification step.
Clean and Disinfect the Snake and Work Area Afterward
After finishing the snake, the technician gathers necessary tools and supplies such as gloves, a bucket, scrub brush, and appropriate cleaners.
The snake and surrounding surfaces are rinsed, scrubbed to remove debris, and allowed to air dry following manufacturer guidance.
Finally, safe disinfection methods—compatible disinfectant, proper contact time, and ventilated conditions—are applied to prevent contamination.
Tools And Supplies Needed
Cleaning and disinfecting the snake and surrounding work area prevents cross-contamination and reduces odors after clearing a drain.
Necessary tools and supplies support safe, efficient cleanup: protective gloves, a sturdy trash bag, and commercial disinfectant.
A rinse bucket, stiff brush, and old towels collect debris and water.
Disposable wipes or paper towels speed surface cleanup; a mask limits inhalation of aerosolized particles.
Bright task lighting and a small mirror help inspect the snake for residue.
Keep supplies in a dedicated kit to avoid contaminating household items and to guarantee readiness for future maintenance.
- Gloves, mask, trash bag
- Disinfectant, wipes, towels
- Bucket, brush, mirror
Proper Cleaning Steps
Before packing away the snake, the technician should remove visible debris, then thoroughly sanitize the tool and surrounding surfaces to prevent odors and bacterial spread.
Wearing gloves, they wipe the cable with disposable towels to lift grime, then flush it with water to dislodge residue. Drip trays or absorbent pads collect runoff.
The snake’s drum and handle receive focused cleaning; moving parts are cleared of buildup.
Hard surfaces—sink rim, counter, floor—are wiped and allowed to air dry.
Waste is bagged securely and disposed of.
Finally, hands and reusable gloves are cleaned; the area is ventilated until fully dry.
Safe Disinfection Methods
Proper disinfection requires selecting EPA-registered disinfectants effective against bacteria and viruses, following label instructions for dilution, contact time, and safe use; technicians should don appropriate PPE (gloves, eye protection) and isolate the work area to prevent cross-contamination.
After snaking, the cable and head should be rinsed with hot water, scrubbed with detergent, then disinfected per label; allow full contact time before rinsing.
Surfaces, tools, and waste containers must be wiped and discarded or laundered.
Ventilate the area and document products used.
Store the snake dry to inhibit microbial growth and inspect before next use.
- Clean, then disinfect
- Follow label contact time
- Dry and store properly
What to Do When a Clog Won’t Budge
What steps should be taken when a stubborn clog resists routine plunging and basic snaking?
First, inspect visible trap and clean P‑trap if accessible, removing debris with gloves and a bucket.
Next, extend the snake carefully, rotating to break compacted material; avoid forcing against solid resistance.
If water remains, check secondary cleanouts or access panels before dismantling more piping.
Use a hand auger of appropriate length and diameter, feeding slowly while observing backup.
After partial clearing, flush with hot water to move loosened residue.
Document pipe condition and consider professional evaluation if repeated blockages or damaged fittings are found.
When to Prefer Hydro‑Jetting, Chemicals, or a Pro
When a snake cannot clear a persistent clog or damage is suspected, a professional plumber should be consulted to assess the issue and recommend a safe solution.
Hydro‑jetting is preferred for heavy buildup and tree-root intrusion because it uses high‑pressure water to scour pipes without chemicals, while chemical cleaners may work for minor organic clogs but can harm pipes and septic systems if misused.
Choosing between methods depends on clog severity, pipe material, and long‑term system health.
When To Call A Pro
In cases where a snake cannot reach the clog or repeated snaking fails to restore flow, a professional should be consulted to assess options like hydro‑jetting, enzymatic or chemical treatments, or full pipe repair.
A plumber evaluates pipe condition, blockage location, and risks of chemical use or high‑pressure cleaning.
They can perform camera inspections, recommend targeted remedies, and prevent collateral damage.
Homeowners should call a pro when clogs recur, foul odors persist, water backs up in multiple fixtures, or when DIY tools fail.
- Persistent or recurring clogs
- Multiple fixtures affected
- Signs of pipe damage or sewage backup
Hydro‑Jetting Vs Chemicals
Compared side-by-side, hydro‑jetting and chemical treatments offer different strengths and risks for clearing drains: hydro‑jetting uses high‑pressure water to mechanically remove scale, grease, and debris from pipe walls, delivering a thorough, long‑lasting clean, while chemical agents dissolve organic matter and are easier for homeowners to apply but can harm plumbing, septic systems, and the environment if misused.
Hydro‑jetting is preferred for severe, recurring clogs, tree root intrusion, and mineral buildup; it requires professional equipment and expertise. Chemical suit minor organic clogs and temporary fixes but risk pipe damage and are unsuitable for older or compromised systems.
When uncertain, consult a plumber.
How to Avoid Common Mistakes That Damage Pipes
Before attempting to snake a drain, homeowners should recognize the most common mistakes that lead to pipe damage so they can be deliberately avoided.
The guide notes proper tool selection, measured force, and awareness of pipe material. Using a metal auger in fragile PVC, forcing the cable past resistance, or neglecting to inspect traps can all cause cracks, dislodged joints, or collapsed sections.
Careful technique and inspection reduce risk; when unsure, consult a professional.
Follow safety measures like wearing gloves and eye protection and avoid improvised tools.
- Choose appropriate snake for pipe material.
- Advance cable gently; never force.
- Inspect traps and joints first.
Prevent Clogs: Habits and Maintenance Routines
After mastering safe snaking techniques and recognizing damage risks, homeowners can shift focus to routines that keep drains clear and reduce the need for augering. Regular habits prevent buildup: use strainers to catch hair and debris, dispose of grease and food scraps properly, and run hot water after soap or oil use.
Monthly maintenance includes flushing drains with boiling water or a baking soda-vinegar treatment, and cleaning accessible P-traps. Avoid chemical cleaners that harm pipes. Schedule periodic inspections and address slow drainage immediately.
Consistent, simple practices extend pipe life, minimize emergencies, and reduce reliance on mechanical snaking.
DIY Cost vs. Hiring a Plumber for Snaking
When weighing whether to snake a drain personally or hire a plumber, cost is a primary factor that includes both immediate expenses and potential downstream consequences.
DIY snaking typically requires a hand auger ($20–$80) and occasional chemical cleaners; time and risk of damage are added costs if mistakes occur. Professional service fees range widely but include diagnosis, proper tools, and warranty on work.
Decision factors balance budget, skill, fixture value, and urgency.
Consider these specifics:
- Equipment and supply costs versus service call and hourly rates.
- Risk of pipe or fixture damage and repair expenses.
- Time investment and likelihood of complete clog removal.
Signs a Clog Will Recur and When to Schedule Service
Frequently, a clog that seems fixed will return, and recognizing the signs of recurrence helps determine whether to monitor the drain or schedule professional service.
Persistent slow drainage, gurgling sounds, recurring odors, water backing up after brief use, and repeated need to snake the line indicate an underlying issue beyond surface debris.
If hair, grease, or foreign objects are suspected and problems recur within weeks, professional inspection is advisable to assess pipe damage, deep blockages, or sewer-line issues.
Emergency symptoms—sewage odors, multiple fixtures affected, or sewage backups—warrant immediate plumber intervention to prevent health risks and property damage.
Conclusion
A homeowner learned that timely snaking, proper tools, and precautions prevent costly repairs. After persistent slow drainage in a kitchen sink, she snaked out grease and food buildup following safety steps, restoring flow without pipe damage; recurring tree-root obstruction, however, required a professional hydro-jetter and trenchless repair. Regular maintenance, correct technique, and knowing when to call a plumber together minimize risk and cost while keeping drains clear and functioning.