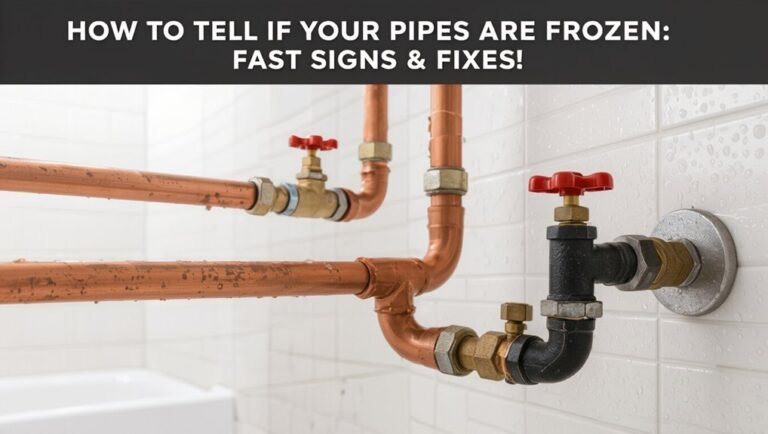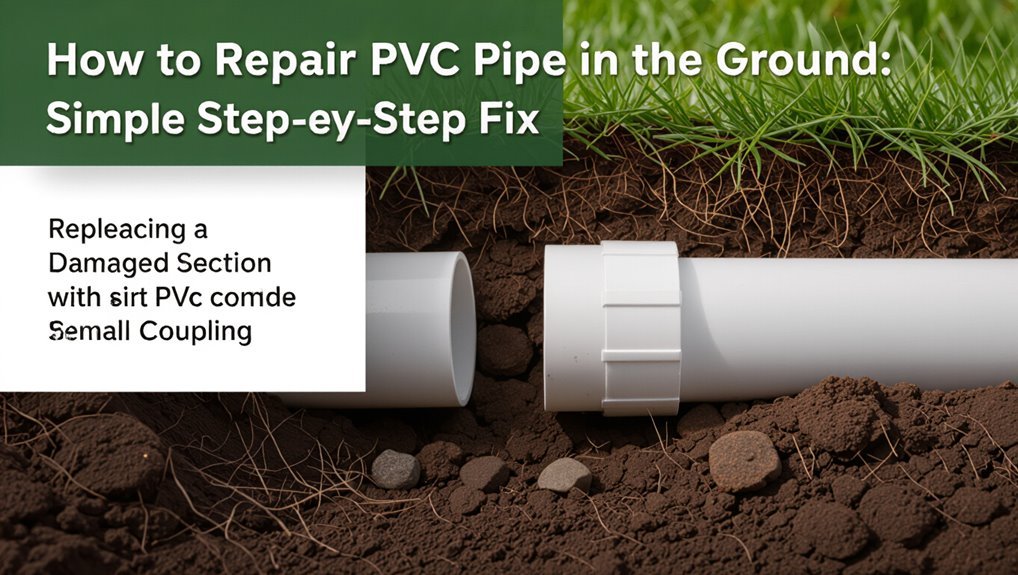
How to Repair PVC Pipe in the Ground: Simple Step-by-Step Fix
To repair a buried PVC pipe leak, first locate the wet area and shut off the water supply to depressurize the line. Next, excavate to expose the damaged section. Cut out the faulty pipe, ensuring the ends are square and deburred. Measure and dry-fit a replacement piece, then either solvent-weld it or install a mechanical repair coupling according to the product instructions. After allowing proper cure time, conduct a pressure test. Finally, backfill the trench in layers with bedding material. Ensure to follow safety guidelines and know when to call a professional if needed.
Quick Guide: How to Fix a Buried PVC Leak (Steps at a Glance)
When a buried PVC pipe leaks, a quick, methodical approach prevents further damage: locate the leak, shut off water, excavate to expose the damaged section, cut out the compromised pipe, and install a replacement coupling or sleeve before backfilling and testing.
A technician confirms line location and pressure, then clears soil to access a stable work area.
Clean cuts are made squarely; fittings and pipe ends are deburred and solvent-welded or mechanically joined per manufacturer instructions.
After allowing cure time, the repair is pressure-tested for leaks.
Backfill in layers, compacting to protect the repair and restore surrounding grade.
What Problems a Buried PVC Leak Causes
Although often hidden beneath soil, a leaking buried PVC pipe can cause a chain of problems that extend far beyond visible dampness.
Soil erosion around the leak may undermine foundations, sidewalks, driveways, and landscaping, creating voids and settling.
Persistent moisture fosters mold, mildew, and root intrusion that weaken structures and clog lines. Water loss raises utility bills and can depress water pressure elsewhere in the system.
Frost heave risk increases in cold climates. Untreated leaks promote corrosion of nearby metallic utilities and attract pests.
Left unchecked, these consequences escalate repair complexity and cost, complicating restoration and site rehabilitation.
When To DIY Versus Call a Pro for Buried PVC Repair
Decision to attempt a buried PVC repair depends primarily on the extent of the damage and the individual’s skill level.
Small, localized cracks or loose fittings may be suitable for a confident homeowner with basic plumbing tools and experience.
Extensive breaks, multiple impacted joints, or uncertainty about locating and isolating the line are better handled by a licensed professional.
Extent Of Damage
Evaluating the extent of damage to buried PVC pipe determines whether a homeowner can safely attempt a DIY repair or should hire a professional.
Minor cracks, small punctures, or single-joint leaks confined to a short accessible section often permit straightforward patching, cutting out a short piece, or installing a coupling.
Extensive crushing, multiple breaks, long corrosion-like degradation, or damage spreading across fittings and branches indicates systemic failure requiring trenching, rerouting, or full replacement.
Soil instability, root intrusion, or contamination around the break increases complexity.
Visible deformation, recurring leaks after temporary fixes, or unclear underground layouts warrant calling a licensed plumber with excavation resources.
Personal Skill Level
After determining how extensive the damage is, homeowners should honestly assess their own skill level before attempting repair of buried PVC pipe.
Individuals comfortable with basic trenching, cutting, gluing PVC, and pressure testing may handle straightforward leaks or short-sleeve repairs.
Those lacking tools, experience with solvent-weld techniques, or familiarity with local codes and buried utilities should hire a licensed plumber.
Complex issues—multiple joints, long runs, persistent pressure loss, or unstable soil—require professional diagnosis and excavation.
Safety, warranty preservation, and avoiding repeated repairs favor calling a pro when uncertainty exists; DIY is appropriate only for simple, low-risk fixes.
How To Locate the Exact Leak Spot Underground
Locating an underground PVC leak begins with a visual sweep for unusually wet or soggy ground that marks the pipe’s path.
If surface signs are unclear, listening for the sound of running water with a stethoscope or similar device can pinpoint the spot.
When visible or audible clues fail, a pressure test isolates the leak by showing where pressure drops along the buried line.
Check For Wet Areas
Often the quickest clue to an underground PVC leak is a persistently wet or soggy patch on the surface above the pipeline.
Observers should scan the yard for unusually green areas, standing puddles, depressions with soft soil, or mud even when surrounding ground is dry.
Mark suspected spots with flags or spray paint and inspect after a dry period to confirm persistent moisture.
Dig minimally to expose soil layers and look for saturated soil, smell of mildew, or visible water seepage.
Document findings and measure distances to known pipe runs to narrow the search before excavating for repair.
Listen For Running Water
Frequently, the most precise way to pinpoint an underground PVC leak is by listening for the sound of running or hissing water; investigators should start by quieting the area and removing background noise, then use a listening device such as a mechanic’s stethoscope, ground microphone, or even a long screwdriver pressed against the pipe with the ear to detect the direction and intensity of the leak.
Careful, methodical sweeps across suspected lines narrow the location before excavation.
Time of day, soil type, and depth affect audibility; mark the strongest signal and corroborate with visual inspection of nearby wet spots.
- Reduce ambient noise and methodically map signal strength.
- Use multiple contact points to triangulate the leak.
- Confirm findings before digging to minimize disturbance.
Use Pressure Testing
Begin by isolating the section of pipe to be tested and attaching a calibrated pressure gauge and a reliable shutoff device to create a closed system.
Pressurize to the system’s rated working pressure, then monitor the gauge for drops over a set interval.
If pressure falls, systematically introduce pressure to short pipe segments using valve isolation or temporary caps, narrowing the leak to a small run.
Combine with audible listening or soil probing at suspect spots; moist soil or bubbling may confirm location.
Once the precise point is identified, depressurize, excavate carefully, and prepare the area for repair or replacement.
How To Shut Off Water and Depressurize the Line Safely
Before any excavation or cutting, the water supply must be isolated and the line depressurized to prevent sudden flow or injury. The technician locates the nearest shutoff—house, meter, or main—and closes it slowly to avoid pressure spikes. Any downstream taps are opened to drain residual water; a test valve or pressure gauge confirms near-zero pressure. If a system has multiple zones, each valve is addressed methodically. Backflow devices or check valves may trap pressure and require separate venting. Record valve positions and notify occupants before work begins.
- Confirm full isolation visually and with a gauge
- Open low points to purge water
- Relieve trapped pockets deliberately
How To Mark Utilities Before Digging
After isolating and depressurizing the line, the technician verifies that all valves remain secured and then proceeds to mark underground utilities to guide excavation. A locate service confirms cable, gas, and water positions; flags and spray paint follow standard color codes. Marks indicate depth, direction, and clearance zones; fragile lines get buffer areas. The crew reviews a site map, notes discrepancies, and establishes a trench outline avoiding marked utilities. Before digging, the technician rechecks marks and communicates limits to the excavator operator. Continuous visual confirmation during excavation prevents strikes and guarantees compliance with safety regulations.
| Utility | Color | Action |
|---|---|---|
| Water | Blue | Flag |
| Gas | Yellow | Buffer |
| Electric | Red | Avoid |
What Tools and Materials You Need for Buried PVC Repair
A concise inventory of tools and materials is presented to prepare for buried PVC repair.
Essential tools include a shovel, pipe cutter or hacksaw, deburring tool, adjustable wrench, and inspection light.
Required materials cover replacement PVC pipe and fittings, primer and cement, sand or bedding material, and appropriate safety gear.
Essential Tools Overview
Gathering the right tools and materials streamlines a buried PVC repair and reduces the risk of mistakes that lead to leaks or rework.
A concise set of reliable tools improves efficiency and safety when excavating, cutting, and joining pipe underground.
Focus on durable, appropriate-sized equipment and a few specialty items to handle confined spaces and soil conditions.
Skillful selection avoids delays and repeated trips for missing gear.
Prepare for measuring, clean cuts, secure connections, and safe handling.
- Quality pipe cutter or fine-tooth saw for clean, square cuts
- Deburring tool and measuring tape for precise fit
- PVC primer, cement applicator, and gloves
Required Materials List
In preparing to repair buried PVC, the technician should assemble a focused set of materials that match pipe size, soil conditions, and the chosen repair method.
Required items include replacement PVC pipe and fittings (matched schedule and diameter), appropriate primer and solvent cement, PVC couplings or repair sleeves, and compatible adhesive or epoxy for temporary fixes.
Support materials: pipe straps, sand or bedding material, and noncorrosive clamps.
Cutting and preparation supplies: a pipe cutter or saw, deburring tool, and clean rags.
Safety items: gloves, eye protection, and a dust mask.
Optional: fiberglass wrap, repair cassette, and tracer wire.
How To Dig a Safe Access Trench to the Pipe
Begin by locating the pipe path and marking both sides of the planned trench, then verify the location of underground utilities with local services before any excavation begins.
A measured, narrow trench reduces collapse risk and limits disturbance; maintain safe slopes in loose soil and keep spoil piles away from edges.
Use hand tools near suspected pipe depth, heavy tools only where safe, and wear protective gear. Shore or brace deep trenches according to local codes. Keep an emergency plan and communication available.
- Maintain a clear, measured work area
- Use appropriate tools progressively
- Follow local safety and shoring standards
How To Expose the PVC Without Causing More Damage
With careful hand tools and a slow, methodical approach, the worker uncovers the PVC by removing soil in thin layers and brushing away debris to reveal contours without stressing the pipe.
Gloves and a soft-bristled brush prevent abrasion while a small trowel and narrow shovel preserve surrounding packing.
Roots are cut cleanly with pruning shears; large roots are left until pipe clearance is confirmed.
Hand digging continues until at least several inches of pipe circumference and joints are exposed.
Loose soil is banked away from the trench edge to avoid collapse.
Progress is paused if vibration, cracking sounds, or shifting soil occur.
How To Inspect the Pipe to Decide the Repair Type
Assess the exposed section visually and tactilely to determine the damage type and scope. The inspector notes cracks, pinhole leaks, crushed areas, joint failures, and surrounding soil saturation. Measure length of damage, pipe diameter, and proximity to fittings. Check for embedded debris, corrosion on fittings, and sheath or coating breaches. Verify water flow and pressure behavior if safe to run the system. Photograph and mark limits for repair planning. Decide whether replacement, patching, or rerouting is appropriate based on structural integrity and access.
- Document severity, size, and location precisely.
- Confirm adjacent fittings and bends for stress.
- Record soil conditions and contamination.
When To Use a Coupler for a Small Pipe Break
After documenting the damage and marking repair limits, determine whether a coupler is appropriate for a small pipe break by considering the break’s length, location, and the remaining pipe integrity.
A coupler suits short, clean fractures where undamaged pipe remains on both sides to accept fittings and solvent cement.
It is preferred when the break is accessible, alignment is achievable without stress, and surrounding soil won’t impose bending forces.
Avoid couplers if the pipe ends are crumbled, too close to fittings or joints, or if the damaged zone exceeds the coupler’s grip length.
Choose compatible coupler type for pipe diameter and schedule.
How To Cut Out a Damaged PVC Section Cleanly
Before cutting begins, the worker verifies the pipe is depressurized and the excavation provides unobstructed access.
The damaged portion is inspected to determine clean cut lines beyond visible cracks.
Markings are made square to the pipe axis; cuts are planned to leave enough sound pipe for fittings without removing excess length.
Appropriate tools—PVC cutter for small diameters, reciprocating saw or pipe cutter for larger runs—are selected.
Cutting proceeds steadily, avoiding jagged edges and heat melt.
Debris and burrs are removed with a file or deburring tool to assure proper joint seating.
- Accuracy preserves fitting integrity.
- Clean edges prevent leaks.
- Minimal removal reduces labor.
How To Measure and Prepare Replacement Pipe Pieces
With the damaged section cleanly removed and burrs dressed, attention turns to measuring and preparing the replacement piece.
Measure the gap between existing pipe ends, accounting for insertion depth of couplings or fittings; subtract twice the insertion depth if using slip couplings.
Mark the replacement pipe clearly, transfer measurements to a straight, deburred cut line, and cut squarely with a fine-tooth saw or PVC cutter.
Recheck length after a dry fit between existing ends.
Lightly chamfer outer edges and remove any burrs or dust with a deburring tool or cloth.
Label or orient the piece if directional flow matters.
How To Choose the Right PVC Primer and Cement
Which primer and cement will bond securely depends on pipe material, pressure rating, and local code.
Selection begins by matching solvent cement and primer to PVC schedule and any CPVC or ABS interfaces; manufacturers label compatibility.
For pressurized mains choose pressure-rated cement; for drainage use standard DWV cement.
Consider set time and temperature ratings for the job environment.
Use code-approved, listed products and observe VOC or safety restrictions.
Store containers sealed and discard expired materials.
When in doubt, consult product data sheets or local inspectors to confirm suitability.
- Match material compatibility
- Verify pressure and temperature ratings
- Confirm code approval and listings
How To Clean and Dry Pipe Ends Before Gluing
Prepare the pipe ends by removing all dirt, grease, and moisture so the solvent cement can form a continuous, chemical weld.
Use a clean rag to wipe away loose soil and debris.
Scrape stubborn residue with a plastic or brass scraper to avoid scoring.
Degrease with a PVC-compatible cleaner or isopropyl alcohol; allow solvents to evaporate.
Lightly sand or de-burr cut edges with fine emery cloth to expose fresh material and guarantee a square cut.
Blow or brush away particles.
Verify surfaces are dry and free of contamination before proceeding.
Proper cleaning guarantees reliable adhesion and prevents joint failures.
How To Apply Primer and Cement for a Solvent Weld
Before applying solvent cement, the primer must be used to clean and soften the pipe and socket surfaces so the cement can penetrate and fuse the PVC.
The primer is applied liberally to both pipe end and fitting socket, stroked in one direction, then allowed a few seconds to soften the surfaces.
Solvent cement is brushed onto the primed pipe and inside the socket immediately, a thin even coat on each.
The joint is inserted with a 1/4 turn to distribute cement, held briefly to prevent push-out.
Excess cement is wiped away and the joint left undisturbed.
- Prep guarantees chemical bonding, not adhesion.
- Uniform coating prevents voids.
- Quick assembly secures proper fusion.
How Long Solvent-Weld Joints Need To Cure
Once joined, solvent-weld PVC requires a short initial set time followed by a longer full cure period that depends on pipe size, ambient temperature, and cement formulation.
Typically, light handling is possible after 15–30 minutes for small-diameter lines at moderate temperatures, but full chemical and pressure resistance can take 24 hours or more.
Cooler weather, larger diameters, or heavy-bodied cements extend cure times; manufacturers’ guides give precise schedules.
For buried repairs, allow the recommended full cure before backfilling or subjecting the joint to internal pressure.
When in doubt, err on the side of longer cure to guarantee joint integrity.
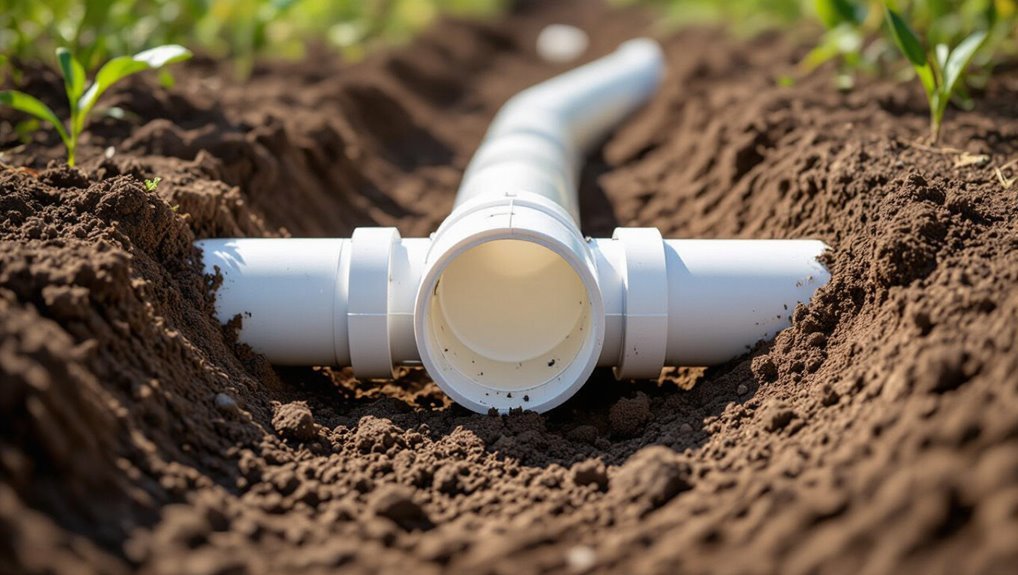
How To Install a Slip Coupling for Repairs Without Movement
After confirming solvent-weld joints have achieved their required cure, attention turns to installing a slip coupling to repair a buried PVC run where no axial movement is expected.
The pipe ends are cut square, deburred, and wiped clean. Mark insertion depth on both ends, apply primer then cement evenly, slide the coupling fully onto one end, then align and push the opposite pipe into position until marks meet. Hold briefly to set, clean excess adhesive, and allow full cure before backfilling. Verify alignment and test under pressure to guarantee a leak-free joint.
- Precision prevents future disturbance.
- Cleanliness guarantees adhesion.
- Testing confirms integrity.
How To Use a Repair Coupling for Misaligned Sections
Address misaligned PVC sections by selecting a repair coupling designed to accommodate offset or angular discrepancy and by preparing both pipe ends for secure bonding. The practitioner measures offset, cuts squarely, deburrs, and cleans with primer. Apply solvent evenly, slide coupling onto one end, align pipes, then push fully while twisting slightly to make certain full contact. Hold briefly per manufacturer cure time. Inspect joint for gaps, and allow recommended cure before backfilling. For flexible misalignment, use an elastomeric repair coupling; for slight angles, a hinged or adjustable coupling may suffice.
| Coupling type | Best use |
|---|---|
| Elastomeric | Flexible offsets |
| Hinged/adjustable | Angular gaps |
How To Make a Repair When Pipe Diameter Changes
When pipe diameter changes in a buried PVC run, the repair requires matching fittings or adapter couplings that maintain flow integrity and soil load capacity; the technician selects a properly sized reducer or flexible adapter, prepares both ends by cutting square, deburring, and cleaning, then uses the appropriate primer and solvent or mechanical adapter to form a secure joint.
The repair zone is excavated to stable soil, bedding is restored, and the joint is tested under pressure before backfilling. Transition fittings must be rated for buried use and matched to pipe material to prevent stress concentrations and leaks.
- Confirm pressure and material compatibility
- Assure square cuts and clean surfaces
- Test joint before backfill
How To Use Rubber Repair Sleeves for Temporary Fixes
A simple alternative to matching reducers or complex adapters is the rubber repair sleeve, which can be fitted over a damaged section of buried PVC to stop leaks temporarily while a permanent repair is planned. The sleeve is positioned over the leak, centered, and secured with stainless steel clamps tightened evenly to compress the rubber against the pipe. It suits hairline cracks, small holes, and minor abrasions. Inspect soil for sharp objects before installation. Monitor the repair; replace with a permanent PVC splice when practical. Proper sizing and clamp torque guarantee effectiveness until a full replacement occurs.
| Size | Use | Notes |
|---|---|---|
| Small | Hairline cracks | Quick fit |
| Medium | Small holes | Stable seal |
| Large | Abrasions | May need support |
How To Install Threaded Adapters for Transition Repairs
Install threaded adapters to join PVC to threaded fittings or convert to metal pipe securely and leak-free. The technician measures and cuts squarely, deburrs the PVC, applies primer and PVC cement for female adapters, or uses PTFE tape on male threads when connecting to metal or threaded components.
Threaded adapters require proper seating and hand-tightening followed by wrench snugging without over-torquing. After installation, pressure-test at low pressure and inspect for seepage. Proper selection of adapter material and size prevents galvanic issues and preserves flow.
- Match thread type and pipe schedule
- Use correct sealant for materials
- Test under service pressure
Joining PVC to Metal: Threaded and Compression Transitions
Shifting between PVC and metal requires attention to thread types, mechanical compatibility, and corrosion risks to guarantee a durable, leak-free joint.
For threaded connections match male and female thread standards (NPT or BSP) and use a suitable adapter: brass or stainless steel reduces galvanic corrosion. Apply thread sealant rated for plastic-to-metal connections and avoid over-tightening PVC fittings.
For compression connections use adapters with elastomeric seals designed for PVC pipe; ensure ferrules or olives compress evenly without cracking the plastic.
Support both materials to limit stress, inspect for crevice corrosion, and choose compatible materials and sealants for long-term underground service.
How To Test the Repair Before Backfilling
Before backfilling, the repaired section should undergo a systematic pressure and leak test to confirm integrity under expected operating conditions.
The technician isolates the repair, fills the line slowly to purge air, then observes joints and fittings for visible drips or weeping.
Monitor pressure gauge for stability over a defined hold period; any drop indicates a fault.
Inspect surrounding soil for seepage or pooling.
Verify that temporary caps and test plugs remain secure.
Document results and mark the repair as pass or fail before restoring the trench.
- Confirm airtight filling and air removal
- Observe for visible leaks and soil saturation
- Record stable pressure during hold period
How To Pressure-Test the Entire Repaired Segment
After confirming the local repair holds under the initial leak test, the technician proceeds to pressure-test the entire repaired segment to verify system-wide integrity. Valves are isolated to confine the test section; fittings and caps rated for expected pressure are installed. A calibrated pressure gauge and pump introduce water to the segment, raising pressure to the system’s normal operating level plus a modest safety margin.
The technician monitors for a steady reading over a prescribed dwell time, inspects visible joints for seepage, and listens for hissing. If pressure holds, the section passes; documented readings and photos are recorded before backfilling.
Diagnosing Persistent Leaks After Repair: Pressure Loss and Hidden Cracks
Occasionally a repaired segment will still show pressure loss, signaling issues beyond the visible patch. The technician inspects joints, fittings, and adjacent pipe for hairline fractures, bedding shifts, or incomplete seals. Pressure decay testing narrows leak zones; dye or ultrasonic detection confirms unseen breaches. Documentation of pressure curves guides targeted excavation only where warranted.
- Verify fittings and joint integrity before assuming new damage.
- Use noninvasive detection (acoustic, dye) to locate subsurface microcracks.
- Record and compare post-repair pressure data to isolate intermittent leaks and decide whether rework or replacement is necessary.
How To Reinforce Repaired Sections Against Soil Movement
To protect repaired PVC against shifting soils, the technician recommends adding flexible pipe sleeves that permit slight movement without stressing joints.
After sleeve placement, backfill should be compacted in controlled layers to minimize future settling.
Together, these measures reduce strain on the repair and extend service life.
Add Flexible Pipe Sleeves
When buried soil shifts, adding a flexible sleeve around a repaired PVC joint provides a buffer that accommodates movement and reduces stress on the pipe.
The sleeve should fit snugly over the repair, extend several inches beyond each side, and be secured with corrosion-resistant clamps or tape.
Materials such as rubber, neoprene, or corrugated polyethylene offer elasticity and abrasion resistance.
Installation must avoid sharp folds and guarantee the sleeve follows the pipe contour to prevent water pooling.
Regular inspections detect wear.
Proper sleeve selection and correct fastening increase repair longevity without altering pipe alignment or hindering flow.
- Choose resilient, UV-resistant material
- Guarantee overlap beyond joint
- Fasten with noncorroding clamps
Improve Backfill Compaction
Following the addition of a flexible sleeve around a repaired joint, attention shifts to the surrounding soil: properly compacted backfill stabilizes the pipe, limits future movement, and distributes loads that could otherwise stress the repair. The worker layers select bedding, avoids large stones, and moistens soil to achieve optimal density. Compaction proceeds in thin lifts, checked with a hand tamper or plate compactor for uniform support. Surface grading prevents water pooling. Inspection verifies no voids remain and that pipe alignment is unchanged. Proper backfill extends repair life and reduces repeat excavations.
| Material | Lift Thickness | Compaction Tool |
|---|---|---|
| Sand | 4 in | Hand tamper |
| Gravel | 3 in | Plate compactor |
| Native soil | 6 in | Mechanical vibratory |
How To Protect Pipe From Future Root Intrusion
In preventing future root intrusion, proactive measures focus on creating physical barriers and maintaining surrounding vegetation to keep roots from reaching PVC joints and fittings.
Trench lining with root-resistant fabric or rigid sleeves isolates the pipe; periodic inspections detect encroaching roots early; targeted pruning and selecting non-invasive plants reduce pressure on underground lines.
Properly installed collars or sand envelopes around joints can deter root anchoring without altering soil stability.
Combining barriers with vegetation management offers durable protection while preserving landscape health.
Regular monitoring verifies measures remain effective and allows prompt corrective action before roots compromise the pipe.
- Install root barrier sleeves at critical joints
- Prune and thin nearby trees regularly
- Use root-resistant fabric around trenches
How To Choose Backfill Materials to Support the Pipe
Choosing appropriate backfill material is critical to guarantee stable bedding, prevent pipe deformation, and protect joints from settlement and external loads.
The ideal backfill is clean, granular, and free of large rocks, organic matter, or debris that could shift or decay. Sand, pea gravel, or crushed stone provide uniform support and drainage; select particle sizes that won’t migrate through bedding or around the pipe.
Native soil may be acceptable if well-graded and non-expansive. Avoid clays and frost-susceptible materials.
Use bedding to cradle the pipe and select surround material that distributes loads to minimize point stresses on the pipe.
How To Compact Soil Correctly Around the Repaired Pipe
Compact soil properly around a repaired PVC pipe to restore load-bearing capacity and prevent future settling or joint strain.
The area should be filled in layers, each tamped to firm but not overly compacted to avoid pipe deformation.
Use suitable backfill material—clean sand or fine gravel near the pipe—then native soil above.
Maintain even support along the pipe length, checking alignment and slope before final compaction.
Avoid heavy machinery close to the trench until sufficient cover exists.
- Layered compaction preserves pipe shape and prevents voids.
- Gentle, consistent tamping prevents point loads.
- Verify alignment periodically during backfill.
How To Restore Surface Landscaping After Backfill
After backfilling and confirming soil compaction, attention turns to restoring the surface landscaping to match existing grade and appearance. The area is smoothed, excess soil removed, and final grade blended to channel water away from the repair. Sod patches or seed are placed to mirror surrounding turf; mulch and edging are realigned for beds. Irrigation heads are checked and adjusted. A light watering settles soil and aids seed germination. Temporary stakes mark vulnerable spots until establishment. Seasonal planting is deferred to the appropriate time to avoid stress.
| Sod patch | Mulch layer | Edging realigned |
|---|---|---|
| Seed zone | Watering | Stakes placed |
| Irrigation checked | Final grade | Cleanup done |
How Seasonal Factors Affect Buried PVC Repairs
Seasonally driven temperature and moisture changes markedly influence the timing, methods, and durability of buried PVC repairs.
Contractors assess soil dryness, root activity, and thermal expansion before selecting adhesives, joint types, and cure times. Scheduling aligns with milder conditions to minimize stress on fittings and reduce trench collapse risk.
Material selection considers UV exposure during brief surface work and potential condensation in cooler months.
Long-term integrity depends on proper backfill technique adjusted for seasonal compaction rates and biological activity.
- Choose adhesives and primers rated for expected temperature ranges.
- Time repairs to avoid peak root-growth and water-table shifts.
- Adjust compaction strategy for seasonal moisture content.
How To Repair PVC in Frozen or Saturated Ground
When working in frozen or water‑saturated ground, technicians must adapt excavation, joining, and backfill techniques to manage limited access, increased brittleness, and poor consolidation. Assess site conditions, thaw or dewater where feasible using heaters, insulation blankets, or sump pumps.
Excavate carefully to avoid shock to brittle pipe, exposing enough length for secure fittings. Use primer and solvent cement rated for low temperatures or mechanical couplings designed for wet conditions. Support joints during cure with temporary bracing.
Backfill in layers with free‑draining material, compact gently to prevent pipe displacement, and restore thermal protection to reduce freeze‑thaw cycling risk.
How To Estimate Time and Cost for a Typical Repair
How long will a typical PVC pipe repair take and how much will it cost depends on pipe size, depth, soil conditions, access, and the chosen repair method; a straightforward shallow splice or coupling replacement in dry, easily accessible soil may be completed in a few hours with modest material and labor costs, whereas deep excavations, frozen or saturated ground, large-diameter pipe, or the need for specialty fittings and traffic control can extend the job to a full day or more and raise costs substantially.
Typical estimates consider labor hours, materials, permits, and restoration.
- Labor: hourly rates, crew size, and excavation time.
- Materials: fittings, pipe, adhesive, backfill.
- Site factors: depth, access, utilities, weather.
How To Find Replacement Parts That Match Your Pipe
Finding the correct replacement begins with matching the pipe diameter exactly, since even small size differences can cause leaks or fitting failures.
The material and schedule (wall thickness) should be identified next, as PVC, CPVC, or other plastics and their schedules determine compatibility and pressure rating.
Confirming these three measurements before purchasing or cutting parts streamlines repairs and prevents costly mistakes.
Match Pipe Diameter Exactly
Accurate measurement of the existing PVC pipe diameter is the essential first step before sourcing replacement parts. The person should measure outside diameter with calipers or a tape, note nominal size markings on the pipe, and confirm fit by test-fitting couplings.
Matching diameter prevents leaks, stress, and failed joints.
- Verify outside diameter (OD) and compare to nominal size charts.
- Use a caliper or flexible tape for buried or obscured pipes.
- Test-fit a short section or coupling before final installation to make certain snug, gap-free connections.
Identify Material And Schedule
Material type and schedule determine the pipe’s wall thickness, pressure rating, and compatible fittings, so identifying them is essential before ordering replacements. The inspector examines pipe markings (e.g., “PVC”, “CPVC”) and schedule number (SCH 40, SCH 80) stamped along the length. If markings are missing, measure outside diameter and wall thickness, then compare to manufacturer charts. Match adhesive type and fitting style (socket vs. slip). Photograph and record findings to provide suppliers with exact specifications.
| Marking | Measurement | Action |
|---|---|---|
| PVC | OD + wall | Compare chart |
| CPVC | OD + wall | Use correct cement |
| SCH40 | Pressure | Standard fittings |
| SCH80 | Pressure | Thicker wall |
How To Document the Repair for Future Maintenance
When completing a PVC pipe repair in the ground, the technician should create a concise record that captures the location, cause, materials used, splice or coupling type, and exact repair date.
The entry should note depth, nearby landmarks, and photos or sketches showing orientation.
Record test results, pressure checks, and any caveats for future access.
Store the file in the project folder and maintenance log with a clear filename and tags.
- Include photos with scale and a brief caption.
- List part numbers, adhesive types, and cure times.
- Note warranty periods, next inspection date, and responsible contact.
How To Prevent Common DIY Mistakes When Repairing Buried PVC
To avoid common DIY mistakes when repairing buried PVC, the technician selects compatible pipe materials and fittings to guarantee proper bonding and pressure rating.
Excavation is performed carefully around the break to prevent further damage and to expose adequate pipe length for secure joints.
Clear planning of materials and cautious digging together reduce the chance of repair failure.
Choose Proper Pipe Materials
Before selecting parts for a buried PVC repair, the homeowner should match pipe schedule, diameter, and chemical compatibility to the original system to guarantee pressure ratings and longevity align.
The writer recommends using UV-resistant, heavy-wall PVC rated for underground use or switching to SDR/CPVC only when compatible with existing fittings and fluids.
Adhesives and primer must be approved for the pipe type and soil conditions.
Selecting proper fittings and pressure-rated couplings reduces leaks and premature failure.
Consider corrosion-resistant metal inserts or adaptor couplers where necessary, and maintain documentation of materials for future repairs.
- Match material ratings to application
- Use approved adhesives and fittings
- Document parts and specifications
Excavate Carefully Around Break
Start by exposing the damaged section with deliberate, controlled digging to avoid widening the break or nicking adjacent pipe lines. The worker removes soil in layers, using hand tools near the pipe and keeping a tidy spoil pile to prevent collapse.
Roots are cut cleanly; heavy machinery stays back until the area is clear. Once the pipe is visible for several inches each side, debris is brushed away and the trench edges are squared for access.
Care is taken to note pipe orientation and depth. This method reduces risk of further damage, guarantees accurate measurement, and creates safe workspace for cutting and fitting.
How Often To Inspect Buried PVC Lines After Repair
Regularly scheduled inspections of repaired buried PVC lines help make certain repairs remain sound and detect emerging problems early.
Inspections should follow a predictable cadence: an initial check soon after backfill, a short-term follow-up, and periodic routine reviews.
Frequency depends on soil conditions, load stress, and repair type.
Visual checks, pressure tests, and moisture probing reveal leaks or settling before they worsen.
Documentation of findings and prompt corrective action preserve system integrity and extend service life.
- Initial inspection: within 1–2 weeks after backfilling
- Short-term follow-up: at 3 months
- Routine review: annually or after major weather events
How To Know When Full Pipe Replacement Is the Best Option
Evaluating when to replace a buried PVC line outright requires weighing repair history, pipe condition, and site factors to determine if replacement offers greater long-term reliability and lower lifecycle cost.
Full replacement is preferable when leaks are frequent, previous repairs fail repeatedly, or a long pipe segment shows widespread cracking, collapse, or advanced corrosion of fittings.
Consider soil instability, root intrusion, improper original installation, and future excavation plans that raise risk or access costs.
If inspection indicates compromised flow capacity, contamination risk, or repair costs approaching replacement expense, replacement minimizes downtime and liability and restores system integrity for decades.
Conclusion
Buried PVC leaks often seem small but can cause big damage: studies show hidden pipe failures account for nearly 30% of residential water loss, heightening repair costs and property risk. A thoughtful, documented repair and routine inspections reduce recurrence and protect investment. When DIY limits are reached, a professional evaluation prevents repeated disruption. Prioritize accurate leak location, safe depressurization, and clear records to keep underground plumbing reliable and prevent costly surprises.