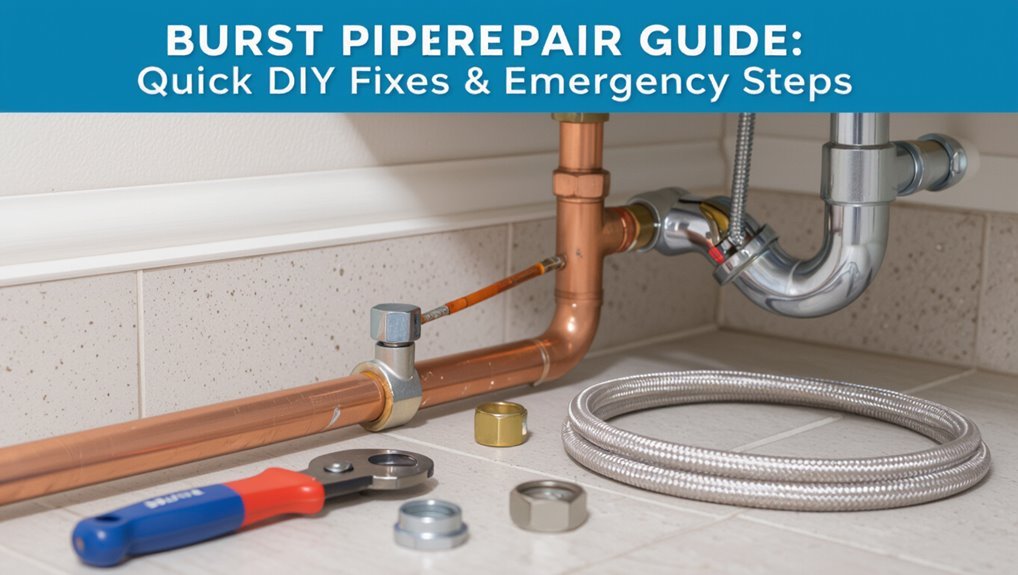
Burst Pipe Repair Guide: Quick DIY Fixes & Emergency Steps
When a pipe bursts, the first thing to do is shut off the main water supply to prevent further flooding. Then, open a nearby faucet to relieve any pressure in the pipes. Next, isolate the affected area using local shutoffs, turn off power to any wet areas, and ensure that people and valuables are moved to safety. To manage the situation, contain and remove any standing water using towels, wet/dry vacs, or dehumidifiers. For small leaks, you can apply a temporary fix such as a rubber patch, clamp, epoxy putty, or self-fusing tape. After making repairs, test them slowly under low pressure and keep an eye on the situation. Follow up with step-by-step instructions for both temporary and permanent solutions.
Quick Checklist: What to Do First When a Pipe Bursts
When a pipe bursts, the immediate priority is to stop the flow, contain damage, and guarantee safety: shut off the main water valve, turn off electricity if water reaches outlets or appliances, and move people and valuables away from the affected area.
Next, assess visible leaks and note their location and severity without touching electrical components. Use towels, buckets, and temporary barriers to limit spread. Photograph damage for records.
Open nearby drains to prevent backups. If possible, relieve pressure by opening a faucet above the rupture. Contact insured professionals if the break is large, contaminated, or beyond simple containment measures.
Stop the Water: Shut Off Your Home’s Main Supply
The homeowner should locate the main shut-off valve immediately, typically found near the water meter, basement wall, or where the service line enters the house.
Once identified, the valve should be turned fully clockwise (or closed) to stop the flow.
After shutting it, verify water is off by opening a nearby faucet to confirm no more water runs.
Locate The Main Valve
Before any repair begins, homeowners must locate and shut off the main water valve to stop flow into the house. The valve is commonly near the water meter, basement wall, garage, or where the supply enters. Exterior homes may have a curb box or ground-level shutoff. A gate valve requires several turns; a ball valve aligns handle parallel to pipe when open. Clear access and mark the valve location for emergencies. If frozen or corroded, use caution and call a professional.
| Location examples | Valve types |
|---|---|
| Basement/wall | Gate, ball |
| Curb/yard | Stopbox, gate |
Verify Water Is Off
Confirm that water has stopped flowing at fixtures and visible leaks before proceeding with repairs.
The person guarantees the main valve is fully closed, then opens a nearby faucet to relieve pressure and drain remaining water.
They check lower and upper fixtures, outdoor spigots, and appliance supply lines for any continuing flow.
If flow persists, the shutoff may be faulty or a secondary valve needs closure; contacting the utility or a plumber is advised.
Once dry, they dry the area, note the exact shutoff position, and document conditions for repair steps.
Proceed only after no water movement is confirmed.
Isolate the Leak: Use Local Shutoff Valves
When a pipe begins leaking, locate and turn off the nearest local shutoff valve to guarantee water flow to the affected section without shutting down the entire system.
The person assesses accessible valves near fixtures, appliances, and branch lines, turning clockwise or using a wrench when required.
If multiple valves exist, close those immediately serving the damaged run.
Confirm isolation by opening a nearby faucet to guarantee flow ceases in the leak area.
Record which valves were operated for restoration.
If a valve is seized or leaks, tag it for professional repair and avoid forcing it further.
- Check valve location visually
- Turn valves firmly, not violently
- Test flow after closing
- Note operated valves
Turn Off Electricity and Protect Appliances
After isolating the leak, the next step is to cut electrical power to the affected area and safeguard nearby appliances and electronics.
The homeowner should switch off the circuit breaker(s) serving the wet zone to eliminate shock risk; if unsure which controls apply, turn off the main breaker.
Unplug devices that can be safely removed and elevate portable electronics onto dry surfaces or shelves.
Keep extension cords and power strips away from water.
Label the breaker used for quick restoration.
If electrical panels or outlets are wet, do not attempt to restore power; contact a licensed electrician before re-energizing.
Quick Water Removal to Limit Damage
Immediate extraction of standing water is essential to halt ongoing damage from a burst pipe.
Rapid removal reduces the risk of secondary problems such as mold growth, warped flooring, and electrical hazards.
Professionals or homeowners should prioritize pumps, wet/dry vacuums, and targeted drying to stabilize the situation.
Immediate Water Extraction
In the minutes following a burst pipe, rapid water removal is critical to prevent structural damage and mold growth. Professionals or capable homeowners should act swiftly, prioritizing safety, electrical isolation, and staged extraction to reduce soaked materials and humidity. Focused efforts limit long-term repairs.
- Remove standing water with a wet/dry vacuum or pump.
- Extract soaked carpets and padding; roll and place outdoors to dry.
- Use towels and mops for smaller pools; wring repeatedly and replace with dry cloths.
- Position box fans and dehumidifiers to accelerate drying after bulk water removal.
Prevent Secondary Damage
With water removed swiftly, attention shifts to actions that stop further deterioration of structures and contents; timely drying and stabilization limit mold, warping, and material breakdown.
The responder assesses affected areas, moves salvageable items to dry zones, and segregates damaged materials for disposal.
Ventilation is raised with fans and dehumidifiers; wet insulation, drywall, and flooring are opened or removed to expose hidden moisture.
Electrical hazards are respected; professionals are contacted for complex remediation.
Documentation of damage supports insurance claims.
Continued monitoring guarantees drying goals are met and prevents secondary microbial growth, restoring safe conditions before repairs proceed.
Assess the Break: Minor Leak vs. Major Burst
How severe is the damage: a slow drip or a full rupture? The observer evaluates water flow, spray pattern, and surrounding wetness to classify the break.
Visible cracks with high-pressure jets indicate a major burst needing immediate shutoff and professional repair. Small, steady weeps suggest a minor leak that still requires prompt attention to prevent escalation.
Consider location and access difficulty when deciding next steps.
- Flow intensity: trickle versus forceful spray
- Visible pipe damage: hairline crack versus split pipe
- Secondary impact: localized wetness or widespread flooding
- Accessibility for temporary measures and repair
Safe Temporary Fixes for Small Pinhole Leaks
The guide outlines quick patch methods for small pinhole leaks, emphasizing speed and ease of application.
It describes safe temporary materials such as rubber patches, epoxy putty, and hose clamps that can stop leaks until a permanent repair is made.
Recommendations focus on compatibility with pipe type and on following manufacturer safety instructions.
Quick Patch Methods
Contain small pinhole leaks quickly to minimize water damage and buy time until a permanent repair can be made. The following concise methods stabilize flow and reduce spray until professional repair occurs.
- Apply rubber patch and hose clamp: press a rubber strip over the hole and secure tightly with a clamp.
- Use epoxy putty: knead, shape, press into the pinhole area, and allow curing per instructions.
- Wrap with self-fusing silicone tape: stretch and wrap overlapping layers to form a waterproof sleeve.
- Tighten nearby fittings and drain pressure: reduce water pressure to limit leakage while patches set.
Safe Temporary Materials
After stabilizing flow with quick patches, attention turns to selecting safe temporary materials for small pinhole leaks. The guide outlines options that are nonreactive, food-safe where needed, and removable without damaging pipe surfaces. It emphasizes short-term use, monitoring, and prompt professional repair. Suitable choices include silicone tape, rubber with hose clamps, and epoxy putty rated for plumbing. Avoid solvents or makeshift materials that degrade pipes. Inspect the repair regularly for seepage or deterioration. This conservative approach minimizes contamination and structural harm while providing time to schedule permanent fixes.
| Material | Strength | Use-duration |
|---|---|---|
| Silicone tape | Medium | Short |
| Rubber patch | Medium | Short |
| Epoxy putty | High | Temporary |
Emergency Options for Larger Splits and Cracks
When a pipe sustains a large split or crack that cannot be contained with tape or clamps alone, immediate measures focus on stopping flow and minimizing water damage until a professional repair or replacement can be completed.
The person should shut off water, isolate the affected section if possible, and remove nearby valuables.
Temporary containment aims to reduce flooding and preserve structure while awaiting a plumber.
- Shut off main water and relieve pressure by opening faucets.
- Contain spills with buckets, towels, and a wet vacuum.
- Protect floors and walls with plastic sheeting and absorbent pads.
- Record damage for insurance and contact a licensed plumber promptly.
Use a Clamp, Rubber Patch, or Hose for Sealing
The section outlines practical sealing options for a burst pipe, starting with clear clamp installation steps to secure larger splits.
It then describes rubber patch application for smaller holes and the materials needed for a reliable seal.
Finally, it explains how to rig a temporary hose bypass to restore flow until a permanent repair is made.
Clamp Installation Steps
Using a clamp, rubber patch, or hose to seal a burst pipe requires careful surface preparation, correct part selection, and steady installation to guarantee a reliable temporary repair.
Steps focus on stopping flow, securing the seal, and testing for leaks.
Clean and dry the pipe; remove corrosion or paint.
Select a clamp sized to cover the damaged area with overlap.
Position a rubber piece or hose over the rupture, center the clamp, and tighten evenly to compress the seal without deforming the pipe.
After installation, restore pressure slowly and inspect for seepage; retighten if necessary.
- Clean and dry pipe
- Size and align clamp
- Tighten evenly
- Test under pressure
Rubber Patch Application
Apply a properly sized rubber patch over the rupture, ensuring the material fully covers the damaged area with at least an inch of overlap on each side.
Clean and dry the pipe surface; remove corrosion, paint, and debris to promote sealing.
Center the patch, then secure it with a stainless steel or galvanized clamp, tightening incrementally and evenly to compress the rubber without cutting it.
For irregular breaks, conform the patch and consider multiple overlapping pieces.
Verify compression by checking for leaks under low pressure before restoring full flow.
Reinspect after several hours and replace with a permanent repair as soon as feasible.
Temporary Hose Bypass
Create a temporary hose bypass by diverting flow around the damaged section with a length of hose or flexible tubing sealed at each end by clamps and rubber patches. The procedure is practical for urgent stops: isolate supply, measure and cut hose, fit over clean pipe ends, and secure with heavy-duty clamps and layered rubber patches.
Test at low pressure, then restore normal pressure cautiously. Monitor for leaks until permanent repair. Consider material compatibility and temperature limits.
- Use hose slightly larger than pipe OD for overlap
- Tighten clamps evenly to avoid slippage
- Layer rubber for added sealing
- Check after 10–15 minutes
Solder Copper Pipes Safely (Advanced DIY)
When soldering copper pipes, a methodical approach and strict attention to safety are essential to prevent fires, burns, and toxic fumes.
The technician isolates water, dries joints, and cleans fittings with emery cloth to expose bright metal.
Flux is applied sparingly; heat is directed to the pipe, not the solder, so molten solder flows by capillary action into the joint.
A proper flame size and a fire-resistant pad beneath the work minimize fire risk.
After cooling, excess flux is wiped away to prevent corrosion.
Ventilation and a respirator are used when indoor; a fire extinguisher remains on hand.
Replace a Section With Push‑Fit or PEX Fittings
After soldering or deciding against heat-based repairs, the burst section can be removed and replaced using push-fit or PEX fittings to simplify and speed the repair.
The damaged length is cut out cleanly; pipe ends are deburred and squared.
Push-fit connectors seat quickly on copper, CPVC, or PEX; PEX requires crimp or clamp rings and proper insertion depth.
Pressure is restored after testing joints for leaks.
Advantages include minimal tools and immediate use.
Consider matching materials and local codes.
Typical steps:
- Measure and cut out damaged section precisely
- Prepare pipe ends: deburr, clean, and square
- Install push-fit or PEX fittings per manufacturer
- Test under pressure for leaks
When to Call a Professional Plumber Right Away
How urgent is the situation? If water gushes continuously, mains pressure persists, or flow cannot be stopped, a professional plumber should be called immediately.
Also summon a pro for visible structural compromise, electrical contact with water, sewage backup, or multiple burst locations.
Temporary DIY measures—shutting valves, isolating circuits, using clamps—are insufficient when corrosion, inaccessible piping, or suspected frozen pipe damage exists.
Rapid intervention prevents extensive water damage, mold, and costly repairs. A licensed plumber offers proper diagnosis, high-pressure-capable repairs, safe restoration of hot water systems, and reliable pipe replacement that meets local codes and insurance requirements.
Document Damage for Insurance and Claims
Immediately following containment and any emergency repairs, homeowners should document all damage thoroughly to support insurance claims and contractor assessments. A systematic record preserves evidence, speeds claim approvals, and guides repair estimates.
Photographs and time-stamped videos should capture affected rooms, structural elements, furnishings, and utilities. Keep receipts for emergency supplies and contractor call-outs. Communicate with insurers promptly, providing the recorded inventory and explanatory notes about conditions observed.
- Photograph wide shots, close-ups, and identifying features
- Record videos narrating visible damage and locations
- List damaged items with approximate ages and values
- Save all correspondence, invoices, and temporary repair receipts
Drying, Mold Prevention, and Odor Control
With documentation complete, attention shifts to thorough drying and mold prevention to protect structure and contents from progressive damage.
Professionals and homeowners should remove standing water, ventilate spaces, and use dehumidifiers and fans to lower moisture quickly.
Porous materials soaked through—carpet padding, drywall, insulation—require prompt removal to prevent hidden colonies.
Surfaces must be cleaned with appropriate antimicrobial cleaners; follow label instructions and guarantee proper protective equipment.
Monitor moisture levels with a meter until readings return to normal.
For persistent odors or suspected mold growth, consult a licensed remediation specialist to assess health risks and execute targeted abatement.
Prevent Future Bursts: Insulation and Winterizing
Regularly insulating vulnerable pipes and completing basic winterizing steps substantially reduces the risk of future bursts.
The guide recommends evaluating exposed plumbing, applying foam or wrap insulation, and sealing gaps where cold air enters. Drains and outdoor faucets should be drained and shut off; heat tape can protect critical runs. Routine checks before cold snaps catch problems early.
- Insulate: foam sleeves for interior, wrap for exterior pipes.
- Seal: caulk around penetrations and close crawlspace vents.
- Drain: winterize outdoor lines and irrigation systems.
- Maintain: install heat tape on susceptible sections and test operation.
Test Repaired Pipes and Check for Hidden Leaks
After repairs are completed and systems are reassembled, the plumbing should be pressurized and inspected to confirm integrity and reveal hidden leaks. Begin by slowly restoring water and observing visible joints, fittings, and repaired areas for seepage.
Monitor pressure gauges or tanks for unexplained drops over 15–30 minutes. Use a dry paper towel or tissue to detect tiny drips, and employ a flashlight to inspect dark cavities and ceilings.
Listen for running water within walls and check meter readings with all fixtures off. If moisture appears, isolate the section and repeat repairs. Document findings and retest until stable.
Tools, Materials, and Cost Checklist for Repairs
For a successful burst pipe repair, a concise checklist of essential tools, consumable materials, and estimated costs helps prioritize tasks and budget effectively. The list below outlines common items, typical single-repair quantities, and rough price ranges; local prices vary and emergency calls increase costs. Proper selection prevents delays and secondary damage.
- Adjustable wrench, pipe cutter, pliers — $15–60 (tools reusable)
- Pipe repair clamp or coupling, replacement pipe section (copper/PEX) — $10–50
- Soldering kit or PEX crimp kit, flux, solder, torch or crimp rings — $20–80
- Pipe sealant, Teflon tape, epoxy putty, replacement fittings — $5–30
Conclusion
When a pipe bursts, prompt action limits damage and expense. Homeowners who shut off the main supply, isolate the leak, and remove standing water often avoid extensive repairs. Fast drying and mold prevention are essential steps before permanent fixes. One striking statistic: burst pipes cause an estimated $2,700 in average home insurance claims, highlighting how small, immediate DIY interventions can substantially reduce long-term costs. Regular insulation and testing help prevent repeat incidents.