How to Remove Air From Water Pipes in House: Quick DIY Fixes
To remove air from water pipes in your house, follow these simple steps: First, turn off the main water supply if necessary. Next, open the highest faucet in your home fully to vent the system. Then, open the lowest faucets one by one, starting from the bottom and working your way up, allowing each to run until the sputtering stops. For appliances, run short rinse cycles, and loosen hose bibs to bleed out any trapped air. After purging the system, check for leaks and retighten any fittings. If sputtering continues, consult the full guide for further troubleshooting and targeted procedures.
Quick 3-Step Guide to Remove Air From Pipes
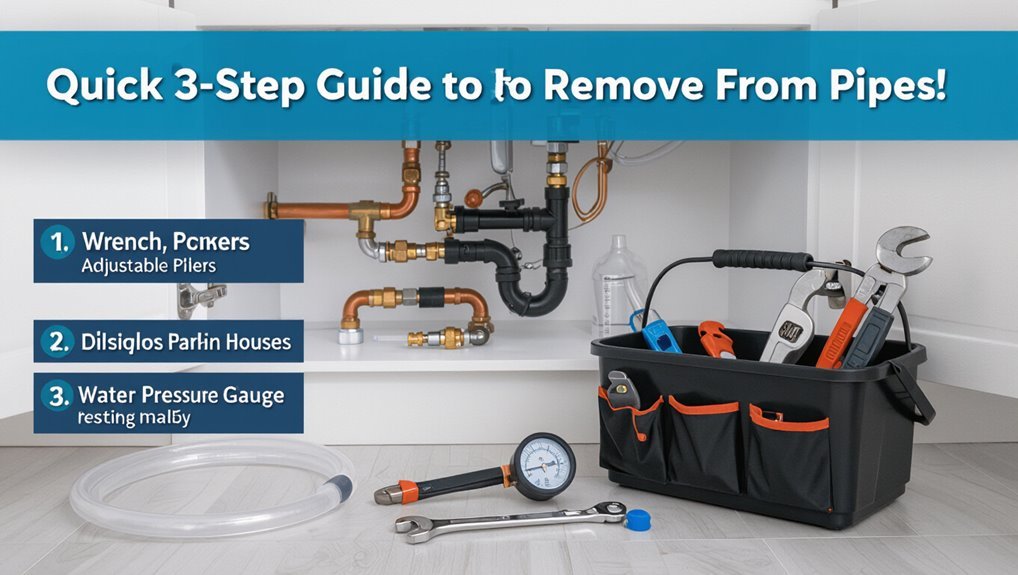
Begin by shutting off the main water supply and opening all faucets to relieve system pressure; this prepares the lines for controlled bleeding.
Next, locate the highest and lowest fixtures: close lower valves and open the highest outdoor or attic faucet to allow trapped air to escape as the system refills.
Restore the main supply slowly, observing each open tap until steady, air-free flow appears; close taps in sequence from highest to lowest to prevent reintroduction of air.
Finally, check fixtures and appliances for sputtering, run them briefly to purge remaining bubbles, and inspect for leaks before normal use.
Who This Guide Is For and What You’ll Learn
This guide is aimed at homeowners, renters, and small property managers facing sputtering taps or noisy plumbing caused by trapped air.
It outlines practical steps and basic troubleshooting to safely purge air from water pipes and restore normal flow.
Readers will learn which tools are needed, when to call a professional, and simple checks to prevent recurrence.
Who This Guide Helps
Who is this guide for and what will they learn: homeowners, renters, and maintenance workers seeking a straightforward method to remove air from residential water pipes will find practical, step-by-step instructions and troubleshooting tips here.
Meant readers include those with limited plumbing experience who want quick fixes, busy occupants needing efficient solutions, and property managers overseeing routine maintenance.
The guide focuses on common household situations and safe DIY techniques rather than advanced plumbing theory.
Visualizing typical scenarios:
- Dripping faucet after intermittent sputters.
- Shower alternating pressure.
- Basement hose bib with noisy flow.
- Whole-house system after repairs.
What You’ll Learn
For homeowners, renters, and maintenance staff, the guide outlines clear, practical steps to locate and eliminate air pockets in residential water lines, plus simple troubleshooting for common symptoms like sputtering faucets, uneven shower pressure, noisy hose bibs, and system-wide issues after repairs. Readers will learn how to isolate affected fixtures, perform controlled flushing sequences, and use shutoff valves and hose connections to purge trapped air safely.
Guidance covers when to bleed radiators, reset pressure tanks, and inspect for leaks or malfunctioning check valves. Safety tips, required tools, preventive measures, and indicators signaling a plumber’s intervention are also included.
Why Air Gets Into Household Water Pipes
Air can enter household water pipes through several common mechanisms: pressure changes in the supply line during pump start-up or shutdown, water main breaks or repairs that introduce air when lines are drained and refilled, loose fittings or open system vents, and trapped air pockets that migrate as flow patterns change.
- A sudden pump start creates a rushing column with voids like beads in a tube.
- Main repairs let air into emptied sections that refill unevenly.
- Leaky joints draw in air during brief pressure drops.
- High points in piping collect pockets that shift when faucets open, moving bubbles along lines.
How to Tell If Your Pipes Have Air (Common Symptoms)
Frequently, the presence of air in household pipes is revealed by distinct, easily observed symptoms: sputtering or spitting at faucets, intermittent surges of water pressure, loud hammering or knocking in the pipes, and noisy or inconsistent flow from fixtures like showerheads.
Additional signs include faucets that alternately gush and trickle, odd vibrations in exposed piping, and brief pauses before steady flow resumes.
Appliances like washing machines or dishwashers may cycle irregularly or alarm.
Visible bubbling in toilet tanks and sudden temperature changes at taps can indicate trapped air.
These symptoms help distinguish air from clogs or mechanical failures.
Safety First: When to Shut Off the Main Water Supply
When symptoms like sputtering faucets, loud knocking, or irregular appliance cycles appear, homeowners should also consider whether shutting off the main water supply is warranted to prevent damage. A timely shutoff limits flooding, protects appliances, and allows safe inspection. Signs that justify closure include persistent hammering, visible leaks after bleeding lines, or inability to isolate a problem to one fixture.
When planning a shutoff, note where the valve is, warn occupants, and drain remaining pressure by opening taps. Visualize stages to act calmly:
- Locate main valve and shut slowly.
- Open lowest and highest taps.
- Check appliances and hoses.
- Monitor for leaks.
Tools and Supplies You’ll Need
A concise list of basic tools and necessary safety gear helps guarantee the air removal process proceeds smoothly.
Tools typically include adjustable wrenches, pliers, tubing or hose, and a bucket for drained water.
Safety items such as gloves, eye protection, and a flashlight are recommended.
Basic Tools List
Several essential tools and supplies make removing air from water pipes efficient and safe. A concise kit helps identify and clear trapped air quickly.
A basic wrench set adapts to common valve and connector sizes. A reliable bucket and towels catch drips and protect surfaces. A flashlight illuminates dark access points and reveals sputtering flow. A simple pressure gauge checks system pressure before and after bleeding. A hose or tubing directs discharged water to drains without splashing. A screwdriver set and pliers assist panel access and small adjustments.
- Adjustable wrench
- Bucket and towels
- Flashlight
- Hose/tubing
Safety Gear Needed
Proper personal protective equipment reduces injury risk while bleeding air from water pipes.
Gloves resistant to water and punctures protect hands when operating valves and handling fittings.
Safety glasses shield eyes from splashes and debris during flushing.
Closed-toe, non-slip shoes prevent slips on wet floors.
A dust mask is advisable if disturbing insulation or old pipe residue.
Knee pads offer comfort when working near fixtures.
Hearing protection may be needed if using power tools.
High-visibility clothing helps in shared workspaces.
A first-aid kit should be available for minor cuts or abrasions.
Make certain gear fits and is in good condition.
Prep Checklist Before You Start Bleeding Pipes
Before opening valves, confirm that the water supply is isolated, the heating system is cooled to avoid scalding, and the main shutoff and pressure-relief points are identified; having a bucket, rags, and adjustable wrench ready prevents delays and water damage.
A brief prep rundown guarantees efficiency and safety. Check access to bleed screws, verify clear floor space, and have towels to catch drips.
Turn off electrical components near wet areas. Keep a flashlight and phone nearby for visibility and communication.
Visualize the procedure and rehearse steps mentally to limit surprises.
- Bucket and rags
- Adjustable wrench
- Flashlight
- Clear workspace
Remove Air From a Single Fixture (Quick Method)
First, other fixtures are shut off to prevent backflow and keep pressure steady.
Next, the affected valve is opened fully to give trapped air a clear exit.
Finally, cold water is run briefly until sputtering stops and flow returns to normal.
Turn Off Other Fixtures
Shut off every other water outlet in the house so the trapped air can be forced toward the single fixture being bled; this concentrates flow and speeds removal. The person guarantees minimal competing flow, isolating pressure and guiding bubbles to one point.
Visualize the process:
- Hall bathroom taps closed, silent pipes.
- Washing machine valve off, supply lines still.
- Garden hose and outdoor spigots shut tight.
- Shower diverters returned to rest.
With only the target fixture available, air pockets travel and exhaust quickly when the valve is opened. This simple isolation reduces time and uncertainty during bleeding.
Open Affected Valve
With all other outlets closed, the person opens the affected valve fully to let pressurized water push trapped air out through the open point. They watch for sputtering or a mixture of air and water, indicating pockets escaping.
Once flow steadies to a smooth, consistent stream without spitting, the valve is gradually reduced to normal use. If noise or pulsation persists, the procedure is repeated after a short pause to allow pressure equalization.
For threaded or cartridge fixtures, gentle operation prevents damage. The method isolates one fixture, offering a quick, controlled way to purge localized air without system-wide adjustments.
Run Cold Water Briefly
Occasionally a single fixture can be cleared of trapped air by running its cold tap briefly. The homeowner should open the cold faucet fully, listen for sputtering, and allow a steady stream until bubbles stop. This quick approach isolates one outlet without disturbing the whole system.
- Faucet opened fully
- Sputtering sounds present
- Steady clear stream achieved
- Air eliminated, normal flow restored
If noise persists after 30 seconds, close the tap and try again, or check adjacent fixtures for shared lines. Persistent issues may indicate a larger trapped-air pocket requiring system-wide purging or professional service.
Remove Air From All Fixtures, Room-by-Room
How should one proceed to purge air from every fixture efficiently? A systematic, room-by-room approach works best.
Begin in one area and open each cold tap fully, running briefly to expel trapped air until steady flow resumes. Move sequentially through bathrooms, kitchen, laundry, then outdoor spigots.
Flush toilets once or twice to clear lines to tanks. Operate shower valves and utility sinks similarly.
Note any sputtering or noise and repeat that fixture after finishing the circuit. Close taps, then check hot water sources afterward if separate vents exist.
Document any persistent issues for further diagnosis.
Start at the Highest Faucet (And Why)
Beginning at the highest faucet in the house guarantees trapped air naturally moves downward and out of the system. Technicians recommend this logical starting point to let gravity assist flow and prevent pockets from shifting unpredictably.
The procedure is simple: open the topmost tap, allow steady flow until sputtering stops, then proceed room by room descending. Visualize the process:
- Rooftop bathroom sink: the initial release point.
- Upper-floor shower: sustained flow clears larger pockets.
- Second-floor laundry tap: confirms downstream clearing.
- Main-level fixtures: observe steady, uninterrupted stream indicating success.
This sequence minimizes backflow and isolates remaining air for removal.
Finish at the Lowest Faucet (Proper Sequence)
After clearing the highest fixtures, the procedure concludes at the lowest faucet to draw remaining air downward and out of the lines. The person opens the lowest cold and hot taps fully after all upper outlets flow steadily.
Water entering from higher points forces trapped air toward the final outlet; steady full flow prevents pockets from reforming. Observe sputtering until a smooth, continuous stream appears, then close taps in reverse order if multiple fixtures were used.
Verify steady pressure at other fixtures. If intermittent air persists, repeat the sequence once. Completion is indicated by consistent flow and restored normal pressure throughout the system.
How to Use a Hose to Speed Purging
Attach a garden hose to the lowest outdoor spigot or a utility sink and run it to a safe drain point, so water and trapped air can discharge continuously without splashing. The homeowner opens the spigot fully and then opens upstairs faucets one at a time to push air down toward the hose outflow.
Observe steady, bubble-free flow from the hose before closing each faucet in reverse order. Visual cues speed the job and reduce time.
- Hissing stops.
- Smooth stream forms.
- No sputtering at fixtures.
- Hose discharge is constant.
Close and remove hose, test all fixtures.
Use a Temporary Hose Loop and Bucket for Stubborn Air
If a direct hose run to a drain doesn’t fully clear pockets of trapped air, a temporary hose loop and bucket can coax remaining bubbles from stubborn high points.
A short length of garden hose is formed into a gentle loop and lowered so its open end sits below the waterline in a bucket. The other end attaches to the affected faucet or spigot. Opening the faucet forces water through the loop, creating a low-pressure path that draws air out into the bucket rather than back into lines.
After steady flow with no sputtering, remove the hose, restore fittings, and test fixtures for consistent flow.
Remove Air From a Toilet (Step-by-Step)
To remove trapped air from a toilet, first shut off the water supply at the valve behind the bowl.
Next, flush to drain the tank and let the residual water exit, which helps purge air pockets.
Finally, reopen the supply slowly to allow the tank to refill and verify a steady, bubble-free flow.
Turn Off Water Supply
Locate the shutoff valve behind the toilet and turn it clockwise until it stops to stop water flow; this isolates the tank so air can be bled without new water entering the system.
Once closed, the person checks the tank for residual water level and listens for hissing that indicates trapped air.
They prepare a small bucket and towel in case of drips.
If the valve is stiff, gentle penetrating oil and slow pressure avoid damage.
After isolation, the following visual cues guide the next steps:
- Valve behind base, hand-graspable
- Tank water level steady
- No inlet hissing
- Minor drip contained
Flush And Refill
With the shutoff valve secured, the user flushes the toilet once to push remaining air through the trap and down the drain, then holds the tank lever down until the bowl evacuates and water flow into the tank begins.
They release the lever briefly, then repeat holding it down to allow a full refill cycle without intermittent air pockets. Observing steady, uninterrupted water entering the tank indicates air has cleared from the toilet feed.
If sputtering or slow refill persists, the shutoff can be briefly reopened and closed again to purge lines. Finally, restore normal supply and confirm normal flush performance.
Remove Air From Showers and Tubs
Bleeding air from showers and tubs restores steady water flow and prevents sputtering or cold bursts during use. The homeowner should turn on both hot and cold taps fully, letting water run until steady. If multiple fixtures are involved, start nearest the main supply and work outward.
Check for consistent pressure and uninterrupted streams; any gurgling indicates remaining air. Tighten loose fittings and inspect visible supply lines for trapped pockets. If air persists, briefly open the shower diverter or tub spout to purge trapped pockets.
Finally, document which fixtures needed attention for future maintenance.
- Open taps fully
- Start near main
- Watch for gurgle
- Purge spout
Purge Washing Machine and Dishwasher Lines
After purging showers and tubs, attention should shift to washing machine and dishwasher supply lines, where trapped air can cause sputtering, loud bangs, or irregular filling.
Shut off appliances and isolate their supply valves. Place towels and a shallow pan beneath connections. Slowly open the hot and cold supply valves to each appliance one at a time, allowing water to flow until steady and bubble-free.
Operate a short wash or rinse cycle to flush internal hoses. Check fittings for leaks and retighten if necessary.
Restore normal operation and observe the first few cycles to confirm air removal and proper fill behavior.
Clear Outdoor Spigots and Hose Bibs
Inspect outdoor spigots and hose bibs for trapped air, as it can cause noisy flow and erratic pressure when faucets are first used.
The homeowner opens the spigot fully, listens for sputtering, then closes it to let pressure normalize.
If air persists, loosen the connection at the hose bib to allow trapped pockets to escape, then retighten.
In winterized systems, confirm vacuum breakers are clear.
Visualize these simple steps:
- Open spigot fully and observe sputter.
- Close spigot briefly to let pressure settle.
- Loosen hose connection to bleed air.
- Check vacuum breaker for blockage and clear.
When to Use the Water Heater Drain to Help Purge
A water heater drain can be used to flush trapped air when normal purging from fixtures is ineffective or when sediment buildup restricts flow.
The valve should be opened slowly with a hose attached, allowing water and air to exit while monitoring pressure and flow.
Before opening, power or gas to the heater should be turned off and cold-water inlet shut to prevent scalding and protect the unit.
When To Use Heater Drain
When the bleeding procedure requires flushing the hot side of the system or water collects near the heater, the water heater drain provides a direct, controlled outlet to remove trapped air and sediment.
It is used when hot fixtures sputter after main purging, when pockets form around the heater, or when sediment buildup worsens aeration.
The drain lets pressure release and concentrated flushing without opening multiple fixtures.
Use it as a targeted measure after standard bleeding fails or to clear the heater zone before repairs.
Visualize the action:
- A steady stream clearing a trapped pocket.
- Sediment flushing out.
- Air bubbles escaping.
- Clear, continuous hot flow.
How To Open Valve
Turn the water heater drain valve counterclockwise slowly to open it just enough for a controlled flow; this allows trapped air and sediment to escape without causing a sudden surge.
A hose attached to the drain directs water to a floor drain or bucket; make sure connections are secure.
Open a nearby hot faucet to provide an outlet and monitor flow for steady water mixed with debris rather than sputtering.
If flow remains intermittent, slightly widen the valve until consistent.
Close the valve gradually when purging finishes to avoid pressure spikes.
Recheck faucets for normal operation and any remaining air.
Safety Precautions First
Always prioritize safety before using the water heater drain to help purge air from pipes: verify the heater is powered off (electricity or gas), the cold-water supply is shut, and pressure has been relieved to prevent scalding, electrical hazards, or tank damage.
A detached observer notes precautions: wear gloves and eye protection, have a bucket and hose ready, and confirm a working pressure relief valve.
Follow the numbered visualization below to prepare calmly and deliberately:
- Power switch off, gas pilot extinguished.
- Cold-water valve closed.
- Relief valve opened briefly to vent pressure.
- Drain hose secured to a safe disposal point.
Purge Air From Hot-Water Systems Safely
Bleed trapped air from a hot-water heating system methodically to prevent noisy pipes, uneven heat, and pump damage. Begin by shutting off the boiler and allowing the system to cool slightly.
Locate manual bleed valves on radiators or baseboard units and use a radiator key or screwdriver to open each valve slowly until water flows steadily, then close.
For systems with automatic air vents or a main purge valve, follow manufacturer guidance to vent at high points and at the pump.
Monitor pressure and top up the fill valve if needed. Restart the boiler, check for leaks, and confirm consistent circulation and quiet operation.
Private Wells: Steps That Differ From City Water
Private well systems require different procedures than municipal supplies when air appears in the lines. Technicians typically begin by checking well water pressure and inspecting the pump and pressure tank for leaks or failed components.
Specific air elimination steps—such as repressurizing the tank, bleeding air from system fittings, and checking for a waterlogged bladder—follow based on those initial findings.
Well Water Pressure Checks
How should homeowners approach pressure checks for a well system differently than for a municipal supply? A well’s pressure behavior reflects on-site equipment and water table conditions, so checks target system response rather than municipal consistency. Inspect gauges, note cut-in/cut-out cycles, and observe recovery after demand. Verify static pressure, running pressure, and any rapid fluctuations that indicate trapped air pockets or control issues.
- Check gauge at a tap for steady static reading.
- Open multiple fixtures to observe pressure drop and recovery.
- Record cycle frequency during normal use.
- Listen for banging or short cycling as signs of air.
Pump And Pressure Tank
Well-pump and pressure-tank behavior on a private well requires attention to equipment-specific dynamics rather than the steady flow assumptions of city systems.
The pump cycle, tank air charge and bladder condition influence air entrainment and intermittent surges.
A failing bladder or low precharge permits rapid cycling, drawing air into lines and causing sputtering faucets.
Inspecting tank pressure with a gauge (pump off, tank drawn down) and comparing to cut-in settings identifies mismatches.
Tightening fittings, replacing damaged bladders, and correcting precharge to manufacturer specifications stabilizes cycles.
Professional service is recommended for pressure switch or pump repairs beyond basic checks.
Air Elimination Procedures
After addressing pump cycling and tank air charge issues, the steps for removing air from a private well system differ from municipal procedures because the source and behavior of entrained air are equipment-dependent.
The homeowner inspects wellhead fittings, pressure switch, and tank bladder for leaks or loose connections.
Purging and controlled bleeding follow, plus pump-run checks and flow tests to verify elimination.
Typical sequence:
- Close isolation valve, open a downstream hose bib to purge.
- Run pump briefly, watch for sputtering and steady flow.
- Cycle several purge-and-rest intervals until air clears.
- Recheck pressure and tighten fittings, replace faulty parts.
Diagnose Persistent Banging (Water Hammer) After Purging
Frequently, banging noises persist even after air has been purged from the lines, indicating the issue may not be fully resolved; this paragraph outlines how to narrow causes such as trapped air pockets, loose pipes, failing check valves, or pressure-surge events.
Inspect visible piping for movement and secure loose straps or hangers. Listen near fittings and appliances to localize the sound. Isolate branches by shutting valves to determine affected sections. Test check valves and fast-acting fixtures for stiffer closure or backflow. If banging remains localized to short runs or dead-ends, bleed those low spots repeatedly to evacuate trapped pockets.
Check and Adjust Water Pressure After Purging Air
Verify system pressure immediately after purging air, since residual high or low pressure can recreate noise, allow air ingress, or stress fixtures and appliances.
Measure at a service port or pressure gauge, comparing to recommended municipal or pump settings.
If readings exceed safe limits, reduce with a pressure-reducing valve; if too low, check pump pressure settings or increase supply.
Re-check after adjustments and run taps to guarantee steady, bubble-free flow.
Monitor for a few hours to confirm stability.
- Pressure gauge reading steady at target.
- No sputtering at faucets.
- Valves set and locked.
- No recurring pressure spikes.
When Trapped Air Indicates a Leak or Failed Valve
When persistent pockets of air reappear despite proper bleeding and pressure adjustment, they often signal a leak or a failing valve elsewhere in the system.
In such cases, recurring gurgling, sputtering faucets, or localized pressure loss suggest air entry points. The homeowner should note where symptoms concentrate and inspect visible fittings, hose bibs, and appliance connections for wetness, corrosion, or loose joints.
Check valves, isolation valves, and pressure-reducing valves can harbor internal faults that admit air under varying loads. If visual inspection is inconclusive, document occurrences and consult a plumber; professional testing or component replacement may be required to stop repeated air intrusion.
How to Find and Fix a Leak That Keeps Introducing Air
If recurring air pockets point toward a leak or failing valve, the next step is a systematic search to locate the exact entry point.
Inspect visible pipes for wet spots, corrosion, or dripping joints.
Listen for hissing near fittings and feel for cold, damp areas with bare hands.
Use a flashlight and mirror for behind fixtures; apply soapy water to suspect joints and watch for bubbles.
- Trace from main shutoff to fixtures visually.
- Check under sinks and behind appliances.
- Test pressure while isolating sections.
- Tighten fittings or replace damaged sections; retest.
Check and Replace Faulty Shutoffs and Check Valves
The condition of shutoff valves and check valves directly affects air entry and backflow in a plumbing system.
Inspectors should verify smooth shutoff operation and listen for signs of internal wear or leaks.
Faulty check valves must be tested under pressure and replaced promptly to restore one-way flow.
Inspect Shutoff Valve Operation
Why does a stubborn air pocket often persist after bleeding a system? A trapped pocket can result from partially closed or seizing shutoff valves that restrict flow paths. The inspector visually checks valve position, rotates handles to confirm smooth travel, and notes leaks or corrosion. If a valve feels gritty or stops before full travel, it may not seat or open fully.
Action steps evoke clear images:
- Finger-turn handle, feel resistance.
- Watch downstream flow during gradual opening.
- Inspect stem packing for drips.
- Note mineral buildup and rust.
Document findings; replace or lubricate faulty shutoffs promptly.
Test And Replace Check Valves
Following inspection of shutoff valves, attention turns to check valves, which often trap air when they fail to seal or swing freely.
The technician isolates the circuit, relieves pressure, and removes the check valve for inspection.
Examine the seat, disk, and spring for debris, corrosion, or wear.
Clean with a soft brush and replace damaged seals; reinstall if components meet specifications.
If sticking, cracking, or persistent leakage exists, fit a new check valve sized and rated for the system.
After reinstallation, repressurize, cycle water to purge trapped air, and verify one-way operation with pressure and flow tests.
Spot and Service a Failing Pressure Tank (Well Homes)
Inspecting a well home’s pressure tank can reveal telltale signs of failure—rapid cycling, waterlogged behavior, or rusty fittings—that warrant immediate attention. A homeowner should observe symptoms, shut power, and relieve pressure before service. Check the tank’s air charge with a tire gauge at the Schrader valve; compare to cut-in pressure minus 2 psi. Drain or add air via an air compressor to restore proper precharge. If the bladder is ruptured or corrosion compromises the shell, prepare for replacement.
- Hissing valve,
- Frequent pump starts,
- Spongy faucets,
- Visible rust.
When to Test for Corrosion or Mineral Buildup
After addressing pressure-tank issues like a ruptured bladder or improper air charge, attention should turn to the supply lines and fittings where corrosion or mineral buildup can quietly impair system performance.
Testing is warranted when flow diminishes, faucets sputter, or pressure cycles increase without obvious tank faults.
Inspect visible fittings for discoloration, pitting, or white crust; check aerators and showerheads for reduced output.
Use simple tests: measure pressure at multiple points and compare to baseline, or run vinegar on a suspect fitting to see if deposits dissolve.
Prioritize older metal piping, homes with hard water, and any recurring air-related symptoms.
Prevent Air Entering Pipes During Home Repairs
Before beginning any repair work, the homeowner should shut off the main water valve to isolate the system and prevent air from being drawn into the pipes.
After completing repairs, a controlled flush of fixtures followed by bleeding low points and high taps will expel trapped air. These steps minimize interruptions and reduce the need for later air removal procedures.
Shut Off Main Valve
Turn the main shutoff valve to stop water flow and prevent air from entering the plumbing system during repairs. One person locates the valve—often near the meter or where the line enters the house—and confirms the type: wheel, lever, or ball.
Once closed, downstream faucets are opened briefly to relieve residual pressure, ensuring trapped air cannot travel into exposed pipes. The valve position is marked and documented for re-opening.
After repairs, the valve is reopened slowly to avoid water hammer. If the valve sticks or leaks, a professional should be called to avoid introducing contaminants or air.
- wheel valve
- lever handle
- ball valve
- valve location
Flush And Bleed
Begin by isolating the affected section and opening downstream fixtures to flush trapped air and residual water from the lines.
The technician then closes isolation valves, slightly opens a drain or bleed valve at the lowest point, and allows flow until water runs steady without sputtering.
Repeat at higher fixtures to displace remaining pockets.
After completing repairs, slowly reopen main valves to avoid pressure surges, checking for leaks and listening for air noise.
If persistent gurgling occurs, repeat the sequence or use an air-release valve.
Document valve positions and test fixtures to confirm normal, continuous flow before leaving the site.
Seasonal Causes and Fixes (Winter Work, Thawing, Etc.)
During winter months, air pockets in water lines often form as temperatures drop, pipe materials contract, and intermittent heating causes pressure changes that draw air into the system. Seasonal fixes focus on thawing, controlled warming, and careful venting. Technicians recommend isolating frozen sections, slowly applying heat, and relieving trapped air after flow returns. Visual cues—gurgling, sputtering faucets—guide actions.
Example steps evoke attention:
- Heat exposed pipes gradually with warm air or heating tape.
- Open highest and lowest fixtures to create a clear flow path.
- Bleed system by running faucets until steady water appears.
- Inspect for cracks or joints stressed by freeze cycles.
Tips to Keep Your Plumbing Air-Free Long Term
Maintain consistent pressure and prevent air ingress by combining routine inspection, strategic upgrades, and simple user habits.
Homeowners should schedule periodic checks for leaks, loose fittings, and corroded valves that admit air.
Installing or servicing pressure regulators, expansion tanks, and air chambers reduces cycling and entrapment.
Flushing systems annually clears sediments that trap bubbles.
Encourage steady water use patterns and avoid rapid shutoffs that draw air into lines.
Insulating exposed pipes prevents thermal contraction-related pockets.
Keep shutoff valves exercised to maintain seals.
When replacing fixtures, choose designs with integrated check valves to discourage backflow and air entry.
Common DIY Mistakes When Removing Air From Pipes
After outlining long-term steps to keep systems air-free, attention turns to common DIY errors that actually worsen trapped air or damage plumbing. A detached overview highlights frequent missteps and consequences.
- Forcing fixtures open: sudden full-valve turns cause pressure surges and pipe stress.
- Skipping main shutoff: bleeding without isolating can flood zones and scatter debris.
- Using excessive heat: torching fittings risks seals, solder joints, and plastic deformation.
- Ignoring trapped pockets: bleeding only one fixture leaves air elsewhere, creating noise and uneven flow.
Each mistake prolongs problems; cautious, methodical actions prevent repeat interventions.
Quick Post-Bleed Checklist to Confirm Success
Once bleeding is complete, a concise checklist helps verify that air removal succeeded and that no new issues were introduced.
Confirm steady, sputter-free flow at all fixtures; test hot and cold taps.
Listen for persistent knocking or whistling in pipes during varied flow rates.
Inspect visible fittings, valves, and hose bibs for leaks or dampness.
Check pressure gauges (if present) return to normal range and remain stable.
Run an appliance cycle (washer or dishwasher) to guarantee consistent supply.
Reopen any isolation valves fully and retighten packing nuts if needed.
Note any anomalies for follow-up monitoring over 24 hours.
When to Call a Plumber: Red Flags and Thresholds
Call a plumber when signs indicate a problem beyond routine bleeding or homeowner fixes. Persistent sputtering, sudden pressure loss, repeated air buildup after bleeding, or water discoloration suggest underlying issues requiring professional diagnosis.
Visual or audible clues may escalate concern.
- Constant sputtering and uneven flow despite multiple bleeds.
- Rapid pressure drops when multiple fixtures run.
- Recurring air pockets within days of corrective action.
- Rusty, cloudy, or foul-smelling water appearing with air events.
A licensed plumber can locate hidden leaks, failed check valves, or problematic mains connections and recommend targeted repairs rather than temporary DIY patches.
Time and Cost Estimate: DIY vs. Pro
A comparison of time and cost helps determine whether a homeowner should attempt air removal or hire a plumber.
Typical DIY flushing and bleeding can take 30–90 minutes and cost little beyond basic tools, while professional service often runs from $75 to $200 plus parts and can be completed in under an hour.
Weighing labor, confidence with plumbing tasks, and potential diagnostic fees clarifies the most economical choice.
DIY Time And Cost
Estimating time and cost for removing air from water pipes requires comparing homeowner effort against hiring a professional: a DIY flush and bleed of a small residential system typically takes 30–90 minutes and costs under $20 for basic supplies, while complex systems or work behind walls can demand several hours and parts, raising expenses to $50–200; a licensed plumber generally completes similar jobs in 1–2 hours but brings labor charges of $75–200 and potential trip fees, plus higher costs if repairs or diagnostic testing are needed.
- Quick sink bleed: 15–30 minutes.
- Whole-house flush: 45–90 minutes.
- Parts (valves, hoses): $10–$60.
- Unexpected repairs: $50–$200.
Hiring A Plumber Cost
Hiring a plumber introduces predictable costs and timelines compared with DIY attempts: most residential air-removal jobs take a licensed professional 1–2 hours, with standard service calls running $75–200 for labor plus any trip fee, while more complex diagnostics or in-wall access can push total bills into the $200–$500 range once parts and additional labor are included. A pro offers rapid diagnosis, guaranteed work, and safer handling of pressurized lines. Homeowners should weigh time saved versus expense; simple bleeding often remains DIY-cheap, while persistent noises or hidden leaks justify professional rates and warranty-backed repairs.
| Service Type | Typical Time | Typical Cost |
|---|---|---|
| Simple bleed | 0.5–1 hr | $75–$150 |
| Diagnostic | 1–2 hrs | $100–$250 |
| Leak repair | 1–3 hrs | $150–$500 |
| Replacement | 2–6 hrs | $300+ |
Troubleshooting Flowchart: Next Steps for Stubborn Air
When stubborn air persists after the basic bleeding steps, the troubleshooting flowchart guides a systematic progression of checks and corrective actions, prioritizing safety and isolation of variables.
It directs attention to likely causes, isolating sections, and escalating interventions in a logical sequence to restore steady flow.
- Inspect supply: confirm main shutoff, meter, and pressure regulator for faults.
- Isolate zones: close valves to divide system, test sections individually.
- Check appliances: verify closed faucets, functioning check valves, and water heater vents.
- Escalate: attach hose for forced purge, consider vacuum or professional diagnosis if bubbles continue.
Conclusion
Air trapped in household water lines is usually fixable with simple bleeding steps, basic checks, and sensible safety precautions. Homeowners gain smoother flow and quieter pipes without specialist tools, but persistent sputtering or repeated air entry can signal bigger faults. When should a DIYer persist and when should they call a pro? If isolated fixes fail, leaks continue, or pressure remains erratic, a licensed plumber should inspect the system to prevent damage and restore reliable service.