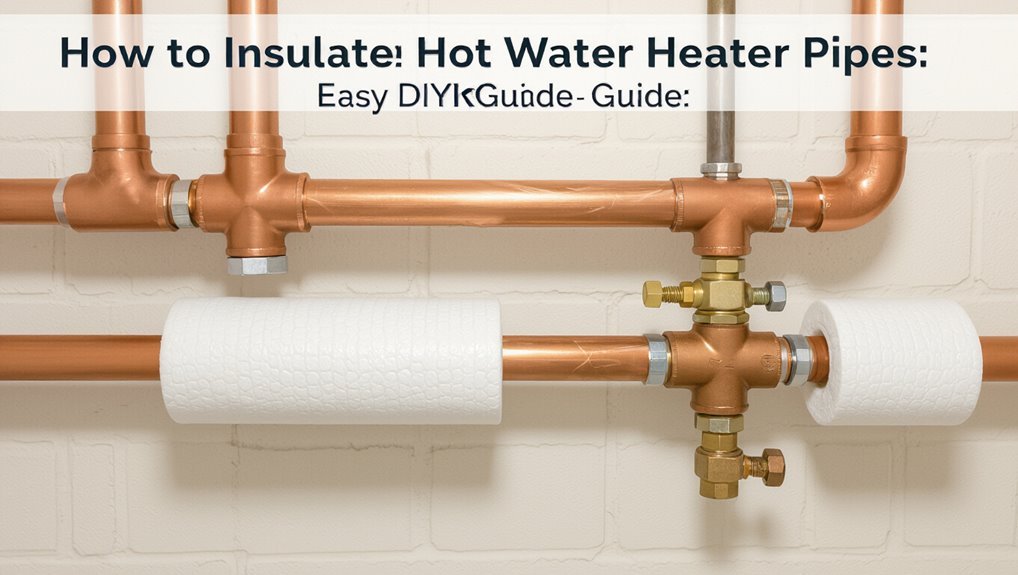
How to Insulate Hot Water Heater Pipes: Easy DIY Guide
Insulating hot water heater pipes is an effective DIY project that reduces heat loss and improves the speed of hot water delivery. To begin, turn off the water supply and power to the heater, relieve any pressure, and inspect the pipes and valves. For straight sections, use pre-slit closed-cell foam sleeves, while fiberglass or elastomeric wraps are ideal for elbows, unions, or outdoor lines. Secure the seams with foil or waterproof tape, ensure the temperature and pressure (T&P) outlet remains exposed, and allow access for future maintenance. Follow the step-by-step instructions for precise sizing, cutting, and sealing techniques to complete the insulation.
Quick How-To: Insulate Hot-Water Heater Pipes
Begin by shutting off the water supply and the heater’s power source, then drain a small amount of water from the hot outlet to relieve pressure.
The technician measures pipe lengths, selects foam or fiberglass sleeves sized to pipe diameter, and cuts sections to fit.
For foam, split along the seam and push onto pipes; for fiberglass, wrap with vapor barrier.
Secure joints with waterproof tape or zip ties, overlapping seams by an inch.
Insulate elbows and valves with preformed covers or cut pieces.
Restore water and power, check for leaks, and adjust insulation so it fits snugly without compressing the material.
Why Pipe Insulation Saves Energy and Prevents Burns
Insulating hot water heater pipes reduces heat loss by keeping water at the desired temperature as it travels from the tank, which lowers energy use and shortens recovery time.
This retained heat leads to fewer heating cycles and measurable savings on utility bills.
Insulation also lowers pipe surface temperature, reducing the risk of scalding for anyone who may touch exposed pipes.
Reduce Heat Loss
By surrounding hot water pipes with a continuous thermal barrier, heat transfer to the surrounding air is markedly reduced, which lowers standby energy losses and shortens the time it takes for hot water to reach fixtures.
Insulation maintains higher fluid temperature along runs, cutting energy wasted by reheating and decreasing fuel or electricity use. Thermal wraps also stabilize temperatures in mixed networks, improving system responsiveness. Properly sized insulation minimizes convective and radiative loss without impeding service access.
Performance gains compound over time through reduced cycles and lower bills, making insulation a cost-effective retrofit for any hot water system.
- Retains heat along pipe length
- Reduces standby heat loss
- Shortens wait time for hot water
- Lowers heating system cycling
- Saves energy and operating costs
Prevent Scalding Accidents
How can a simple layer of insulation protect both energy and people? A sleeved pipe reduces surface temperature, lowering burn risk and retaining heat en route. This dual benefit cuts standby losses while keeping exposed runs safe, especially near sinks, bathtubs, and children’s areas. Properly fitted insulation minimizes temperature variation, so thermostatic mixing valves perform better and accidental scalds become less likely. Regular inspection prevents gaps that compromise protection. The measure is inexpensive, quick to install, and complements other safety devices to form a layered defense against burns and wasted energy.
| Benefit | Effect |
|---|---|
| Safety | Lower surface temps |
| Efficiency | Reduced heat loss |
Identify Which Heater Pipes to Insulate
To determine which hot water heater pipes need insulation, examine the accessible length of both the hot and cold supply lines, focusing first on sections closest to the tank and any exposed runs through unheated spaces.
The inspector should note pipe material, visible heat loss, and proximity to living areas.
Prioritize short exposed segments near the tank, long runs in crawlspaces, and any cold-water inlet that may sweat.
Measure diameters and lengths for correct insulation sizing and mark sections obstructed by valves or fittings that need removable insulation.
- Short exposed sections near the heater
- Long runs through unheated spaces
- Cold inlet lines that may sweat
- Pipes passing through uninsulated walls
- Areas around valves and fittings
Types of Pipe Insulation (Foam, Fiberglass, Elastomeric)
When selecting insulation for hot water heater pipes, three common types—closed-cell foam, fiberglass, and elastomeric rubber—cover the majority of residential needs, each offering distinct thermal performance, moisture resistance, and installation characteristics.
Closed-cell foam provides simple slip-on sleeves for quick DIY fitting, good for short runs and limited exposure.
Fiberglass is suited where higher temperature tolerance and shaping around irregular fittings are required, often needing vapor barrier jacketing.
Elastomeric rubber combines flexibility, durable moisture resistance, and low thermal conductivity, working well in humid spaces or outdoor-exposed lines.
Cost, pipe temperature, and ambient moisture typically guide the selection.
Foam Sleeves vs. Fiberglass Wrap: Which to Choose?
Foam sleeves offer easy, tool-free installation and good thermal performance for accessible straight runs and indoor pipes.
Fiberglass wrap suits higher-temperature sections, irregular shapes, and installations requiring a tighter fit or flame-resistant material.
Comparing their benefits and typical uses helps determine the best choice for specific heater pipe conditions.
Foam Sleeves Benefits
In comparing pipe insulation options, foam sleeves stand out for their ease of installation and consistent thermal performance.
Their closed-cell structure resists moisture and reduces heat loss along short pipe runs, offering a practical DIY solution that balances cost and effectiveness.
Ideal for accessible home piping, they require minimal tools and provide durable abrasion resistance without elaborate sealing.
- Quick, tool-free installation for threaded or slip-on runs
- Closed-cell foam limits condensation and moisture infiltration
- Uniform R-value along the sleeve length for predictable savings
- Lightweight, easy to cut for tight spaces
- Low cost with long-lasting mechanical resilience
Fiberglass Wrap Uses
Although less convenient to install than slip-on foam, fiberglass wrap excels on irregular, hard-to-fit sections and where higher-temperature resistance is required.
It conforms to valves, elbows, unions, and threaded connections, offering continuous coverage where preformed sleeves cannot.
Fiberglass tolerates higher temperatures and resists compression, preserving insulating value in tight spots.
It pairs well with foil or vapor barriers to reduce moisture penetration and improve reflectivity.
Installation requires gloves and proper cutting; seams should be overlapped and secured with high-temperature tape or wire.
For exposed, complex, or high-heat applications, fiberglass wrap often outperforms foam sleeves despite added labor.
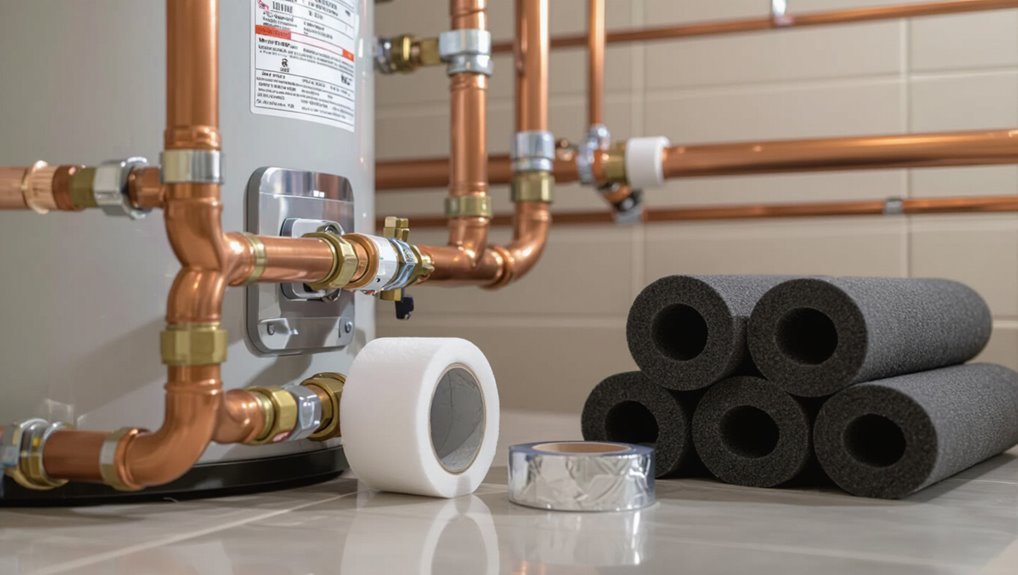
Tools and Materials You’ll Need
What tools and materials are required to insulate hot water heater pipes efficiently? The task requires a small set of reliable items to guarantee safe, effective insulation.
Quality materials and basic tools reduce heat loss and simplify installation. Protective gear is advised when handling fiberglass or adhesives. Select materials compatible with pipe temperature and local codes. Gather everything before starting to streamline the process and avoid interruptions.
Recommended essentials include:
- Pre-slit foam pipe insulation (appropriate diameter)
- Fiberglass wrap or pipe jacket
- Pipe insulation tape or foil tape
- Utility knife and scissors
- Work gloves and safety glasses
Measure Pipes for Correct Insulation Size
Before cutting insulation, the installer measures each pipe’s outer diameter to select the matching sleeve size.
They then record the run length and note bends or turns to guarantee continuous coverage.
Finally, allowances are added for valves and fittings so custom pieces or extra insulation can be prepared.
Pipe Diameter Measurement
Measure the pipe diameter accurately to choose insulation that fits snugly and performs as meant.
The person measures outside diameter (OD) with calipers or a tape measure, or finds nominal pipe size stamped on the pipe. For plastic and copper, OD differs from nominal size; consult a size chart if uncertain. Round or oval pipes need averaging.
Record each run’s diameter before buying insulation; choose slightly larger sizes if insulation is compressed. Proper fit minimizes heat loss and prevents condensation.
- Use calipers for precision
- Note material type
- Compare to manufacturer charts
- Round measurements twice
- Label measurements immediately
Length And Turns
When preparing to insulate, measure each pipe run from fitting to fitting, noting total linear length and every elbow, tee, and valve encountered; include short stub-outs and offsets so purchased insulation covers the entire run without gaps.
Record each turn type and count; tight 90s and long sweeping bends require more length than straight sections.
Add allowance for insulation seams and overlaps, and mark repeating patterns to simplify material calculation.
Use a tape measure along the pipe centerline, following curves.
Round up measurements to the nearest convenient increment to avoid shortage.
Compile measurements before buying insulation to guarantee accurate coverage.
Allow For Fittings
Once pipe runs and turns are logged, attention must shift to fittings—elbows, tees, unions, valves and flanges—that change the pipe diameter or create gaps if ignored.
Measure each fitting diameter and overall length, noting insulation type (split sleeve, tape, or pre-formed).
Select insulation with a matching ID or use adjustable wraps for irregular shapes.
Allow extra length for overlaps and secure with appropriate tape or clamps.
Document fittings on the layout to order correct sizes and quantities, reducing on-site adjustments and thermal losses.
- Measure diameter and length precisely
- Note fitting type and material
- Choose compatible insulation form
- Add overlap allowance
- Record for ordering
Choose Insulation Thickness for Hot-Water Lines
Selecting the correct insulation thickness for hot-water lines balances heat retention, pipe diameter, and cost: thicker insulation reduces standby heat loss and lowers energy use, but returns diminish beyond certain thicknesses and space or fitting constraints may limit options.
Common recommendations match thickness to pipe temperature and ambient conditions; for typical residential 120–140°F lines, 1/2″ to 1″ foam is often sufficient, while older systems or higher temperatures may benefit from 1″–1.5″.
Measure pipe diameter before buying, choose a product with appropriate thermal resistance (R-value), and prioritize continuous coverage along runs to maximize effectiveness.
Cut Foam and Fiberglass to Fit Valves and Fittings
Around valves, unions, and other fittings, insulation must be cut and shaped to maintain continuous coverage without interfering with operation or access.
The installer measures each fitting, transfers shapes onto foam or fiberglass, and uses a sharp knife or scissors for clean cuts.
Overlaps and sealed seams preserve thermal performance; removable sections allow future adjustments.
Small slits and tabs accommodate handles and packing nuts.
Edges are finished with foil tape or wire ties to keep material secure and neat.
- Measure twice, cut once for accurate fit
- Trim slowly to avoid gaps
- Leave removable panels for service
- Overlap seams slightly
- Secure with tape or ties
Turn Off and Drain Pipes Safely Before You Start
Before any insulation work begins, the water supply to the heater and its branch lines must be shut off and the pipes drained to prevent burns and water damage.
The technician first turns off the cold-water inlet and the heater’s power source—electrical breaker or gas control—then opens a nearby hot faucet to relieve pressure.
A hose attached to the drain valve directs water to a floor drain or bucket; internal tank drainage is not required for pipe insulation unless specified.
After draining, the system is checked for residual hot water and pressure before proceeding.
Caps and tags mark shutoff valves.
Install Foam-Sleeve Insulation Step-by-Step
Begin by measuring the exposed hot and cold water runs from the heater to the first major branch or valve to determine how many foam sleeves and what lengths are required; use a tape measure and add a small allowance for overlap at joints.
Next, cut foam sleeves to length with a utility knife, opening the pre-slit seam.
Fit sleeves snugly over pipes, aligning seams away from heat sources.
Secure seams with aluminum foil tape or cable ties, keeping insulation continuous.
Inspect fittings and valves, cutting small sections to fit tightly around obstacles.
Finish by checking for gaps and smooth seams.
- Measure runs and plan materials
- Cut to fit precisely
- Slip sleeves over pipes
- Secure seams and joints
- Inspect for gaps
Wrap Fiberglass Insulation Step-by-Step
After fitting foam sleeves on straight runs, attention shifts to areas where pipes, valves, and irregular shapes require a more conforming material: fiberglass insulation wrapped in foil or kraft facing. The installer measures each irregular section, cuts a strip slightly longer than the pipe segment, and wraps tightly with facing outward. Staggered seams overlap by an inch and are pressed flat. Secure with foil tape or stainless steel bands, avoiding compression of the fiberglass. Finish by smoothing the facing to shed moisture. Periodic inspection guarantees integrity and replacement if facing tears or insulation settles.
| Task | Tip |
|---|---|
| Measure | Add extra length |
| Wrap | Facing outward |
| Secure | Tape or bands |
Seal Hot-Water Pipe Joints, Elbows, and Tees
Before insulating, measure and mark each joint, elbow, and tee to guarantee properly sized coverage.
Cut and fit insulation pieces to closely wrap fittings, leaving minimal gaps around bends.
Secure seams and ends with appropriate tape or sealant to maintain a continuous thermal barrier.
Measure And Mark
Measure the run of hot-water piping and mark locations of joints, elbows, and tees so insulation fits without gaps. Attention to spacing prevents cold spots and reduces trimming later. Use a tape measure and pencil or chalk; note pipe diameter and any offsets. Record measurements on a simple sketch indicating orientation and nearby obstructions. Double-check lengths to nearest 1/4 inch, accounting for overlapping insulation seams. Clear markings speed installation and help select appropriate pre-cut sections.
- Measure from valve to valve and note centers
- Mark each elbow pivot and tee branch
- Label pipe diameter at intervals
- Indicate wall or floor penetrations
- Verify measurements twice
Insulate Around Fittings
When working around joints, elbows, and tees, snug, continuous coverage is essential to prevent heat loss and condensation at the most vulnerable points.
Fittings require shaped insulation: pre-formed elbow pieces fit bends, split foam wraps curve around tees, and short straight sections bridge gaps. Cut pieces to match geometry, leaving minimal seams.
Overlap seams slightly and orient them away from airflow. For metal fittings, use thin adhesive-backed foam or rubber to avoid galvanic contact.
Make certain insulation fully covers threaded or soldered connections without compressing them. Trim excess tightly and inspect for any exposed metal before finishing.
Secure And Seal
Having shaped and fitted insulation around joints, attention turns to securing and sealing those assemblies to prevent moisture intrusion and heat loss at seams and connections.
The installer checks fit, trims excess, and aligns seams before fastening. Appropriate tapes and sealants are chosen for temperature and compatibility. Fasteners are applied sparingly to avoid compressing insulation. Seals are continuous around elbows and tees, with overlap at ends and around valves.
Final inspection verifies no gaps, movement, or exposed seams; corrective measures are taken where needed. Properly secured and sealed joints maintain efficiency and extend insulation life.
- Verify fit and alignment
- Trim excess cleanly
- Use temperature-rated sealant/tape
- Fasten without compressing
- Inspect and correct gaps
Insulate Flexible Hoses and Braided Supply Lines
For flexible hoses and braided supply lines, insulating reduces heat loss and limits condensation that can corrode fittings and shorten component life.
These lines often lack rigid pipe insulation fit, so use split foam sleeves sized to the hose diameter or wrap with self-sealing neoprene tape.
Trim sleeves to leave room for movement and service access at fittings.
Secure with UV-resistant zip ties or aluminum foil tape, avoiding overtightening that can deform hoses.
For braided stainless lines, add a thin layer of closed-cell insulation to prevent galvanic action from moisture.
Inspect annually for wear, compression, or moisture and replace damaged sections promptly.
Work Safely Around Valves and the Pressure-Relief Valve
Before insulating pipes, the water supply to the heater should be shut off to prevent flow while working near valves.
Care must be taken to protect the temperature and pressure-relief valve from insulation or accidental impact so it can function freely.
Appropriate personal protective equipment—gloves and eye protection at minimum—should be worn when handling valves and trim.
Turn Off Water Supply
Shut off the incoming cold-water supply at the household shutoff or the water heater’s dedicated valve to stop flow before working on insulation; confirm the supply is closed by opening a nearby faucet and checking that water flow has ceased.
After stopping flow, the technician verifies system pressure is relieved by opening a drain or faucet and observes no significant discharge. Valves should be operated slowly to avoid shock. Identification of valve types ensures correct handling. If corrosion or stiffness is present, note condition for replacement.
- Confirm shutoff visually and by testing a faucet.
- Operate valves slowly.
- Label valves if unclear.
- Inspect for leaks.
- Note replacement needs.
Protect The Pressure-Relief
Exercise care around the temperature and pressure-relief (T&P) valve: protect the valve and its discharge piping from insulation, compression, or impact so it can operate freely and vent safely if needed. Insulation should stop short of the valve; secure foam or tape without covering the outlet. Position cuts and seams to keep the valve exposed. Check routing so discharge pipe remains unobstructed and slopes downward to drain. Inspect periodically for corrosion or leaks. If replacement is suspected, consult a professional.
| Topic | Action | Frequency |
|---|---|---|
| Valve clearance | Leave exposed | Every inspection |
| Discharge pipe | Keep clear | Monthly |
| Corrosion | Inspect | Annually |
Use Proper Personal Protective
When working near valves and the temperature-and-pressure (T&P) relief assembly, wear appropriate personal protective equipment—gloves rated for thermal and cut protection, eye protection, and long sleeves—to guard against hot water, steam, and sharp edges.
The individual should approach valve areas cautiously, avoid placing insulation over relief openings, and keep tools controlled to prevent accidental discharge or damage.
Awareness of surroundings and steady movements minimize risk. If uncertain, consult the heater manual or a professional before proceeding.
- Inspect PPE for damage before starting
- Isolate water and relieve pressure when feasible
- Keep a clear workspace around valves
- Use non-conductive tools
- Never block a T&P outlet
Insulate Inlet and Outlet Runs at the Water Heater
Although often overlooked, insulating the short inlet and outlet runs at the water heater reduces standby heat loss and improves system efficiency by keeping hot water hotter and cold supply lines from warming prematurely. The installer measures pipe length, selects foam or rubber sleeves sized to fit, and secures insulation with tape or zip ties. Pay attention to valves and unions; cut and fit pieces neatly, leaving serviceable access. Regular inspection prevents compression or gaps. Use labeled insulation for hot and cold lines to avoid confusion during maintenance.
| Item | Material | Tip |
|---|---|---|
| Sleeves | Foam/Rubber | Match diameter |
| Fasteners | Tape/Zip ties | Tight, neat |
| Access | Cutouts | Label lines |
Insulating Pipes in Tight or Hard-to-Reach Spots
After insulating the inlet and outlet runs at the water heater, attention turns to sections where standard foam sleeves cannot fit: tight joist bays, wall cavities, clustered valves, and existing insulation chases.
The writer recommends using flexible fiberglass wrap, split-foam strips, and self-sealing tape to reach confined runs. Small heat-resistant tape and zip ties secure wraps without compression.
For valves and fittings, use removable insulation blankets for access.
In-wall runs may require access panels or conduit-style insulation pushed through cavities.
Careful labeling preserves serviceability while minimizing heat loss in awkward, crowded areas.
- Flexible fiberglass wrap
- Split-foam strips
- Self-sealing tape
- Removable valve blankets
- Access panels and labeling
Protect and Insulate Outdoor Hot-Water Pipes
Outdoor hot-water pipes require materials rated for weather exposure to maintain insulation performance and resist moisture.
Insulation should be firmly fastened or taped to prevent wind-driven loosening and loss of coverage.
Proper wrapping and the use of heat tape or foam jackets help prevent freezing in winter and reduce condensation in warm, humid conditions.
Choose Weatherproof Insulation
When insulating hot-water pipes exposed to the elements, select materials rated for UV resistance, moisture protection, and temperature extremes to guarantee long-term performance.
Durable jacketed foam or elastomeric rubber prevents degradation from sun and rain.
Closed-cell foams resist water absorption; waterproof tape and sealed seams keep insulation dry.
Insulation thickness should match climate demands to limit heat loss and freeze risk.
Consider protective outer sleeves or DIY cladding for added abrasion resistance.
Maintain accessibility at valves and joints without compromising weatherproofing.
- UV-stable outer jacket
- Closed-cell core material
- Waterproof seam sealing
- Appropriate thickness for climate
- Removable access panels
Secure Insulation Against Wind
Windproofing the insulation is essential to preserve thermal performance and prevent convective cooling that can expose pipes to freezing.
Wind straps, stainless steel hose clamps, or UV-resistant zip ties secure foam sleeves and wraparound jackets tightly, eliminating gaps where wind-driven air can penetrate.
Overlap seams and seal with exterior-grade foil tape or silicone to maintain continuous coverage.
For long runs, add windbreaks — plywood or corrugated plastic panels anchored into the ground — to reduce direct exposure.
Periodic inspections verify fasteners remain taut and seals intact; replace degraded materials promptly to maintain protection and extend insulation lifespan.
Prevent Freezing And Condensation
Because exposed hot-water pipes are vulnerable to both freezing and condensation, protecting them requires a combination of insulation, moisture barriers, and heat sources matched to the local climate and pipe configuration. The approach balances thermal resistance and vapor control to prevent burst pipes and mold.
Use closed-cell foam, self-sealing sleeves, and weatherproof tape; add heat tape where codes allow; and guarantee joints are sealed. Elevated or enclosed routing reduces exposure. Monitor during cold spells and replace degraded materials promptly.
- Choose closed-cell insulation for wet locations
- Install a continuous vapor barrier at seams
- Apply approved heat tape per instructions
- Route pipes away from drafts
- Inspect and replace annually
Fire-Safety and Code Rules for Pipe Insulation
Addressing fire-safety and code requirements for insulating hot water heater pipes guarantees both occupant safety and compliance with local regulations. Installers must consult local building codes and appliance manufacturer instructions for clearance distances, combustible materials, and permitted insulation types.
Use noncombustible or specially rated insulating jackets near burners, vents, and flue connections. Maintain required clearances from ignition sources and access panels. Secure insulation to avoid sagging that exposes piping.
For gas systems, avoid blocking vents or combustion air. When in doubt, engage a licensed plumber or inspector to verify installations meet fire codes and do not void warranties or violate regulations.
How Much Energy and Money You’ll Save Yearly
Estimated annual energy savings from insulating hot water heater pipes are presented as kilowatt-hours or therms saved, with corresponding reductions in utility bills.
Typical payback periods based on insulation material cost and installation time are calculated to show how quickly the investment is recovered.
The section compares example scenarios so readers can gauge expected yearly financial benefit for their own homes.
Annual Energy Savings
Typically, insulating hot water heater pipes reduces standby heat loss and consequently lowers energy consumption for water heating over the year. Annual savings depend on pipe length, climate, and insulation quality. Estimates range from modest to meaningful for older or poorly insulated systems. Savings appear as reduced fuel or electricity use and lower utility bills without changing habits.
- Reduced standby heat loss cuts energy wasted between uses.
- Short runs yield smaller absolute savings than long runs.
- Colder climates amplify benefits through greater temperature differentials.
- Higher insulation R-value increases yearly energy retained.
- Older heaters often show larger percentage savings.
Payback Period
Calculating the payback period for insulating hot water heater pipes requires comparing the upfront cost of materials and installation to the annual energy and dollar savings from reduced standby heat loss.
Typical pipe insulation costs range from $10–$50 for DIY supplies. Expected energy savings depend on climate, water heater efficiency, and usage, often yielding 4–12% reduced heat loss for exposed pipes.
Translating that to dollars might save $10–$60 annually for an average household. Payback period equals total cost divided by annual savings; commonly it falls between several months and five years, making insulation a low-cost, quick-return upgrade.
Common Mistakes That Cut Insulation Performance
What reduces insulation effectiveness most often are simple installation and material errors: gaps at joints, compressed or crushed insulation, and unsecured seams that allow convective heat loss. Attention to detail prevents common failures.
Poorly sized sleeves leave voids; adhesive that deteriorates opens seals; insulation wrapped too tightly reduces insulating air pockets; exposed seams invite moisture and thermal bridging; incompatible materials degrade over time. Regular inspection and correct product selection restore performance. The following highlights typical pitfalls to avoid for reliable thermal protection and maximum energy savings.
- Incorrect sizing
- Damaged or compressed material
- Loose or unsealed seams
- Moisture exposure
- Mismatched materials
When to Replace Old Pipe Insulation
The condition of existing insulation should be assessed regularly for visible damage or wear such as cracks, compression, or water staining.
If heat loss increases or hot water delivery slows, diminished thermal performance may indicate insulation has degraded.
When either symptom appears, replacement of the pipe insulation is warranted to restore efficiency.
Visible Damage Or Wear
Inspecting pipe insulation for visible damage is the first practical step in deciding whether it needs replacement. Signs of deterioration are often obvious and warrant prompt action to prevent heat loss, leaks, or mold growth. Check lengthwise seams, bends, and connections where wear concentrates.
- Cracked, split, or compressed insulation exposing the pipe
- Water stains, mildew, or soft spots indicating moisture intrusion
- Rodent gnaw marks or nesting material inside insulation
- Loose sections that no longer fit snugly around pipes
- Rigid foam that has crumbled or lost structural integrity
Replace affected sections rather than patching when multiple signs appear.
Reduced Heat Performance
When hot water arrives noticeably cooler at fixtures or takes longer to reach set temperature, diminished insulation performance should be suspected; aging, compressed, or waterlogged insulation no longer slows conductive and convective heat loss effectively, increasing energy use and straining the heater.
Inspect for hardening, gaps, flattened sections, or insulation that retains moisture; measure temperature drop along runs if possible.
Replace insulation when drops exceed manufacturer or installer tolerances, when material crumbles on touch, or when repairs become frequent.
Upgrading to higher-R-value or closed-cell sleeves can restore performance, reduce recovery cycles, and lower utility costs.
Insulating Pipes for Tankless Water Heaters
For tankless water heaters, insulating supply and discharge piping reduces heat loss and improves response time without interfering with the unit’s compact installation or ventilation requirements. Insulation should fit snugly, resist high temperatures, and allow access for servicing. Use closed-cell foam or flexible rubber sleeves sized to pipe diameter; seal seams with appropriate tape or adhesive. Maintain clearance from combustion vents and controls per manufacturer guidance. Consider insulating short runs and any exposed sections to maximize efficiency gains without altering appliance operation.
- Choose material rated for hot water lines
- Measure and cut for tight joints
- Seal all seams and ends
- Preserve access to valves and sensors
- Follow manufacturer clearances
Prevent Condensation on Insulated Cold Pipes
Preventing condensation on insulated cold water pipes requires selecting the correct insulation type and applying a continuous vapor barrier so warm, humid air cannot contact the cold surface.
Closed-cell foam or elastomeric rubber with factory-applied foil or polymer facings minimizes moisture penetration.
Seal all seams, end cuts, and penetration points with compatible tape or mastic.
Maintain insulation thickness appropriate to pipe diameter and ambient humidity to keep surface temperature above dew point.
Avoid compressing insulation and eliminate gaps at hangers or fittings with preformed pieces or silicone sealant.
Ventilate surrounding spaces and control indoor humidity to reduce condensation risk.
Inspecting and Maintaining Pipe Insulation Over Time
Over time, pipe insulation can degrade, loosen, or become compromised by moisture and mechanical wear, so periodic inspections are essential to preserve thermal performance and prevent damage.
A regular schedule—seasonally or annually—helps identify compression, gaps at joints, deteriorated adhesive, or pest intrusion before heat loss or corrosion accelerates.
Document findings, note areas needing replacement, and prioritize sections exposed to outdoor temperatures or high humidity.
Properly maintained insulation extends service life and maintains efficiency.
- Check for soft spots, mold, or wetness along the insulation.
- Inspect seams, tape, and fasteners for secure attachment.
- Verify insulation thickness remains uniform.
- Look for rodent or insect damage.
- Record repairs and plan timely replacements.
Quick Fixes and Temporary Insulation Options
When immediate repairs are needed or full replacement isn’t practical, temporary insulation solutions can reduce heat loss and protect pipes until permanent work is done.
Simple options include wrapping pipes with foam pipe wrap, fiberglass sleeves, or bubble wrap covered with tape for short-term use.
Self-sealing foam tape and rubber sleeve remnants provide quick coverage around bends and valves.
For exposed joints, use cloth and waterproof tape to limit drafts.
Label temporary fixes and schedule permanent insulation.
Avoid obstructing pressure-relief valves and make certain materials are non-flammable near the heater.
These measures buy time while preserving heat and reducing energy waste.
DIY Cost Breakdown vs. Hiring a Pro
A clear comparison of costs helps homeowners decide whether to insulate hot water heater pipes themselves or hire a professional.
The DIY route typically requires foam sleeves, tape, adhesive and basic tools, while professional work adds labor, travel, and warranty value. Savings depend on pipe length, complexity, and local labor rates. Consider time, skill, and potential for mistakes when estimating true cost.
- Materials: inexpensive, readily available for DIY
- Labor: free for DIY, billed hourly for pros
- Complexity: simple runs favor DIY, tight spaces favor pros
- Warranty: usually provided by professionals
- Time investment: homeowner vs. contractor
How to Find a Qualified Installer
Locating a qualified installer begins with checking credentials and local reputation: verify license and insurance, read recent customer reviews, and confirm experience specifically with hot water pipe insulation rather than general plumbing. A concise vetting list reduces risk: request references, review before-and-after photos, ask about insulation materials and R-values, get written estimates, and confirm warranties. Compare at least three bids and prioritize installers who demonstrate clear timelines and safety practices. Use local trade groups or utility-recommended contractors when possible. Trustworthiness, documented experience, and transparent pricing indicate a reliable choice.
| Criterion | Why it matters |
|---|---|
| License | Legal compliance |
| Insurance | Protects homeowner |
| References | Work quality |
| Materials | Longevity |
| Warranty | Recourse |
Printable Tools-and-Materials Checklist
For quick preparation before insulating hot water heater pipes, a concise printable checklist organizes required tools, materials, and safety items so installers or DIYers can confirm readiness at a glance.
The checklist groups essentials into tool, material, measurement, fastening, and safety categories, enabling efficient shopping and on-site verification.
A printable format with checkboxes reduces omissions and speeds workflow.
It notes quantities, preferred sizes, and alternative items to accommodate varied pipe configurations.
Users can mark completed items and tuck the sheet into a project folder for reference or handoff to a professional.
- Tape measure
- Pipe insulation sleeves
- Utility knife and scissors
- Foil tape and zip ties
- Safety gloves and goggles
Troubleshooting Residual Heat Loss After Insulating
Why does heat still escape after insulation seems properly installed? Residual loss often stems from gaps, compressed insulation, or incomplete coverage at fittings and valves.
Thermal bridging can occur where foam contacts metal clamps or supports; insulating those spots or adding small foam patches reduces conduction.
Aging insulation may degrade or detach, so inspect seams and adhesive.
Measure surface temperatures to locate hot spots and verify results; a simple infrared thermometer suffices.
Confirm insulation thickness matches manufacturer recommendations for the pipe temperature.
If persistent loss remains after fixes, evaluate pipe routing or flow patterns before assuming the insulation is ineffective.
Upgrades That Complement Pipe Insulation (Blankets, Timers)
Alongside pipe insulation, targeted upgrades such as tank blankets and programmable timers can further reduce standby heat loss and improve system efficiency.
The detached overview highlights practical, cost-effective additions: insulating blankets lower tank surface losses; timer controls prevent heating during unused periods; heat trap fittings reduce convection; insulated faucets and mixing valves limit distribution losses; and simple maintenance like thermostatic setback optimizes temperature.
Selection depends on heater type, local climate, and usage patterns.
Professional consultation guarantees compatibility and safety, especially for gas-fired units.
Combined, these measures complement pipe insulation to deliver measurable energy savings and increased appliance longevity.
Conclusion
Insulating hot-water heater pipes proves both practical and protective, conserving energy while reducing burn risk. Imagine thin, unnoticed sleeves transforming scalding metal into safely touchable lines, the quiet savings adding up month by month. Whether foam, fiberglass or elastomeric, the right wrap brings immediate comfort and longer equipment life. When residual heat persists, complementary upgrades like blankets or timers complete the system. A brief, informed installation yields lasting warmth, safety and measured efficiency.